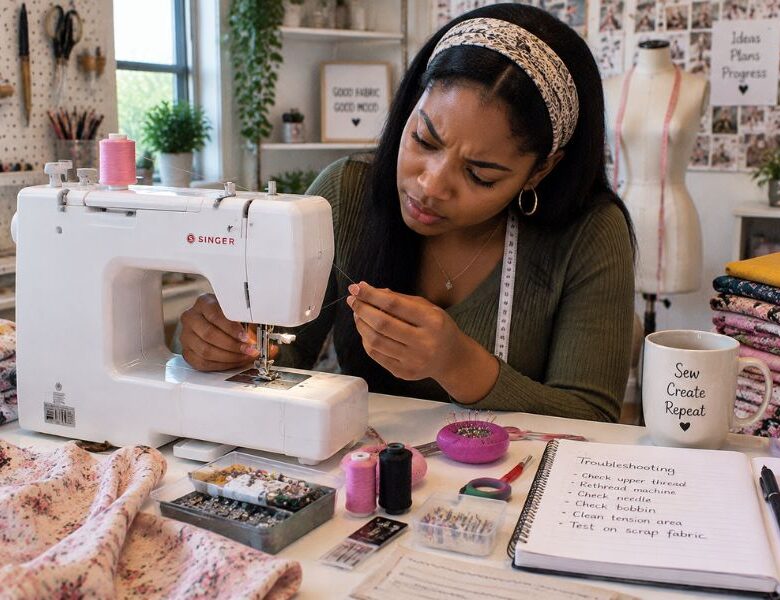
Sewing machine thread that keeps breaking at the needle can turn an otherwise simple seam into a frustrating stop-and-start job.
The upper thread may snap repeatedly even after re-threading, changing the spool, or replacing the needle, leaving you wondering what is really causing the problem.
There isn’t one universal reason for it. The break can come from the needle itself, the way the upper thread is travelling through the machine, excessive tension, a thread that does not suit the needle and fabric, or a rough point that is catching and weakening the thread.
Brother, SINGER and BERNINA all include these areas in their troubleshooting guidance for upper-thread breakage.
One detail matters more than it might seem: where and how the thread breaks. A clean break right at the needle eye tells you to inspect different things from thread that is already frayed before it reaches the needle.
Paying attention to that difference can save you from randomly changing tension settings or buying new thread when the real problem is somewhere else.
This guide breaks down what to check, in a sensible order, so you can trace the problem from the spool to the needle, understand what each check tells you, and know when the machine may need more than a simple adjustment.
When a sewing machine starts making a messy thread nest underneath, Sewing Thread Tangling Underneath: 8 Fixes for the Sewing Machine Bird’s Nest Problem can help you troubleshoot the cause.
First, check where the thread is actually breaking
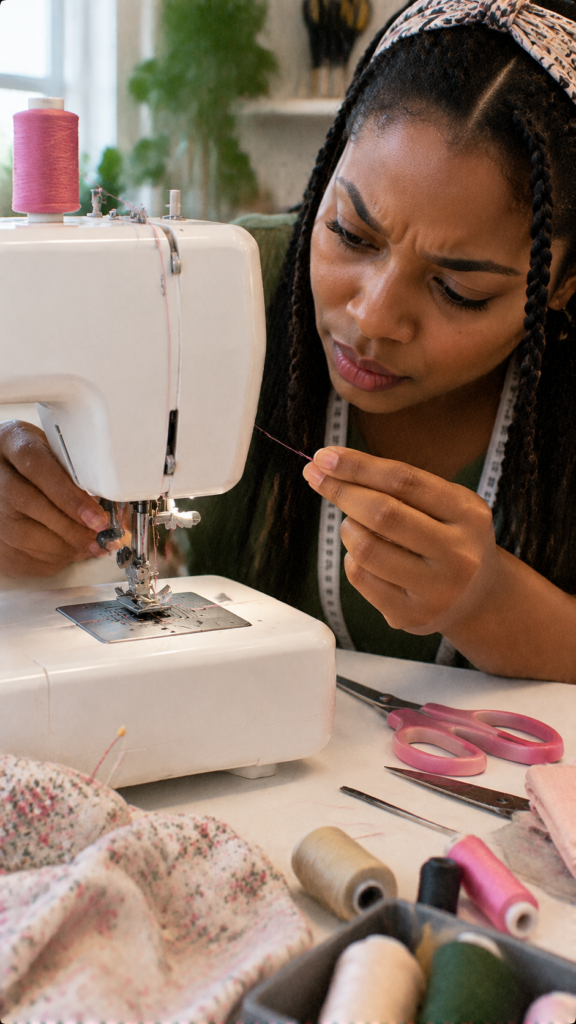
On an ordinary home sewing machine, the upper thread travels from the spool, through the thread guides and tension area, down to the needle. The bobbin supplies the lower thread underneath the fabric.
That means “my sewing machine thread keeps breaking at the needle” does not always mean the needle is causing it. The thread may already be getting damaged somewhere along its path.
Before changing several settings, stop and look at the broken thread.
The thread breaks right at the needle eye
The needle is the first place to inspect when the upper thread keeps snapping directly at the needle eye.
Check for:
- A bent, blunt or damaged needle
- A rough or damaged needle eye
- A needle that is not inserted correctly
- A needle that is too small for the thread
- A needle and thread combination that does not suit the fabric
A fresh needle that matches the thread and fabric is a good first test. If the thread continues breaking at the same point, keep tracing the thread rather than repeatedly changing needles.
Skipped stitches can have several causes. Why Your Sewing Machine Keeps Skipping Stitches (And 7 Easy Fixes That Work Fast) walks through the checks.
Thread is frayed before it reaches the needle
Fraying or fuzzy areas are a useful clue. They suggest that the thread may be rubbing against something before it gets to the needle.
Check the thread guides and tension area carefully. Look for anything that could catch the thread or create unusual resistance.
The spool deserves attention too. The thread should unwind smoothly. A knot, damaged section of thread, rough spool edge or thread catching as the spool turns can weaken the thread before it reaches the needle.
The thread snaps closer to the spool
A break higher up the machine points attention toward the spool and upper thread path rather than immediately toward the needle.
Check:
- Spool movement: The spool should unwind smoothly without catching or jerking.
- Spool cap: On machines that use one, make sure it is the correct size and fitted properly.
- Thread guides: Make sure the thread has passed through every guide required by your machine.
- Thread condition: Check for knots, weak spots or damaged sections on the spool.
Incorrect threading, a restricted thread path and a spool that does not unwind properly can all contribute to sewing machine thread breaking.
Do not forget the bobbin
The bobbin is not usually the first thing to blame when the upper thread keeps breaking at the needle. However, it is worth checking when the machine is still having trouble after the upper thread, needle and spool have been examined.
Remove the bobbin and check that:
- It is the correct bobbin for your machine.
- The thread is wound evenly rather than loose or piled up.
- The bobbin is inserted in the correct direction.
- The bobbin thread is threaded through its guides correctly.
- There is no tangled thread or lint interfering with the bobbin area.
A problem underneath the fabric can affect stitch formation and make the machine behave as though the upper thread is the only problem.
Ready to turn your sewing skills into a home-based income stream? See Struggling to Make Money From Home Sewing? Launch a Profitable Sewing Side Hustle.
One simple test can narrow it down
Suppose the thread breaks after a few stitches. Stop sewing and examine the broken section.
A clean break directly at the needle eye puts the needle and needle-thread combination high on the list.
Fraying or thinning before the thread reaches the needle tells you to inspect the guides, tension area and spool for rubbing or resistance.
Damage farther up near the spool makes the spool and upper threading path more important to check.
This small inspection can prevent random adjustments. Rather than changing the tension, needle and bobbin all at once, trace the upper thread from the spool to the needle and look for the first place where it is being damaged.
That gives you a much clearer starting point for fixing the problem.
The right foot can make certain techniques much easier, so keep Sewing Machine Presser Feet: How to Choose the Right One for Your Project handy.
Re-thread the upper path before changing machine settings
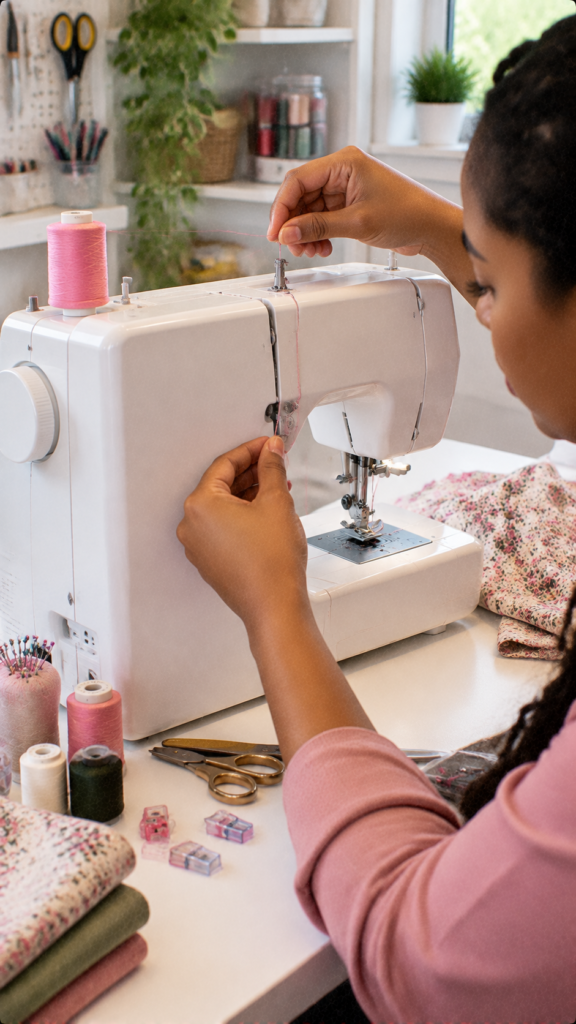
A sewing machine thread keeps breaking at the needle can make you want to adjust the tension straight away. Re-threading the upper thread is a better first step.
Incorrect threading can leave the thread outside part of the tension system or cause it to miss a guide. The machine may still sew, but the thread can move with too much or too little resistance.
Re-thread the machine with the presser foot raised, then check the path carefully before changing the tension setting.
Raise the presser foot
Lifting the presser foot opens the tension mechanism on many domestic sewing machines. This gives the upper thread a better chance of settling into the tension discs as you thread the machine.
Turn off the machine, raise the presser foot and follow the normal threading procedure for your model. SINGER specifically recommends raising the presser-foot lifter before threading the upper thread.
Follow the machine’s exact thread path
There is no single threading route that works for every sewing machine. The position of the guides, tension area and take-up lever varies between models.
Use the threading diagram in your machine manual rather than copying the path from another machine.
Pay attention to every guide. Missing just one can change how the thread moves while you sew.
Confirm the thread is actually in the take-up lever
The take-up lever is easy to miss because it moves up and down inside the machine.
The upper thread needs to pass through it as shown in your machine’s threading instructions. Missing this step can leave the thread with an incorrect path and contribute to upper-thread problems.
If your machine has a clear threading diagram, compare your thread with it from the spool all the way to the needle.
Pull the thread through the guides without forcing it
Once threaded, gently pull the thread by hand. It should move through the guides along its intended path without catching on an obvious point.
Do not yank the thread to test it. The aim is simply to make sure it is following the correct route and nothing is trapping it.
With the upper thread correctly re-threaded, sew a few stitches before changing the tension. If the sewing machine thread keeps breaking at the needle, you have ruled out one of the simplest causes and can move on to the needle, thread and other contact points.
A waistband that keeps twisting after laundry day has a fixable cause. See Elastic Waistbands Keep Twisting After Washing — Here’s What’s Actually Going Wrong.
Inspect the needle as a thread-contact surface, not just a needle
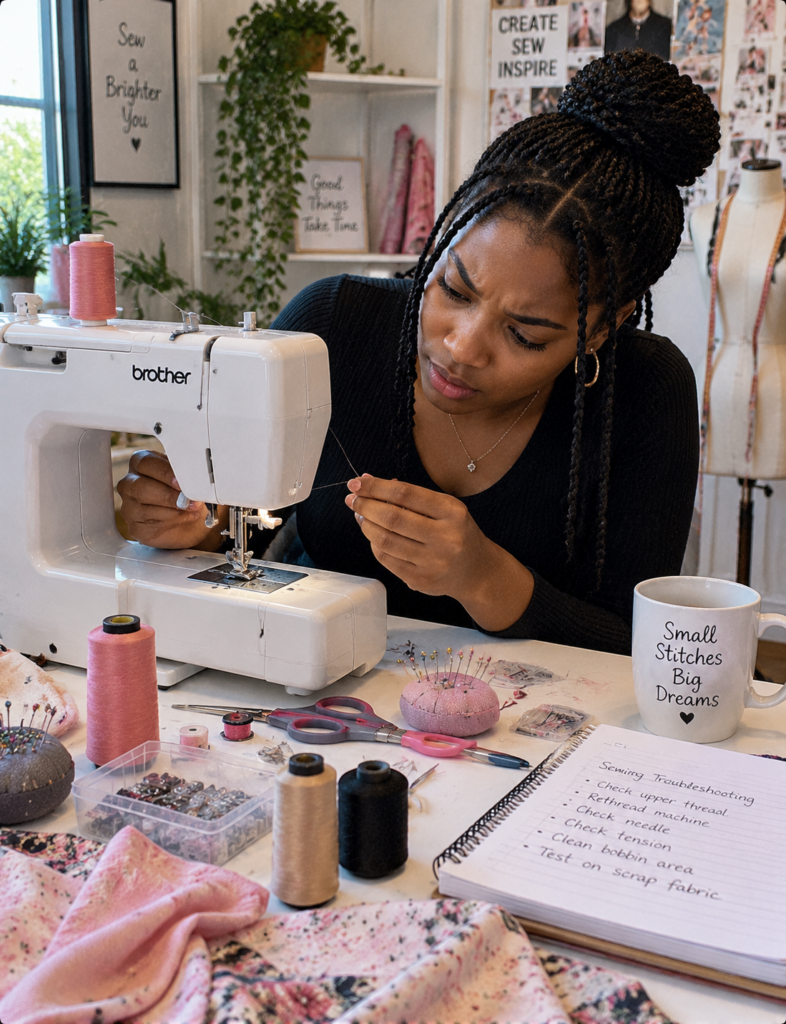
The needle does more than make a hole in the fabric. The upper thread passes through its eye repeatedly at high speed, so its condition can affect how smoothly that thread moves.
Look for a bent, dull or damaged needle
A needle can look usable at first glance and still have damage that affects sewing.
Check that it is:
- Straight
- Not blunt or damaged
- Fully inserted
- Facing the correct direction for your machine
A bent or damaged needle can alter the way the thread passes through the eye and can contribute to sewing machine thread breaking.
Brother and BERNINA both list bent or damaged needles among possible causes of upper-thread problems.
A fresh needle is therefore a useful test, especially when the thread is breaking directly at the needle eye.
Choose one that is appropriate for your fabric and thread rather than assuming every sewing project uses the same needle.
Starting later in life doesn’t mean starting without guidance. How to Learn to Sew as an Adult When You Feel Like You Are Already Too Late is a useful place to begin.
Inspect the needle as a thread-contact surface, not just a needle
The needle has a direct relationship with the upper thread. Every stitch sends the thread through the small eye of the moving needle, so a problem with the needle can gradually weaken the thread or cause it to snap.
That makes the needle worth checking when your sewing machine thread keeps breaking at the needle.
Get cleaner results from the cutting stage with How to Cut Fabric Without Wasting It: A Beginner’s Guide to Cutting Confidently the First Time.
Look for a bent, dull or damaged needle
A needle does not have to look badly damaged to cause trouble. A slightly bent, blunt or rough needle can affect how the thread moves through the eye.
Check the needle for:
- Bending
- A blunt point
- A damaged or rough eye
- Other visible damage
Brother and BERNINA both list bent or damaged needles as possible causes of upper-thread breakage.
When in doubt, replace the needle with a fresh one that suits the project. It is a simple test before making more complicated adjustments.
Check that the needle is fully and correctly installed
The needle needs to sit in the correct position for the machine. If it is not fully inserted or is facing the wrong way, its position can change in relation to the presser foot, needle plate and thread path.
Use the instructions for your particular machine to check the needle position. Do not rely on the position used by another sewing machine because needle installation can vary between models.
Save yourself hours of frustration by learning how to choose patterns through How to Find Sewing Patterns That Are Easy to Follow and Beginner-Friendly (Save Hours of Frustration).
Match the needle to the thread and fabric
Needle choice is not simply about picking a “universal” needle and using it for everything.
The needle needs to work with both the thread and the fabric.
A heavier thread, delicate fabric or specialty sewing thread may require a different needle from an ordinary sewing project.
Brother includes an incorrect needle, thread and fabric combination among the possible causes of upper-thread breakage.
Your sewing machine manual and the needle manufacturer’s recommendations are safer guides than choosing a size at random.
Pay attention to the needle eye
The needle eye is where the upper thread repeatedly passes as you sew. That small opening therefore matters more than it might seem.
A thread that is too thick for the needle eye can rub against the sides as the needle moves. Repeated friction can weaken the thread and eventually cause it to break.
Think of it this way: the needle is not only making a hole in the fabric; it is also carrying the upper thread through that eye on every stitch.
When the thread keeps snapping at the needle, checking the needle’s condition, installation and compatibility with the thread can tell you much more than simply putting in another needle and hoping the problem disappears.
Want to recreate a favourite garment? Learn how with How to Copy a Pattern From Clothes You Already Own (Without Taking Them Apart).
Check the thread itself before blaming the machine
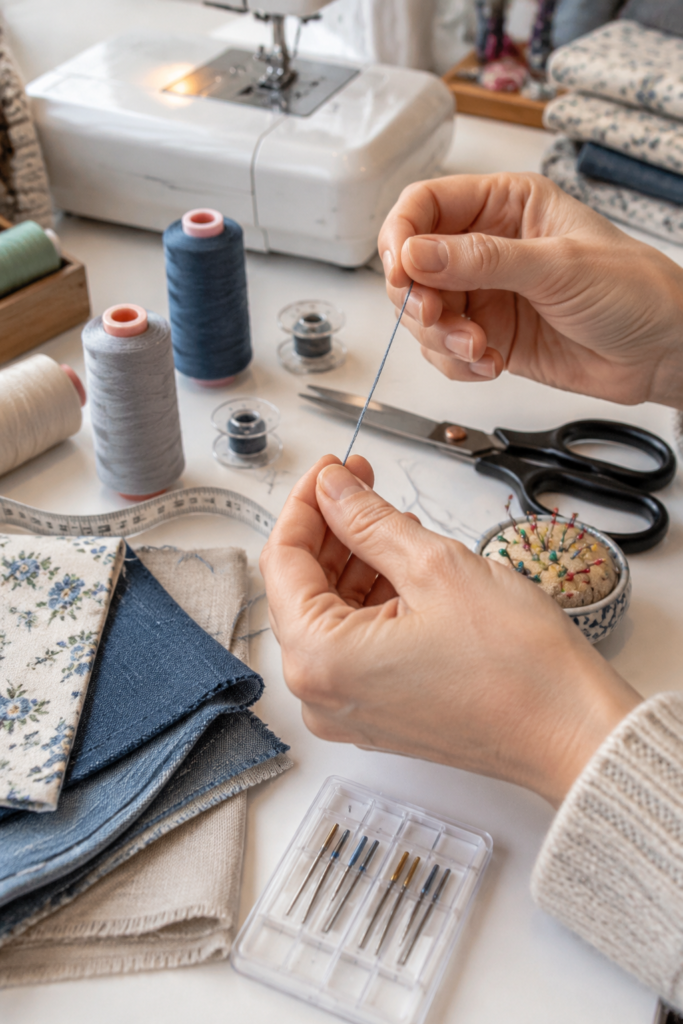
Thread can be the source of a sewing machine thread keeps breaking problem even when the machine is working properly.
Weak spots, damaged areas or a spool that does not unwind smoothly can put extra stress on the thread as you sew.
A quick check can tell you whether the thread deserves some suspicion.
Run the thread through your fingers
Take a length of thread from the spool and gently run it between your fingers. Feel for places that are noticeably different from the rest.
Look for:
- Frayed or fuzzy areas
- Knots
- Thin or weak sections
- Uneven thickness
- Visible damage
A weak section may break once the machine puts it under repeated movement and tension. Old, damaged or poor-quality thread can also be more prone to breaking.
That does not mean every thread break is caused by the thread. It simply gives you another thing to rule out before changing machine settings.
Choosing the right needle matters more than many beginners realise. See How to Choose the Right Sewing Needle for Every Fabric Type — Before You Blame Your Machine.
Watch how the spool unwinds
The thread needs to leave the spool smoothly. A good thread can still cause sewing machine thread breaking if it keeps catching as it unwinds.
Run the machine slowly and watch the spool for a moment. Notice whether the thread comes away evenly or jerks, catches or becomes trapped.
Check the:
- Spool for rough or damaged edges
- Spool cap for anything that could catch the thread
- Thread position on the spool
- Thread path between the spool and the needle
SINGER recommends checking that the spool unwinds smoothly and that the thread is not catching on the spool, spool cap or rough areas.
Choosing fabric becomes much easier when you understand how different materials behave. Start with Understanding Fabrics for Sewing: Choosing the Right Material for Every Project.
Don’t assume thicker thread needs more tension
A common reaction to thread breaking is to increase or decrease the upper tension. That can make the problem worse when the real issue is a mismatch between the thread, needle and fabric.
Thicker thread needs a needle with an eye that can accommodate it properly. The fabric and type of sewing matter too. There is no single tension setting or needle size that works for every thread.
Think of these three parts as a combination:
Thread + needle + fabric = a workable sewing setup.
When one part is poorly matched to the others, the thread may experience unnecessary friction or resistance.
Check the thread manufacturer’s or sewing machine manufacturer’s guidance for suitable needle sizes and thread types rather than increasing tension simply because the thread is thick.
For a sewing machine thread keeps breaking at the needle problem, this simple check can prevent you from adjusting the machine when the real issue is the thread or the way it is feeding from the spool.
Turn useful sewing abilities into income with Sewing Skills That Actually Make You Money (Even If You’re Just Starting).
Check tension only after the thread path and needle
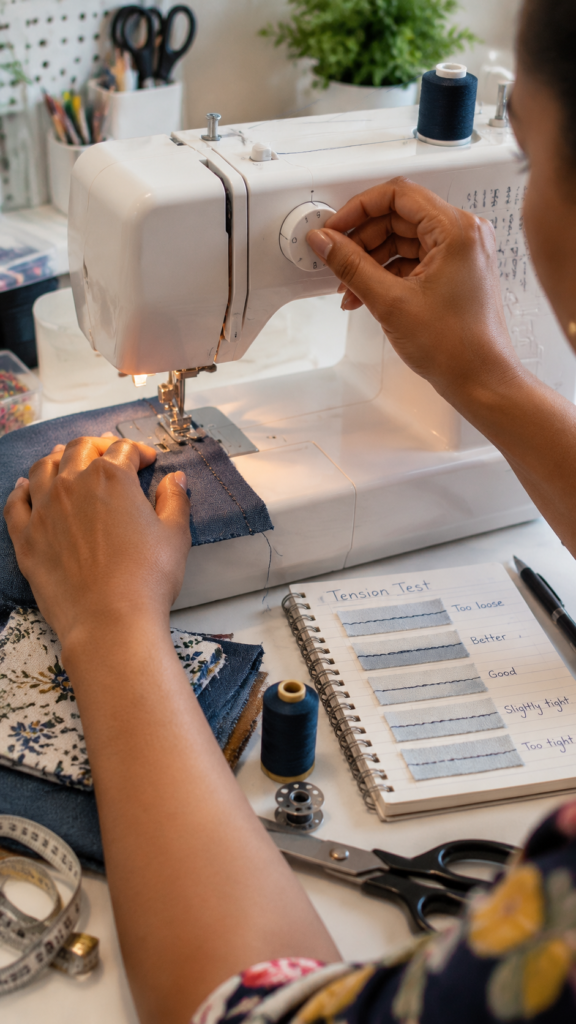
Thread tension controls how much resistance the upper thread meets as it passes through the machine. Too much upper tension can contribute to thread breaking, but it is not the first thing to adjust.
Check the upper threading, needle, thread and spool first. Those problems are easier to overlook, and changing tension before ruling them out can make the machine harder to diagnose.
Start from the machine’s recommended setting
There is no single tension number that works for every sewing machine or every sewing job.
Return to the setting recommended in your machine manual or the normal setting used for ordinary sewing. Use that as your starting point rather than copying a tension number from another machine.
Change one thing at a time
Make one small adjustment, then test the machine.
Changing the tension, needle, thread and other settings together makes it difficult to know what solved the problem. It can also create a new tension problem while you are trying to fix the original one.
A useful troubleshooting habit is simple: change one variable, sew a few stitches, and observe what happens.
Test on the same fabric
Use a scrap of the fabric you were sewing when the thread started breaking. The thickness and structure of fabric affect how the machine forms each stitch, so testing on a completely different material may give you a misleading result.
Sew a short line at a steady speed and watch the upper thread. If it stops breaking after a small tension adjustment, you have useful evidence.
If it continues to snap, return to the thread path, needle and other possible contact points instead of continuing to turn the dial.
Brother and SINGER both identify excessive upper-thread tension as one possible cause of thread breakage. It is a possible cause, not a universal answer.
Before throwing damaged clothes or fabric away, check 15 Smart and Easy Sewing Fixes for Clothes and Fabrics You Keep Throwing Away.
Look for a rough spot that is cutting or weakening the thread
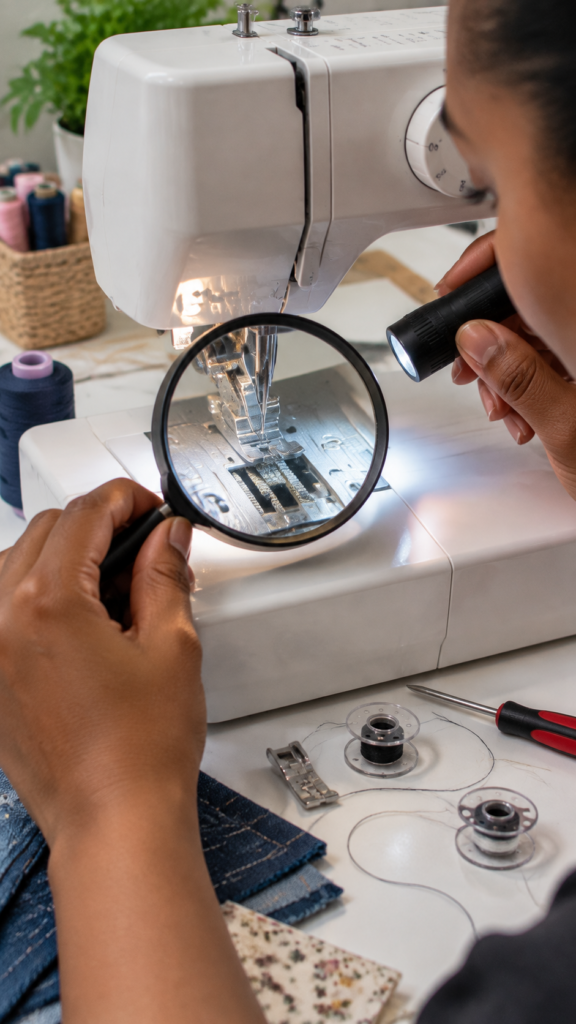
Sometimes the machine is not pulling the thread too tightly. The thread may be getting rubbed against a rough spot every time the needle moves.
A tiny burr, scratch or damaged edge can gradually weaken sewing thread. The thread may look fine when you start, then become fuzzy or thin before finally snapping.
Turn the machine off and inspect the places the thread passes or moves near.
Check the:
- Needle eye for roughness or damage
- Needle plate opening for scratches or burrs
- Presser-foot opening for a rough edge
- Thread guides for anything that could catch the thread
- Spool area for a rough edge that interferes with unwinding
- Bobbin area and race, where accessible and relevant to your machine
Run your eyes along these areas rather than trying to find a problem while the machine is running. You are looking for a place where the thread could catch, scrape or repeatedly rub.
Brother specifically recommends checking for scratches or burrs around areas such as the needle plate, presser foot and bobbin case when upper-thread breakage continues.
Don’t sand or file a machine part casually
Finding a rough spot does not mean you should immediately sand or file it down.
The needle plate, presser foot, bobbin area and other parts have specific positions and surfaces that affect how the machine forms stitches. Removing material or changing an edge without knowing what you are doing can create a bigger problem.
For an ordinary home sewing machine, a safer approach is to replace an obviously damaged removable part or have the machine checked by a qualified sewing-machine technician when the rough area is part of the machine itself.
This is especially worth doing when a new needle, correctly threaded upper path and suitable thread have not stopped the sewing machine thread breaking. A small damaged surface can keep cutting or weakening the thread even after everything else has been checked.
The important point is simple: when thread keeps breaking in the same place, look for what the thread is touching. The break may be the final result of repeated rubbing rather than the original problem.
Keep your sewing setup practical and affordable with 11 Essential Sewing Tools for Sewists That Help Improve Accuracy and Are Budget-Friendly.
Choosing fabric becomes much easier when you understand how different materials behave. Start with Understanding Fabrics for Sewing: Choosing the Right Material for Every Project.
Check the fabric and stitch setup
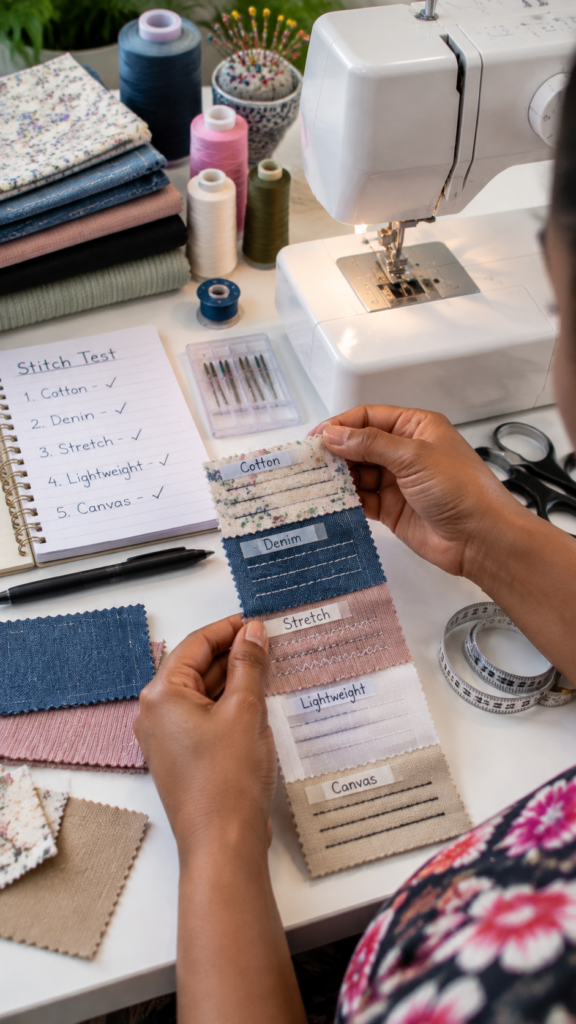
Thread breakage that happens on one project but not another is an important clue. The machine may not have a general problem at all. The combination of fabric, needle, thread and stitch can change how smoothly the machine forms each stitch.
A simple comparison can help you narrow it down.
Test with a simple woven fabric
Try a short line of straight stitching on a stable woven fabric such as ordinary cotton, using a suitable needle and thread.
If the machine sews normally on the cotton but the thread keeps breaking on your original fabric, pay closer attention to that fabric and the needle being used.
This test is useful because it gives you a basic setup to compare against instead of changing several things at once.
Stretch fabric needs a closer look
Stretch fabrics can require a different needle from ordinary woven fabrics. A needle that works well on cotton may not be the best choice for a knit.
Check that the needle is suitable for the fabric and that the thread is appropriate for the type of sewing. SINGER notes that needle selection needs to correspond with the fabric, including stretch materials.
The important point is not that stretch fabric automatically causes thread breakage. It is that a needle, thread and fabric combination that works well in one project may not work as well in another.
Pay attention to decorative or dense stitches
The stitch setting matters too.
A basic straight stitch is relatively simple for the machine to form. Dense zigzag, decorative or other closely spaced stitches can place different demands on the thread and needle.
Try the same thread and fabric with a basic straight stitch. If the thread breaks only with one particular stitch, check that stitch setting, the recommended needle and the thread being used before assuming the whole machine has a fault.
Notice what changes at higher sewing speeds
Speed is another useful clue.
Sew the same fabric with the same needle, thread and stitch, first at a slower speed and then at your normal sewing speed. Watch for a difference.
A thread that breaks only when sewing faster does not automatically mean that speed is the cause. It simply tells you that the problem appears under those conditions and gives you another clue to investigate.
The goal is to find the pattern behind the breakage. Change one condition at a time and observe what happens.
That approach is far more useful than adjusting the machine randomly and hoping the thread stops breaking.
Pattern instructions can feel confusing at first, but How to Read Sewing Patterns Without Feeling Lost breaks down the basics.
Run a controlled test instead of changing five things at once
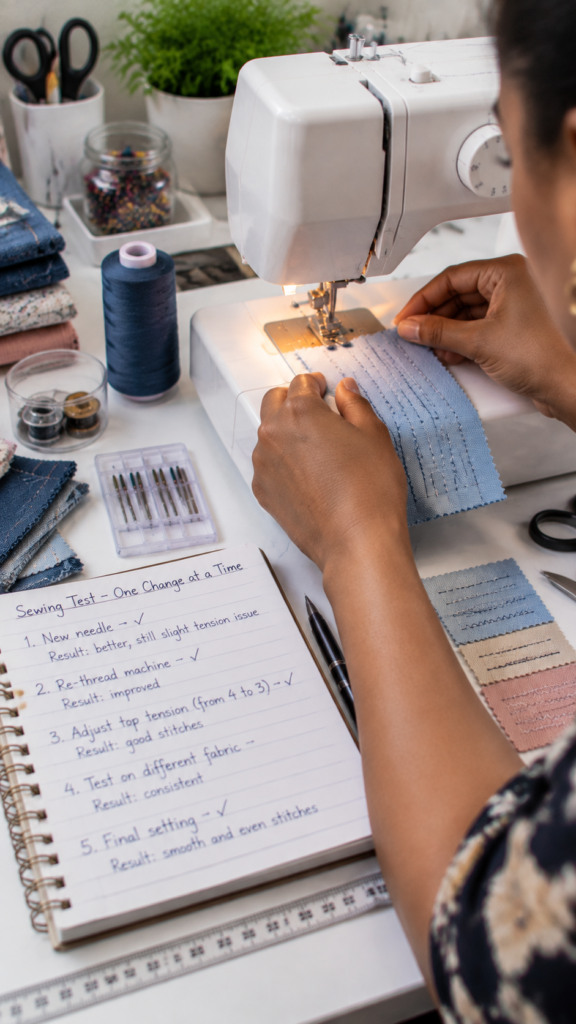
Changing the needle, thread, tension and stitch setting at the same time may stop the breakage, but it leaves you with another problem: you won’t know what fixed it.
A simple controlled test makes troubleshooting much clearer. Keep most things the same and change only one part when you need to test a possible cause.
Test 1 — Start with a fresh needle
Fit a new needle that is suitable for your thread and fabric. Make sure it is fully inserted and positioned correctly for your machine.
This removes a damaged, blunt or incorrectly fitted needle from the list of possibilities.
Test 2 — Re-thread the upper path
Raise the presser foot and thread the machine again, following your machine’s threading diagram.
Check every thread guide and make sure the thread passes through the take-up lever. Do not assume the thread is correctly positioned simply because the machine was already threaded.
Test 3 — Use a simple woven fabric
Take a small piece of ordinary woven cotton and use a basic straight stitch.
This gives you a straightforward setup. Testing on several layers of heavy fabric, stretchy material or a decorative stitch at this stage can introduce other variables.
Test 4 — Leave the normal settings alone
Use the machine’s usual recommended settings for the test.
Do not adjust the upper thread tension yet. The aim is to find out whether the machine can sew normally with a fresh needle, correctly threaded upper path and suitable fabric.
Test 5 — Watch where the thread breaks
Sew a short line and pay attention to what happens.
If the thread breaks, stop and examine it. Note whether it snaps at the needle, becomes frayed along the thread path or breaks closer to the spool.
That location gives you another clue about where to investigate.
Test 6 — Change only one thing
Once the basic test has been completed, change one variable and sew another short test.
For example, you might try a different needle designed for the fabric while keeping the same thread, fabric and stitch. If that makes no difference, return to the original setup before testing another possibility.
The same method works when checking thread, stitch type or upper tension.
One change at a time matters. Changing the needle, thread and tension together might solve the problem, but you will not know which change made the difference. Keeping the other conditions steady turns random trial and error into useful troubleshooting.
The aim is not to make the machine behave by chance. It is to find the condition that makes the thread break and remove that cause.
Start with the machine fundamentals covered in Beginner’s Guide to Sewing Machine Basics You’ll Actually Use.
When the problem may be beyond a simple adjustment
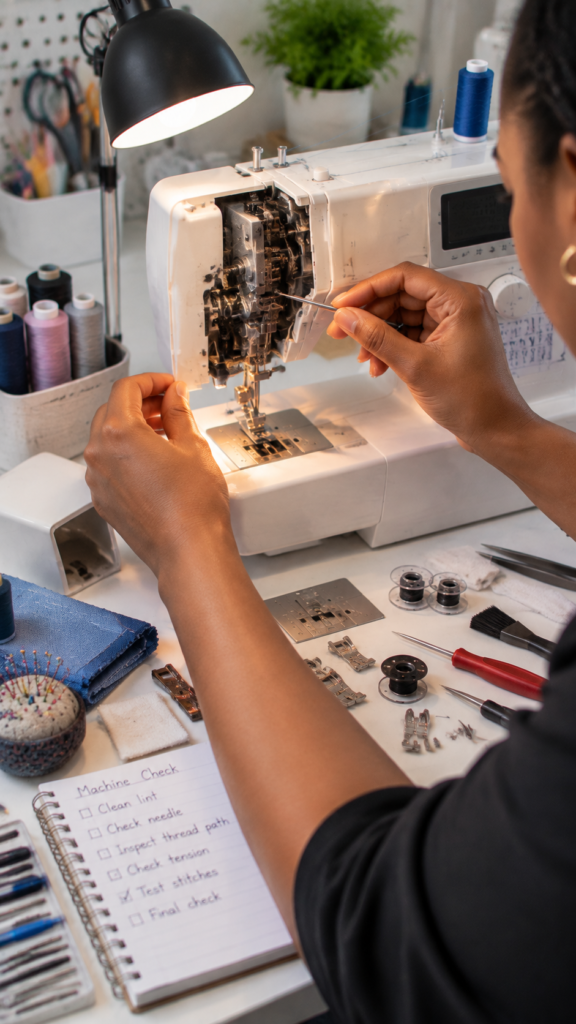
Not every sewing machine thread keeps breaking problem comes from threading, the needle or tension. Sometimes the machine itself needs attention.
Consider professional servicing when:
- A new, correctly installed needle does not help.
- Careful re-threading does not stop the breakage.
- The thread keeps breaking with a suitable needle, thread and fabric.
- You can see a burr, scratch or other damage on a machine part.
- The machine repeatedly catches or damages the thread.
- Timing or another internal mechanical problem may be involved.
- The machine has been dropped, knocked or otherwise damaged.
At that point, more adjustments may only make troubleshooting harder.
Manufacturer guidance from Brother and other sewing-machine brands recommends service when persistent upper-thread breakage continues after the basic checks have been completed.
Sometimes the best fix is knowing when to stop adjusting and have the machine checked.
For small changes that can make sewing neater and easier, try 15 Sewing Hacks for Beginners Who Want Neater, More Professional Results.
A quick diagnostic order to save before your next sewing session
Thread breaks near the needle? Work through these checks in order rather than changing several things at once.
- Stop sewing and remove the damaged thread. Look at where the thread broke and whether it is frayed or worn.
- Check the needle. Make sure it is straight, undamaged, fully inserted and facing the correct direction for your machine.
- Check the needle, thread and fabric combination. The needle needs to be suitable for the thread and fabric you are sewing.
- Raise the presser foot and re-thread the upper thread completely. Follow your machine’s threading diagram from the spool to the needle.
- Check the take-up lever and thread guides. Make sure the thread has passed through every point shown in your machine’s instructions.
- Check the spool. It should unwind smoothly without catching, jerking or rubbing against a rough edge.
- Inspect thread-contact points. Look for obvious rough or damaged areas around the needle plate, presser foot and other places the thread passes. Do this with the machine switched off.
- Check the upper-thread tension. Compare the setting with the recommendation in your machine manual instead of choosing a tension number that works for another machine.
- Sew a short test on suitable scrap fabric. Keep the fabric, thread and needle combination the same as the project so you can tell whether the problem has been resolved.
- Still breaking? The problem may need a closer look at the bobbin area or an internal mechanical fault. At that point, a qualified sewing-machine technician can inspect the machine rather than having you keep changing settings without knowing the cause.
Choosing between a home machine and an industrial setup? Compare the two in Industrial vs Domestic Sewing Machines: Which One Should You Buy as a Beginner.
Conclusion
A sewing machine thread keeps breaking at the needle problem becomes much easier to approach once the break is treated as a clue rather than just an annoyance.
Look for the pattern, test one change at a time, and give the machine a chance to show you what is going wrong. That approach can save wasted thread, unnecessary adjustments and plenty of frustration.
Still chasing the cause? Keep working through the checks until you find the point where the thread is being damaged, then take the next step from there.
Make sewing more comfortable with Sewing With Arthritis: 11 Tools and Techniques That Take the Strain Out of Stitching.