How to cut fabric for beginners without wasting a single piece, the simple habits that turn fear and costly mistakes into confident, clean cuts.
There’s a specific kind of hesitation that has nothing to do with how steady your hands are.
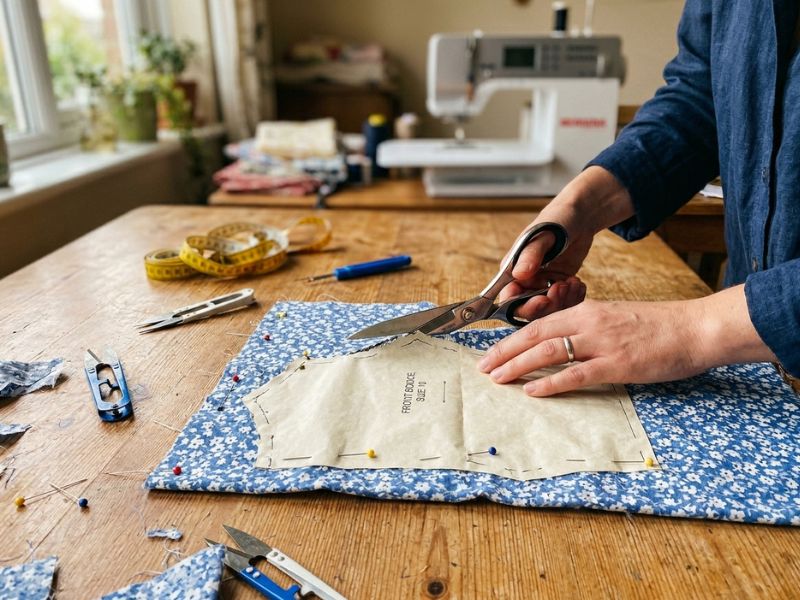
You can mark every cut line perfectly, pin every pattern piece exactly where it should go, and still find yourself standing over the fabric for a full minute before the scissors actually move.
Many aspiring sewers become afraid or demotivated when a project doesn’t turn out the way they wanted, and that fear almost always traces back to one specific moment: the first cut.
Here’s why that moment feels so much heavier than it should. In sewing, almost every other mistake has a way back.
A crooked stitch line gets ripped out with a seam ripper. A wrong measurement gets erased and redrawn. But a cut line is final the second the blades close , there’s no undo, no eraser, no second attempt on that exact piece of fabric.
You’re not just nervous about technique. You’re making a financial and creative decision you can’t reverse, on a material you may have spent real money on, with zero feedback on whether you got it right until it’s already done.
That’s not a confidence problem. It’s a completely rational response to an irreversible action, and once you see it that way, the fix isn’t just be braver.
It’s learning exactly which habits make that one irreversible moment far less risky than it feels right now.
Already cut your fabric and ready for the next step? How to Read Sewing Patterns Without Feeling Lost walks you through what comes right after the cutting table.
Why Most Wasted Fabric Disasters Actually Start Before the Scissors Even Touch It
Most beginners assume fabric waste comes down to a shaky hand or a wrong cut.
The research tells a different story: the damage is usually already done before the first snip, caused by a handful of setup mistakes that have nothing to do with cutting skill.
✅ Fabric that wasn’t pre-washed first
Many fabrics shrink after their first wash, sometimes unevenly depending on the fabric type and weave. If you cut a piece to the exact measurement before washing it, that piece may come out a different size, and a slightly wrong shape, once it’s actually laundered.
The fix happens before cutting, not during it: wash and dry the fabric the same way you plan to care for the finished project, then cut.
✅ A pattern piece placed off-grain
Every woven fabric has a grain, the direction the threads run. Placing a pattern piece even slightly off that grain doesn’t always look wrong right away, but it can cause the fabric to twist, sag, or pull strangely once it’s worn or washed.
This mistake is invisible at the cutting table and only shows up later, which is exactly why it gets blamed on bad sewing instead of where it actually started.
✅ Fabric that wasn’t fully unfolded
This is one of the most common, least talked-about causes of wasted fabric: cutting through fabric that’s still folded or layered without realizing it, and ending up with two cut pieces where you only meant to cut one, or a piece that’s the wrong shape entirely because the fold shifted things out of place.
Always unfold fabric completely and check it’s lying flat before placing a single pattern piece.
✅ Cutting technique that causes jagged, wasted edges
Once the setup is right, technique still matters, but the actual cause of a jagged, frayed cut almost never comes down to lack of skill.
It comes down to three fixable habits:
- Dull scissors, which tug and fray the fabric instead of slicing cleanly
- Short, choppy cutting strokes instead of one long, smooth motion
- Lifting the fabric off the table while cutting, which shifts the cut line out of alignment
None of these require years of practice to fix. They require noticing them once, and adjusting.
Haven’t picked a pattern yet? How to Find Sewing Patterns That Are Easy to Follow and Beginner-Friendly (Save Hours of Frustration) helps you choose one before you even reach for the scissors.
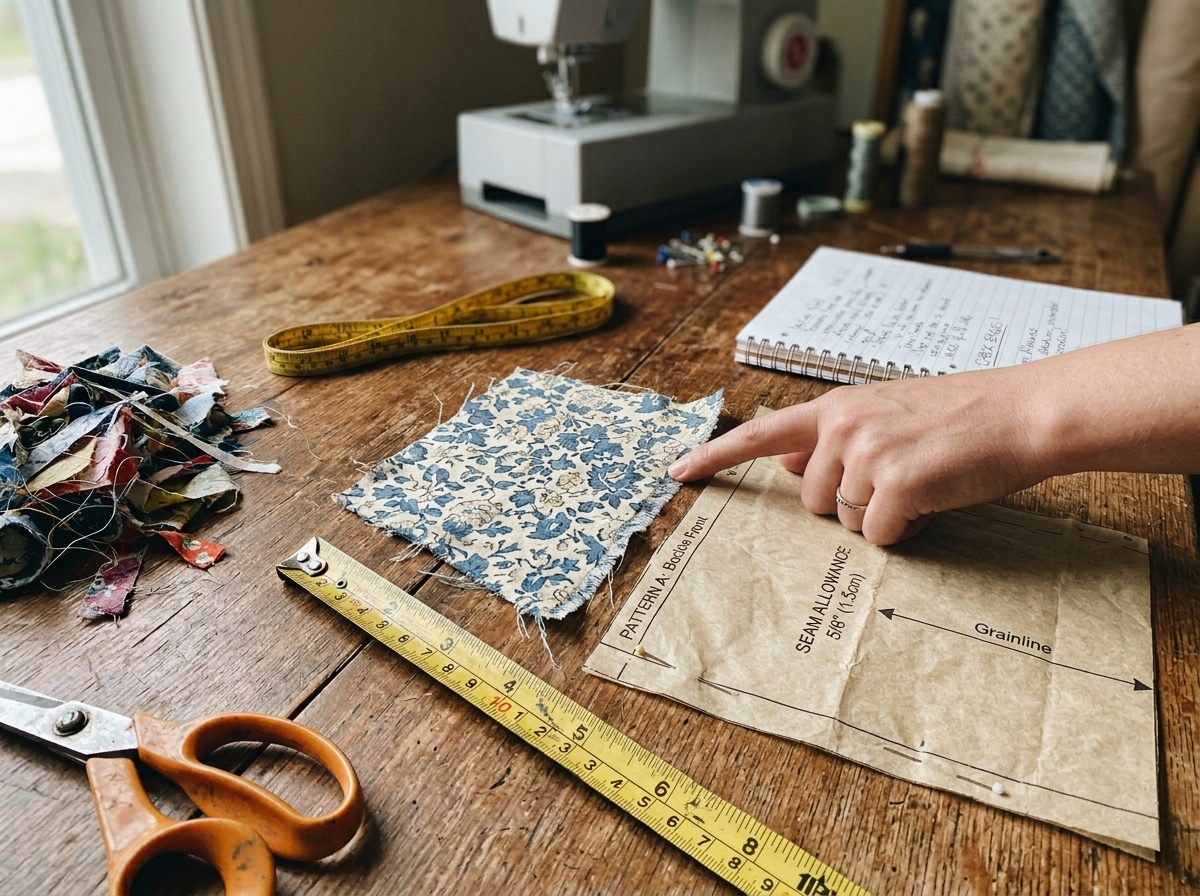
The Grain Line: The One Concept That Prevents the Most Expensive Mistakes

If you only learn one thing from this guide to how to cut fabric for beginners, make it this.
Grain line isn’t a minor technical detail, it’s the difference between a garment that hangs the way it’s supposed to and one that quietly looks “off” in a way you can’t quite explain.
What Grain Line Actually Means
Every woven fabric is made of threads running in two directions, and the direction those threads run is called the grain.
- Lengthwise grain runs parallel to the selvage (the finished edge of the fabric) and has the least amount of stretch
- Crosswise grain runs perpendicular to the selvage and has slightly more give
Pattern pieces include a grainline marking, usually a straight arrow, telling you which direction that piece needs to align with on the fabric.
The Hidden Cost That Shows Up Later
Cutting a piece even slightly off-grain doesn’t always look wrong at the cutting table.
The fabric can look perfectly fine right after cutting, and the seams can go together without obvious problems. The real cost shows up later.
- A garment cut off-grain will often sag, twist, or pull slightly in one direction after it’s been worn or washed
- This delayed effect means the mistake usually isn’t discovered until the project is finished and already costly to redo
- By the time it’s noticeable, there’s no cheap fix, since the fabric has already been cut and sewn
Why this is the mistake worth learning to avoid first
Most beginner guides mention grain line in passing without explaining why it actually matters, which means the lesson doesn’t stick.
Once you understand that grain line affects how fabric behaves after the project is finished, not just how it looks while you’re cutting, it becomes one of the easiest mistakes to start checking for every single time.
How to check it before you cut
Measure from the selvage to your pattern piece’s grainline arrow at both ends of the piece. If the distance matches at both ends, the piece is correctly aligned. If it doesn’t, adjust the piece before pinning it down, not after.
Want to skip buying a pattern altogether? How to Copy a Pattern From Clothes You Already Own (Without Taking Them Apart) shows you how to create one from a garment you already have.
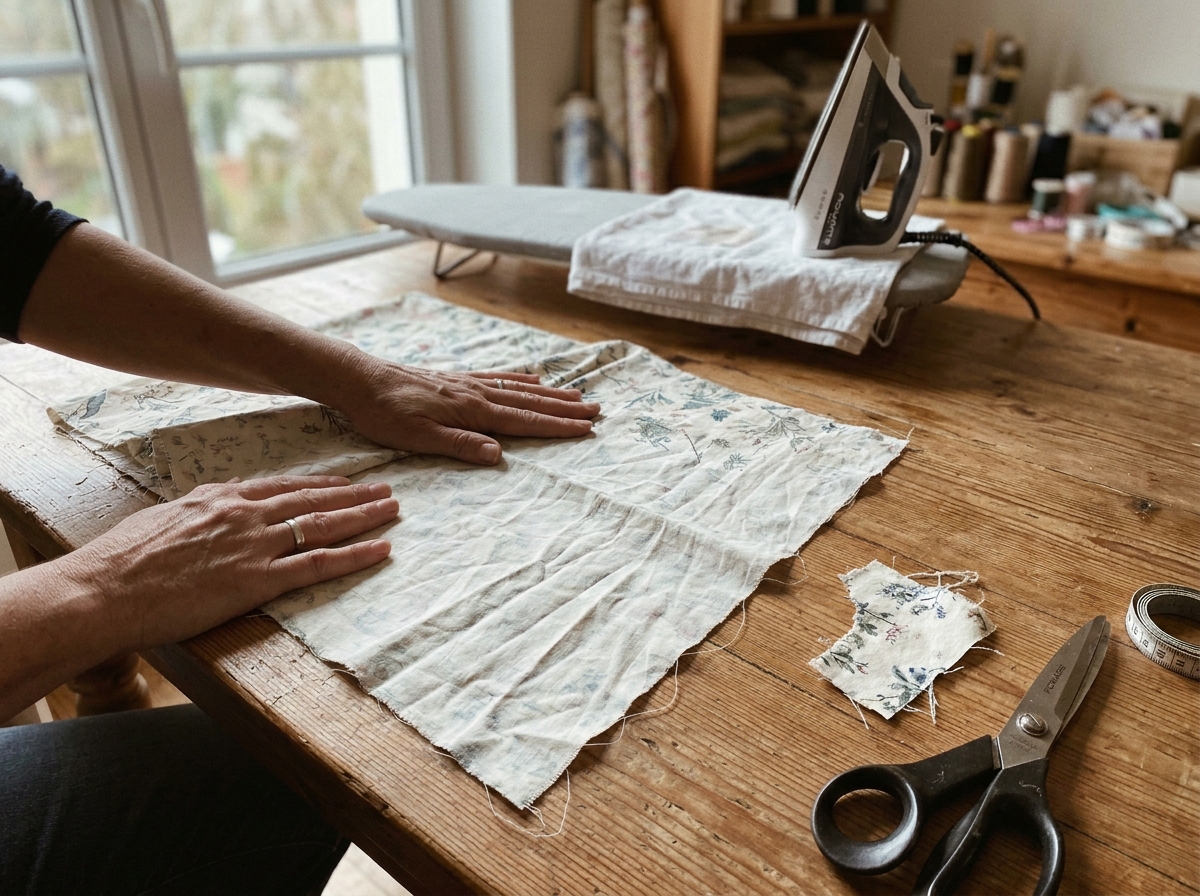
Pre-Cut Prep That Actually Prevents Waste (Not Just Iron Your Fabric)
If you’re learning how to cut fabric for beginners, this is the part most guides rush past, and it’s actually where most fabric gets saved or wasted. None of these three habits require any cutting skill at all. They just need five minutes before you ever pick up the scissors.
1. Pre-wash the fabric before cutting, not after
Many fabrics shrink the first time they’re washed, and that shrinkage isn’t always even across the whole piece.
If you cut your fabric to the exact size first and wash it later, the finished project can come out a different size and shape than intended, and there’s no fixing fabric that’s already been cut and sewn.
The fix: wash and dry the fabric exactly the way you plan to care for the finished item, before cutting a single piece. Let the shrinking happen on the full yardage, not on your already-cut pieces.
2. Fully unfold the fabric before laying out anything
This is one of the leading causes of accidental waste, and it has nothing to do with cutting technique.
Fabric that’s still folded, even slightly, can hide an extra layer underneath your pattern piece, so you end up cutting through two layers when you only meant to cut one, or cutting a shape that’s distorted because the fold shifted mid-cut.
The fix: unfold the fabric completely and smooth it flat on your cutting surface before placing a single pattern piece. Check with your hand that there’s no hidden fold or layer underneath.
3. Do one test cut on a scrap before cutting the real piece
This step gets skipped constantly, and it’s the simplest way to avoid a costly surprise. Different fabrics behave differently the moment scissors meet them, some fray immediately, some shift under the blade, some are heavier or slipperier than expected.
The fix: cut a small scrap piece first, in the same fabric, and see how it behaves. If it frays, shifts, or distorts more than expected, you’ll know to adjust your approach before it matters, on the piece that actually counts.
Note:
None of this is about being a more skilled or careful cutter. It’s about removing the unknowns before the moment that can’t be undone. Five minutes of prep here prevents far more wasted fabric than any amount of careful scissor work ever could.
Not sure your sewing machine basics are solid yet? Beginner’s Guide to Sewing Machine Basics You’ll Actually Use covers the setup knowledge that pairs naturally with confident cutting.
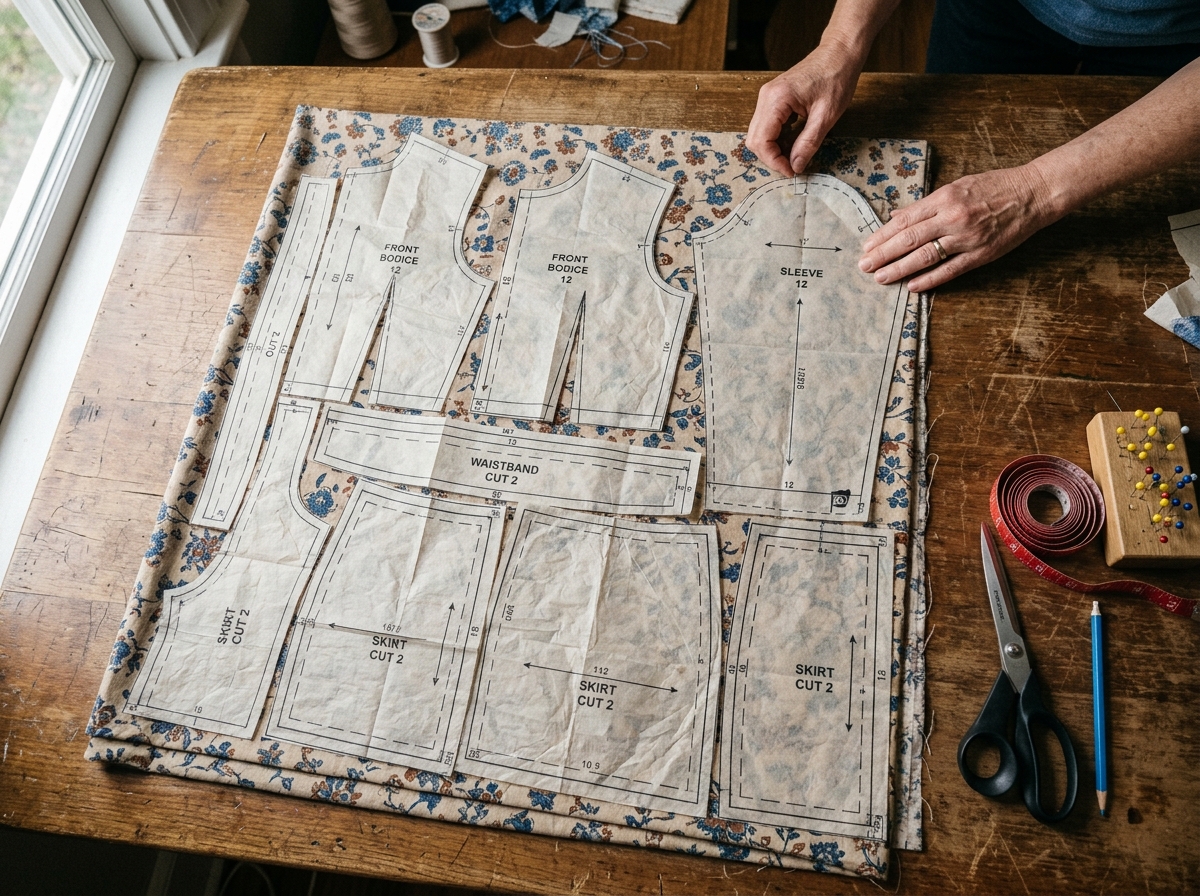
Laying Out Pattern Pieces for Minimum Waste
This is one of the most overlooked steps in how to cut fabric for beginners, and it’s also one of the easiest ways to prevent the most frustrating outcome of all: running out of fabric halfway through a project.
1. Why a layout plan exists in the first place
Sewing patterns include a lay plan, which guides the best way to lay out fabric and pattern pieces to reduce fabric wastage and ensure enough fabric is bought to fit all the pieces.
That layout isn’t just a suggestion, it’s been worked out specifically so every piece fits on the fabric with as little leftover waste as possible.
2. The mistake that causes I ran out of fabric halfway through
This disaster almost never happens because you didn’t buy enough fabric. It happens because pieces were cut one at a time, in whatever order felt natural, without checking first whether the remaining pieces would actually fit on what’s left.
Want a budget-friendly way to practice your new skills? Thrift Flip Sewing Projects Ideas For People Who Want Expensive Style on a Budget is a fun, low-cost way to keep cutting and sewing.
3. The fix: dry-lay everything before you cut anything
- Lay out every single pattern piece on the fabric first, without cutting a single one
- Treat it like fitting together a puzzle, not a one-at-a-time process
- Move pieces around until all of them fit, paying attention to grainline alignment on each piece as you go
- Only pick up the scissors once every piece has a confirmed spot
Why this one habit changes everything
Once every piece is dry-laid and confirmed to fit, there’s no more guessing. You’re not hoping the fabric holds out for the last piece, you already know it does, before a single cut is made.
This single shift, from “cut and hope” to “lay first, then cut,” is the difference between a layout that wastes scraps and one that uses the fabric efficiently.
Wondering if you’re using the right needle for your fabric? How to Choose the Right Sewing Needle for Every Fabric Type — Before You Blame Your Machine is the next fabric-specific decision after cutting.
The Actual Cutting Technique That Prevents Jagged, Wasted Edges
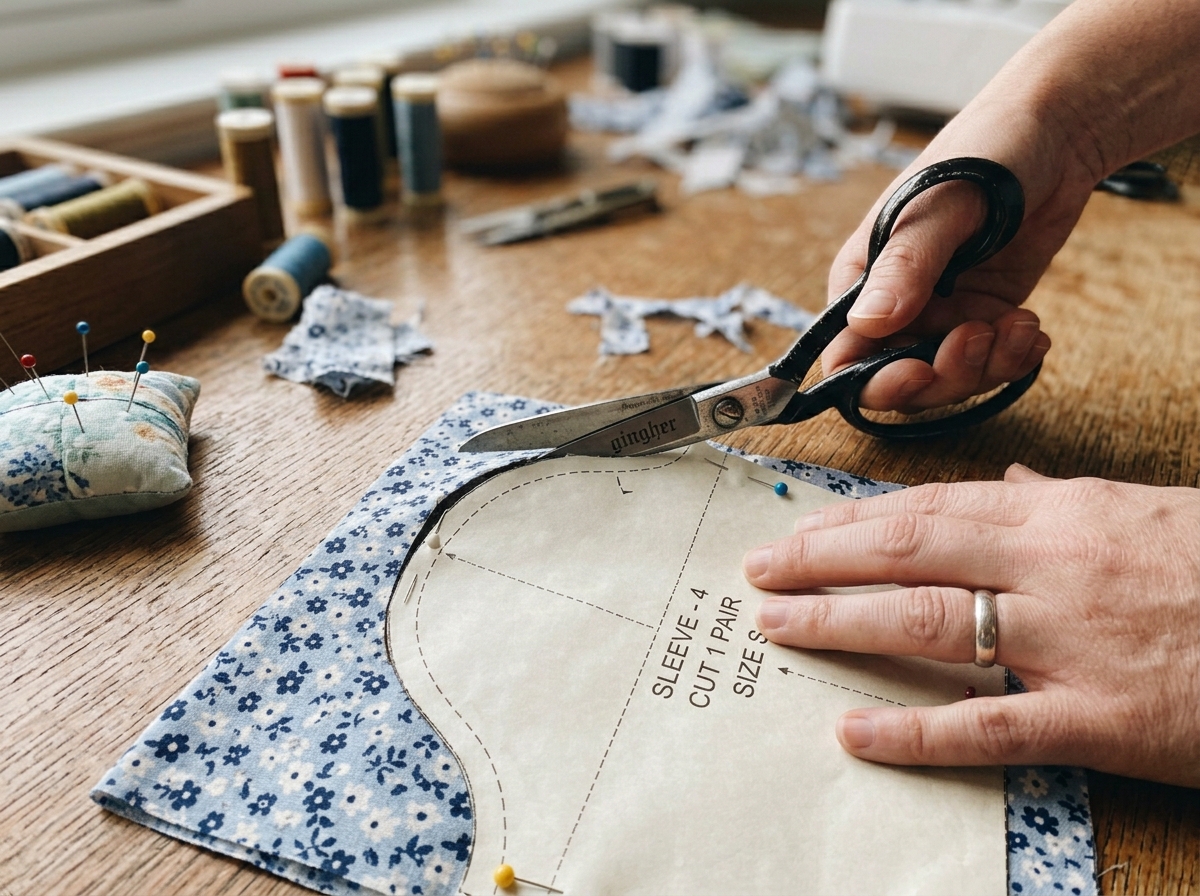
This is the part of how to cut fabric for beginners that actually happens with scissors in hand, and it comes down to three specific habits, not raw skill.
✅Cut In Long, Smooth Strokes, Not Short Choppy Snips
Short, repeated snips create a jagged, uneven edge because each tiny cut slightly changes direction from the last one. A single long stroke, guided steadily along the cut line, keeps the edge clean and continuous.
- Use the full length of the scissor blades, not just the tips
- Move the fabric or your body as needed to keep cutting in one continuous motion, rather than stopping and repositioning constantly.
Want to build a toolkit that makes future cuts even more accurate? 11 Essential Sewing Tools for Sewists That Help Improve Accuracy and Are Budget-Friendly covers the tools worth having on hand.
✅ Keep The Fabric Flat On The Table — Never Lift It While Cutting
Lifting the fabric off the table while cutting feels natural, but it distorts the cut line. The moment fabric is lifted, it shifts slightly out of position, so the line you’re cutting no longer matches the line you marked.
- Cut with the fabric resting fully on a flat surface
- Move around the fabric rather than picking it up and turning it toward you
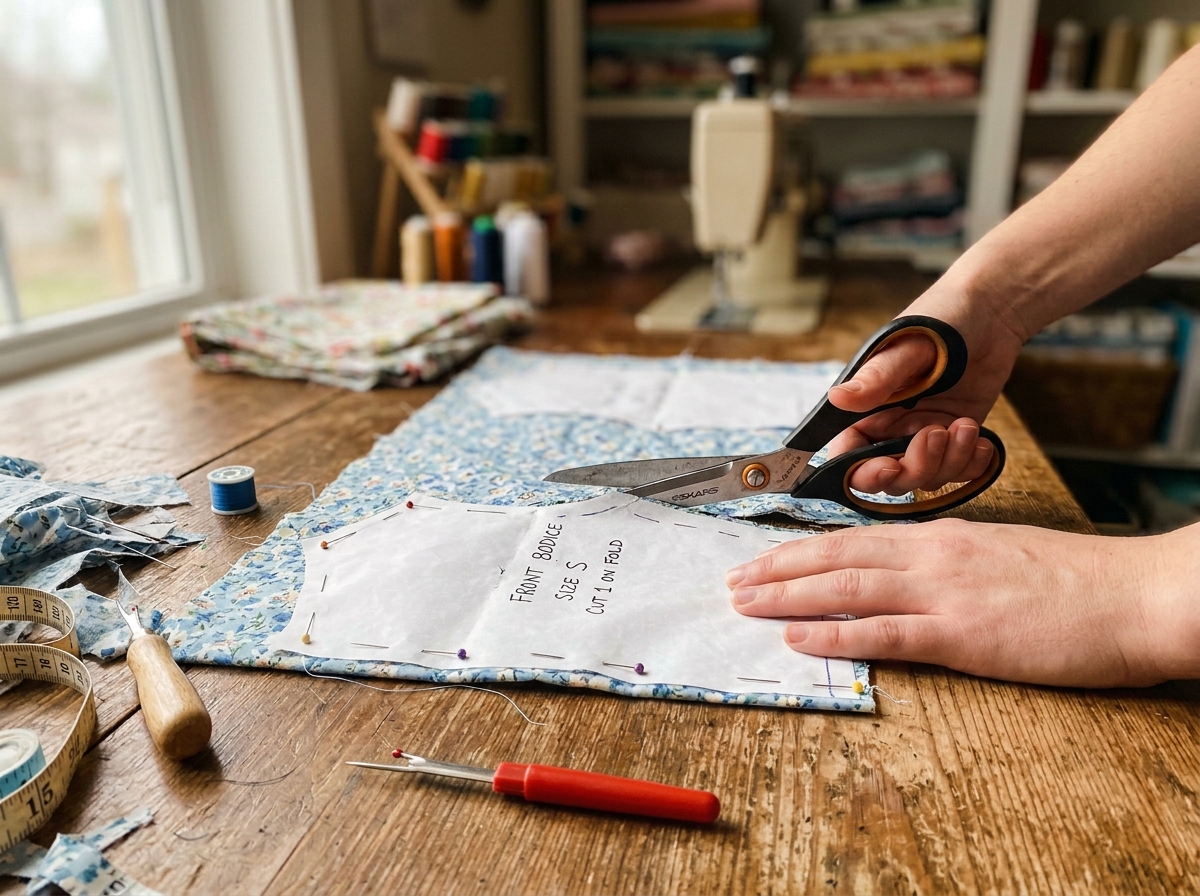
✅ Secure The Fabric So It Can’t Shift Mid-Cut
Fabric that moves even slightly during cutting throws off the entire line, especially on slippery or lightweight fabrics.
- Use pins around the edges of the pattern piece, placed well within the seam allowance so they don’t interfere with the blade
- Or use pattern weights instead of pins, which hold fabric in place without creating any holes at all
These Three Habits Beat Years of Experience
None of this requires years of practice to get right.
A beginner who cuts in long strokes, keeps the fabric flat, and secures it properly will get a cleaner edge than someone with years of experience who skips these basics. The mechanics matter more than the muscle memory.
Curious why your machine struggles even after a clean cut? Why Your Sewing Machine Keeps Skipping Stitches (And 7 Easy Fixes That Work Fast) solves the next common beginner frustration.
What to Do When You’ve Already Cut Wrong
If you’re reading this after the cut has already happened, prevention tips aren’t what you need right now.
This part of learning how to cut fabric for beginners is about what’s actually salvageable, and that answer depends on exactly what went wrong.
Not every mistake is a disaster. A piece that’s slightly too narrow, slightly off-grain, or cut a little crooked along one edge often has more room to work with than it seems.
- Check your seam allowance first. Most patterns include extra fabric (commonly around 1.5 cm or 5/8 inch) built into the cut edge specifically to allow for small adjustments during sewing.
- A piece that’s slightly small can sometimes be sewn with a narrower seam allowance than the pattern calls for, effectively “giving back” a small amount of width.
- A piece that’s slightly off-grain on one section can sometimes still work if the distortion is minor and falls in a less visible area of the finished garment, like an inner seam rather than a front panel.
This won’t rescue every mistake, but it rescues more than most beginners assume, simply because they don’t know the seam allowance exists as a built-in safety margin in the first place.
Sometimes a cut is too far off to recover, and the most useful thing to know in that moment is that this isn’t a failure of skill, it’s just fabric that needs to be re-cut.
- Check your remaining fabric or scraps first. If there’s enough left over from the same project, even pieced together from smaller leftover sections, a new piece can often be cut from a remnant rather than requiring an entirely new fabric purchase.
- If the original fabric is genuinely gone, treat this as information for next time, not a verdict on your ability. The exact habits that prevent this (grain checks, dry-laying, test cuts) are the same ones that turn this from a recurring problem into a one-time lesson.
Why Keeping Every Scrap Matters More Than it Seems
This is the habit that makes future mistakes cheap instead of costly: keep the leftover fabric from every project, even small pieces.
- A scrap pile means a miscut piece can often be re-cut immediately, from material you already own, instead of requiring a trip back to the fabric store
- Scraps are also the ideal material for the test cuts covered earlier in this guide, since they let you check how a fabric behaves without risking the real piece
- Over time, this turns every past project into a safety net for the next one, rather than fabric waste that’s simply thrown away
The actual lesson here
A miscut piece doesn’t mean you’re bad at this. It means you’re at the exact stage every person who sews fabric confidently has already passed through.
The difference between a beginner who quits and one who keeps going usually isn’t the mistake itself, it’s knowing there is always a next step after it.
Thinking about turning this skill into income? Sewing Skills That Actually Make You Money (Even If You’re Just Starting) is a good next read once you’re cutting confidently.
Conclusion
That moment of hesitation from the very start of this guide, scissors in hand, fabric pinned, breath held, doesn’t disappear because you become braver. It disappears because you understand what’s actually happening underneath it.
Once you’ve learned how to cut fabric for beginners the right way, almost every ruined cut traces back to one of a small handful of fixable habits, not a lack of skill, and definitely not bad luck.
Pre-washed fabric, checked grain lines, a full dry-lay before the first snip, long smooth strokes, fabric held flat and secure, none of it requires years of practice. It requires knowing what to check, in what order, before the scissors ever move. And now you do.
What was your first fabric-cutting experience like? Share your biggest cutting fear, or the moment you finally felt confident with the scissors, in the comments, I would love to read your experience.