That drawer of leftover Perler beads doesn’t have to sit there for months, here’s how to actually sort, store, and use them up.
Open any bag of Perler beads and count what’s left after a project. It’s never even. You’ll have four blues, one lonely orange, and about sixty of a beige you didn’t even know you owned.
That’s not bad luck, the bags are packed unevenly on purpose, so certain colors always run short and others just… sit there.
Most people sweep that leftover pile into a container and forget about it. It sits in a drawer for months, half-sorted, half-useless, until someone finally asks “what do we even do with all this?”
Here’s what to actually do with it, projects that use mismatched leftovers instead of a full color set, plus a sorting system that keeps this pile from showing up again every few weeks.
Brighten craft time with Sunflower Crafts for Kids: The Suncatcher and 14 More Easy Ideas They’ll Beg to Make Again, featuring cheerful flower projects that are fun for home, school, or summer activities.
Why Loose Beads Pile Up in the First Place
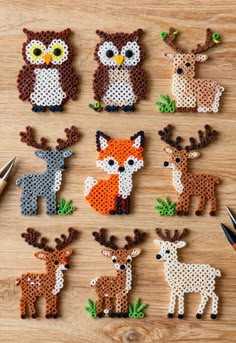
Perler bead patterns are built like pixel art, each design is really a grid, and the colors used depend on the image, not on what’s fair to your bead stash.
A face uses a lot of skin-tone and outline beads and only a few accent colors. A flag uses a handful of colors in bulk and almost nothing else. Whatever colors barely make it into the picture are the ones that barely get used up.
Multi-color bags make this worse, not better. They package a mix of colors together in fixed ratios, but that ratio has nothing to do with how patterns actually use color. So the same few shades, often tan, gray, or pale pastels, get left behind bag after bag, while primary colors run out fast and get repurchased. Over time, that’s how a pile of leftover Perler beads builds up without anyone doing anything wrong.
Two things worth understanding here:
- The imbalance starts before you ever open the bag, it’s in how the colors were packaged, not in how a project was planned
- Single-color bulk bags don’t have this problem, since every bead is the same color to start with, but most people begin with mixed bags, since that’s the standard starter option
A drawer of leftover Perler beads isn’t a mistake to undo. It’s just what happens when a hobby runs on pre-packaged color ratios instead of paint you can mix to the exact amount you need.
Put broken crayons to good use with Melted Crayon Art for Kids: What to Do With Broken Crayon Pieces, where colorful leftovers become beautiful works of art.
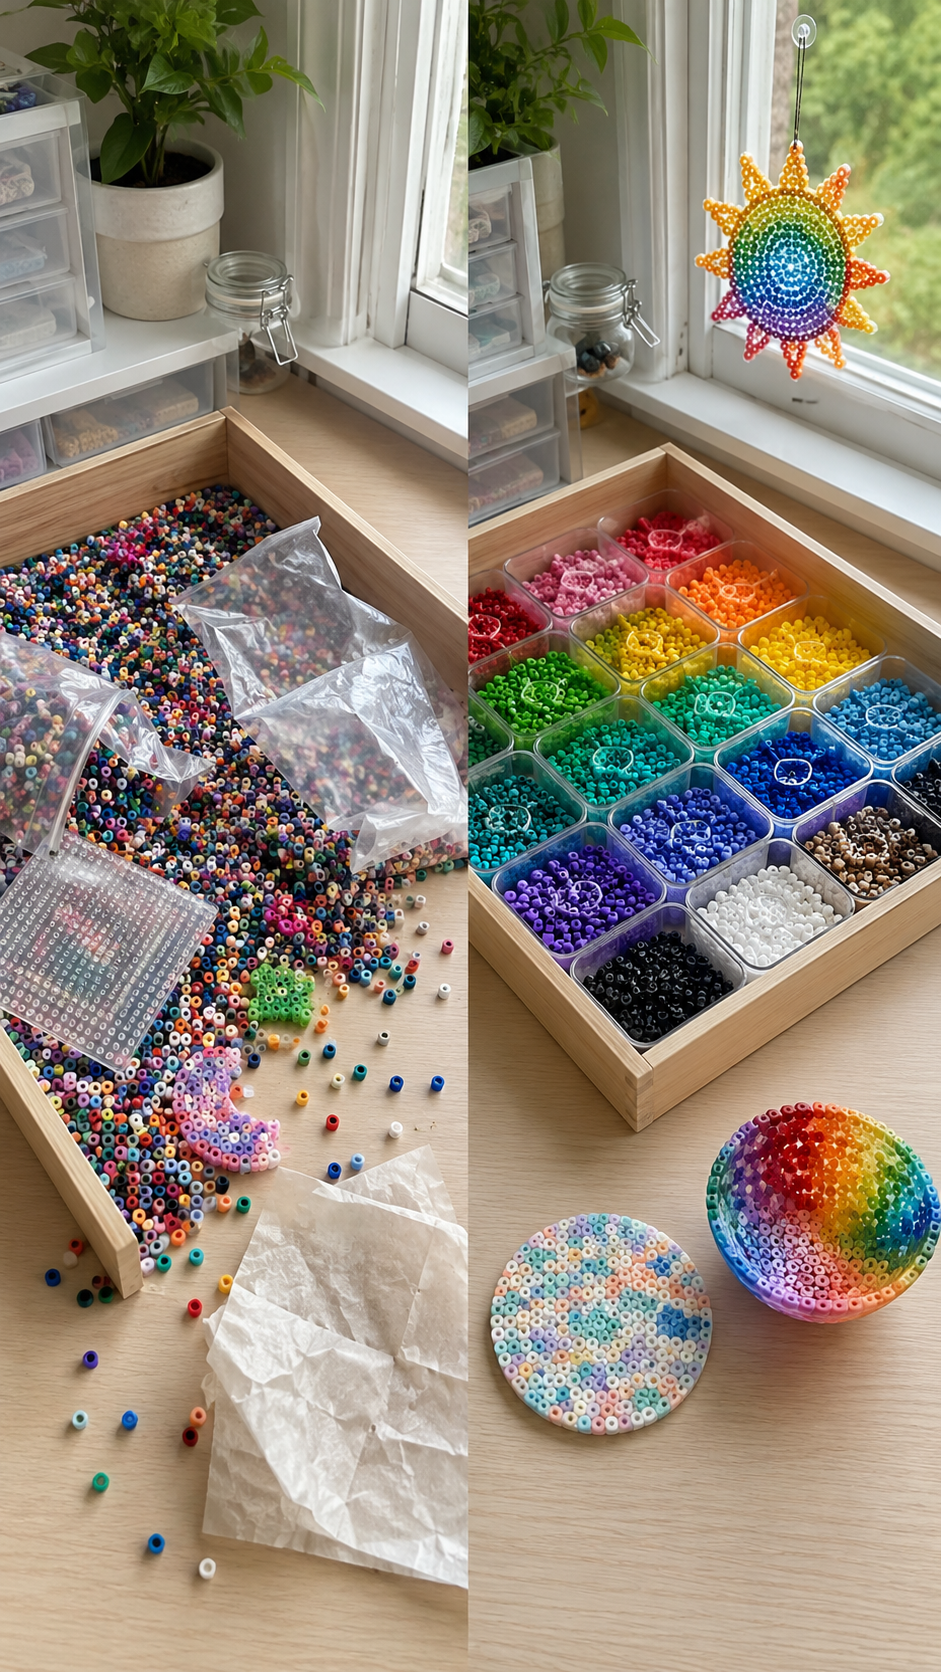
What to Actually Make With the Odd Leftovers
None of these need a full color set. They’re made for random, mismatched beads — the messier your pile, the better most of them turn out. This is the part where that drawer full of “I don’t know what to do with these” finally earns its keep.
1. Confetti Coasters
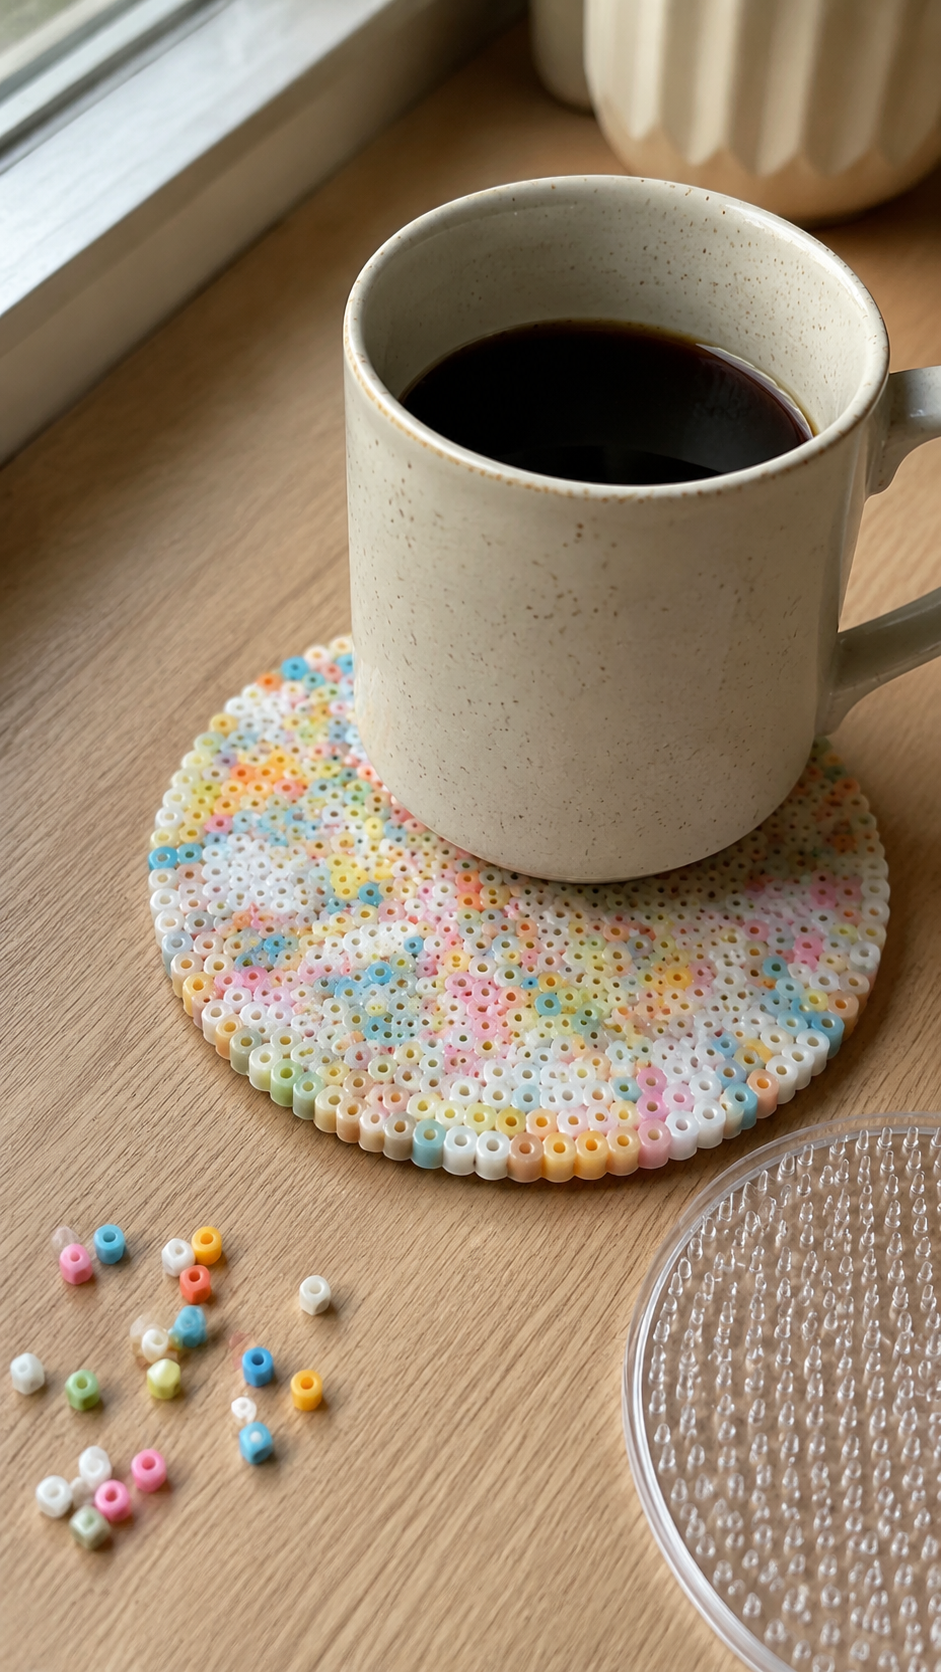
This is the one to start with, because it’s almost impossible to mess up, and it’s oddly satisfying to watch a chaotic pile turn into something that looks deliberate.
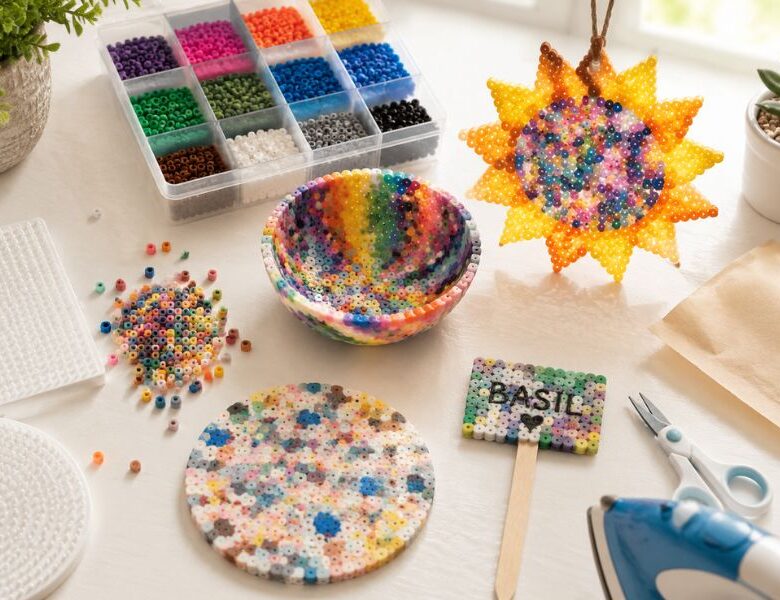
What to do: Fill a round pegboard with whatever’s left in your color bins, don’t sort, don’t plan, just dump it in and spread it out. Cover with ironing paper and iron on a medium-low, no-steam setting, small circular motions, about 15–20 seconds, until the beads go glossy but haven’t lost their shape.
Flip it and iron the back the same way, that second pass is what makes it strong enough to hold an actual mug without cracking down the middle. Let it cool flat under a heavy book for a minute before you pick it up.
The Terrazzo Effect
The moment it comes off the ironing board, it stops looking like leftovers and starts looking like something you’d pay for at a home goods store, that speckled, marbled terrazzo look happens purely by accident, because randomness fused solid reads as intentional.
One coaster eats up roughly 200–250 beads, so this is genuinely one of the fastest ways to make a real dent in a big pile in one sitting.
Make learning the alphabet exciting with Train Craft Ideas for Kids That Make Learning the Alphabet Fun With Things You Already Have, combining creative play with early literacy skills.
2. Rainbow Melt Bowls
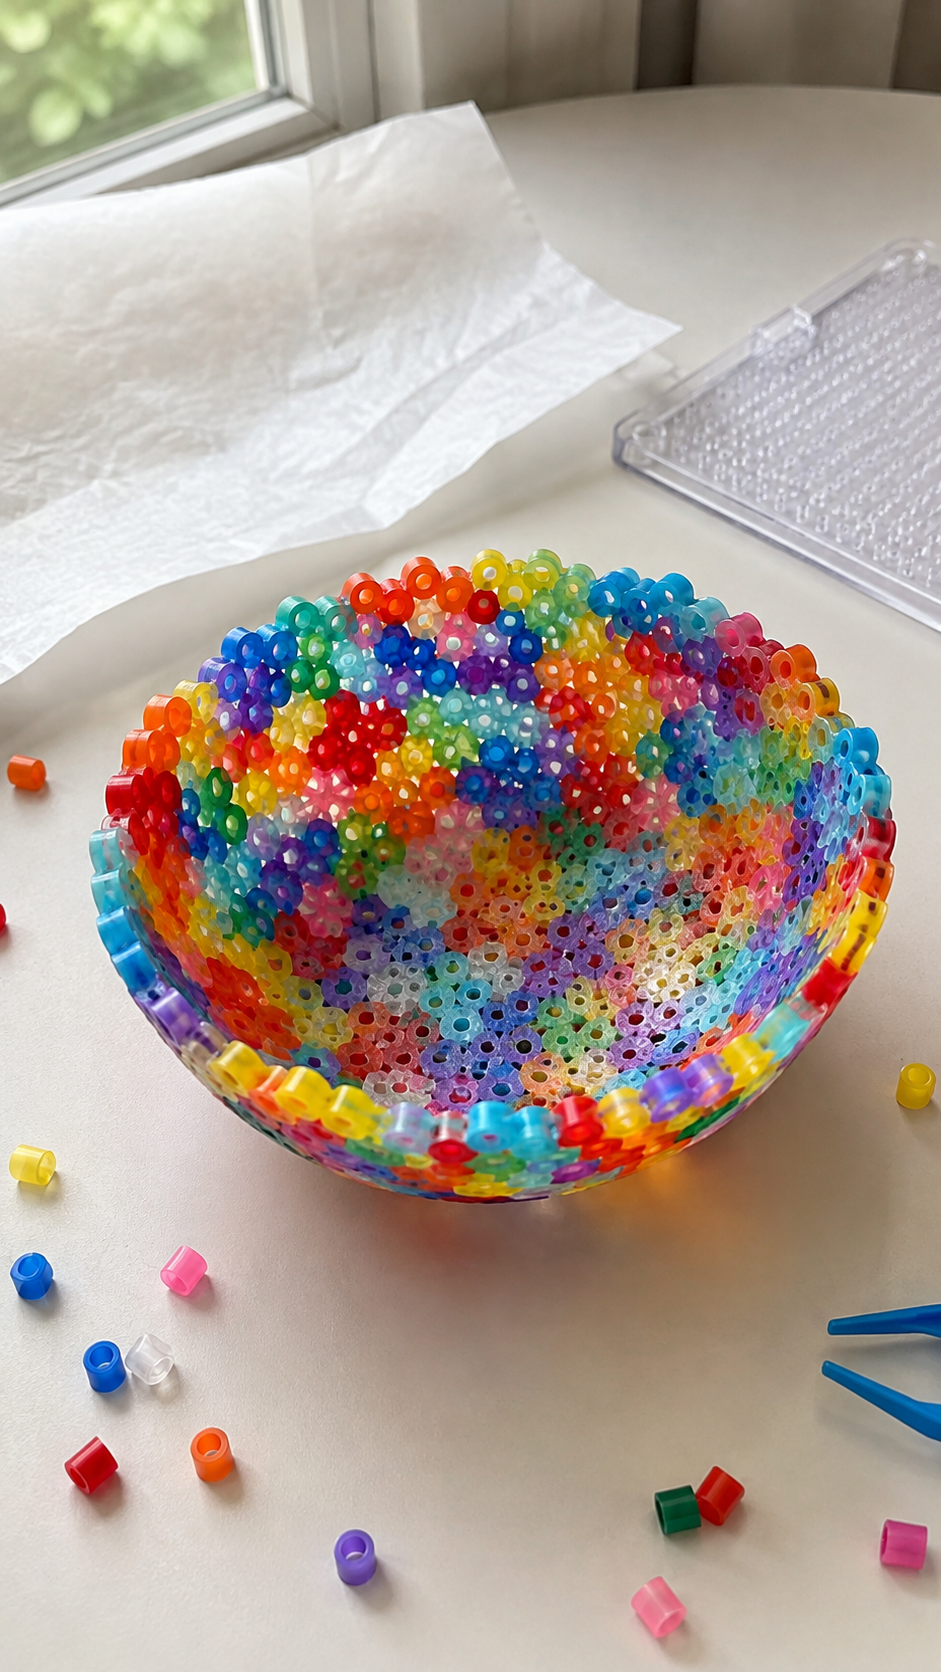
This one has a bit of magic to it, kids drop in a fistful of mismatched color and pull out a little bowl, and the “how did that happen” reaction is worth the extra step of using the oven.
What to do: Set a metal cookie cutter on a parchment-lined baking sheet and fill it with mixed leftover beads, about 1–1.5 cups for a small bowl, more for anything wider than 4 inches.
Bake at 400°F for 5–7 minutes, checking at the 5-minute mark. They’re done once fully fused with edges that have gone soft and rounded, not sharp. This step needs an oven and hot metal, so it’s the adult’s job, even if the kids picked every bead going in.
Why It Slumps Into a Bowl
The curve isn’t shaped by hand, it happens because the beads soften and sag slightly under their own weight while they’re hot, which only happens when there’s enough volume in the cutter to sag.
That’s exactly why this is a better fit for a big, mixed pile than a small one. Let it cool all the way in the cutter before popping it out; pull it while it’s still warm and the shape will droop wrong.
Add texture to painting time with Bubble Wrap Painting: The Easy Texture Trick That Turns Bored Kids Into Little Artists, an easy art activity children will want to try again and again.
3. Scrap Bead Suncatchers
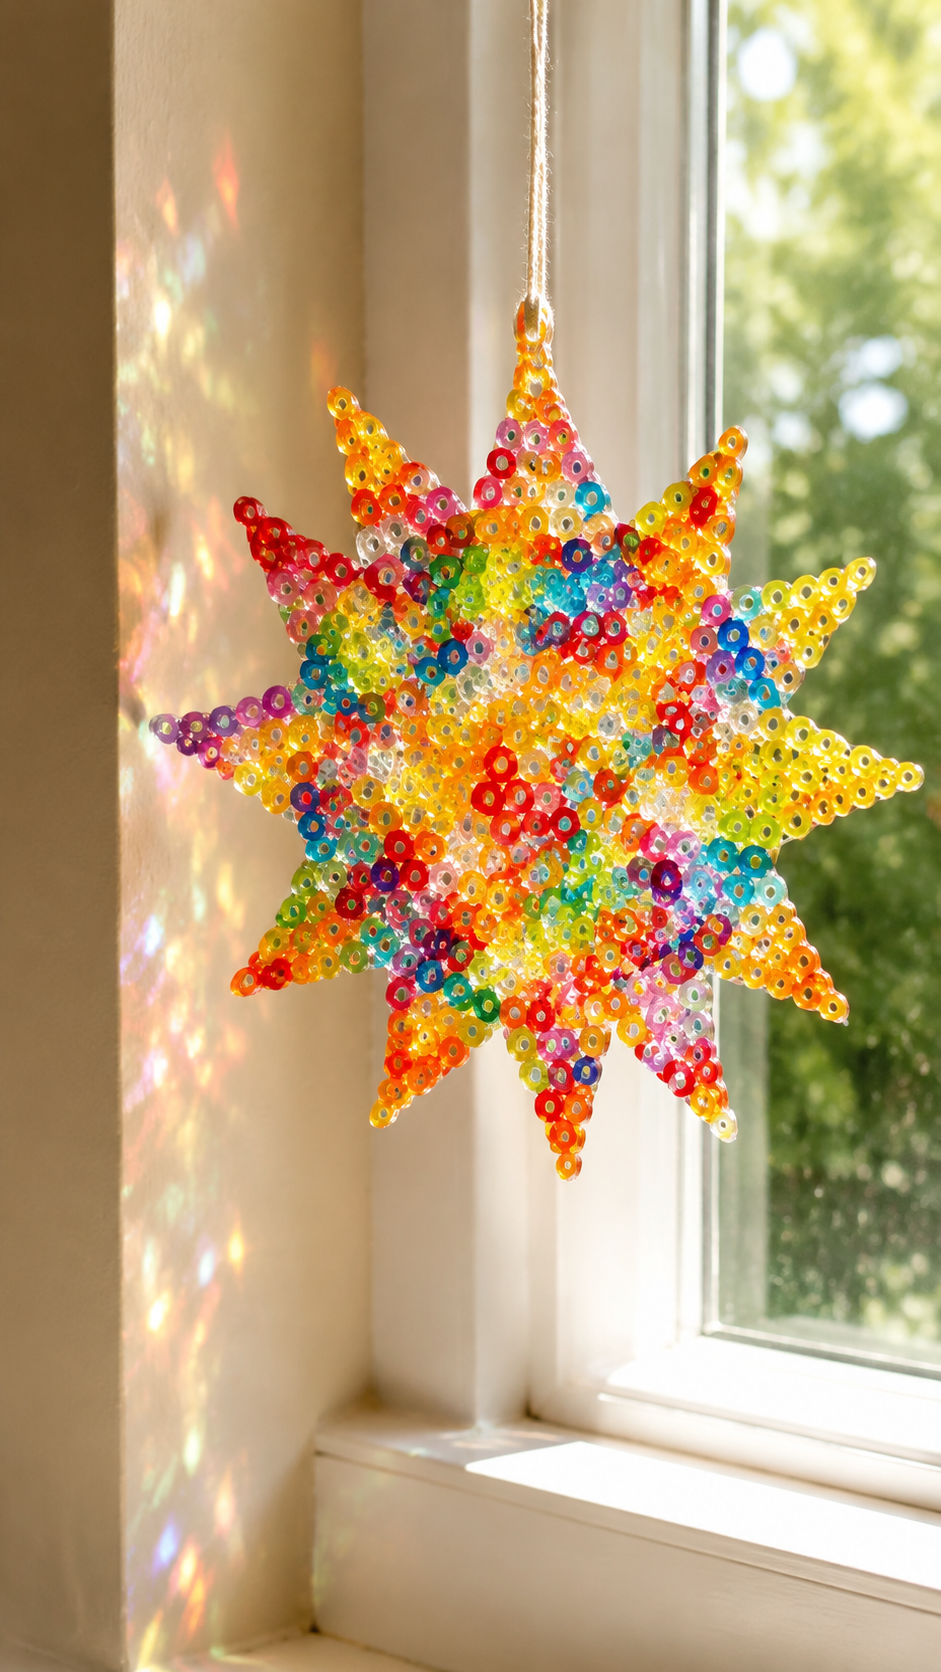
Where the coasters hide the randomness, this one puts it on full display, and it’s the project where “leftover” beads genuinely beat a matched, planned set.
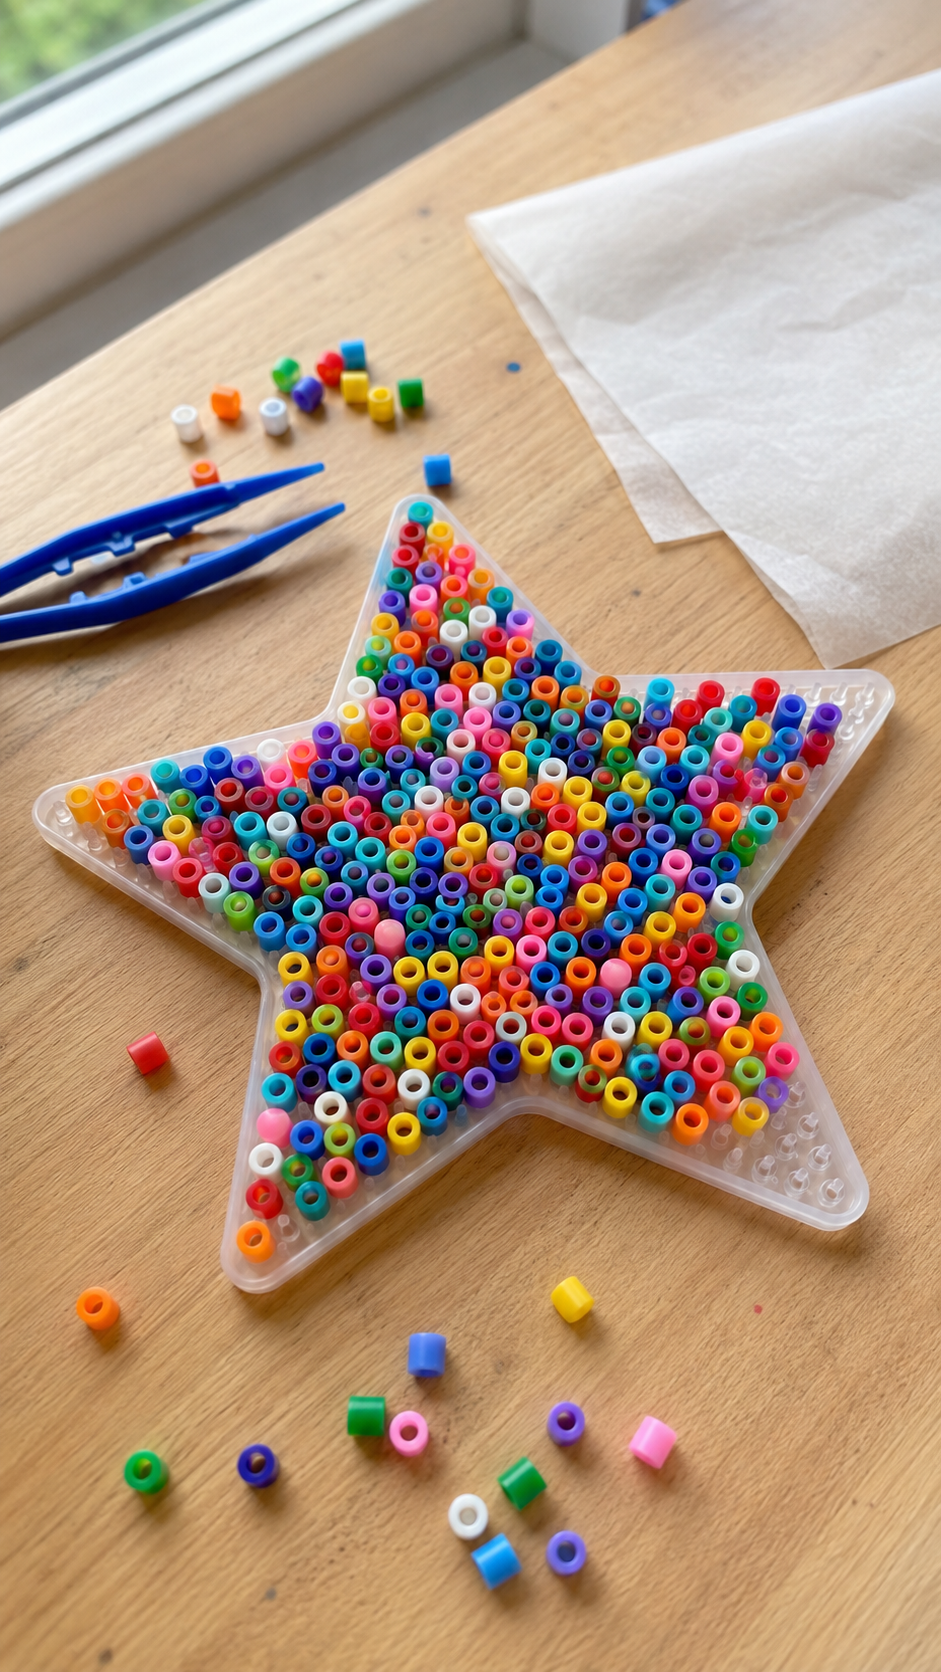
What to do: Arrange beads on a sun or star-shaped pegboard and let the colors fall wherever they land. Iron both sides the same way as the coasters, then thread string or ribbon through one of the outer holes once it’s fully cooled, pull string through while it’s still warm and you’ll distort the shape around the hole.
Where the Mismatch Pays Off
Hang it in a window on a sunny afternoon and watch what happens: light passes through the different shades and thicknesses unevenly, throwing color and texture across the room that a single, matched color could never do. It’s proof the “wrong” colors were never actually wrong.
Introduce children to creativity from around the world through 12 African Art Projects for Kids That Teach Culture, Not Just Craft, blending hands-on fun with meaningful learning.
4. Garden Markers
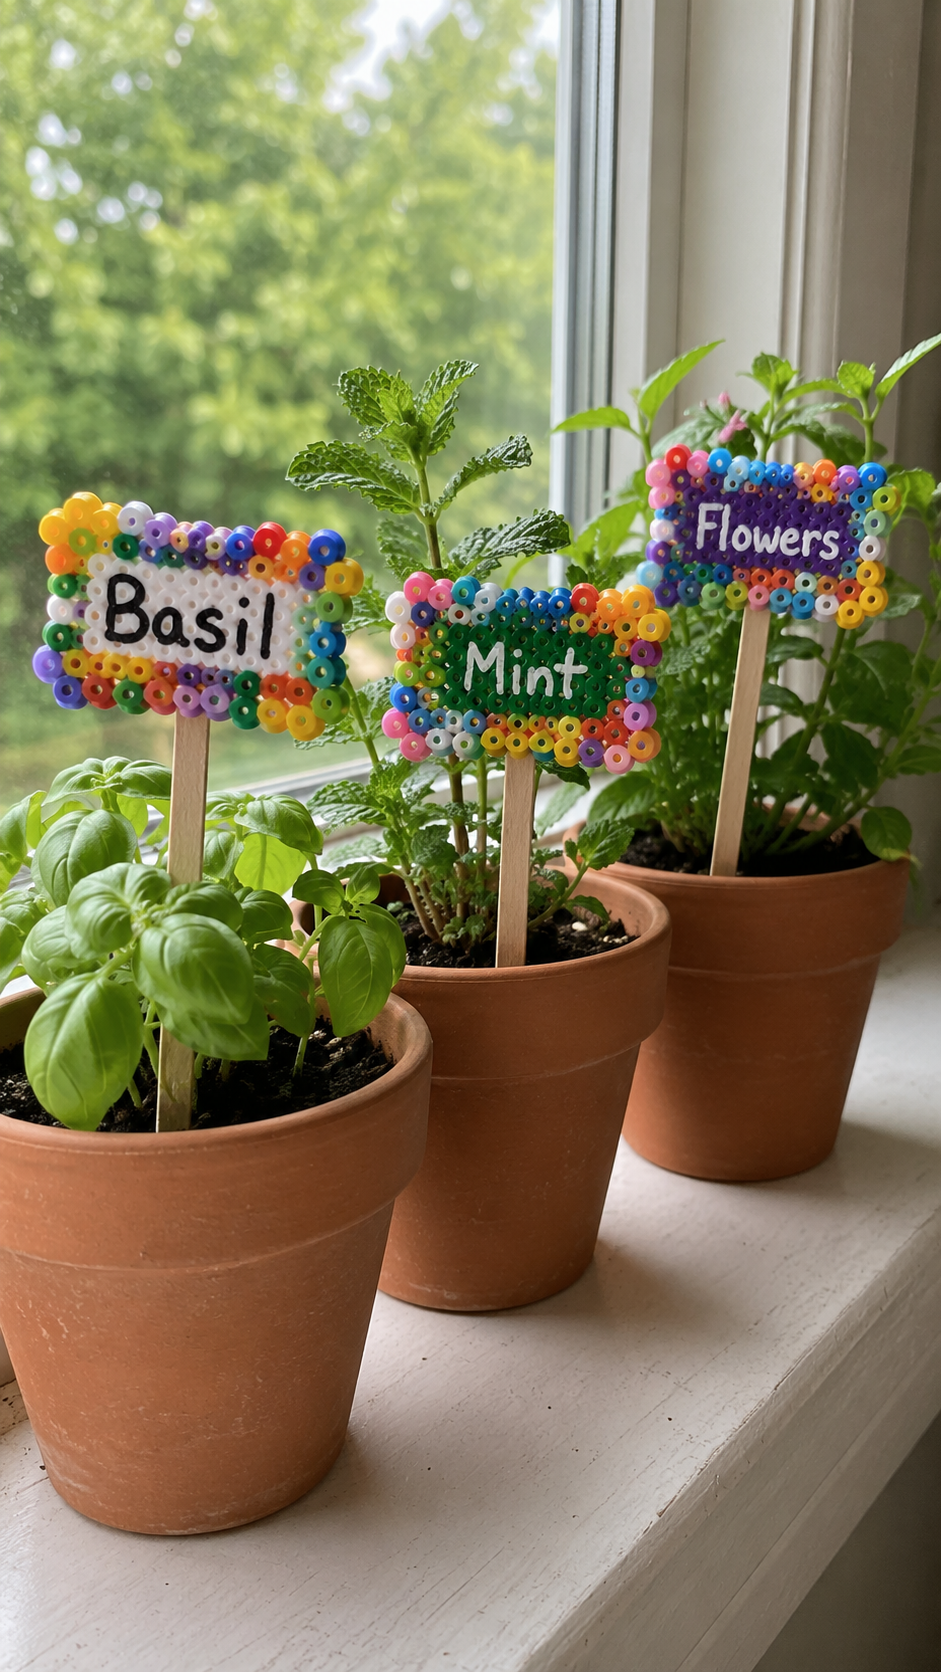
And when what’s left isn’t even enough for a coaster, just a stray dozen beads rattling around a container, this is where they go instead of the trash.
What to do: Melt them into a small flat rectangle, then push a wooden skewer or popsicle stick into it while it’s still warm, right after ironing. Let it cool for 2–3 minutes, then write the plant name on it with a paint pen once it’s fully hardened — write on warm plastic and the ink will smear.
The Point of This One
It’s the smallest project here on purpose. It exists so the last few odd beads, the ones too few for anything else, still get used instead of sitting in a drawer for another six months waiting for a purpose that was never going to come.
Grow something special with How to Make Seed Paper with Kids: A Fun Nature Craft That Actually Grows, an eco-friendly project that continues long after craft time ends.
Sort Smarter So You Actually Use What You Have
Most people sort beads by dumping them onto a table and picking through by hand. It works, but it’s slow, and it’s usually where the “I’ll finish this later” pile actually starts. There’s a faster method a lot of experienced Perler crafters use instead: the straw-sorting technique.
You drop a handful of mixed beads into a wide straw or narrow tube and tilt it.
The straw is just narrow enough to force the beads into a single-file line as they fall, so instead of scanning a whole messy pile at once, you’re only ever looking at one bead at a time, you tap each color out as it reaches the opening, in order, without having to hunt for it.
Once sorted, where you put the beads matters as much as how you sorted them:
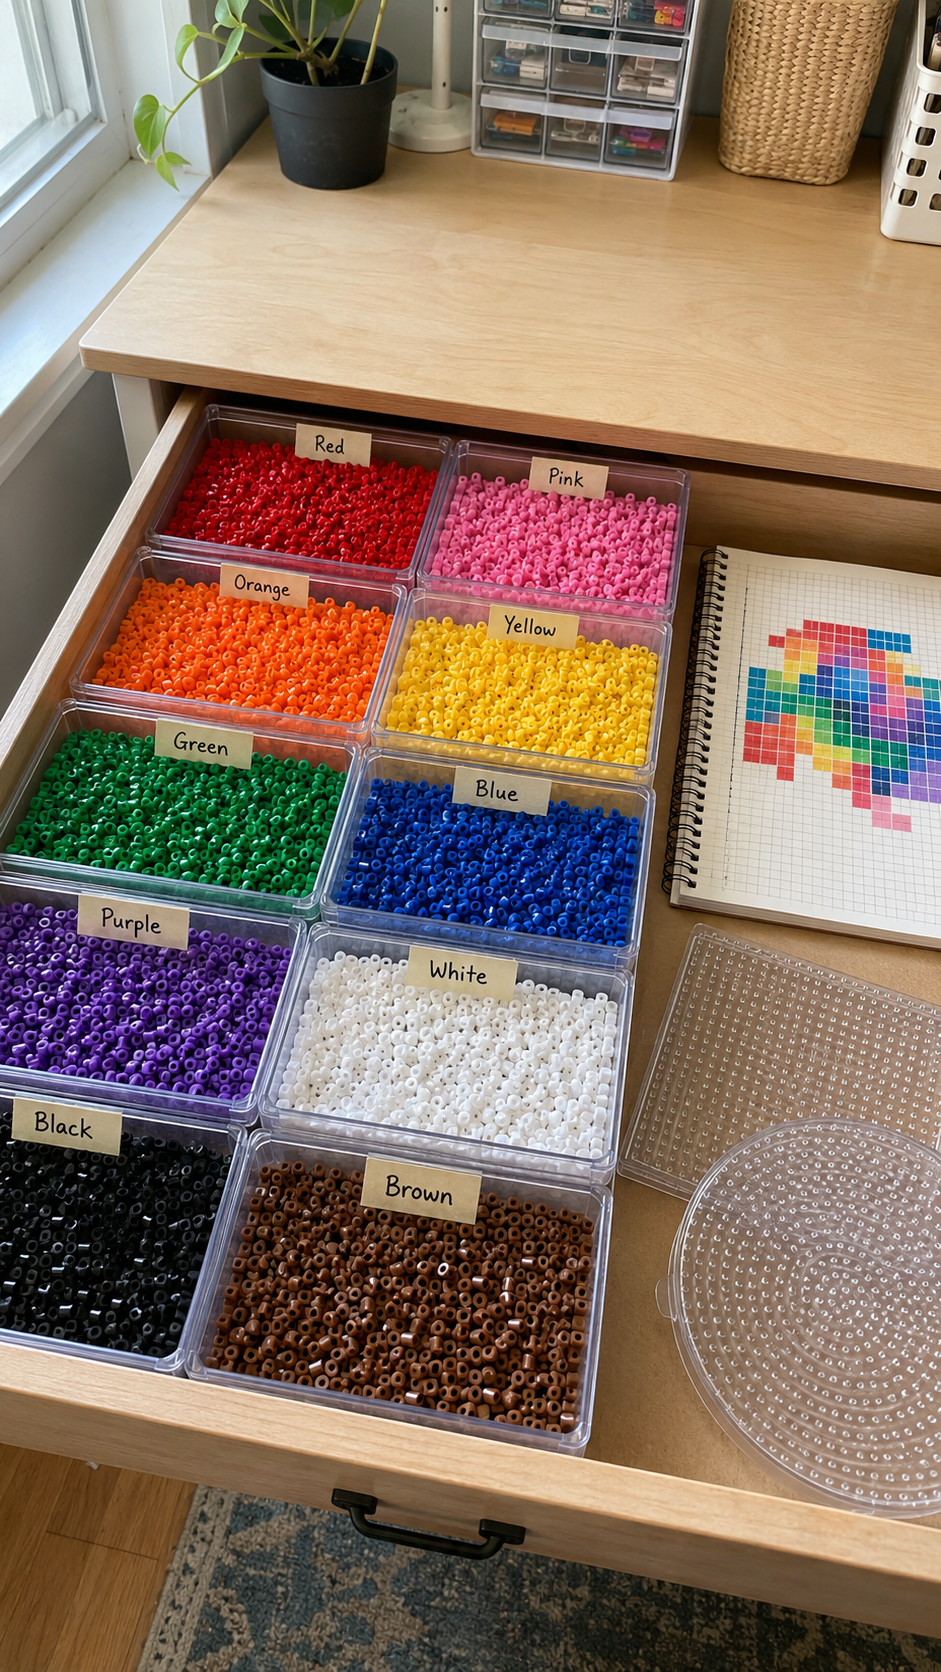
- Compartmentalized boxes — every color is visible and grabbable in seconds, which matters when a kid wants to start a project right now, not after five minutes of digging through bags. The trade-off is space: a full set of compartments takes up more shelf room than flat bags do.
- Small labeled bags — stack flat and take up a fraction of the space, but every bag has to be opened and closed each time you need a color, so it’s slower in the moment.
If shelf space is tight, bags are the better call. If a kid is going to be starting projects on their own, without an adult around to dig through bags, compartments are worth the extra space.
There’s also something sorting does that’s easy to miss: it tells you exactly what you’re working with.
Once leftover Perler beads are separated by color, you can see, not guess, that you’ve got eighty pale blue and only six red.
That rules out any project that needs a lot of red before you waste time starting one, and points you toward projects your actual stash can finish.
Sorting isn’t just cleanup. It’s what tells you which projects are realistic before you pick one.
Keep children entertained with Safe and Easy Slime Craft Ideas for Kids — Non-Toxic Projects That Keep Them Busy for Hours, featuring simple recipes made with kid-friendly ingredients.
The Use It Up First Rule (Stopping the Pile-Up)
Everything above works with beads you already have. This part is about making sure the pile doesn’t come back once it’s gone.
-
Use existing singles before opening anything new
Before a new bag gets torn open, the loose leftovers get first pick. That’s the whole rule. In practice, it means checking the leftover bins before choosing a pattern, rather than after, pick a project the singles can actually finish, then only reach for a fresh bag to fill in whatever’s missing.
It sounds almost too simple to matter, but it’s the difference between a leftover pile that slowly drains and one that just keeps growing underneath every new bag.
Turn ordinary craft sticks into amazing creations with 13 Popsicle Stick Crafts for Kids That Actually Keep Them Busy and Boosts Creativity, featuring fun projects for every season.
-
Buy loose beads by weight instead of pre-packaged kits
The other half of the problem starts with how the pile forms in the first place. Multi-color kits come with fixed colour ratios that rarely match what a pattern actually needs. That mismatch creates the leftover pile.
Buying loose beads by weight avoids that problem. You choose the colours a specific project requires instead of buying whatever combination the manufacturer puts in the kit.
It takes a little more thought at checkout, but this simple habit can stop the same problem from returning six months later with another bag of leftovers.
Together, these two habits do what sorting and storage can’t: they reduce the pile at the source instead of simply managing it after it grows.
Create colorful stained-glass butterflies with Coffee Filter Butterfly Craft for Kids (Easy Stained Glass Effect Craft Idea), a fun project that also strengthens fine motor skills.
Storage Tips That Keeps Loose Beads From Becoming a Mess Again
Sorting solves today’s mess. Storage decides whether that mess comes back next week.
-
Keep them away from heat and direct sun.
This is the one rule that actually matters for long-term storage of leftover Perler beads, and it’s the one most people skip. Fuse beads are plastic, and enough heat, a sunny windowsill, a hot car, even a shelf near a radiator, can soften or warp them just slightly.
It’s not enough to notice at a glance, but it’s enough to throw off how evenly they fuse the next time they’re used. A closed drawer or a cupboard beats an open shelf by a window every time.
-
Pick a container that matches how the beads will actually get used.
Stackable drawer organizers work well for a family that beads often, since every color stays visible and grabbable without digging. A single lidded bin with small containers inside works fine too, and takes up less shelf space , it just means a bit more searching each time.
Neither is wrong; it comes down to how often those leftover beads are actually going to get picked up.
-
Label by color, not by project.
Leftovers don’t belong to any one pattern anymore, so storing them by “what they were for” doesn’t hold up. Labeling by color instead means any container of leftover beads is usable for whatever comes next, not just the project it was originally sorted for.
Turn everyday recyclables into creative masterpieces with Toilet Paper Roll Crafts for Kids That Turn Everyday Waste into Fun, using simple supplies already around the house.
The Fix Isn’t a Project — It’s a Habit
A drawer of leftover Perler beads was never actually a mess to clean up. It was a signal that the way beads get bought and used doesn’t match, kits are packed for convenience, not for how patterns actually spend color.
Once that clicks, the pile stops feeling like clutter and starts feeling like material with a purpose still waiting to happen.
Start with whatever’s sitting in that drawer right now. Pick one project from this list that fits what’s actually there, not what you wish you had, and see it through before another bag gets opened.
Make colorful creations with 13+ Pipe Cleaner Crafts for Kids That Are Simple, Fun, and Completely Mess-Free, perfect for quick craft sessions with minimal cleanup.
FAQS
-
Can you mix different brands of beads (Perler, Hama, Artkal) in the same project?
Yes, in most cases, they’re all the same basic plastic (fusible EVA/PE) and melt at similar temperatures.
The one thing to watch is size: standard Perler and Hama beads are close in size, but Artkal’s “mini” (2.6mm) and “midi” (5mm) lines are noticeably smaller than standard beads and won’t sit flush in a standard pegboard grid. Mixing sizes in one piece usually looks uneven once fused, brand doesn’t matter, size does.
-
Do leftover beads go bad or degrade over time?
Not really, as long as they’re kept away from direct heat and sunlight. The plastic itself doesn’t expire, but prolonged heat exposure (a hot car, a sunny windowsill) can cause beads to warp slightly or fade, which makes them harder to fuse evenly later.
Stored in a drawer or bin at normal room temperature, a pile of leftovers is fine to use years later.
-
Is it safe to melt a random mix of colors together?
Yes. Color doesn’t affect melting temperature or safety, all standard fuse beads use the same base plastic regardless of dye.
The only real caution with melting (mixed or single-color) is ventilation: iron or bake in a room with some airflow, since melting plastic does release a mild odor, even though it’s not considered hazardous in normal craft quantities.
-
What do you do with beads that are too warped, melted, or fused wrong to use again?
Once beads have fully fused into a shape, they can’t be re-separated back into loose beads, the melting process is permanent.
A botched or ugly fused piece isn’t wasted, though: it can be re-melted into a new confetti coaster or garden marker shape, since those projects don’t care what the beads looked like beforehand, only that they’re plastic and can re-fuse.
-
What if there aren’t even enough leftovers for the smallest project on this list?
Garden markers can be made with as few as 8–10 beads, which is close to the lower limit, below that, there usually isn’t enough surface area to hold together once melted.
At that point, the more practical move is to set the last handful aside in a small jar and let it merge with the next round of leftovers rather than forcing a project out of too little material.