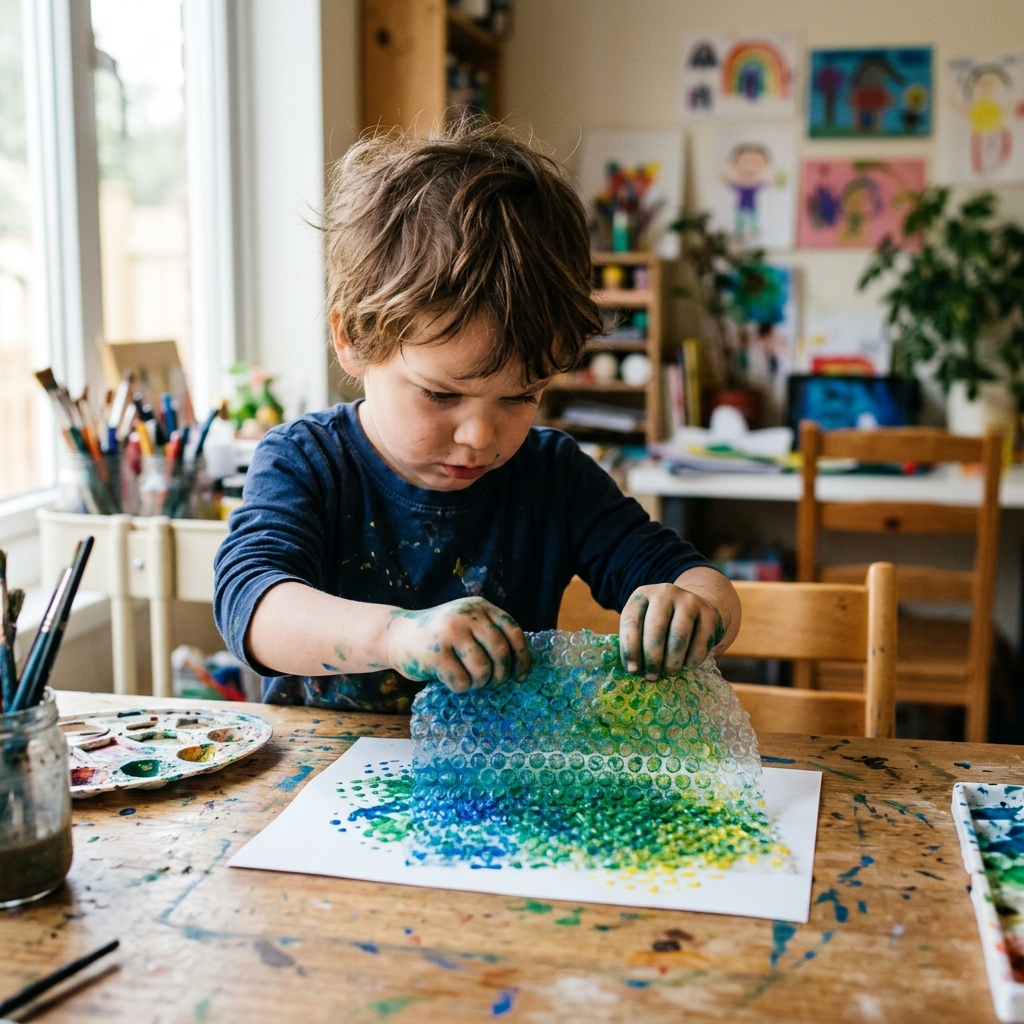
Bored kids, 5 minutes, zero mess-ups: here’s the bubble wrap painting trick that turns leftover packaging into screen-time-free fun.
Somewhere around age five or six, most kids stop drawing freely and start asking, “Can you draw it for me?” It’s not a lack of imagination, it’s the moment they start comparing their stick figures to what a picture is “supposed to” look like, and deciding they’ve already failed at it.
Early-childhood specialists call this the shift from process art to product art: product art refers to more structured, results-oriented activities that are often led by adults and have clear examples and guidelines for the final work, and somewhere in there, a kid’s sense of I’m not good at art quietly takes root.
Bubble wrap painting sidesteps that entirely, not because it’s a clever distraction, but because the materials themselves remove the comparison. There’s no “correct” bubble pattern to fall short of, no line to color inside of.
You press, you lift, you see something nobody could have predicted, including the kid who made it.
It’s the rare craft where the result isn’t really the point, and that’s exactly what makes it work as a summer boredom fix: no setup pressure, no “that’s not what I meant to draw” meltdown, and bonus it runs entirely on the packaging waste already piling up by your recycling bin.
This post shows you exactly how to turn that leftover packaging into a no-fail painting activity that keeps kids busy (and proud of what they made) all summer long.
Liked the texture and pattern angle? Coffee Filter Butterfly Craft for Kids (Easy Stained Glass Effect Craft Idea) uses a similar no-fail, color-blooming technique kids can’t mess up.
The Tiny-Stamp Science Behind Every Print
The bubbles are doing the same job as a stamp
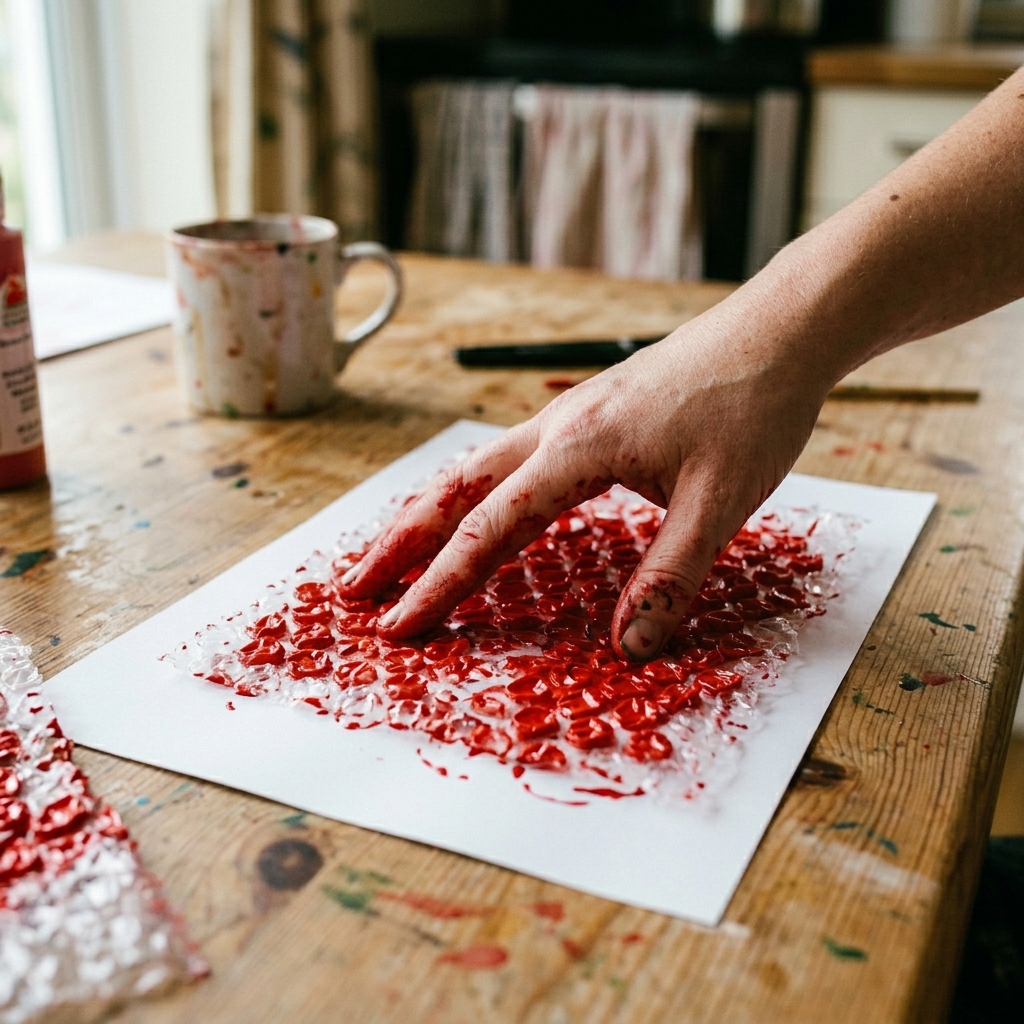
Every bubble in that sheet of bubble wrap is its own miniature dome, raised slightly above the flat plastic around it.
When you press the bubble side into paint, only the very tops of those domes pick up color, the paint never reaches the flat valleys between them.
So the paint isn’t going on as one solid coat. It’s transferring as hundreds of tiny, separate dots, one per bubble, arranged in whatever pattern those domes happen to sit in. That’s the entire reason the print comes out looking dotted and textured instead of flat and smooth.
Bubble size controls the look — not luck
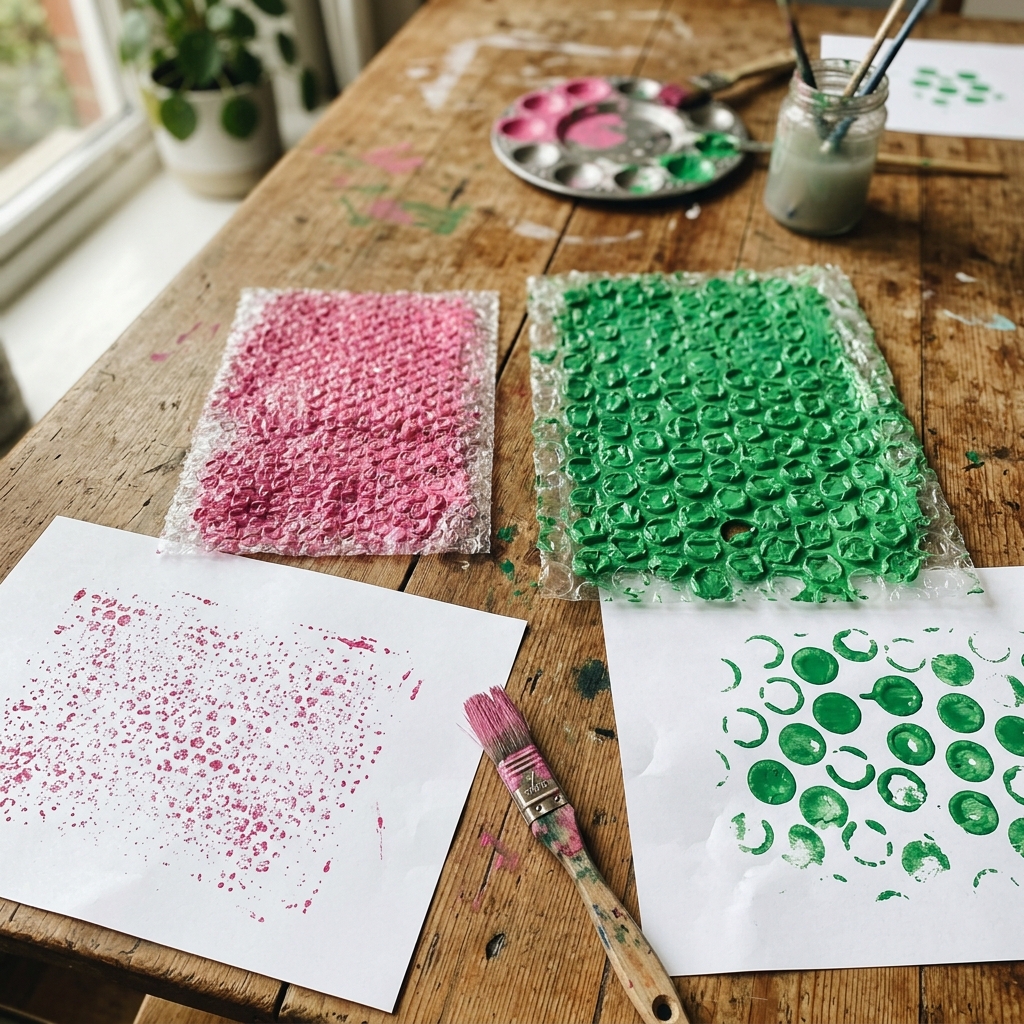
- Small bubbles: hold less paint per dome, leave fine, dense speckling
- Large bubbles: hold more paint per dome, leave bold, spaced-out circles
Once you know this, the results stop feeling random. You’re not hoping for a good print, you’re choosing the bubble size that matches the texture you want.
Want another recycled-material win? Toilet Paper Roll Crafts for Kids That Turn Everyday Waste into Fun, Skill-Building DIY Projects at Home shows you how much craft potential is already sitting in your recycling bin.
Choose Your Bubble Size on Purpose, Not by Accident
A lot of messy, unclear prints come down to one simple thing: the bubble size didn’t match the result the painter was going for. The fix is just as simple, match the bubble size to the texture you actually want before you start.
Small bubbles
- Leave fine, dense, speckled texture
- Best for: skies, grass, snow, fields of flowers, background texture
Large bubbles
- Leave bold, clearly spaced-out circles
- Best for: flowers, suns, bubbles, balloons, anything where you want the circle shape to read clearly
The simple rule to remember
Pick the bubble size first, based on the result you want, then start painting. The size you choose decides whether your print looks clean and intentional or scattered and messy.
Need a mess-free option for a different day? 13+ Pipe Cleaner Crafts for Kids That Are Simple, Fun, and Completely Mess-Free is the cleanup-free alternative for when paint isn’t practical.
Materials You’ll Need
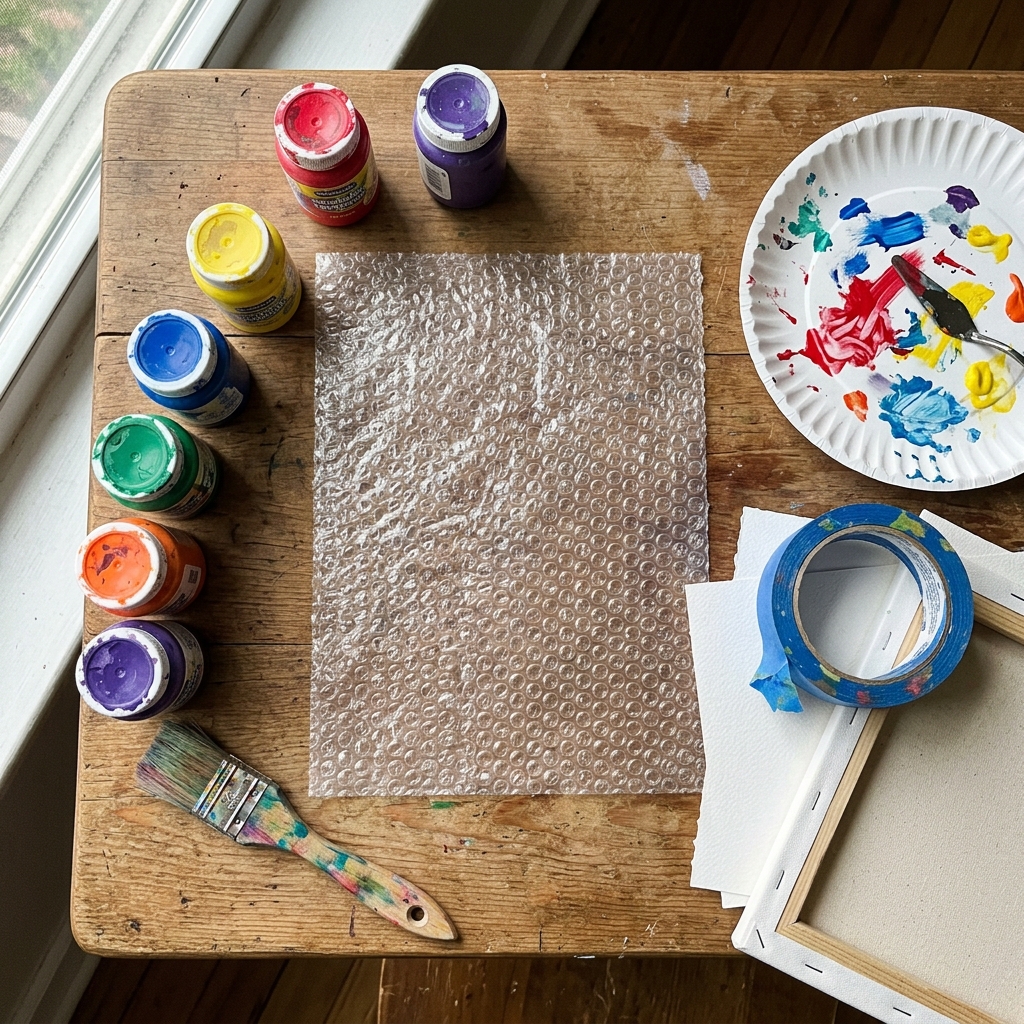
1. Bubble Wrap
Save it from your last few packages instead of buying it new. Shipping bubble wrap works exactly the same as anything bought specifically for crafts, the only thing that matters is the bubble size, not where it came from.
2. Washable tempera or acrylic paint
Tempera is the easier choice for younger kids since it washes out of clothes and off skin more forgivingly. Acrylic gives slightly bolder, more saturated color if you’re after a more finished-looking piece, but it doesn’t wash out as easily, so factor that in based on who’s painting.
3. Paper or Canvas
Plain paper is fine for a quick activity. Canvas or cardstock holds up better if you want the final print to be sturdy enough to frame, gift, or turn into a card afterward.
4. A tray or Paper Plate
This is just your paint surface, anything flat and shallow works. The goal is a thin, even layer of paint to press the bubble wrap into, not a deep puddle.
5. Painter’s Tape
Used to secure the bubble wrap in place so it doesn’t slide while you’re pressing. Skipping this is one of the easiest ways to end up with a smeared, doubled-up print.
The one tip that actually changes your results: thin your paint slightly
Paint straight from the bottle is usually thicker than it needs to be for this technique. Add a small amount of water and mix until it moves easily off a brush.
- Too thick: paint pools over the bubbles and flattens into blobs, losing the dot pattern entirely
- Too thin: paint barely shows up, and the print comes out faint
- Just right: the paint coats the raised bubble tops without filling in the gaps between them, so the dot pattern stays crisp
Painting indoors because of the weather? Indoor Activities for Kids on Rainy Days That Actually Keep Them Busy has more ideas for the next rained-in afternoon.
What To Avoid:
- Acrylic paint — dries too fast, hard to wash off skin and clothes
- Regular printer paper — too thin, wrinkles or tears when wet
- Bubble wrap with flattened bubbles — won’t create a clear print, so toss it once the bubbles lose their shape after repeated use.
Want a craft activity with a genuinely satisfying payoff? How to Make Seed Paper with Kids: A Fun Nature Craft That Actually Grows turns leftover paper scraps into something that literally sprouts into flowers.
Step-by-Step Bubble Wrap Painting Method (And the One Mistake That Ruins Most Prints)
Almost every disappointing bubble wrap painting result traces back to the same problem: smudging. The good news is smudging isn’t random, it happens at predictable points in the process, and once you know where, it’s completely avoidable.
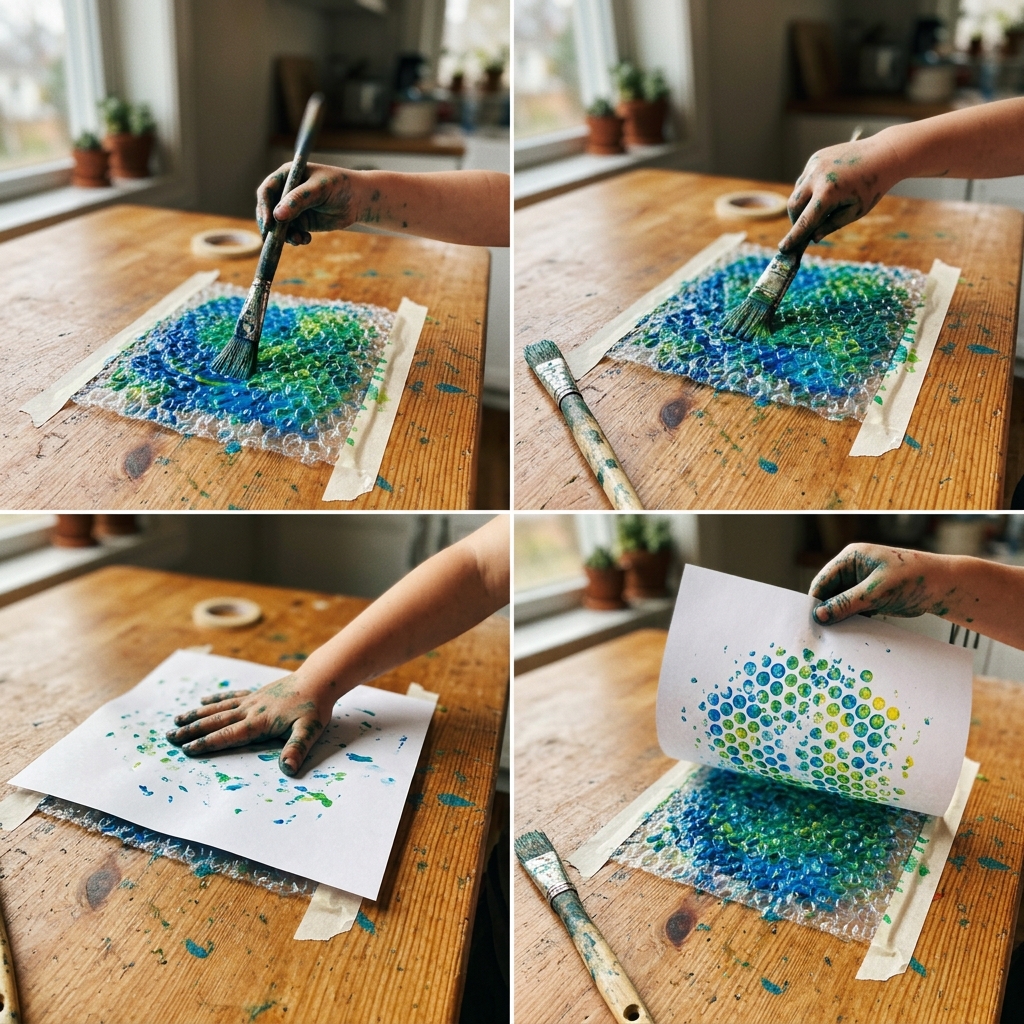
Step 1: Tape the bubble wrap down, bubble-side up
Lay your bubble wrap flat with the bumps facing up, and secure all four edges with painter’s tape directly onto your table or work surface.
Why this matters: bubble wrap shifts very easily once paint hits it. If it slides even slightly mid-press, the dots drag and blur instead of staying crisp. Taping it down removes that risk before it can happen.
Step 2: Apply paint to the bubble side only
Using a brush, roller, or sponge, spread a thin, even layer of paint over the raised bubble side, never the flat underside.
Why this matters: the bubbles are what create the print. Paint on the flat side does nothing but waste paint and make a mess, since that surface never touches the paper.
Step 3: Press your paper down firmly, straight down
Lay your paper or canvas directly on top of the painted bubble wrap and press down evenly with flat palms, working from the center outward.
Why this matters: even pressure across the whole sheet means every bubble makes contact with the paper. Pressing harder in one spot and lighter in another gives you a patchy, inconsistent print.
Looking for something with a learning hook too? 12 African Art Projects for Kids That Teach Culture, Not Just Craft pairs art with real cultural context, similar to the printmaking lesson tucked into this one.
Step 4: Lift straight up — never twist or drag
Hold the edges of the paper and lift it directly upward, in one smooth motion, the same way you’d lift a lid off a pot.
Why this matters: this is the step most people get wrong, and it’s the actual cause of smudged prints. Any sideways motion, twisting, sliding, dragging, drags wet paint across the page and turns clean dots into streaky smears. Straight up, every time.
Step 5: Reuse the same paint load for a second, lighter print
Don’t wipe the bubble wrap clean and start over right away. If there’s visible paint still sitting on the bubbles after your first print, press a second sheet of paper onto it before reapplying any paint.
Why this matters: that second print comes out lighter and softer, almost like a faded echo of the first, and it’s genuinely useful for layering effects, making companion pieces, or just stretching one paint application across two prints instead of wasting the leftover paint.
Painting indoors but want a seasonal theme? Q-Tip Firework Painting Craft for Kids for 4th of July Indoor and Outdoor Fun is another no-fail, no-brush-skills-needed technique, just like this one.
What Kids Are Actually Practicing While They Paint
It’s easy to oversell crafts as secretly “educational,” so here’s the grounded version: bubble wrap painting does involve a few real developmental skills, just not in a dramatic way.
Pressing bubble wrap evenly, not too hard, not too soft, and holding paper steady while lifting both require fine motor coordination, the same small hand-muscle control kids are building toward things like holding a pencil correctly.
There’s a brief pause between pressing the paper down and lifting it where nothing visible is happening yet. Resisting the urge to peek too early, or to yank the paper up the second it touches the paint, is a small but real exercise in impulse control.
Bubble wrap has a repeating, grid-like arrangement of bubbles. Pressing it down and seeing that repeating structure show up in the print is an early, hands-on encounter with pattern recognition, noticing that a shape repeats in a predictable way, which is a foundational skill that shows up again later in math.
None of this makes the activity a substitute for structured learning, and it doesn’t need to. It’s simply a craft where a bit of skill-building happens as a side effect of having fun, not the main point of doing it.
Want a craft that scales up for older kids too? 13 Popsicle Stick Crafts for Kids That Actually Keep Them Busy and Boosts Creativity keeps the busy-but-creative streak going with another simple, hands-on project.
Age-Appropriate Variations

Kids covers a huge range, what works for a toddler won’t hold an 8-year-old’s interest, and what works for an older child might frustrate a toddler. Here’s how to adjust this bubble wrap stamping craft for kids depending on age.
For Toddlers (ages 1–3)
- Pre-cut the bubble wrap into pieces before they start, small hands aren’t ready for cutting, and ready-to-go pieces mean less waiting and fewer meltdowns.
- Use large bubble wrap, bigger bumps are easier for little hands to grip and press.
- Focus on the motion, not the result. At this age, the goal is sensory exploration: the feel of the bubble wrap, the surprise of the print appearing, the act of pressing and lifting. Don’t worry about neat placement or a finished “picture.”
- Expect (and allow) overlapping prints and lots of one color at a time, precision isn’t the point yet.
Preschoolers (ages 3–5)
- Offer a couple of color choices at a time rather than the whole paint set, this keeps things manageable and avoids overwhelming mixing.
- Let them choose where to stamp, but guide gently if needed (e.g., “try one over here too”).
- This is a good age to start naming what’s happening, “look, the bubbles made circles!, without turning it into a lesson.
For Older Kids (ages 6 and up)
- Use smaller bubble wrap for more detailed, intentional prints.
- Encourage planning before starting, ask them to sketch a simple design or pattern first, then recreate it using stamped circles. This shifts the activity from “just stamping” to actual design thinking.
- Introduce color mixing as a mini lesson: have them stamp one color, then stamp a second color partially overlapping the first, and observe what new color appears. This turns the craft into a hands-on color theory lesson without it feeling like schoolwork.
- Challenge them to create a themed piece, a night sky, a bunch of grapes, a field of flowers, using only the stamped circles as the building blocks.
Want your little ones to craft something extra? Farm Animal Crafts for Toddlers: Build Creativity and Fine Motor Skills Beyond Playtime shows what to craft and how to about it.
What to Do With Your Prints Once They’re Dry
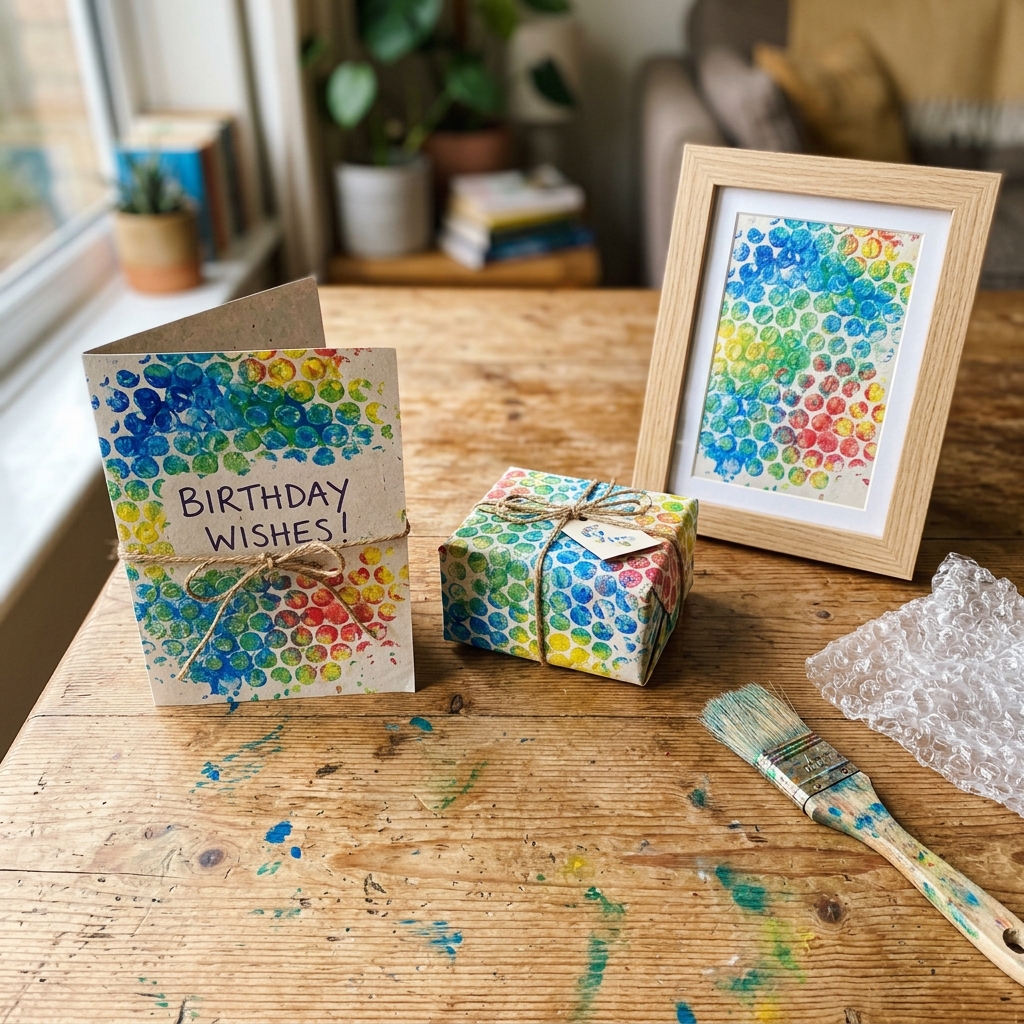
Once the paint has fully dried, the prints themselves have a few easy second lives beyond just sitting on the fridge.
-
Turn them into cards
Fold a finished print in half (or glue it onto a folded piece of cardstock) and you’ve got a handmade greeting card, birthdays, thank-yous, or just-because notes all work well here, especially with the flower or sun shapes from larger bubbles.
-
Use them as gift wrap
A few sheets of bubble-wrap-printed paper, taped together if needed, make genuinely good wrapping paper, and it has the bonus of looking nothing like anything store-bought.
-
Frame one as a simple display piece
Pick the cleanest print from the batch, trim it to fit a basic frame, and it becomes an easy piece of wall art for a kid’s room , no extra materials needed beyond what you already used.
Looking for a mess-free craft for a different day? Easy Foam Sheet Crafts for Kids That Keep Them Focused, Creative, and Productively Busy at Home is a clean, low-prep alternative when paint isn’t practical.
Bubble Wrap Painting: A Simple Fix for Summer Boredom That Actually Works
Bubble wrap painting proves that the best boredom-busters aren’t the most complicated ones, they’re the ones with no way to get it wrong.
A few minutes of taping, pressing, and lifting, and you’ve got a no-fail activity that turns packaging you were going to throw out into something a kid actually wants to keep.
Try it this week, and let us know in the comments what shapes or colors your own bubble wrap painting turned into.