Want to make candles at home that look store-bought and smell amazing? Follow this simple step-by-step guide for beginners to start candle making easily
Most people try making scented candles at home at least once… I’ve been there too, I tried it, flopped, and honestly thought maybe candle-making just wasn’t for me. The wax looked fine while melting, but once it set, everything went wrong.
The candles looked nothing like the clean, aesthetic ones I had seen online. For a moment, it felt like I was missing something advanced that everyone else knew but wasn’t saying out loud.
What I later realized is that candle-making isn’t difficult, it’s just very detail-sensitive. Most of the frustration doesn’t come from lack of skill, but from missing the small, unspoken steps that actually determine the final result.
Things like pouring at the wrong temperature, adding fragrance too early or too late, using the wrong wick size for your container, or not allowing enough curing time can quietly ruin the entire outcome without you even knowing why. And this can feel like you’re doing everything right when you’re actually missing the exact points that matter most.
This guide is written with that in mind. Not just to show you how to melt and pour wax, but to walk you through the exact decisions that turn a simple DIY candle into something that looks polished, smells strong, and burns evenly.
By the end, you won’t just be guessing anymore,you’ll understand what actually makes candles behave the way they do, and how to consistently get results that feel professional right from your own space.
Creativity doesn’t require experience, as shown in DIY Projects for People Who Don’t Feel Crafty at All which focuses on simple, confidence-building ideas that make starting feel easy instead of overwhelming.
Materials You Actually Need
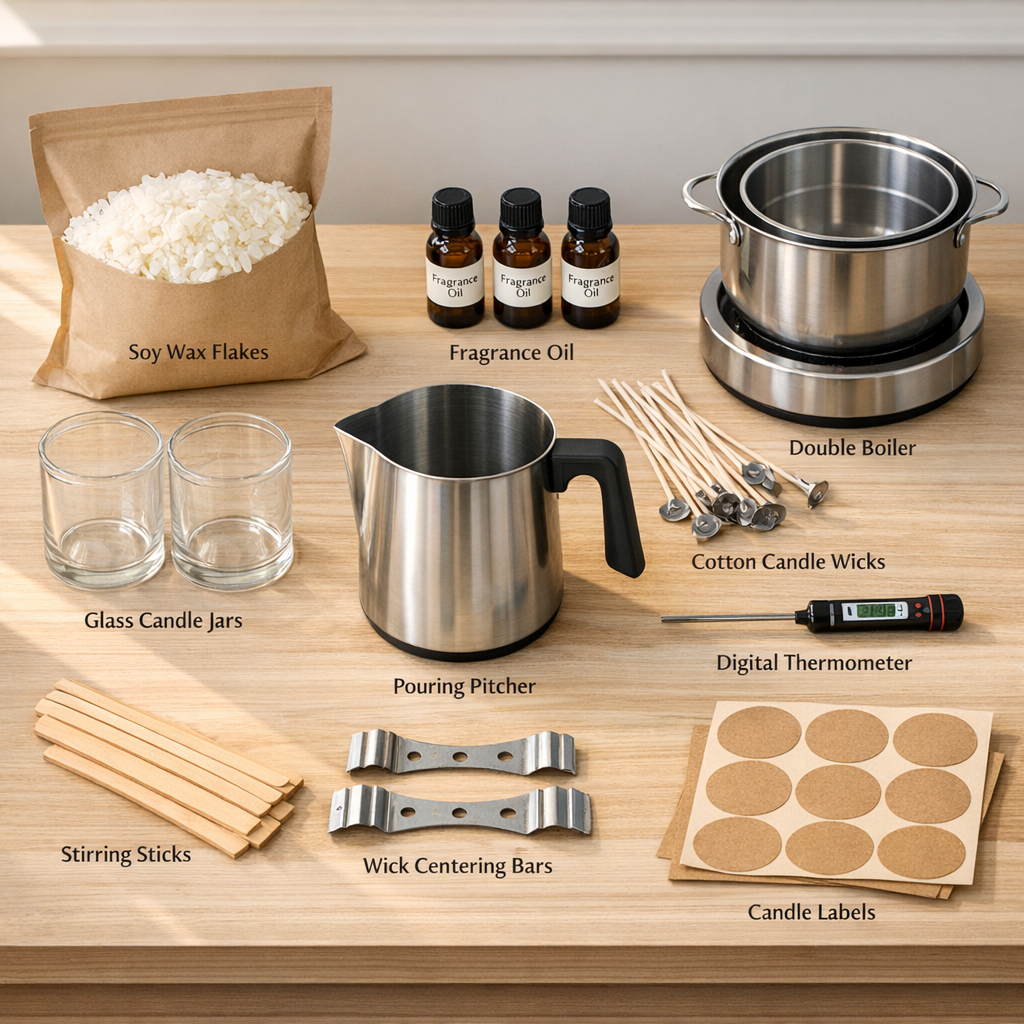
To make your own DIY candle, you only need a few right materials.
Core Ingredients
-
Wax (the base of your candle)
Wax is what holds everything together. It melts when heated, traps the fragrance, then solidifies into your candle shape.
- Soy wax → plant-based, beginner-friendly, burns clean, but can sometimes look slightly textured on top
- Paraffin wax → holds fragrance very well and gives a strong scent throw, but is petroleum-based
- Coconut or blends → smoother finish, more “luxury” look, often used in high-end candles
Wax is not all the same, some are better for scent, some for appearance.
-
Fragrance Oils (what makes your candle smell)
Fragrance oils are specially made scents designed for candles. They are what give your candle its smell when it burns.
A common beginner mistake is using essential oils instead.
- Essential oils are natural, but they are not designed to hold up well in hot wax
- They often fade quickly when the candle is burning
That’s why fragrance oils are recommended if you want a strong, noticeable scent both in the jar and when lit.
-
Wicks (the part that controls how your candle burns)
The wick is the small cord in the middle that you light. It pulls melted wax upward to keep the flame going.
This is where many people get it wrong.
- Too small → weak flame, poor scent release
- Too big → soot, fast burning, uneven melt pool
Wick size directly affects how well your candle performs.
Tools
-
Pouring Pitcher
This is what you melt and pour your wax from. It helps you pour safely and cleanly without spilling or burning yourself.
-
Thermometer (this is non-negotiable for good results)
A thermometer tells you the exact temperature of your wax.
This matters because fragrance oil must be added at the right temperature. Without knowing that temperature, you are guessing—and guessing is usually why candles fail.
-
Wick Holders (or simple alternatives)
Wick holders keep your wick centered while the candle sets.
If the wick moves, the candle burns unevenly, which can ruin both the look and performance.
You can also use simple alternatives like chopsticks or pencils placed across the jar to hold the wick in place.
Tip
Skipping a thermometer is one of the biggest reasons beginners struggle.
Without it, you can’t tell:
- When to add fragrance
- When wax is too hot or too cool
- Why scent is fading or not binding properly
Once you start using one, your results become far more consistent, and your candles immediately start looking and smelling more professional.
Many beginners struggle not because they lack skill, but because they lack the right tools, which is why 15 Must-Have Crafting Tools Beginners Often Forget -That Make DIY Projects Easier helps you avoid common mistakes and improve your results.
Step-by-Step Guide to Making Scented Candles at Home
Understanding how to make scented candles at home becomes much easier when you stop guessing and start following each step with clarity.
The aim here isn’t just to make a candle for the sake of it, it’s to help you create one that actually carries a strong scent, burns evenly, and has a smooth, clean finish that looks intentional and well-made.
Step 1 – Measure Wax and Fragrance Properly
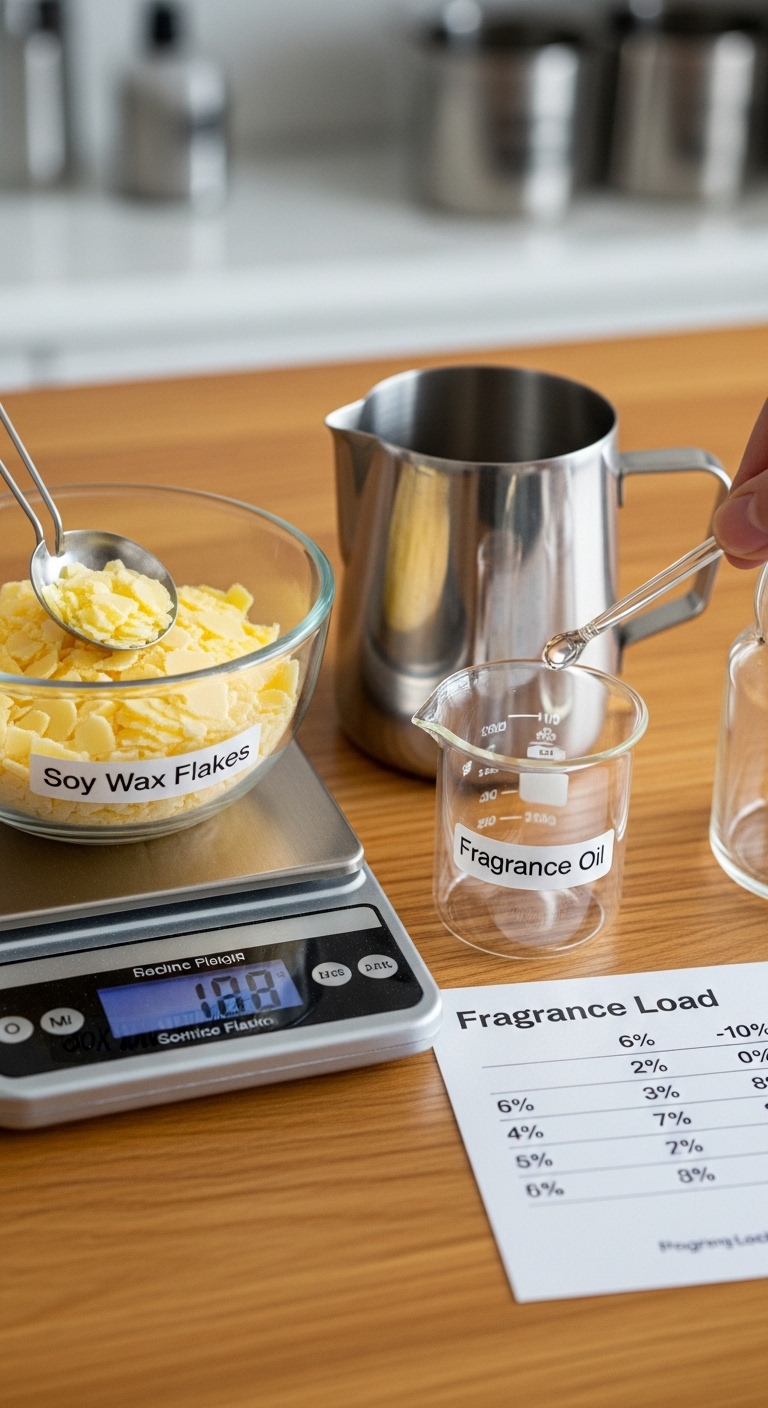
Before anything melts, this is where your candle is actually decided.
One of the biggest mistakes people make is guessing fragrance oil amounts. That’s usually why candles come out weak or too strong and unstable.
A good starting point is a 6% to 10% fragrance load.
- 6% = lighter scent, safer for beginners
- 8% = balanced, commonly used sweet spot
- 10% = stronger scent (only if your wax supports it well)
Simple formula
To make it easy:
- Wax weight × fragrance percentage = fragrance oil needed
Example:
If you use 500g of wax:
- 8% fragrance = 40g of fragrance oil
That’s it. No guessing, no pouring randomly.
This step alone already improves your results in learning how to make scented candles at home because scent strength starts here, not later.
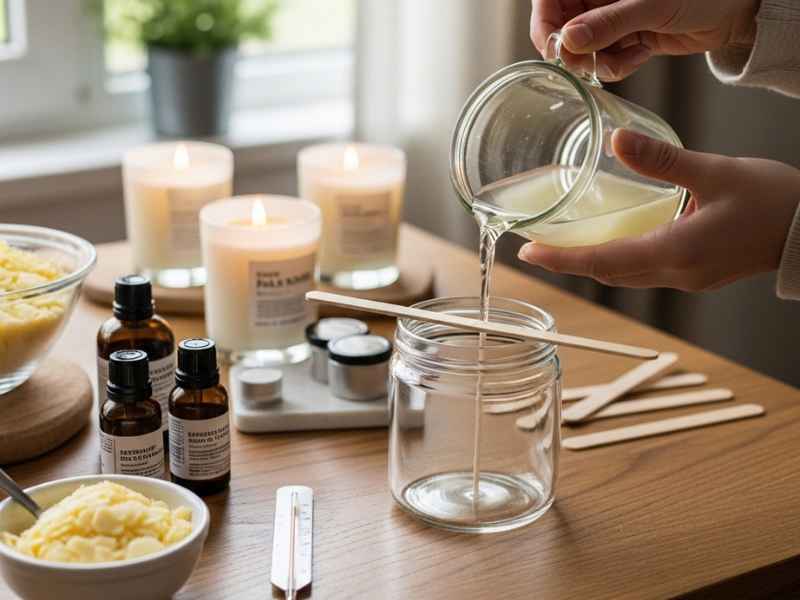
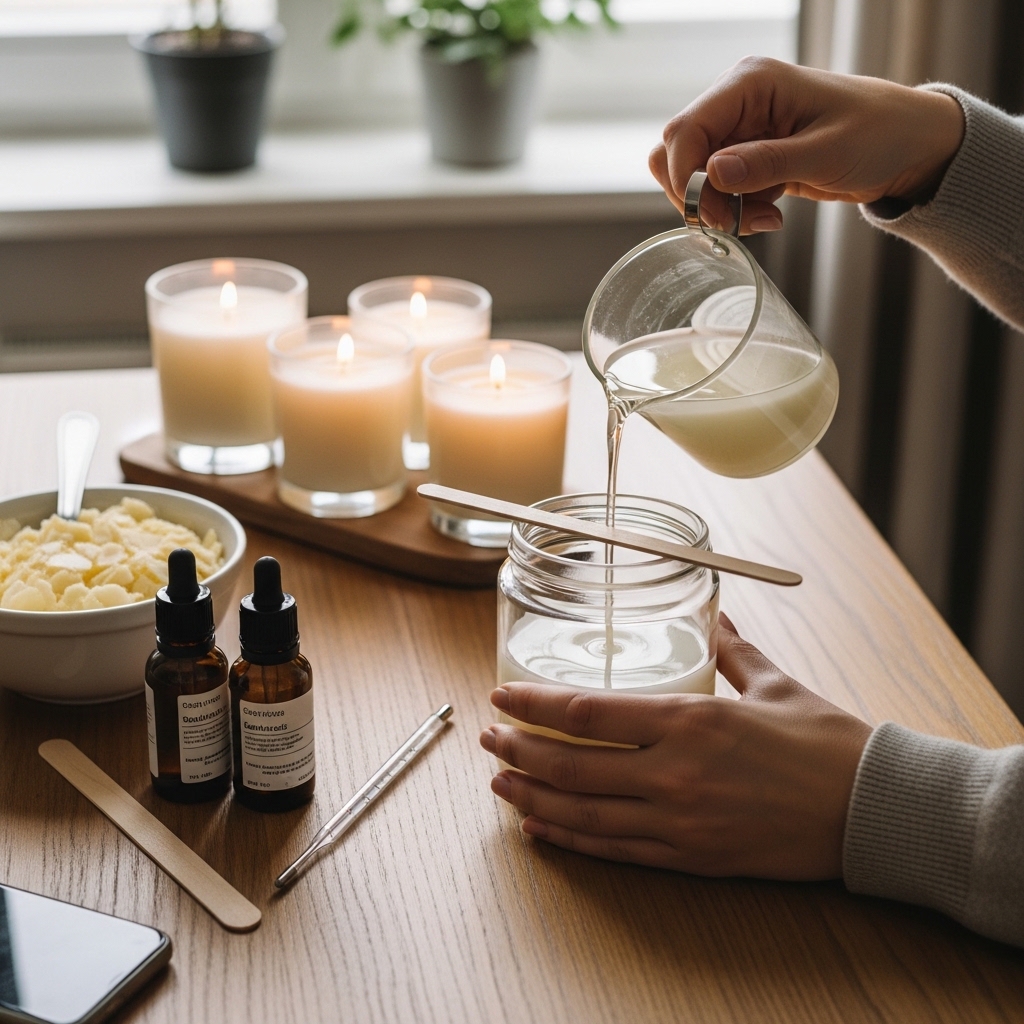
Step 2 – Melt Wax the Right Way
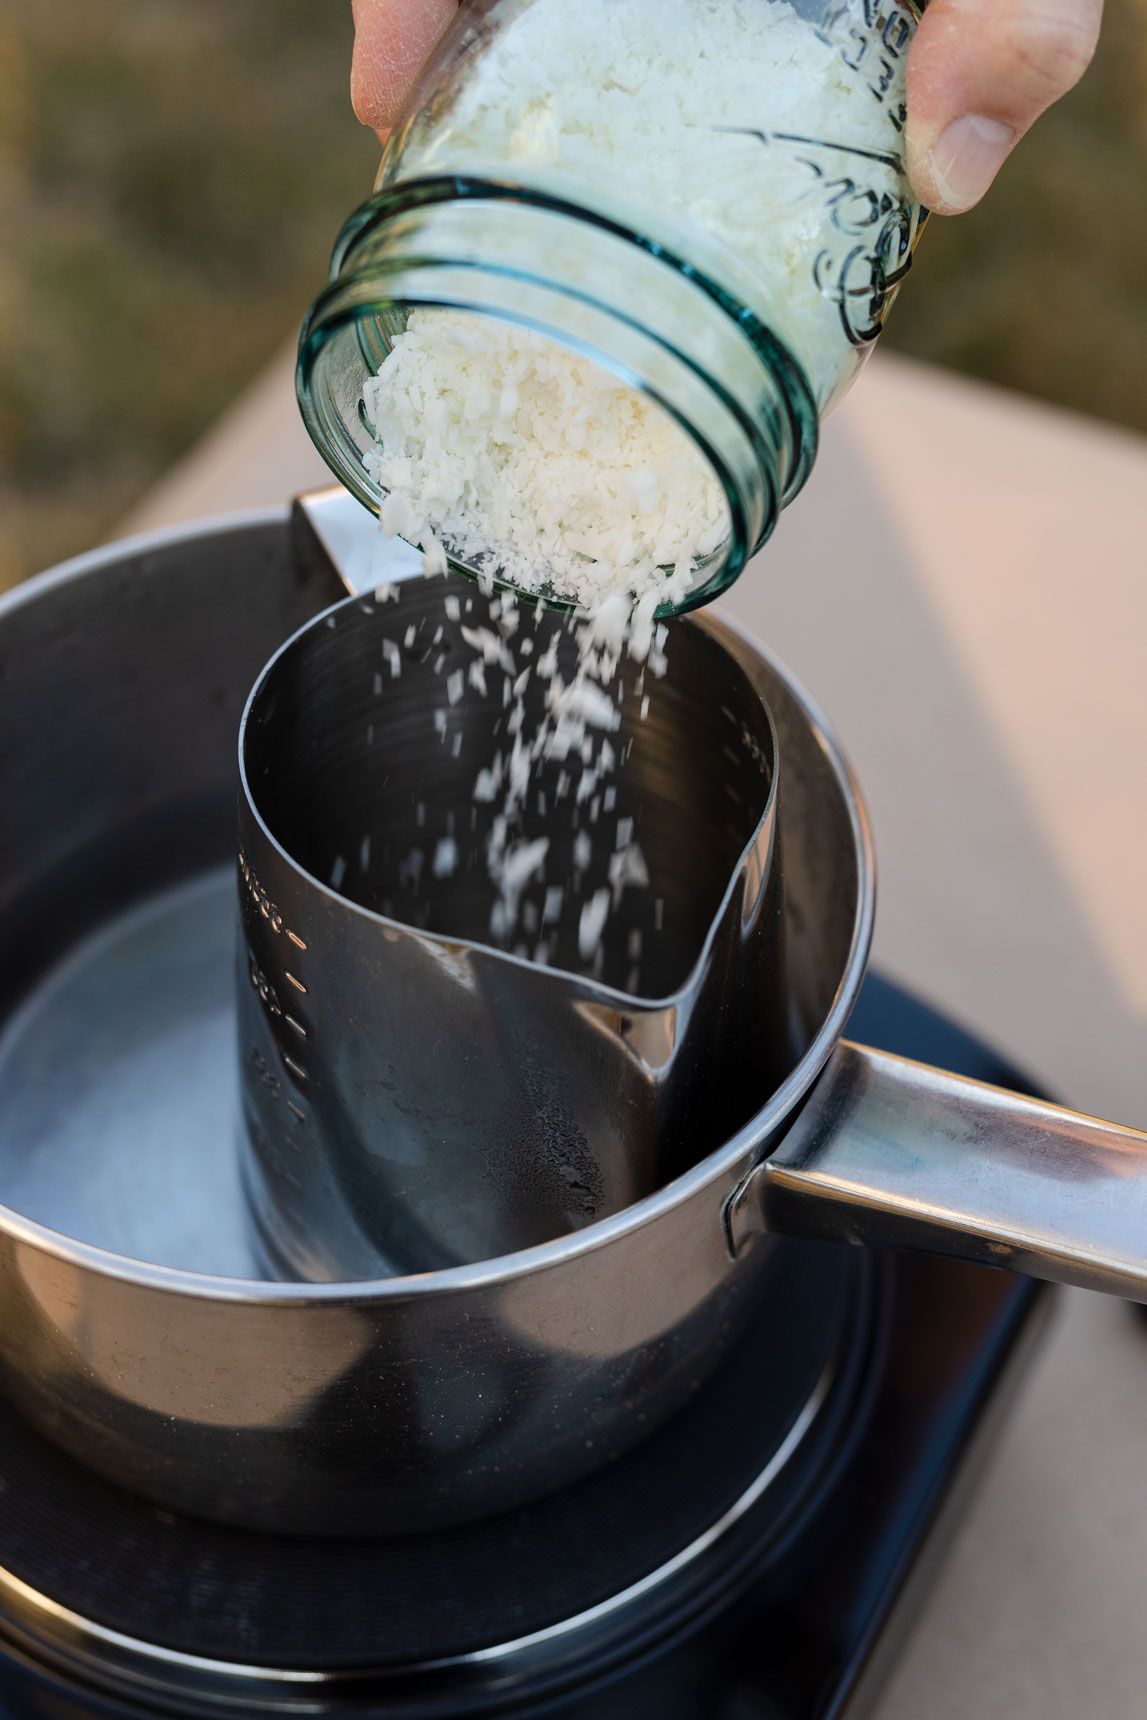
Now you melt the wax, but how you melt it actually matters.
The safest and most reliable method is the double boiler method.
How it works:
- You place wax in a heat-safe container
- That container sits over a pot of simmering water
- The steam gently melts the wax
This matters because direct heat can:
- Overheat the wax
- Burn fragrance performance later
- Cause uneven melting
With a double boiler, the heat is gentle and controlled, which gives you a smoother final candle.
Think of this as building stability for everything that comes next in how to make scented candles at home.
Step 3 – Add Fragrance at the Correct Temperature
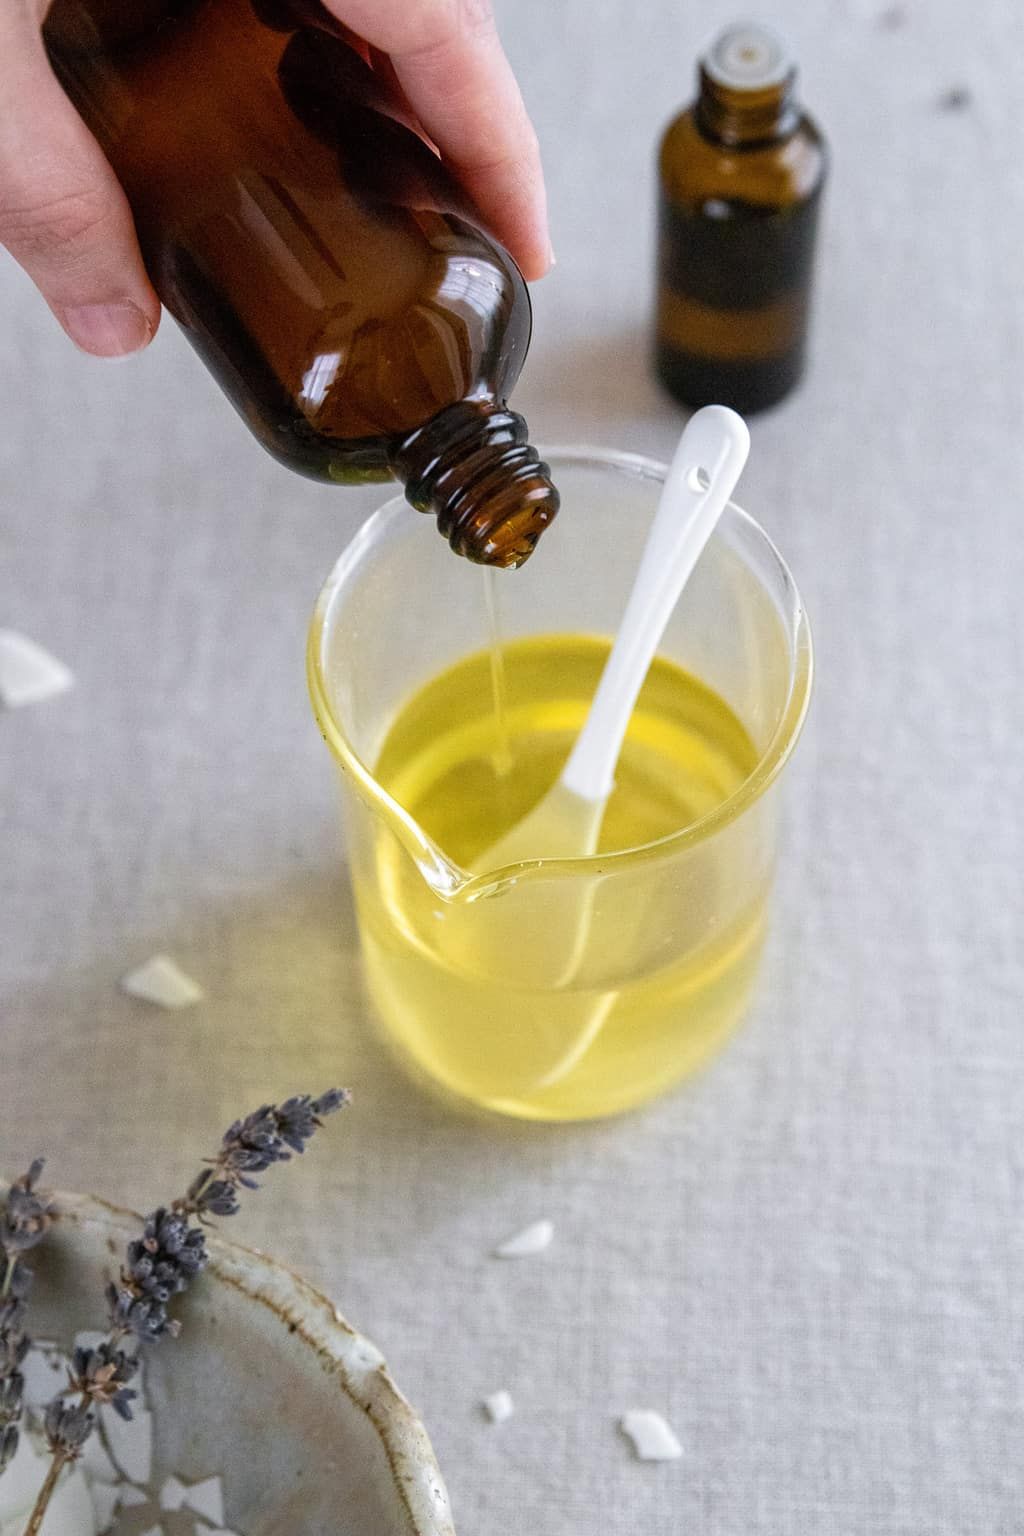
This is the step where most people get confused, and where most candles fail.
Adding fragrance is not just “pour and mix.” Temperature controls everything.
Ideal temperature range:
- Usually between 60°C – 75°C (140°F – 167°F) depending on wax type
Why this matters:
- If wax is too hot → fragrance evaporates (you lose scent strength)
- If wax is too cool → fragrance doesn’t fully bind (weak burn throw)
So what you’re really trying to do is hit the “sweet spot” where the wax is liquid but stable enough to lock in the scent.
What to do:
- Check temperature with a thermometer
- Add fragrance slowly
- Stir gently for 1–2 minutes so it fully blends
This is one of the most important secrets in how to make scented candles at home that actually smell strong when burned.
Step 4 – Secure Wick and Pour Smoothly
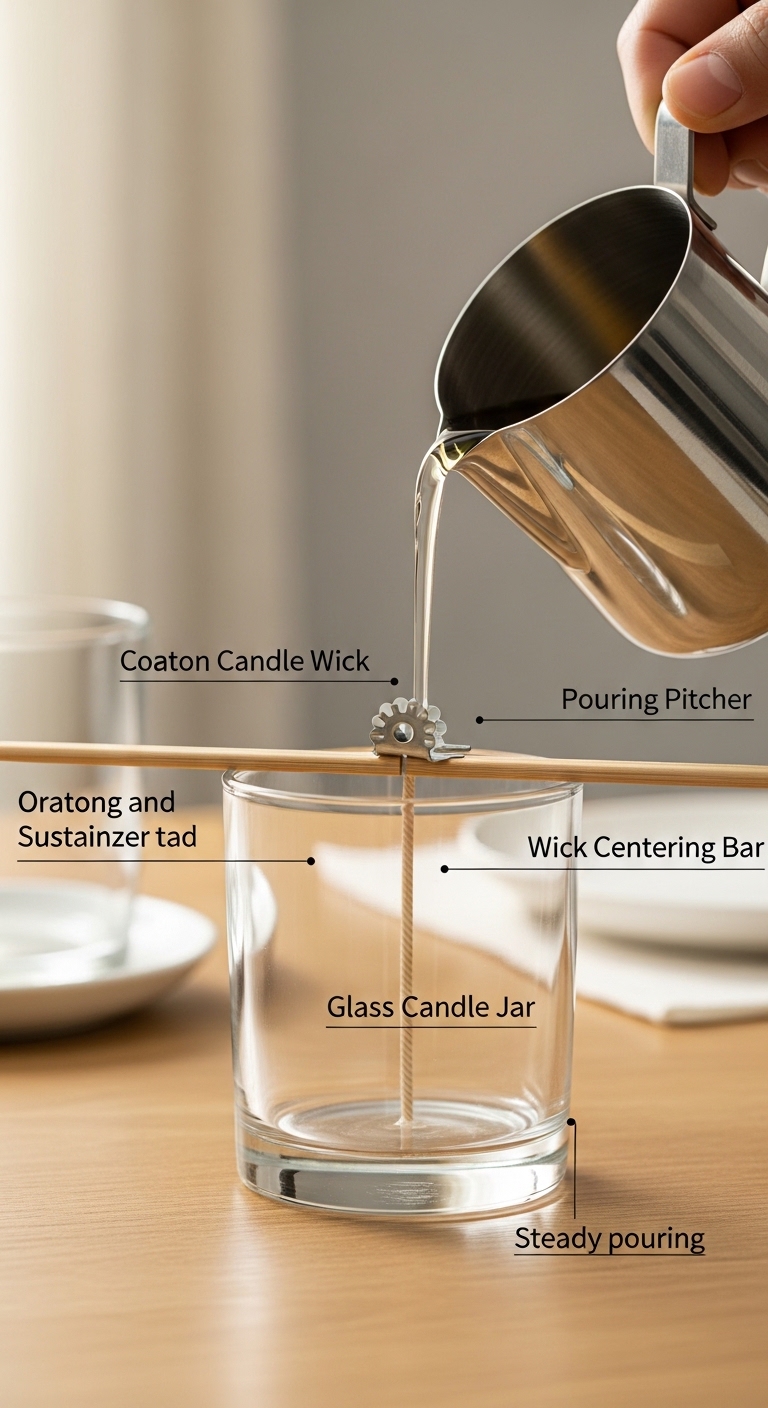
At this stage, everything starts coming together visually.
The wick controls how your candle burns, so if it’s off-center, your candle will burn unevenly.
How to avoid problems:
- Secure the wick before pouring
- Use a wick holder (or even a pencil/chopstick across the jar)
- Make sure it stays centered while wax sets
When pouring:
- Pour slowly to avoid air bubbles
- Don’t rush, fast pouring can create uneven tops or sinkholes
A well-centered wick is what makes your candle burn evenly from start to finish in how to make scented candles at home.
Step 5 – Let It Cool Slowly
This step looks simple, but it’s actually where the “professional finish” is decided.
Once you pour your candle, don’t rush it.
What can go wrong if you rush:
- Cracks on the surface
- Sinkholes in the middle
- Rough or uneven tops
Why it happens:
When wax cools too quickly, it contracts unevenly and pulls away from the jar walls or collapses slightly in the center.
What to do instead:
- Let it cool at room temperature
- Avoid fans or cold surfaces
- Don’t move it while it sets
Slow cooling is what gives you that smooth, clean finish people associate with professional candles.
Good candles don’t come from doing more—they come from doing each step correctly:
- Measure properly
- Melt gently
- Add fragrance at the right temperature
- Center your wick
- Let it cool naturally.
Turning hobbies into income becomes more achievable with beginner-focused guides like 10 Low-Cost DIY Crafts to Make and Sell From Home, which highlights simple crafts you can create and sell without heavy investment.
Why Your Candle Doesn’t Smell Strong (And How You Can Fix It)
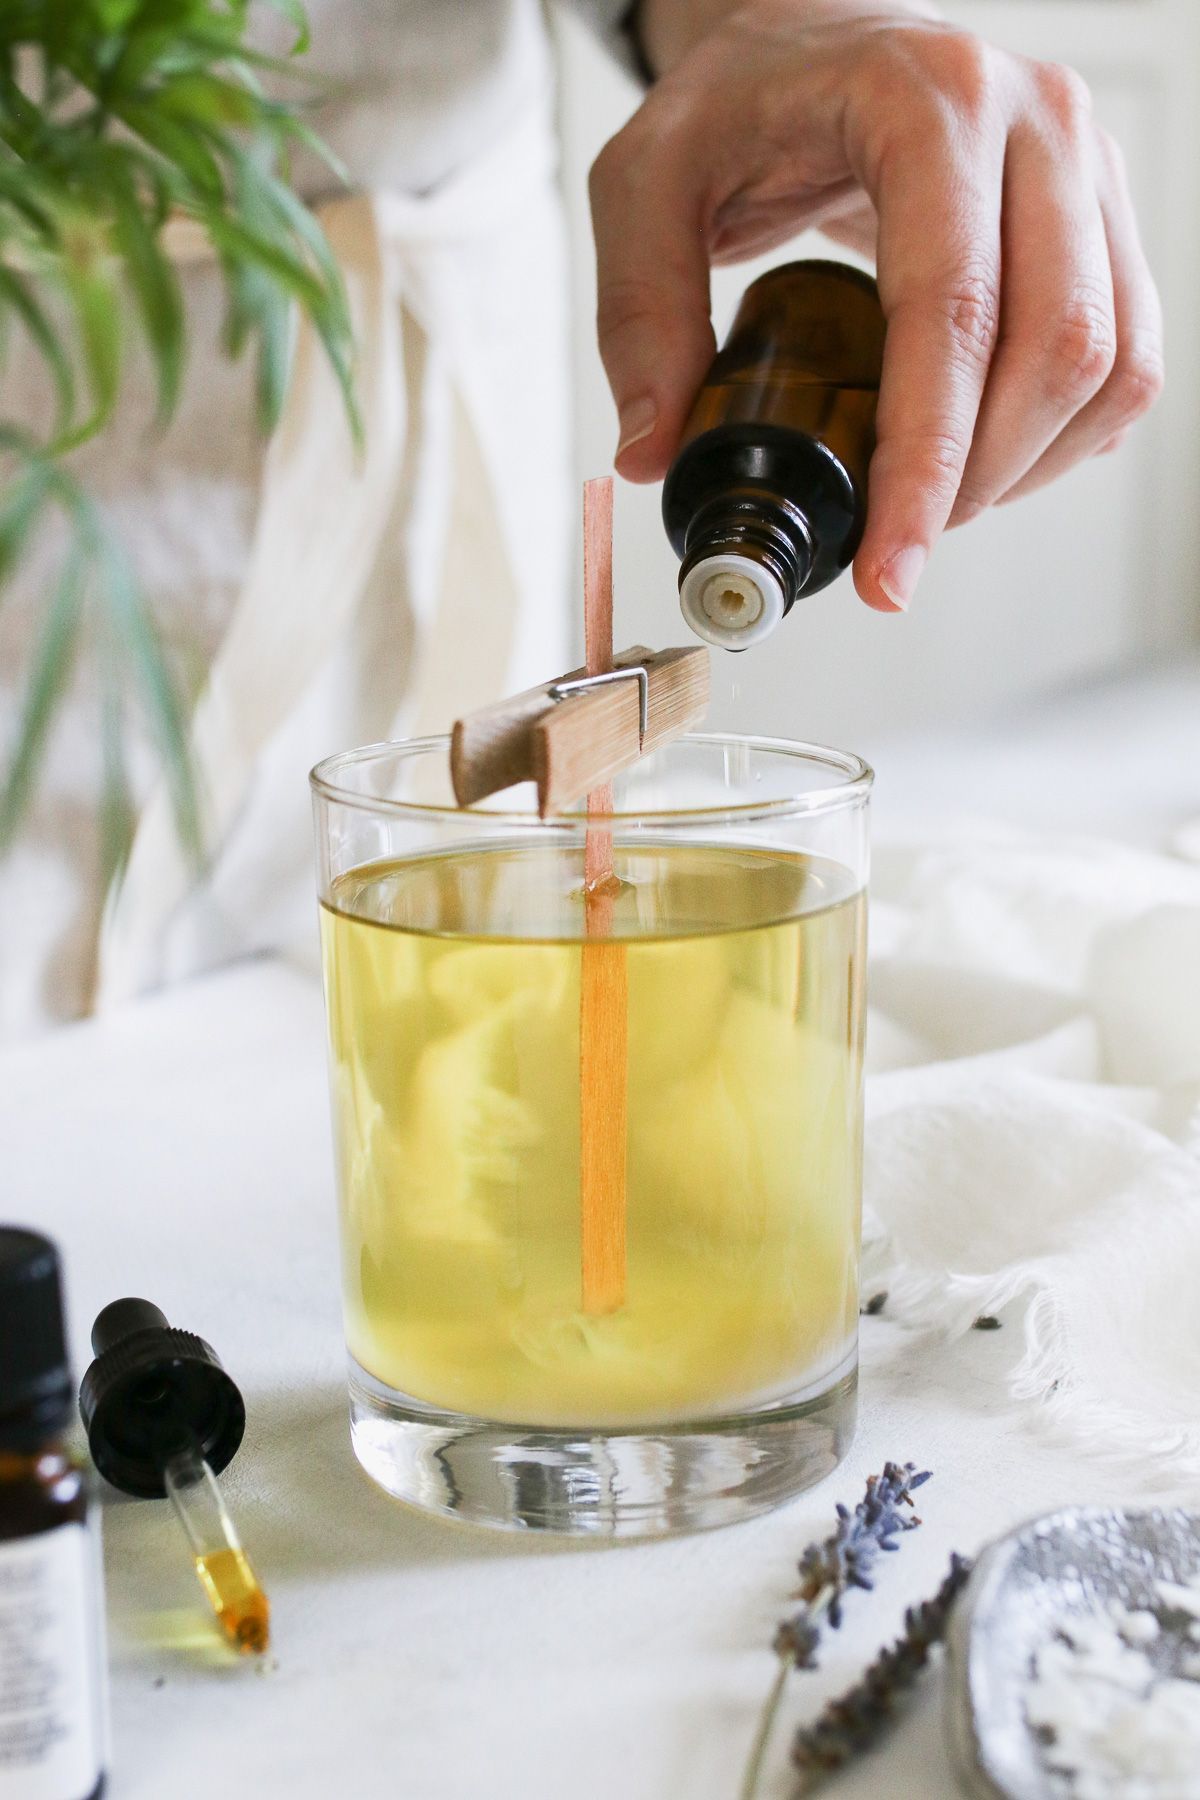
Photo credit: @ Hello Nest
I want you to think about your last candle for a second (ie if it didnt come out as expected).
You made it, it looked fine, everything seemed to go well… and you were probably even a bit excited to finally try it. But when you lit it, the scent was either very light or almost not there at all.
That’s usually the point where it starts to feel like something is wrong, but in most cases, nothing is actually wrong with you or your candle. It’s just one or two small things in the process that changed how the fragrance behaves in the wax.
And once you see what those things are, it becomes much easier to fix.
Know these:
-
The timing of your fragrance matters more than you think
One of the most common issues is when the fragrance oil is added.
If you add it when the wax is too hot, part of the scent simply burns off before it ever gets trapped in the wax.
If you add it when the wax is too cool, it doesn’t blend properly, so the scent ends up weak when the candle burns.
How to fix it:
You want to add your fragrance when the wax has cooled slightly after melting, not boiling hot, and not starting to thicken. This is the point where it can properly hold onto the scent.
-
The amount of fragrance oil changes everything
This is another small detail that quietly affects your result.
If the oil is too little, the candle will always feel weak, no matter how good everything else is.
If it’s too much, the wax can’t hold it well, and it may not burn evenly.
How to fix it:
Stick to a balanced ratio and measure it properly instead of guessing. Once you find the right range for your wax, be consistent with it every time.
-
The wax you’re using might be limiting your results
This is something most beginners don’t realize at first.
Some waxes naturally hold fragrance better and release it strongly when burning. Others are softer in scent performance, even if you do everything correctly.
So if your candle smells okay in the jar but fades quickly when lit, it might not be your process, it might just be the wax itself.
How to fix it:
If strong scent is your priority, choose waxes known for better fragrance throw rather than focusing only on appearance. The right wax already solves half the problem.
-
Curing time is not optional if you want strong scent
This is the part many people skip because they want to test the candle quickly.
But wax and fragrance need time to settle together. During this period, the scent becomes stronger and more stable.
If you burn it too early, it can smell weak even if you did everything right.
How to fix it:
Let your candle sit undisturbed for several days before lighting it. This patience step is what turns a “light smell” into a properly strong scent.
How to Make Your Candles Smell Strong (Like Store-Bought Ones)
If you’ve ever wondered why your candle smells nice in the jar but weak when burning, this is where the real difference is made. Getting a strong scent isn’t luck, it’s about a few specific choices you make during the process.
1. Use the right fragrance load (don’t guess)
The strength of your candle starts with how much fragrance oil you use.
Most good results fall within a 6%–10% fragrance load:
- Too low → candle smells weak no matter what you do later
- Too high → wax can’t hold it properly, and performance drops
The key is consistency. Once you pick a range that works with your wax, stick to it instead of estimating each time.
2. Stir fragrance properly (1–2 minutes minimum)
Adding fragrance isn’t enough—you have to fully bind it into the wax.
When you pour in your fragrance oil:
- Stir slowly and consistently
- Do it for at least 1–2 minutes
- Make sure it’s fully blended, not just floating in the wax
This step helps the scent distribute evenly so every part of the candle carries fragrance, not just parts of it.
3. Use the correct wick size (this controls scent release)
This is one of the most overlooked reasons candles smell weak.
The wick doesn’t just burn, it controls the melt pool, which is what releases fragrance into the air.
- Too small → wax doesn’t melt fully → weak scent throw
- Too large → burns too fast → uneven performance
A properly sized wick creates a full, even melt pool, which is what allows the fragrance to actually fill the room.
Curing Time
Curing time simply means the period after you pour your candle when you leave it to rest so the wax and fragrance can fully bind together.
At this stage, your candle is technically “finished,” but it’s not yet at its best. The fragrance is still settling into the wax structure, and it hasn’t fully developed its strength.
For soy candles, this usually takes 7–14 days.
Why curing matters
When you first pour a candle, the fragrance oil is not fully stabilized inside the wax yet. It’s still distributing itself evenly and bonding properly.
During curing:
- The wax hardens fully in a stable way
- The fragrance spreads evenly through the entire candle
- The scent becomes stronger and more noticeable when burned
If you skip this step and light the candle too early, you’re basically testing it before it’s ready. That’s why it may smell weak even if you did everything correctly.
So curing isn’t extra, it’s what completes the process of how your candle actually performs when burned.
Creative nights feel more enjoyable and less repetitive when you try relaxed at-home activities such as Paint and Sip Ideas at Home That Actually Make Your Nights Feel Exciting Again, designed to help you unwind while still doing something creative.
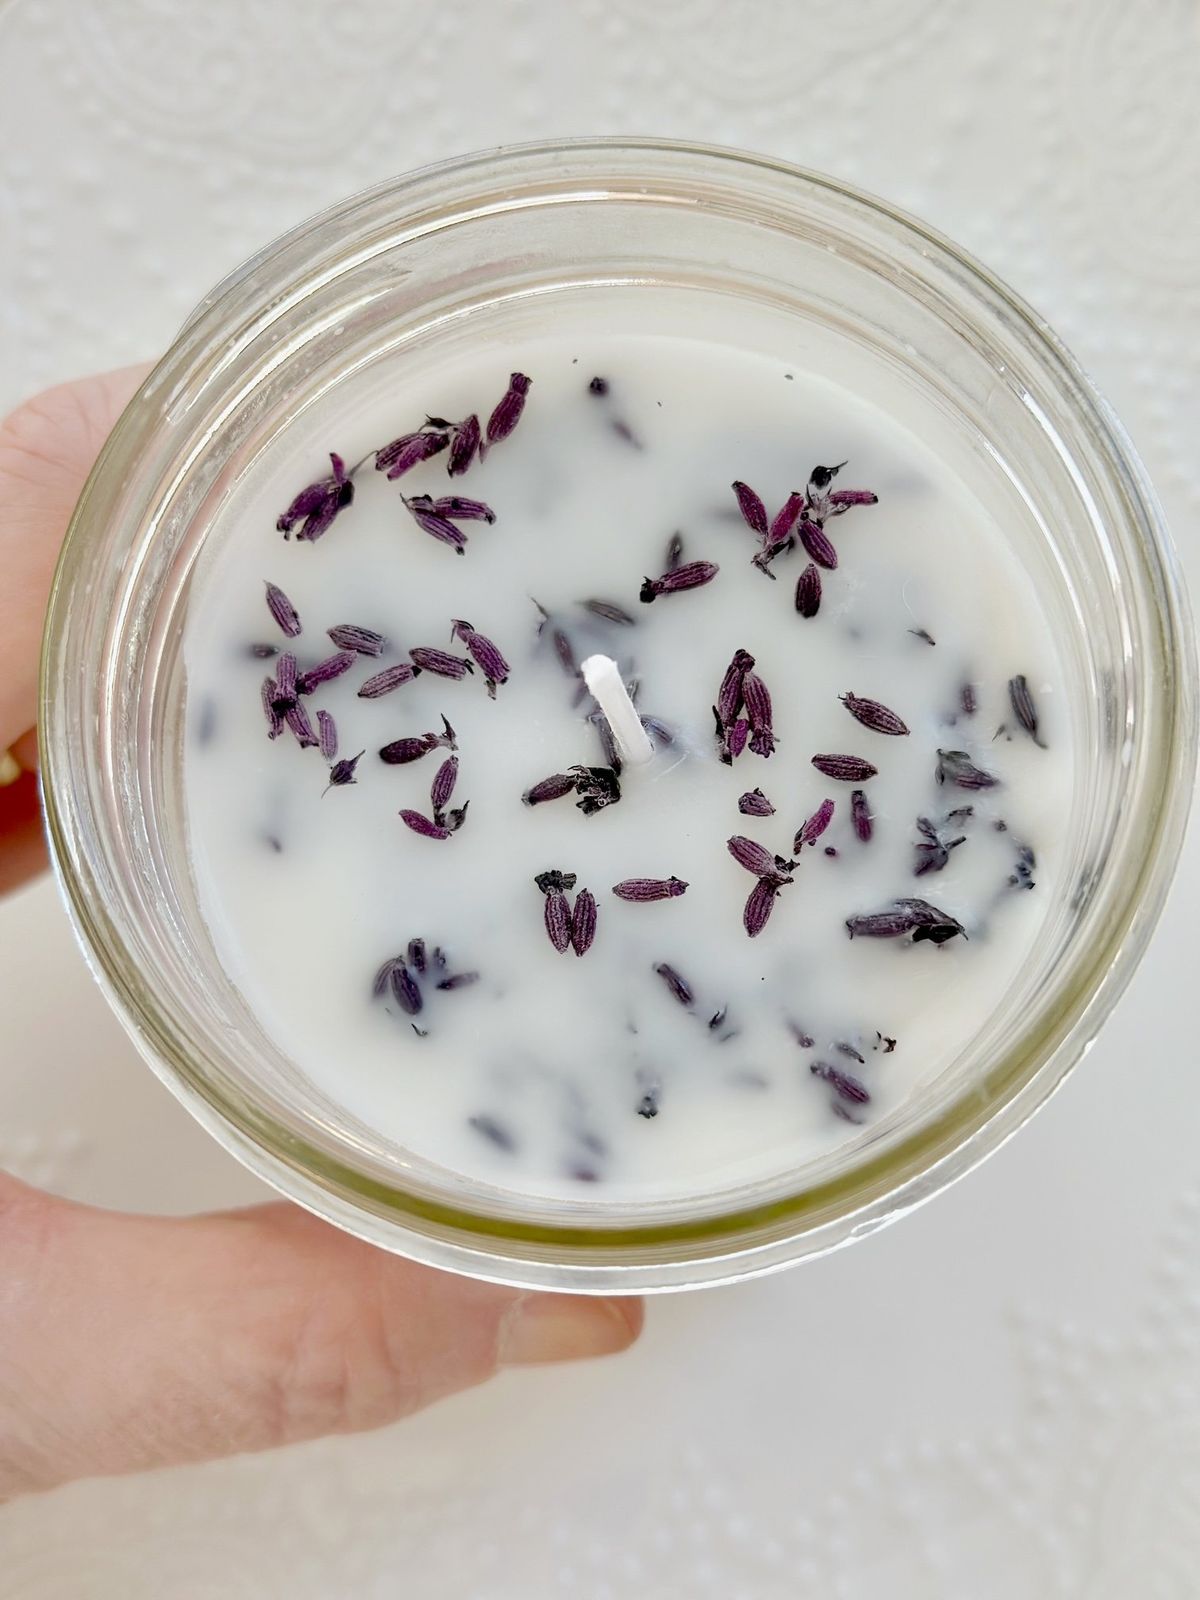
How to Get Smooth, Aesthetic Candle Tops Every Time
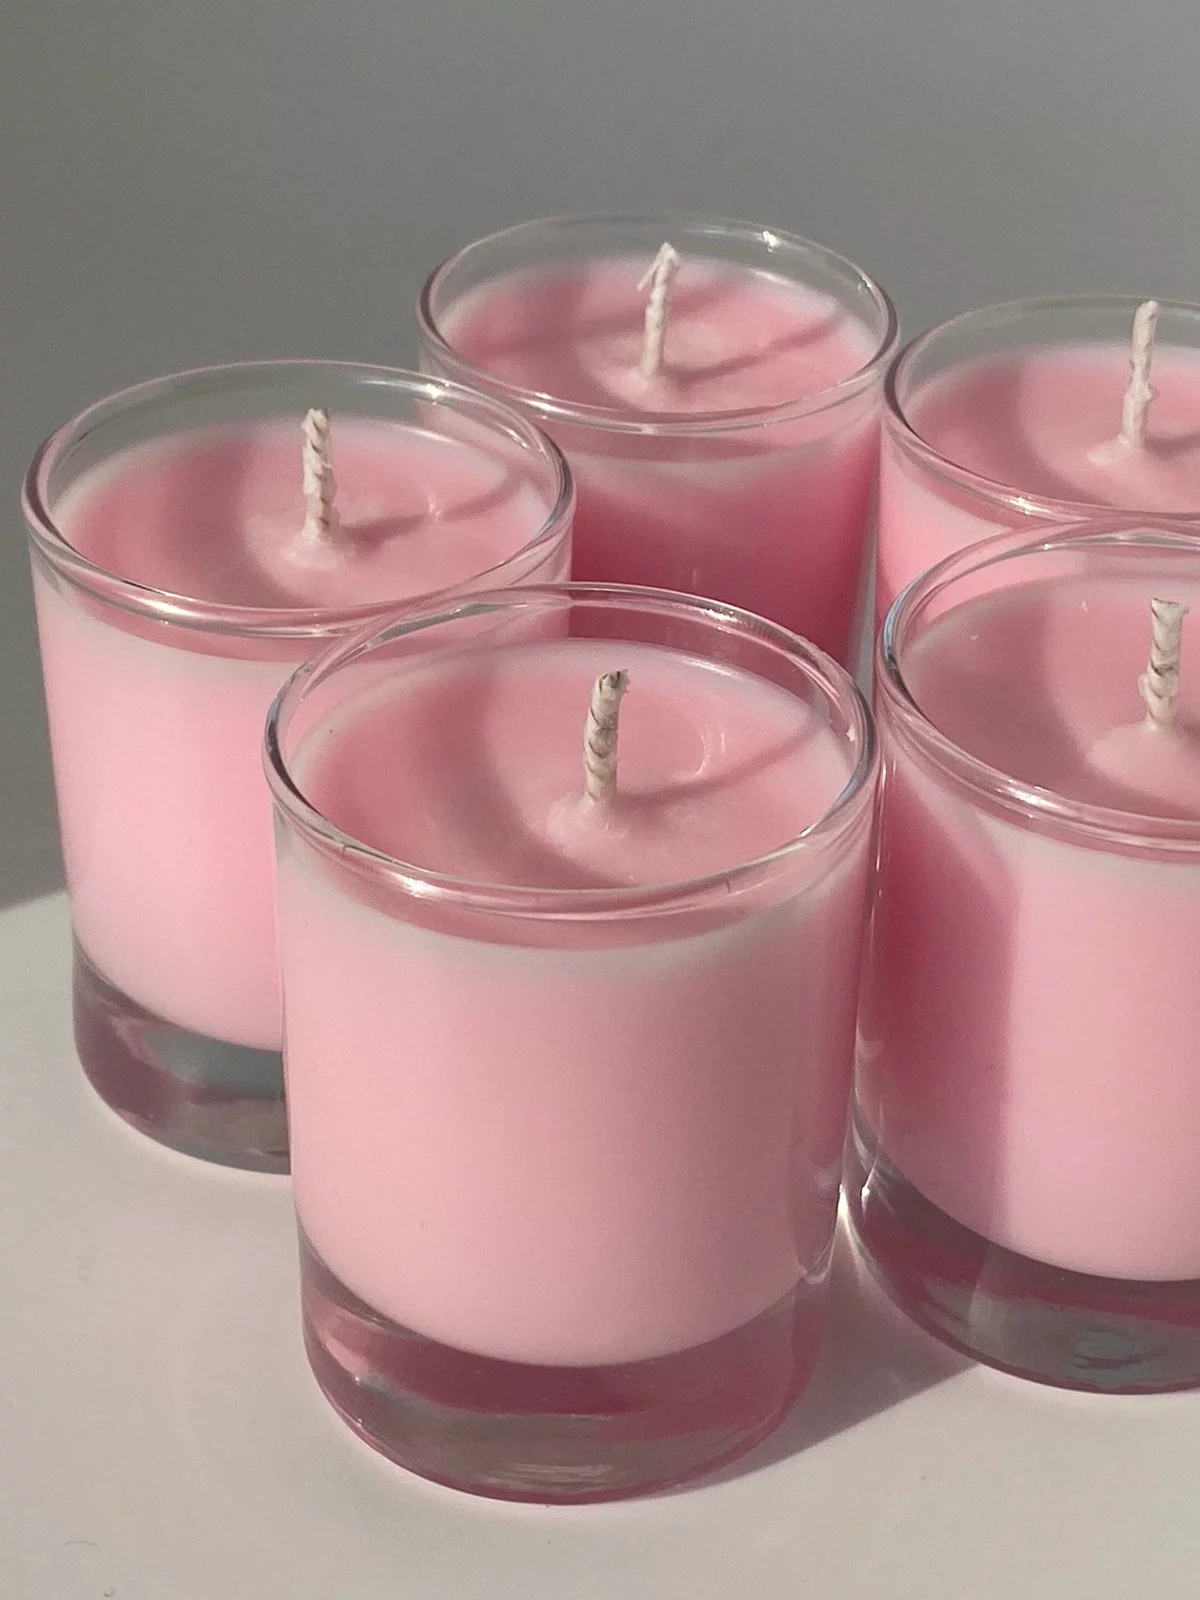
Photo credit: @ Candle Inspiration
When you’re learning how to make scented candles at home, one of the first things you notice is that the top of the candle doesn’t always come out clean.
Instead of that smooth, store-bought look, you might end up with rough surfaces or uneven texture, and it can make the whole candle feel less “finished” even if everything else is right.
Common issues
These are the problems that usually show up:
- Rough tops → the surface looks bumpy or uneven instead of smooth
- Sinkholes → dips or holes form in the center after cooling
- Frosting → a white, cloudy layer on the surface (common with soy wax)
All of these are normal at the beginning, but they’re also fixable once you understand what causes them.
Fixes
- Pour at the correct temperature
This is one of the biggest factors. If the wax is too hot or too cool when poured, it can cool unevenly and create texture problems on top.
- Preheat containers slightly
Cold jars can shock the wax when it’s poured in. Warming the container just a little helps the wax settle more evenly and reduces surface flaws.
- Use the heat gun trick (simple but powerful)
If your candle already sets with a rough top, a heat gun (or gentle surface heat) can melt just the top layer slightly, allowing it to reset smooth and clean.
Getting started with hands-on creativity becomes much easier when you follow beginner-friendly guides like How to Start Embroidery as a Beginner – Step-by-Step Guide for Complete Beginners, which breaks down the process in a simple and stress-free way for first-time learners.
Cost Breakdown – Is Making Candles at Home Worth It?
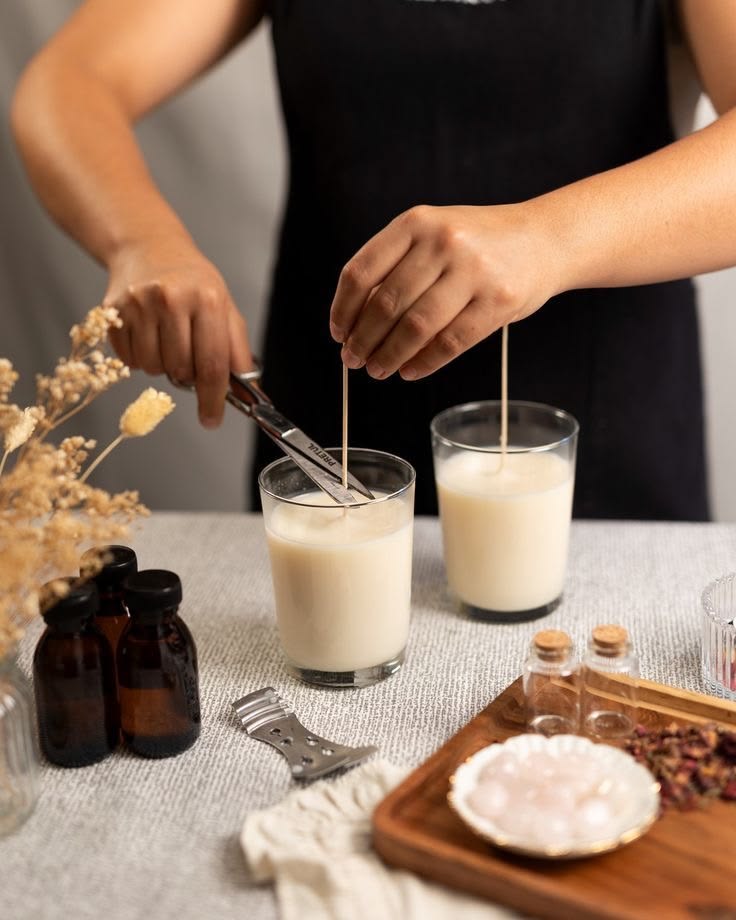
Photo credit: @ UNIK💜♓ ™
Before you go too far into how to make scented candles at home, it’s normal to ask yourself one honest question, is this actually worth the money?
Because candle-making can look cheap from the outside, but the first few purchases can feel like a lot.
Let’s break it down in a simple, realistic way.
Startup cost vsLong-term savings
When you’re just starting, you’re not only buying wax—you’re setting up the basics.
Typical startup items:
- Wax (soy or blend)
- Fragrance oils
- Wicks
- Containers (jars or tins)
- Thermometer
- Pouring pitcher or melting pot
At the beginning, it can feel like a lot because you’re buying everything at once. But the important thing to understand is this: most of these are reusable or long-lasting supplies.
Once you have them, you’re not repurchasing them every time you make a candle.
Now compare that to buying finished candles from a store:
- You pay for packaging
- Branding
- retail markup
- shipping (if online)
So even though the first setup costs more, it spreads out over many candles.
When it becomes cheaper than buying candles
This is where it starts to make sense.
After your initial setup, the cost per candle drops significantly because you’re mainly only replacing:
- wax
- fragrance oil
- wicks
At that point, each candle becomes much cheaper than store-bought ones, especially scented candles, which are usually priced higher because of branding and presentation.
The turning point:
It usually becomes cheaper after you’ve made a few batches (not just one candle). Once your tools are already in place, every new candle costs less than what you’d normally pay in a shop.
Conclusion
To really improve in how to make scented candles at home, it comes down to doing the basics properly and being consistent with them. Nothing complicated, just steady practice and small adjustments each time.
Keep experimenting, pay attention to what changes your results, and build from there. That’s how your candles start looking and smelling more refined over time.
If this helped you, you can save it, share it, or try your next candle with these steps in mind.
Frequently Asked Questions
1. Why does my candle tunnel when it burns?
This is a very common problem where the wax only melts in the middle, leaving wax stuck on the sides. It usually happens because the wick is too small or the candle wasn’t allowed to burn long enough on the first use.
2. Can I use essential oils instead of fragrance oils for candles?
Many beginners try this, but essential oils don’t always perform well in wax. They tend to fade faster and don’t give a strong hot throw when the candle is burning.
3. Why does my candle have air bubbles after pouring?
Air bubbles usually form when the wax is poured too quickly or stirred too aggressively. They can also appear if the wax temperature is too high during pouring.
4. Why does my candle smell good in the jar but weak when burning?
This often happens when the fragrance oil isn’t properly bound to the wax, the wick is too small, or the wax type doesn’t release scent well during burning.
5. How long should I burn a candle the first time?
The first burn should be long enough for the wax to melt evenly across the entire surface. If it’s too short, it can lead to tunneling and poor future burns.
This post talked on: How to Make Scented Candles at Home That Look and Smell Professional.