How to make seed paper with kids using recycled materials for a fun hands-on craft that grows into real flowers, herbs, or plants at home.
If you’ve ever wanted a craft that doesn’t end when the glue dries, this is it.
Seed paper is one of those rare activities where the making is only half the story. What if the craft your child made on Saturday was still doing something by the following month?
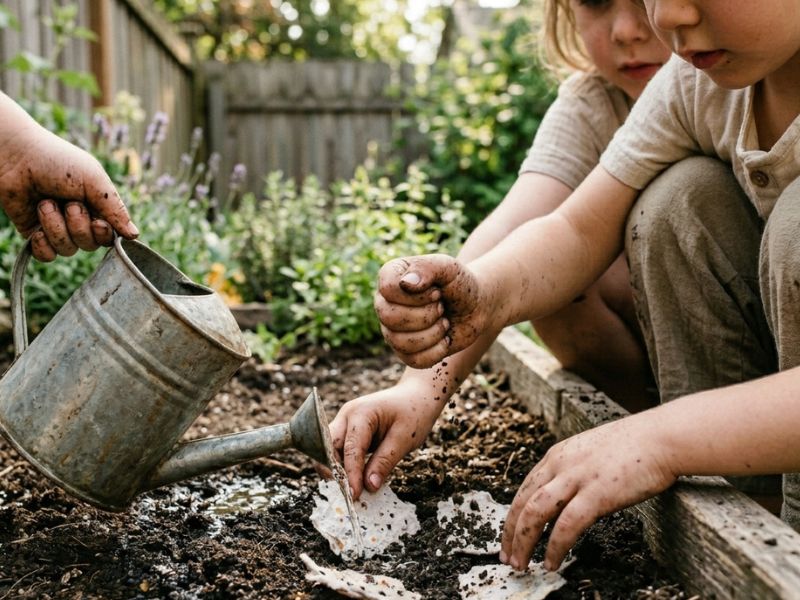
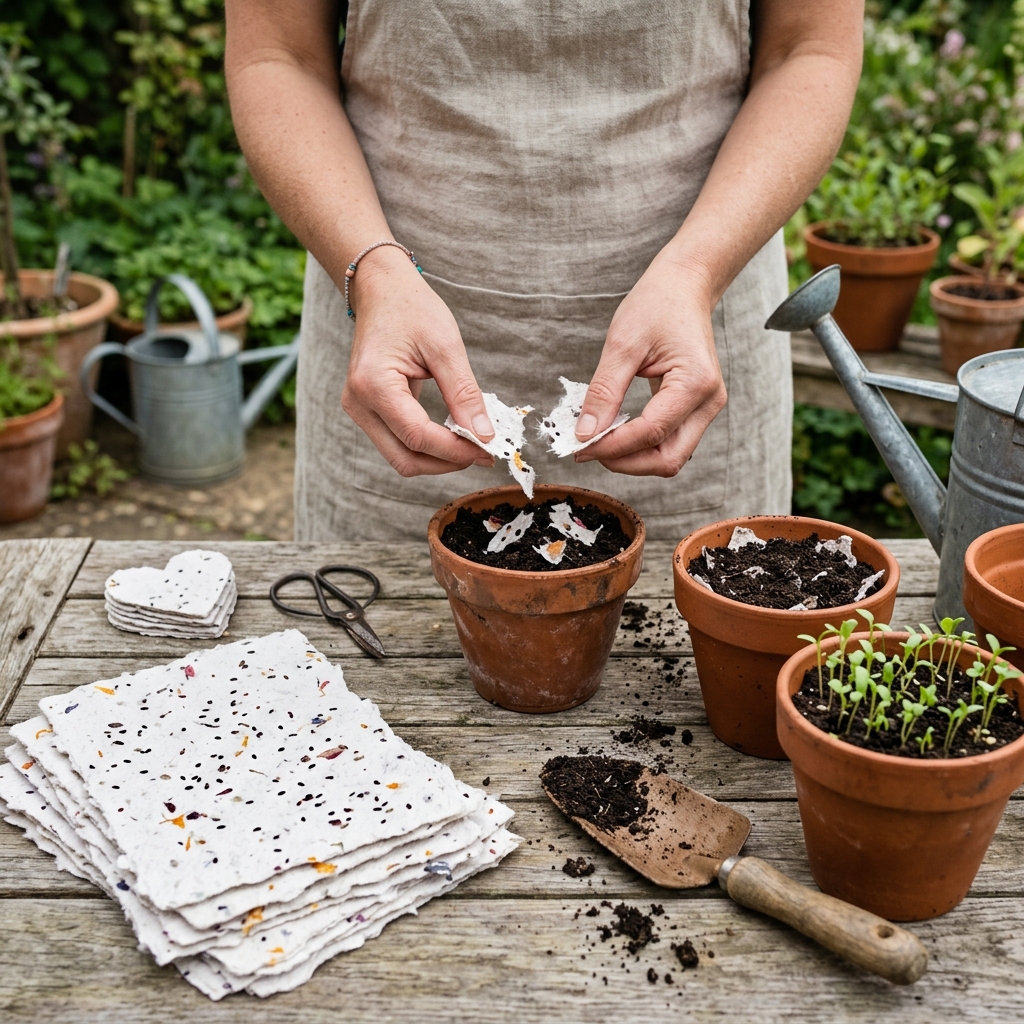
That’s exactly what seed paper does. It’s recycled paper, paper you probably already have at home, blended into pulp, mixed with real seeds, shaped by small hands, and planted in soil. Weeks later, flowers or herbs grow from it. Something living, from something made.
And here’s what makes it even more remarkable: seed paper has been around since 1941. It’s not a trend. It’s a real, proven craft with genuine science behind it. It might just be the most rewarding thing you make with your child this season.
This guide will walk you through the whole process, simply, honestly, and in a way that actually works. Because this craft deserves to work.
And it will. Ready? Let’s do this properly.
Kids who love sensory play will enjoy these Safe and Easy Slime Craft Ideas for Kids — Non-Toxic Projects That Keep Them Busy for Hours that keep them engaged with hands-on, screen-free fun.
What Is Seed Paper — And What Really Happens When You Plant It?
Before we get into the making, let’s talk about what’s actually going on here. Because once you understand it, you’ll be able to explain it to your child in a way that makes this feel less like a craft and more like a small science experiment, which, it is.
Seed paper is exactly what it sounds like: real paper with real seeds pressed into it. But the magic is in what happens after.
When you blend recycled paper with water, it breaks down into something called pulp, a soft, wet, fibrous material. When you mix seeds into that pulp and let it dry, the seeds don’t die.
They go dormant, sit quietly inside the dried paper, waiting. Seeds are remarkably patient like that.
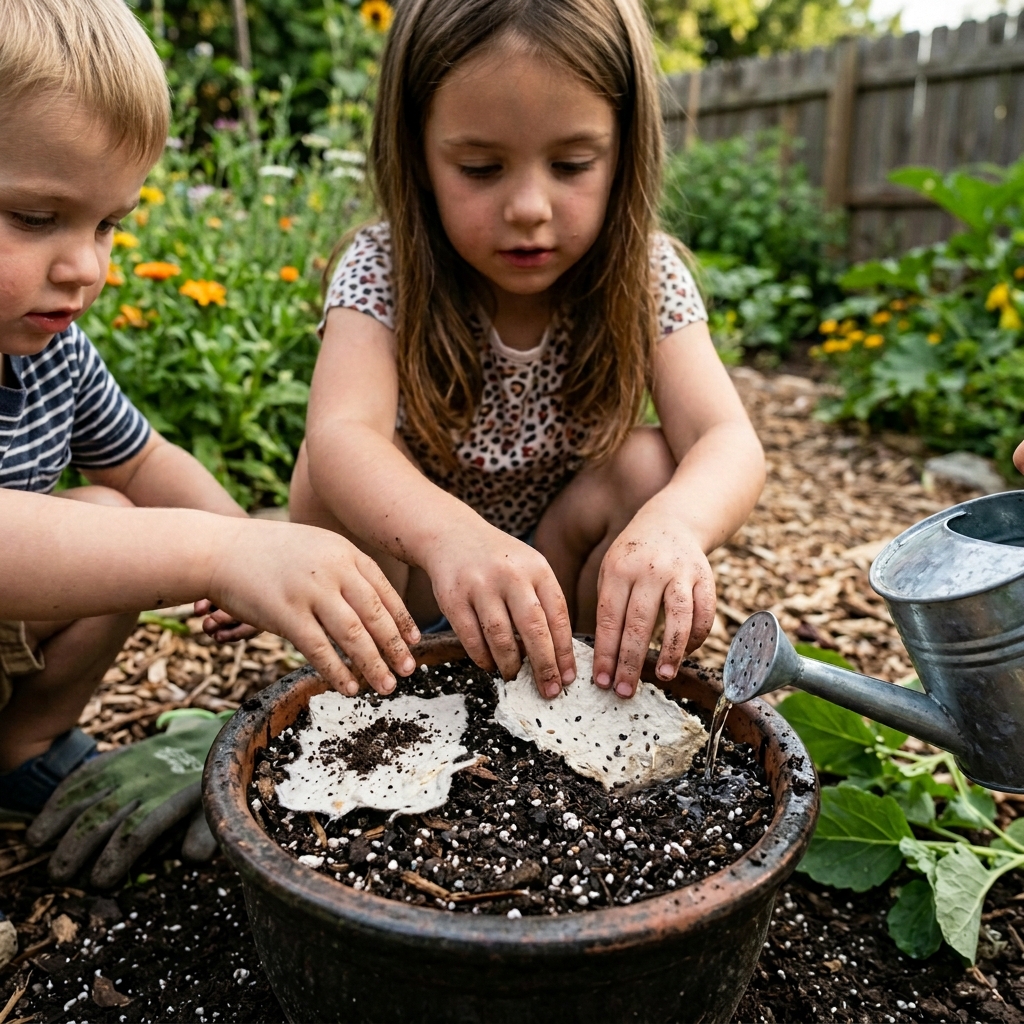
Then you plant the paper in soil. You water it. The moisture softens the paper, the fibres begin to break down, and the seed finds itself exactly where it needs to be, in dark, warm, moist soil with nowhere to go but up.
The paper doesn’t leave a trace. It becomes part of the earth. No waste, no mess, no landfill. Just a plant.
This is what makes seed paper genuinely different from most eco-crafts that use the word “sustainable” loosely. It is fully biodegradable and compostable. It gives back to the soil it’s planted in. And it’s been working this way since 1941, long before it became something people pinned on Pinterest.
So when your child asks “will it actually grow?”, the honest answer is yes. If you make it correctly, it will. And that’s exactly what the rest of this guide is for.
Creative nature-inspired activities become simple with the Coffee Filter Butterfly Craft for Kids (Easy Stained Glass Effect Craft Idea) that teaches color blending and fine motor skills.
What You Need
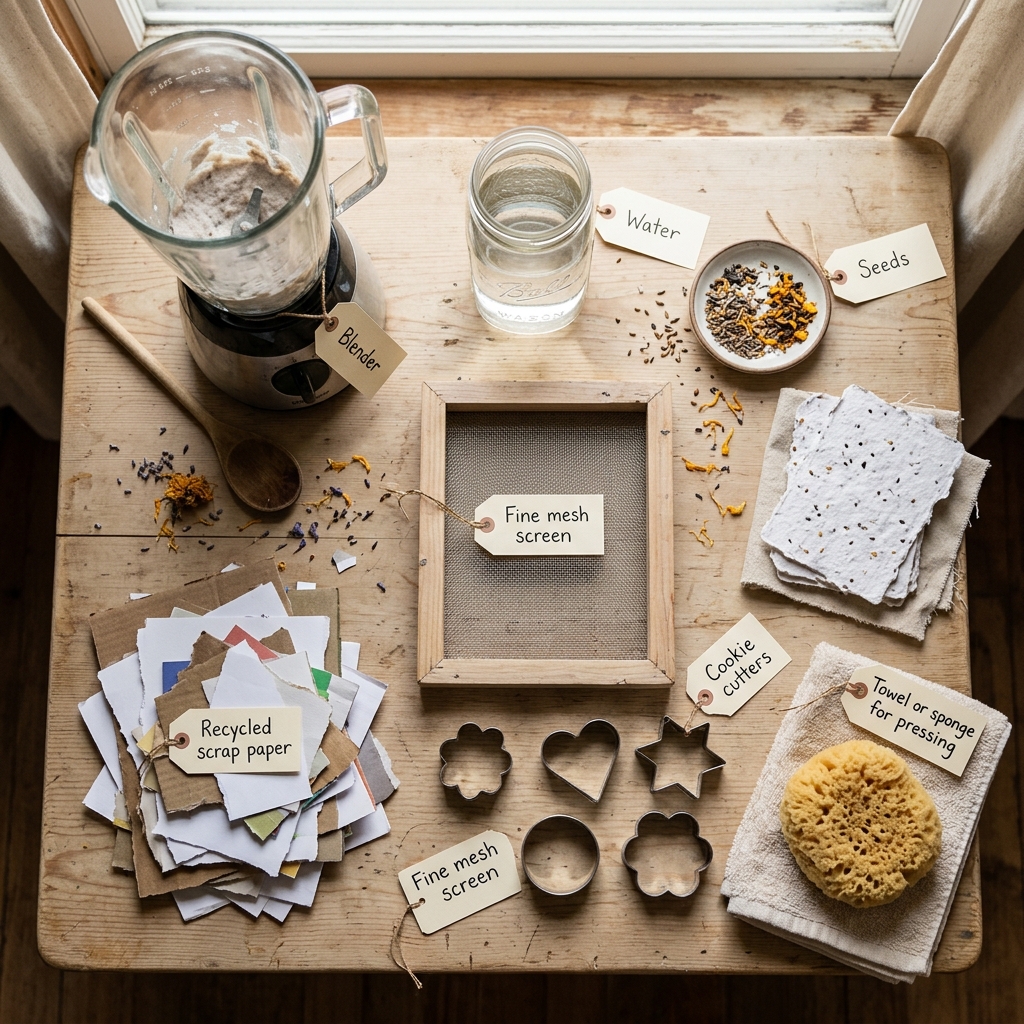
1. Recycled Scrap Paper
This is your raw material, the base of your seed paper. Construction paper, old newspapers, junk mail, used printer paper, even paper bags all work well.
Avoid glossy magazine pages or coated packaging paper. Glossy paper has a coating that resists water, which means it won’t break down into pulp properly, and pulp is everything in this process.
2. Blender
This is what turns your soaked paper into pulp. Use an old one you don’t mind dedicating to craft use. Paper fibres are surprisingly tough on blender blades, they dull them over time. Don’t use your kitchen blender and expect it to perform the same way afterwards.
3. Water
Water does two jobs here: it softens the paper during soaking and thins the pulp to the right consistency during blending. Plain tap water works perfectly.
4. Seeds
The heart of the whole craft. The seeds go into the pulp and stay embedded in the paper as it dries. Which seeds work best, and which ones quietly fail, is covered fully in the next section.
5. Fine Mesh Screen Or Old Window Screen
This is your draining surface. You spread the wet pulp onto the screen so the water drains away while the pulp holds its shape and begins to dry. An old window screen works perfectly, or you can find small mesh frames at most craft stores.
6. A Towel Or Sponge For Pressing
After spreading the pulp on the screen, you press out as much water as possible. A folded towel or sponge placed on top and pressed firmly does the job. The drier the paper at this stage, the faster and more evenly it dries overnight.
7. Cookie Cutters (optional but genuinely great for kids)
Press them into the wet pulp on the screen to cut shapes, hearts, stars, flowers, letters. Kids love this part, and shaped seed paper makes beautiful gifts.
Holiday creativity comes alive in the Q-Tip Firework Painting Craft for Kids for 4th of July Indoor and Outdoor Fun, perfect for safe seasonal art projects.
What To Avoid
Bleached white office paper and glossy magazine pages don’t pulp cleanly.
And if you’re buying seeds specifically for this project, avoid anything from a hardware store labeled as “treated” or “coated”, many commercial seeds are coated with fungicide to extend shelf life, and that coating can prevent germination inside the moist pulp environment.
Recycling becomes fun learning through Toilet Paper Roll Crafts for Kids That Turn Everyday Waste into Fun, Skill-Building DIY Projects at Home that encourage creativity and sustainability.
How To Make Seed Paper With Kids: Step-By-Step Instructions
Before you begin, here’s something worth knowing: this process takes two days because the paper needs to dry overnight. That’s not a flaw — it’s just the nature of what you’re making.
Set that expectation with your child before you start so the waiting becomes part of the experience rather than a disappointment. Day one you make it. Day two you finish it. Then you plant it. Three stages, all of them meaningful.
Step 1 — Shred The Paper
- Tear your recycled paper into small pieces, the smaller the better for smoother pulp
- Kids love doing this by hand, let them go at it, there’s no wrong way.
- Once shredded, cover the pieces completely with water and leave to soak
- An hour works, but overnight makes the paper significantly softer and far easier to blend, if you can, soak it the evening before your craft day
What’s happening here: Water is breaking down the bonds between paper fibres, returning the paper close to its original raw state. This is real papermaking science, your child is doing it at the kitchen table.
Step 2 — Blend Into Pulp
- Fill your blender most of the way with water first, then add one to two handfuls of soaked paper
- Blend until you get a smooth, even paste, think thin watery oatmeal, no large chunks remaining
- Don’t add too much paper at once or it will be too much work for the blender.
- Work in small batches if you’re making a larger amount
- Pour each blended batch into a bowl as you go
What’s happening here: The blender breaks the softened fibres down into what papermakers call slurry. Those same fibres will bond together again as the paper dries, forming a brand new sheet that belongs entirely to your child.
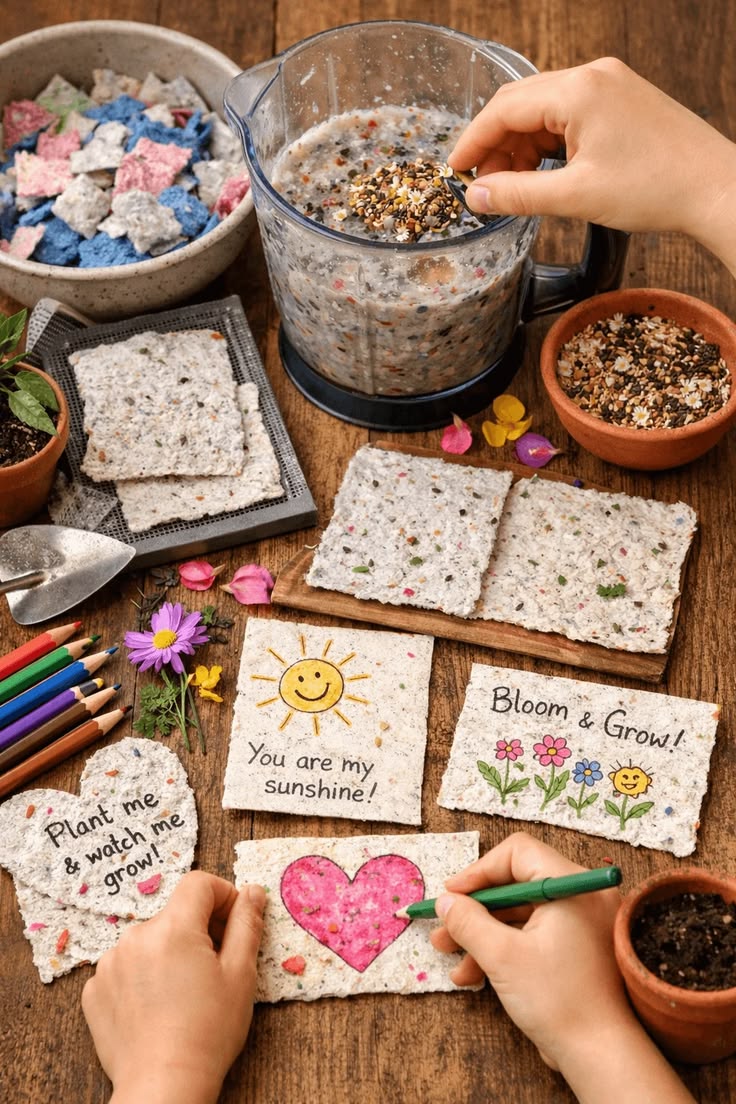
Step 3 — Add The Seeds
- Pour the pulp from the blender into a bowl
- Add your chosen seeds and stir them in slowly and evenly with a spoon
- Make sure seeds are distributed throughout the pulp, not sinking to one spot
- Your child can do this entire step on their own
One rule that cannot be skipped: Do not put seeds in the blender. The blades will destroy the seed embryo, the tiny living part inside every seed that makes germination possible. Your paper will look perfect but grow absolutely nothing. Seeds go in after blending, always by hand, always with a spoon.
What’s happening here: The seeds are being suspended throughout the pulp. As the paper dries, the fibres close around them and hold them safely in place, until soil moisture releases them at planting time.
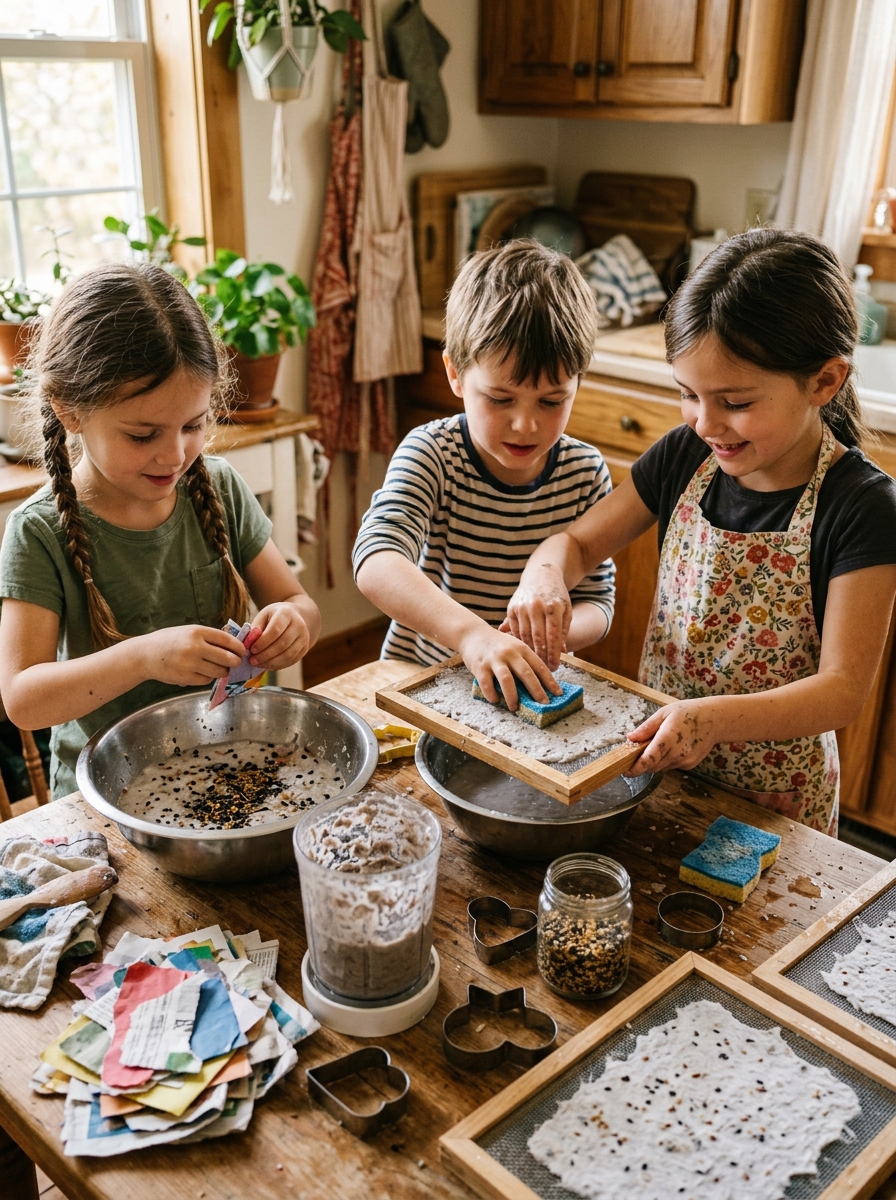
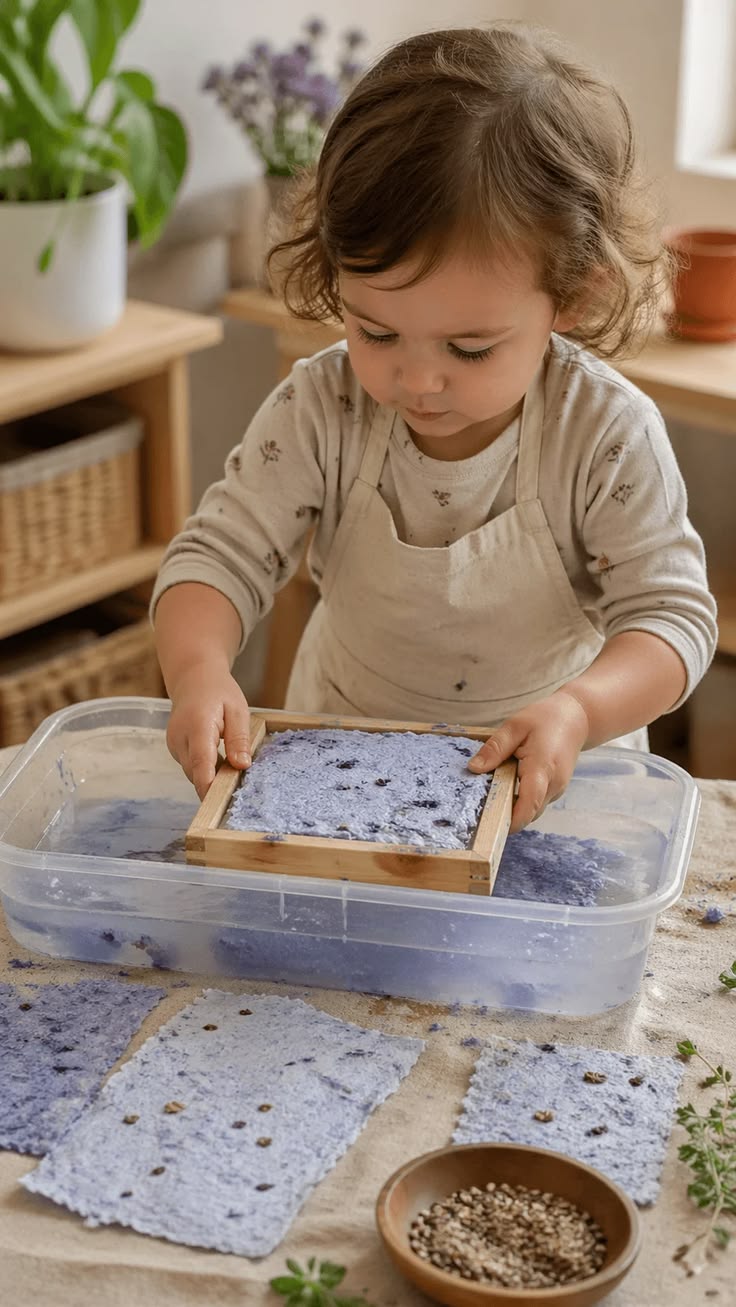
Step 4 — Strain And Shape
- Pour or scoop your seed pulp onto your mesh screen, positioned over a sink or bowl
- Spread the pulp across the screen and gently press it into a flat, even sheet
- Press out as much water as you can without disturbing the shape, thinner paper dries better and lets seedlings push through more easily once planted
- Press cookie cutters into the wet pulp to create shapes, hearts, stars, letters, flowers
- No cookie cutters? Use your hands to form any shape you like, it will hold
What’s happening here: Gravity and pressure are pulling water out through the mesh while the fibres begin settling into their final shape. The more water removed here, the cleaner your finished paper will be.
Step 5 — Press And Dry
- Transfer the shaped pulp carefully onto a flat towel
- Place a second towel on top and press firmly with your hands or a rolling pin to squeeze out more water
- Change the towel if it becomes too saturated, the drier the paper at this stage, the better
- Leave it completely flat at room temperature overnight to finish drying
The most important rule in this entire guide: Do not use heat to speed up drying. No heater nearby. No hairdryer. No oven. Seeds begin to die at temperatures above 108°F (42°C) and are fully sterilized at 140°F (60°C), according to Cornell University.
Room temperature air drying is the only safe method. This is the step most tutorials skip explaining, and it’s the reason a lot of homemade seed paper never grows anything.
What’s happening here: The paper fibres are slowly bonding together as moisture leaves them, locking the seeds safely inside. This cannot be rushed. Patience here is what makes the difference between paper that grows and paper that doesn’t.
Step 6 — Decorate
- Wait until the paper is completely dry, fully dry, not just dry on top, before decorating
- Draw on it with pencil or crayon
- Write a name, a message, planting instructions for the recipient
- For natural colour, paint lightly with beet juice for pink, turmeric for yellow, or spinach juice for green
- These natural dyes won’t harm the seeds and give the paper a beautiful, handmade finish
Why this step matters: This is the moment the craft becomes personal. Seed paper shaped like a heart, decorated by a child, handed to someone they love with a note that says “plant me”, that’s not just a craft. That’s a memory.
Focus and imagination improve with Easy Foam Sheet Crafts for Kids That Keep Them Focused, Creative, and Productively Busy at Home, ideal for quiet indoor play.
Choosing Seeds That Will Actually Germinate

One of the most important decisions you’ll make when learning how to make seed paper with kids is choosing the right seeds. And it’s a decision most guides treat as an afterthought, just add any seeds you like.”
But not all seeds behave the same way inside paper pulp, and choosing the wrong one is one of the quietest reasons homemade seed paper fails to grow anything.
Here’s what actually works.
-
Marigold
Marigold seeds are flat, lightweight and embed beautifully into wet pulp without sinking or clumping. They have one of the highest germination rates of any beginner-friendly flower, which matters when you’re making this with a child who is genuinely waiting to see something happen.
Marigolds also sprout relatively quickly, usually within seven to fourteen days — which keeps young attention alive long enough to witness the reward.
-
Zinnia
Zinnias are tough. They grow in most climates, tolerate inconsistent watering better than most flowers, and come up in bold, bright colours that genuinely excite children. If you want something forgiving for a first attempt, zinnia is a strong choice.
-
Wildflower Mixes
Wildflower seeds are naturally small and lightweight — which is exactly what you need for thin seed paper. They’re designed by nature for surface-level planting, which is precisely how seed paper works when it’s placed in soil. A wildflower mix also means your child won’t know exactly what’s coming up, which adds a lovely element of surprise to the growing stage.
-
Basil Or Thyme
If you’d rather make herb paper than flower paper, basil and thyme are your best options. Their seeds are tiny, embed easily and evenly into pulp, and give children the added satisfaction of growing something they can actually smell, and eventually use in the kitchen.
Mess-free crafting is easy with 13+ Pipe Cleaner Crafts for Kids That Are Simple, Fun, and Completely Mess-Free, great for quick creative activities.
What To Avoid
Large seeds like sunflower or pumpkin are too heavy and bulky for thin paper pulp. They create uneven thickness, struggle to stay embedded as the paper dries, and are simply too big to germinate well in the shallow soil coverage that seed paper requires.
Also avoid any seeds labeled “treated,” “coated,” or “primed” at garden centers or hardware stores. That coating exists to extend shelf life on a shelf, but inside moist paper pulp, it can actively block germination. Always choose raw, untreated seeds for seed paper.
A Note For Parents Around The World
How to make seed paper with kids looks a little different depending on where you live, and that’s worth acknowledging. If you’re in a tropical climate like Nigeria, India, or Southeast Asia, choose heat-tolerant varieties like marigold or vinca.
These seeds are built for warmth and will germinate confidently in hot, humid conditions.
If you’re in a cooler climate, time your planting to spring when soil temperatures are rising, most flower seeds need soil above 15°C (59°F) to germinate reliably. Plant too early in cold ground and the seed will simply wait, or not make it at all.
The right seed in the right season really helps.
I love that this craft keeps going even after the kids finish making it — turning recycled paper into something that actually grows makes the whole activity feel much more meaningful. The bit about seed paper existing since the 1940s was really interesting too, because it shows this isn’t just a trendy craft but something with real staying power. I’d also imagine this would make a fun homemade gift idea for grandparents or teachers.