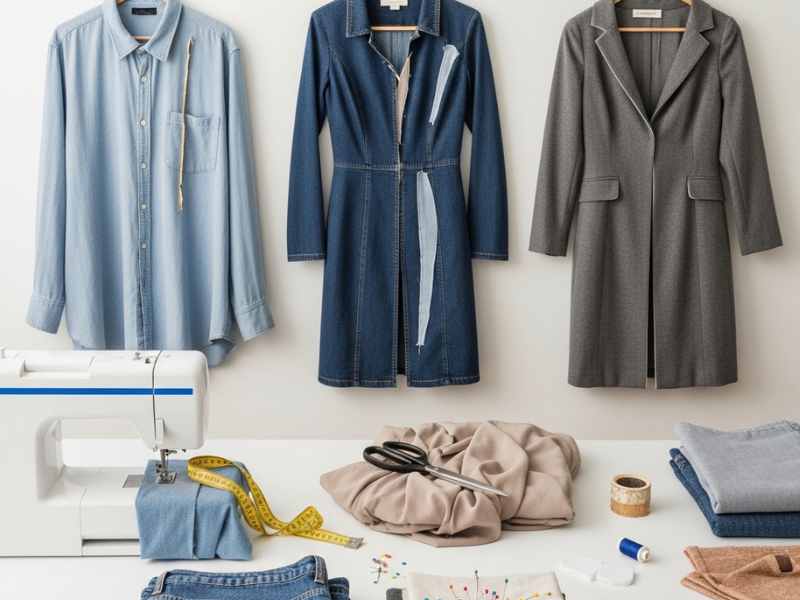
Small fabric damage doesn’t mean disposal. Find 15 easy sewing fixes for clothes and fabrics that repair clothes, save money, and bring worn items back to life.
Many people have clothes, bedsheets, or fabric items sitting in their homes that are no longer used, not because they are completely damaged, but because of small issues like tears, loose stitching, or worn edges.
Over time, these items are often thrown away simply because fixing them feels complicated or unnecessary.
In reality, most common fabric problems are not difficult to repair. A loose button, a small tear in a seam, a fraying towel edge, or a broken bag strap can often be fixed with basic sewing techniques.
You don’t need advanced tailoring skills or expensive equipment, just a few simple sewing methods can help restore many everyday items.
Learning basic sewing fixes is a practical skill that can make a real difference at home.
It helps reduce unnecessary spending, extends the life of clothing and household fabrics, and encourages a more mindful approach to replacing items too quickly. Instead of discarding damaged pieces, small repairs can keep them usable for much longer.
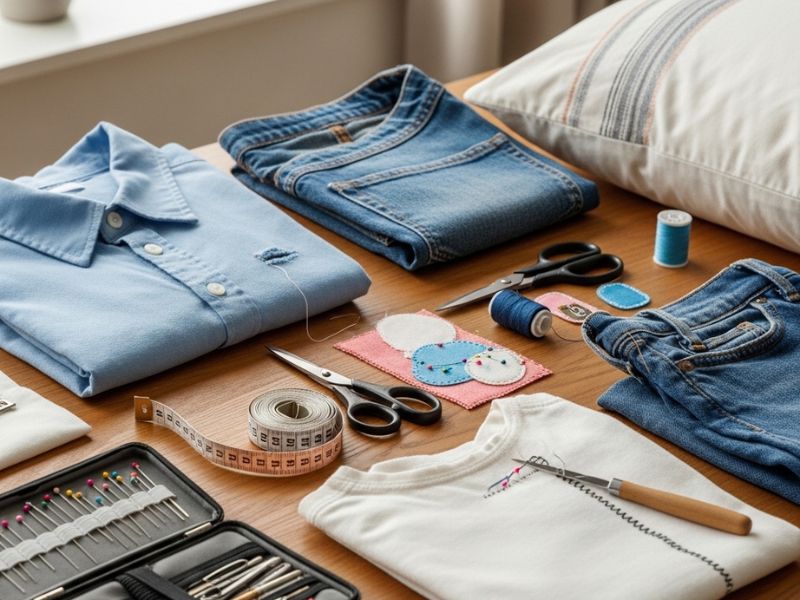
Some of the most common problems include torn seams in clothing, missing or loose buttons, small fabric holes, fraying edges on towels and bedsheets, weak stitching in bags, and general wear in frequently used home textiles like curtains and pillowcases.
These are everyday issues that often go ignored, even though they are usually easy to fix.
Before you throw anything away, here are 15 smart and easy for clothes and fabrics you can try at home.
Using the right tools can make sewing repairs much easier, especially for beginners. Here’s a simple guide on essential sewing tools that improve accuracy and are budget-friendly.
If you’re using a sewing machine for repairs, it helps to understand the basics first. This beginner guide to sewing machine basics you’ll actually use explains the essentials clearly.
CLOTHING REPAIR FIXES
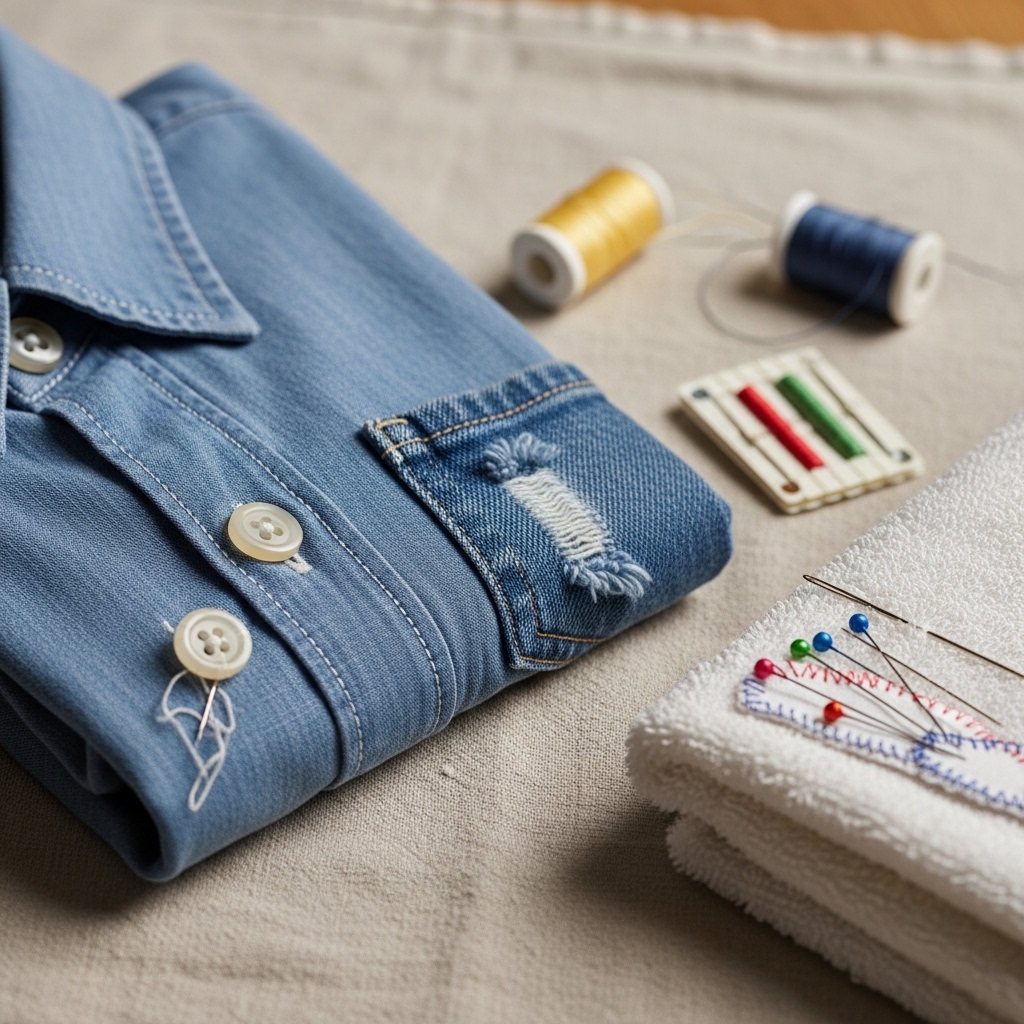
1. Reattaching Loose or Missing Buttons
Loose or missing buttons are one of the most common clothing issues in everyday wear. They usually happen because of repeated friction when clothing is worn, washed, or pulled open and closed.
Over time, the original thread weakens and eventually breaks, causing the button to fall off completely.
🧵 Why buttons fall off
- Regular friction when opening/closing clothes
- Weak or old thread holding the button
- Frequent washing and stretching of fabric
✂️ Simple way to reattach a button
- Place the button back where it originally sat
- Thread a needle and tie a small knot at the end
- Push the needle from the inside of the fabric to the front
- Pass it through one hole of the button
- Bring it back down through another hole
- Repeat this 5–8 times until the button feels tight
- Finish by tying a knot on the inside of the fabric
🔧 Reinforcement tip (important)
- Use double thread for extra strength
- Stitch through the holes several times (don’t rush)
- Wrap thread tightly under the button base to create a small “stem”
→ This reduces pressure when buttoning and unbuttoning.
Instead of paying for small fixes, here are clothing alterations you can easily do yourself at home that save both time and money.
2. Repairing Small Fabric Tears
Small fabric tears are very common in everyday clothing, especially in areas that experience frequent movement or friction. You’ll often find them in sleeves, side seams, or light cotton clothing. These tears usually start small but can become bigger if not repaired early.
Fixing them is a core part of sewing fixes for clothes and fabrics, and it can help extend the life of your clothing instead of throwing it away.
🧵 Where small tears usually happen
- Sleeve areas (from bending and movement)
- Side seams of shirts or dresses
- Light cotton clothing (because the fabric is thinner)
- Areas that rub often during daily wear
✂️ Simple straight stitch repair
- Turn the fabric inside out if possible
- Align the torn edges carefully
- Use a needle and thread to make a straight stitch along the tear line
- Keep stitches small and close together for strength
- Go slightly beyond the tear on both sides to secure it properly
- Tie a knot at the end on the inside of the fabric
This helps close the tear neatly and prevents it from spreading further.
🧵 When patching is better than stitching
Not all tears should be stitched directly. In some cases, patching is a better and stronger solution.
Use a patch when:
- The tear is too wide or irregular
- The fabric is thinning around the damaged area
- Stitching alone won’t hold the structure
To patch:
- Place a small piece of similar fabric underneath or over the tear
- Stitch around the edges of the patch to secure it
- Make sure the patch covers the entire weak area
🔧 Key tip
Early repair is very important. The longer a tear is left, the more it spreads and weakens the fabric. Fixing it early makes the repair stronger and less visible.
If you often struggle with fit issues, this post on outfit problems short women deal with and how to fix them can help you understand common styling adjustments.
If you enjoy fixing and creating items at home, you can even turn it into income. Here’s how to start a profitable sewing side hustle from home.
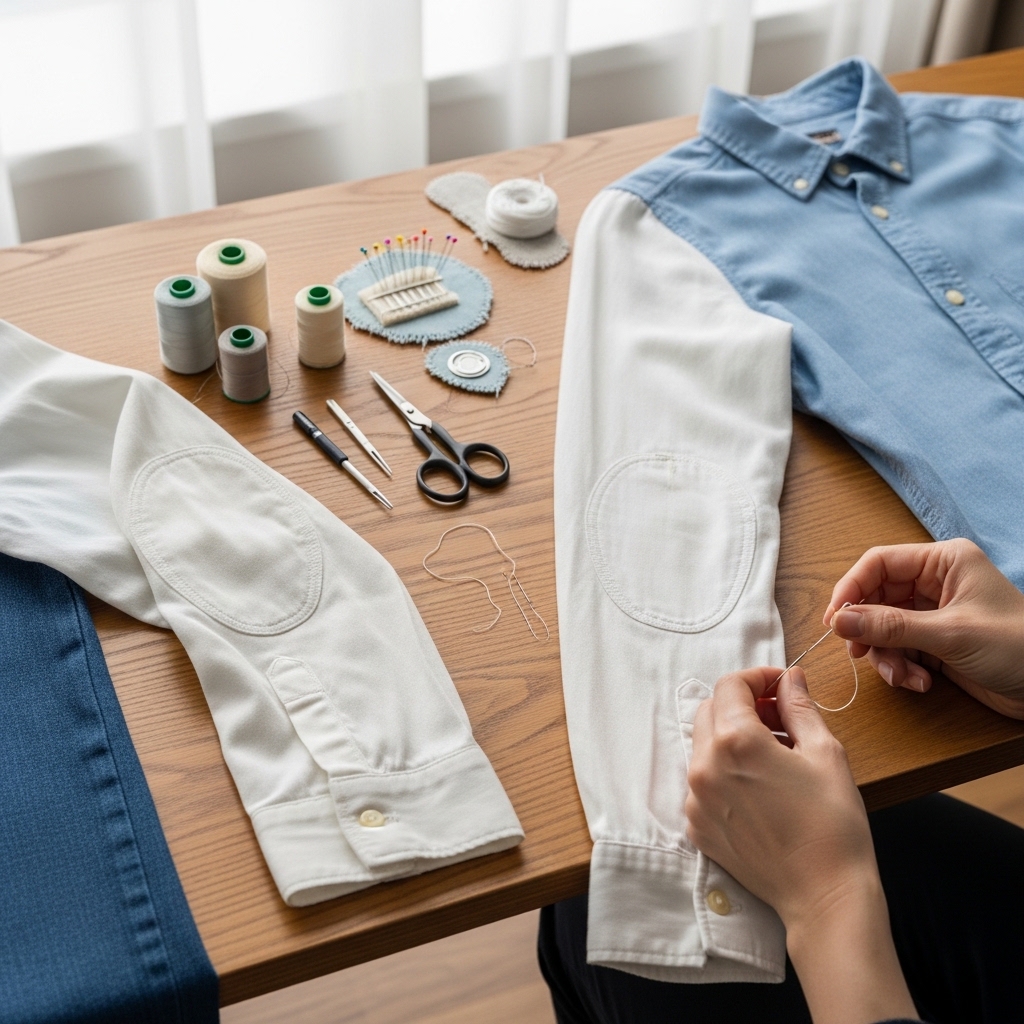
3. Reinforcing Weak Clothing Areas
Some fabric problems don’t start as tears, they start as weak spots. These are areas of clothing that thin out over time from constant movement, friction, and washing. If you reinforce them early, you can prevent full damage and extend the life of your clothes.
This is one of the most practical sewing fixes for clothes and fabrics you keep throwing away, because it helps you repair before things actually break.
🧵 What “weak clothing areas” mean
These are parts of clothing that are under constant stress, such as:
- Elbows (from bending and resting arms)
- Thigh areas (from walking and rubbing)
- Armpits (from movement and sweat friction)
- Inner seams of trousers or jeans
- Areas where fabric looks thin or slightly worn
✂️ Simple preventive reinforcement method
- Turn the clothing inside out if possible
- Identify the thin or stressed area
- Place small, even stitches over the weak section
- Use short, tight stitches (do not leave gaps)
- Sew in a simple grid or cross pattern for added strength
- Make sure stitching extends slightly beyond the weak spot
🧵 Extra reinforcement option (for longer durability)
- Add a small patch of similar fabric underneath the weak area
- Stitch around the edges of the patch to secure it
- Keep stitches neat but firm so the fabric stays flexible
🔧 Important tip
- Do not wait until the fabric fully tears
- Reinforcing early makes the repair stronger and less visible
- Light, repeated stitching is better than heavy stitching in one spot.
If you want your repairs to look cleaner and more professional, these sewing hacks for neater results and better finishing are very helpful for beginners.
4. Closing Small Holes in Clothing
Small holes in clothing are usually caused by everyday wear and tear. They often appear in areas where fabric rubs frequently, or where the material has become thin over time. If ignored, these small holes can quickly get bigger, which is why fixing them early is important.
This is one of the most useful sewing fixes for clothes and fabrics you keep throwing away, because it helps restore items that would otherwise be discarded for minor damage.
🧵 Common causes of small holes
- Constant friction (like inner thighs or underarms)
- Thin or worn-out fabric from repeated washing
- Small snags that gradually open up
- Insect or accidental puncture damage
✂️ Basic darning-style stitch method
- Turn the fabric inside out if possible
- Place the hole flat on a stable surface
- Start stitching around the edges of the hole to stop it from spreading
- Use a simple in-and-out weaving motion across the hole
- Then weave stitches in the opposite direction to create a light “net” over the area
- Keep stitches close enough to close the hole, but not too tight to bunch the fabric
- Secure the thread with a knot on the inside when finished
🧵 Important note
- This method works best for small holes only
- Larger holes or heavily worn fabric may require patching instead
- The goal is to close the gap without stretching or damaging the surrounding fabric.
Instead of throwing away leftover fabric, you can reuse it for small repairs or creative fixes. These fabric scrap sewing hacks show practical ways to reuse them.
5. Fixing Split Seams in Clothes
Split seams are one of the most common clothing problems. They happen when the stitched line holding two pieces of fabric together gives way, usually because of tension, movement, or repeated washing.
You’ll often notice this in high-stress areas like underarms, side seams, or along jeans.
Fixing split seams is one of the most practical sewing fixes for clothes and fabrics you keep throwing away, because it restores structure and makes the clothing wearable again without replacing it.
🧵 Where split seams usually happen
- Underarms of shirts and dresses (constant arm movement)
- Side seams of tops and dresses (stretching and pulling)
- Inner seams of jeans and trousers (friction and pressure)
- Areas that are frequently stretched during wear
✂️ Simple seam re-stitching technique
- Turn the clothing inside out so the seam is visible
- Align the two fabric edges neatly together
- Start stitching from a few centimeters before the split begins
- Use small, tight straight stitches along the original seam line
- Continue slightly past the damaged area to secure it fully
- Reinforce by going back over the stitch line once more if needed
- Tie a strong knot at the end on the inside
🧵 Reinforcement tip
- Use small, close stitches for stronger hold
- Stitch slightly beyond the split to prevent it reopening
- For jeans or thick fabric, double stitching improves durability
If you enjoy transforming old clothes instead of discarding them, these ways to upcycle old clothes into new trendy outfits can give you inspiration.
HOME FABRIC FIXES
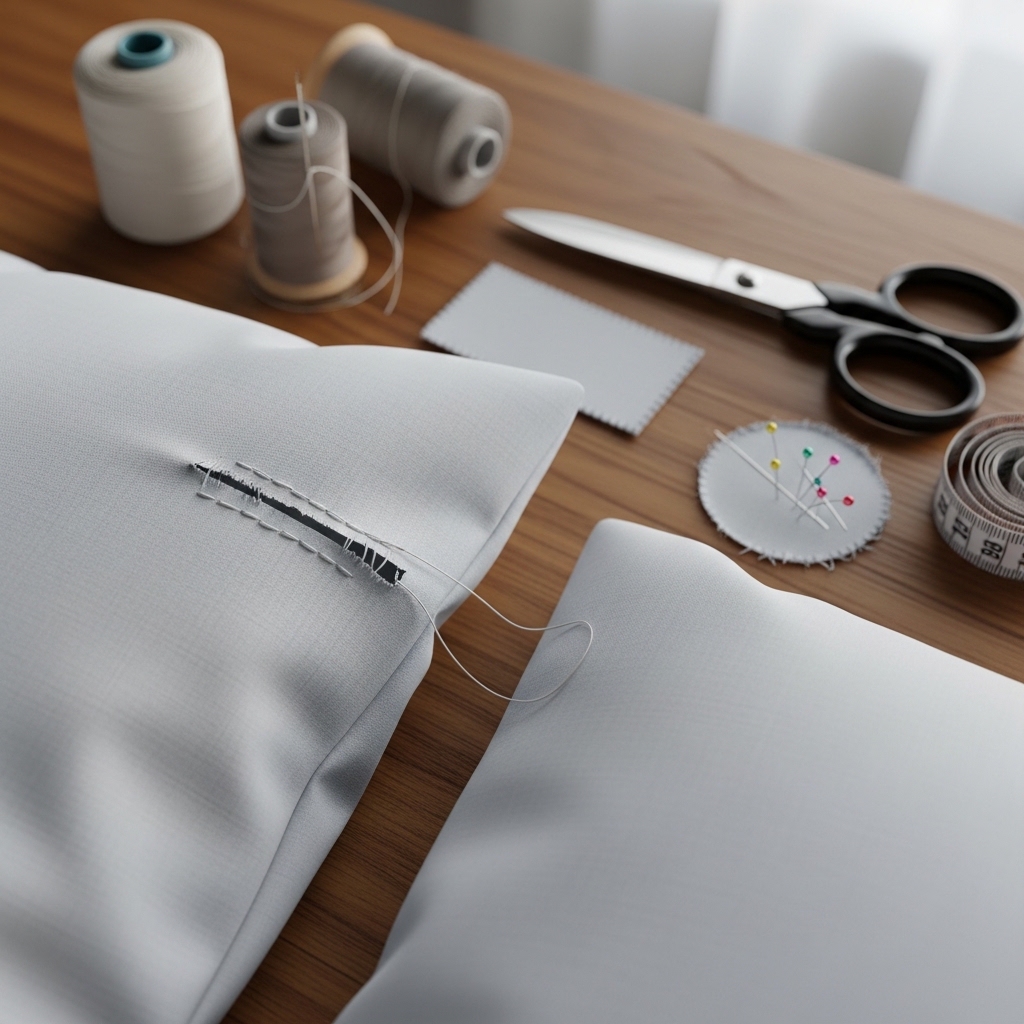
6. Repairing Torn Bedsheets or Pillowcases
Bedsheets and pillowcases often tear at the edges or corners because those areas take the most stress during washing, drying, and daily use. Over time, the fabric becomes weaker, especially if it is lightweight or frequently used.
Instead of throwing them away, many of these tears can be repaired with a simple sewing fix that strengthens the fabric and extends its use.
🧵 Common causes of damage
- Constant washing and spinning in the machine
- Pulling or stretching when making the bed
- Thin or low-quality fabric wearing out over time
- Fraying at corners and stitched edges
✂️ Simple seam reinforcement method
- Turn the bedsheet or pillowcase inside out
- Align the torn edges neatly together
- Stitch along the tear using small, tight straight stitches
- Extend stitching slightly beyond the damaged area for strength
- If the edge is fraying, fold it inward before stitching to seal it
- Secure the end with a tight knot on the inside
🧵 Extra reinforcement tip
- For weak or thin fabric, sew a second line of stitching just beside the first one
- This “double seam” helps the repair last longer after washing
- Avoid pulling the fabric too tightly while sewing to prevent distortion
🔧 When this repair works best
- Small to moderate edge tears
- Light to medium-weight cotton bedsheets
- Pillowcases with seam splitting or corner damage
If the fabric is extremely thin or has multiple tears close together, replacement may be more practical than repair.
Once you’re ready to improve, this guide on finding beginner-friendly sewing patterns that are easy to follow can save you a lot of frustration.
7. Fixing Loose Curtain Hems
Loose curtain hems are a common household fabric problem. They usually happen because curtains are constantly pulled, moved, and exposed to gravity over time. This repeated movement slowly weakens the stitching at the bottom edge, causing the hem to come undone or hang unevenly.
This is one of those sewing fixes for clothes and fabrics you keep throwing away that can easily save curtains from being replaced unnecessarily.
🧵 Why curtain hems become loose
- Constant pulling when opening and closing curtains
- Weight of fabric causing downward stress (gravity)
- Weak original stitching or low thread quality
- Frequent washing without reinforcing the hem
✂️ Simple re-fold and stitch method
- Lay the curtain flat on a clean surface
- Identify the loose or fully undone hem section
- Fold the fabric edge back to its original hem line (or slightly neaten it if uneven)
- Pin or hold the fold in place to keep it steady
- Use a needle and thread to make small, even straight stitches along the hem
- Keep stitches close together for better durability
- Secure the thread at the end with a firm knot on the inside
🧵 Reinforcement tip
- For heavier curtains, stitch a second line just above the first hem line for extra strength
- Make sure stitches are not too tight to avoid puckering the fabric
- Use stronger thread if the curtain fabric is thick or heavy
🔧 When this method works best
- Light to medium-weight curtains
- Partial hem loosening (not fully damaged edges)
- Curtains with simple straight hems
This simple repair restores structure and helps extend the life of curtains without needing replacement or professional tailoring.
For more creative ideas, here are handmade sewing gift projects that are perfect for special occasions like weddings.
8. Repairing Frayed Kitchen Towels or Cloth Edges
Kitchen towels and everyday cleaning cloths often start to fray at the edges after repeated washing and heavy use. Once fraying begins, it can quickly spread if it is not stopped early.
🧵 Why this happens
- Frequent washing and scrubbing
- Rough fabric edges not properly sealed
- Constant wetting and drying cycles
- Thin or worn cotton fibers breaking down
✂️ Clean edge hem stitching method
- Trim any loose or hanging threads carefully
- Fold the frayed edge inward to create a clean line
- Stitch along the folded edge using small, even stitches
- Make sure stitches cover the full length of the frayed area
- Tie off securely at the end to prevent unraveling
🔧 Helpful tip
- If the fabric is heavily frayed, fold twice before stitching for better sealing
- Avoid pulling the fabric too tightly to keep the towel shape intact
9. Fixing Cushion Cover Seams
Cushion covers often split at the seams because these areas are under constant pressure from sitting, leaning, and daily use. Over time, the stitching at the corners and edges weakens and begins to open.
🧵 Why seam damage happens
- Constant pressure on cushion corners
- Frequent removal and washing of covers
- Weak original stitching along seam lines
- Stretching of fabric during use
✂️ Reinforced stitching method
- Turn the cushion cover inside out
- Align the split seam edges carefully
- Stitch along the original seam line using small, tight stitches
- Extend stitching slightly beyond the damaged area for strength
- Go over the seam again if the fabric feels weak
- Secure the thread firmly at the end
🔧 Durability tip
- Add a second line of stitching on high-stress corners for extra support
- Use slightly stronger thread for thicker cushion fabrics
- Avoid over-tight stitching to prevent fabric puckering.
If sewing patterns confuse you, this guide on how to read sewing patterns without feeling lost breaks it down step by step.
10. Repairing Small Upholstery Fabric Tears
Small tears in upholstery fabric can happen on items like chairs, cushions, or lightly covered furniture surfaces. These are usually minor surface tears, meaning they affect only the fabric layer, not the internal structure of the furniture.
Because of this, they can often be repaired at home without professional reupholstery, especially if the damage is caught early.
🧵 Common causes of small upholstery tears
- Friction from regular sitting or movement
- Snagging from sharp objects (zippers, buttons, nails)
- Weak fabric areas from long-term use
- Thin decorative fabric layers wearing down
✂️ Patch method (best for slightly larger tears)
- Clean the area around the tear gently
- Cut a small patch of similar or matching fabric
- Place the patch under or over the tear (depending on visibility needs)
- Use small stitches around the edges to secure it firmly
- Make sure the patch fully covers the weakened area
🪡 Hidden stitch approach (best for small tears)
- Align the torn edges carefully
- Use a needle and thread to bring the edges together
- Stitch using small, tight stitches along the tear line
- Work slowly to avoid pulling or widening the tear
- Secure the thread tightly at the end
🔧 Important note
- These methods are suitable only for minor surface fabric damage
- If the furniture padding or internal structure is exposed, repair may require professional help
- Always match thread strength with upholstery fabric thickness for better durability.
For creative inspiration beyond sewing basics, you can explore traditional fashion styles from around the world for design ideas and creativity.
BAGS & EVERYDAY ITEM FIXES
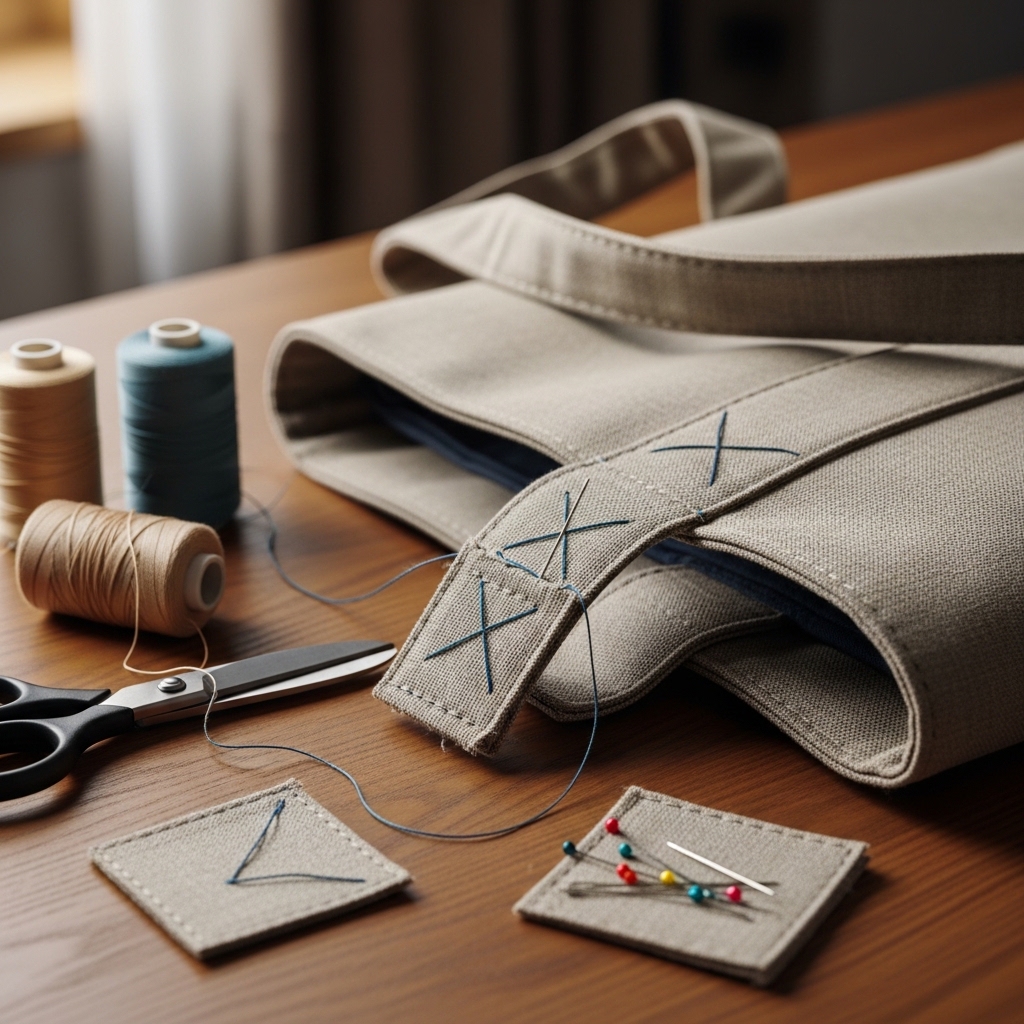
11. Fixing Broken Bag Straps
Broken or weakened bag straps are a common issue in everyday use, especially with tote bags, handbags, and fabric bags that carry weight regularly. These straps usually fail at the point where they connect to the bag body due to constant pulling and pressure.
🧵 Common causes of strap damage
- Carrying heavy items regularly
- Weak original stitching at attachment points
- Constant pulling and swinging of the bag
- Thin fabric or low-quality thread used in construction
✂️ Cross-stitch reinforcement technique
- Position the broken strap back in its original place
- Secure it temporarily with pins or a simple holding stitch
- Use a needle and strong thread to stitch in a criss-cross pattern
- Repeat stitches over the same area for added strength
- Make sure stitching extends slightly beyond the damaged section
- Tie off securely inside the bag
This cross-stitch reinforcement helps distribute weight more evenly and improves durability.
Choosing the right machine also matters, especially for beginners. Here’s a comparison of industrial vs domestic sewing machines for beginners to help you decide.
12. Strengthening Weak Handles on Bags
Weak handles often show early signs of wear before they fully break. Reinforcing them early is one of the most effective sewing fixes for bags that are used daily.
🧵 Why handles weaken
- Constant lifting and carrying weight
- Stress at stitching points
- Thin fabric or single-line stitching used in construction
✂️ Layered stitching for durability
- Inspect handle attachment points for weak areas
- Stitch over the existing seams using multiple layers of stitching
- Add a second line of stitching beside the original seam
- Reinforce both ends of the handle where stress is highest
- Ensure stitches are tight and evenly spaced
Layered stitching increases strength and helps prevent future breakage.
13. Repairing Fabric Accessories (Pouches, Organizers)
Small fabric accessories like pouches, makeup bags, and storage organizers often develop minor tears along seams or edges from frequent use and opening/closing.
🧵 Common issues
- Small seam splits
- Edge fraying
- Minor fabric tears from zipper stress or overfilling
✂️ Patch or stitch closure method
- For small tears, align the fabric edges carefully
- Use tight, small stitches to close the tear neatly
- For larger weak areas, place a small fabric patch underneath and stitch around it
- Reinforce corners where stress is highest (especially near zippers or openings)
- Finish with a secure knot inside the fabric
🔧 Durability tip
- Avoid overfilling repaired pouches or organizers
- Reinforce stitching at stress points to extend lifespan
- Match thread strength with fabric thickness for better hold.
If your machine starts acting up during repairs, this guide on why sewing machines skip stitches and how to fix them can help you troubleshoot quickly.
PREVENTION & EARLY DAMAGE CONTROL
14. Securing Loose Threads Before They Spread Damage
Loose threads might look harmless, but they are often the first sign that a fabric is weakening.
If left unattended, they can gradually pull at the weave of the material and lead to larger tears or seam damage over time. This is especially common in frequently worn clothes and regularly washed fabrics.
🧵 Why loose threads become a problem
- They get caught and pulled during wear or washing
- They slowly unravel the surrounding stitches
- They weaken nearby fabric structure over time
- They can turn a small issue into a visible tear
✂️ Simple trimming + securing stitch method
- Carefully trim any loose or hanging threads with scissors
- Avoid pulling the thread, as this can worsen the damage
- If the area looks slightly open, use a small stitch to secure it
- Stitch lightly along the weak point without tightening the fabric
- Finish by tying off the thread securely on the inside
🔧 Key Tip
- Deal with loose threads early before they spread into seams or holes
- Regular small fixes prevent bigger repairs later.
Clothing fit and structure can completely change how an outfit looks on the body. These flattering outfit ideas that help balance proportions and create a more defined waistline offer styling inspiration alongside practical sewing repairs.
15. Reinforcing High-Stress Fabric Areas Early
Some parts of clothing are naturally more prone to wear because they experience constant movement, pressure, or friction. Reinforcing these areas before damage appears is a simple but effective form of preventative maintenance.
This is one of the most practical sewing fixes for clothes and fabrics, because it focuses on preventing damage instead of repairing it after it happens.
🧵 Common high-stress fabric areas
- Underarms of shirts and dresses
- Elbows on long-sleeve clothing
- Inner thighs of trousers or jeans
- Shoulder straps on bags and clothing
- Seams that stretch during movement
✂️ Preventative reinforcement approach
- Identify areas that show early signs of thinning or stress
- Add small reinforcement stitches over these zones
- Use tight, even stitching to strengthen the fabric structure
- For extra durability, stitch slightly beyond the weak area
- Keep reinforcement light so the fabric remains flexible
🔧 Important Tip
- Reinforcing early helps prevent full tearing later
- Small, preventive stitching is more effective than repairing large damage
- Focus on areas that experience repeated daily stress.
Understanding your material is also important, this guide on choosing the right fabric for sewing projects helps you avoid mistakes before you start.
Practical Sewing Tips (Before You Start Any Repair)
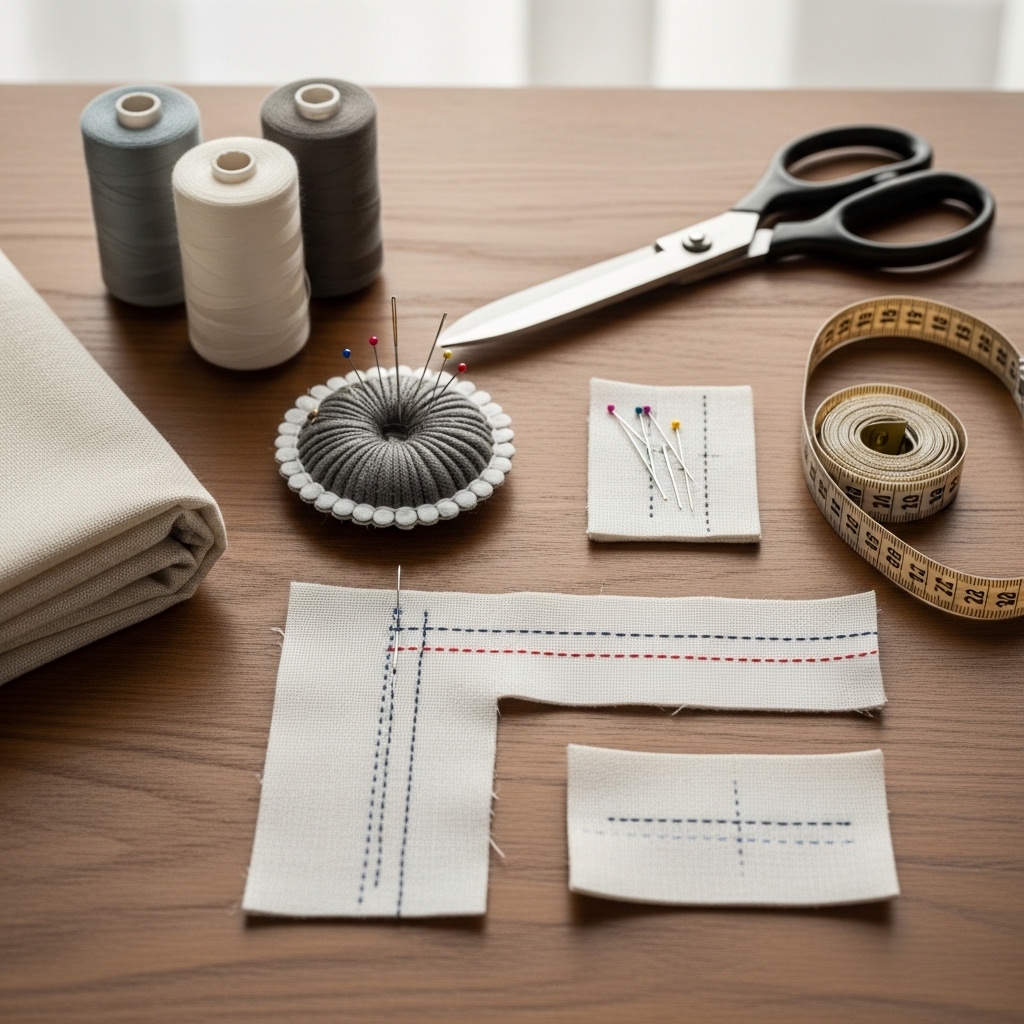
These simple habits can make a big difference in how strong and neat your repairs turn out. Most sewing problems don’t come from complex mistakes, they come from skipping small but important steps.
1. Match thread strength to fabric type
- Use stronger thread for thick fabrics like denim or upholstery
- Use lighter thread for soft fabrics like cotton or rayon
- Avoid using weak thread on high-stress areas like seams or straps
This helps the repair last longer and prevents it from breaking again quickly
2. Always test on scrap fabric if unsure
- Try your stitch on a small leftover piece of similar fabric
- Check how the thread, tension, and needle behave
- Adjust before working on the actual item
This prevents visible mistakes on your final repair
3. Don’t overstretch damaged areas while sewing
Keep fabric flat and natural while stitching
- Pulling or stretching the damaged area can make the tear worse
- Work slowly and gently to maintain shape
This helps avoid distortion after repair
4. Use reinforcement stitches on stress points
- Go over seams more than once in areas like elbows, seams, or straps
- Use short, tight stitches instead of long loose ones
- Reinforce both ends of a repair to prevent reopening
This is key for durability in everyday wear and use
5. Small repairs are stronger than large weak patches
- Fix problems early before they spread
- Smaller repairs hold better and look cleaner
- Waiting too long often leads to bigger, weaker fixes
Early repair is always more effective than major patching.
Once you start repairing and reworking your clothes, you may also enjoy exploring how fashion is evolving. These 2026 sewing fashion trends showing how classic pieces are updated with modern styles can help you refresh your wardrobe with new ideas.
Conclusion
Sewing fixes are practical life skills that help you take care of everyday clothes and fabrics instead of replacing them too quickly. Most small issues—like tears, loose seams, or worn edges, can be handled with simple repairs once you know what to do.
Learning these basic sewing fixes for clothes and fabrics also helps reduce waste and saves money over time. Instead of throwing away items after minor damage, you can extend their life with a few simple stitches.
If you’re just starting, don’t try to master everything at once. Begin with one easy repair, build confidence, and improve gradually. Sewing is not about perfection, it gets better with practice and consistency.
Start with one simple repair today, you’ll be surprised how many items you can save instead of throwing away.
This post talked on: 15 clever sewing fixes for clothes and fabrics that save money and reduce everyday waste.