This reversible bowl cozy sewing tutorial walks you through the right fabric, correct sizing, and step-by-step construction, everything you need to make it right the first time.
There is a certain kind of small daily annoyance that nobody complains about out loud, but everybody experiences. The kind you have just accepted as part of life without questioning it.
Burnt fingers from a microwave bowl is one of them.
You reach in, grab, and ouch, every single time. And it makes sense when you understand what is actually happening; that heat you are feeling is not a defective bowl, that is physics doing exactly what physics does.
Your food gets hot, your food heats the ceramic, and by the time the microwave beeps your bowl has quietly absorbed all of that heat. The bowl is working perfectly. Your hands are just caught in the middle.
A bowl cozy solves this, and it is embarrassingly simple. It is a small quilted fabric square, usually three layers, that your bowl sits inside while you carry it. Think of it like a little fabric nest for your bowl. The cozy absorbs the heat radiating off the ceramic so your hands do not have to.
And the best part? You can make one yourself, with basic supplies.
Let’s make one.
If you’ve ever struggled with uneven stitches or fabric that just doesn’t behave the way you expect, learning How to Choose the Right Sewing Needle for Every Fabric Type — Before You Blame Your Machine can completely change the outcome of your sewing projects and save you a lot of frustration.
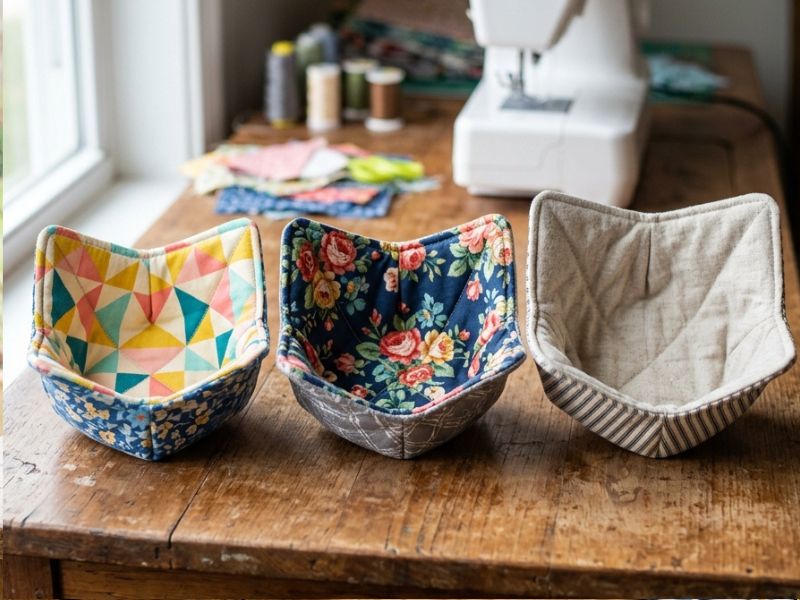
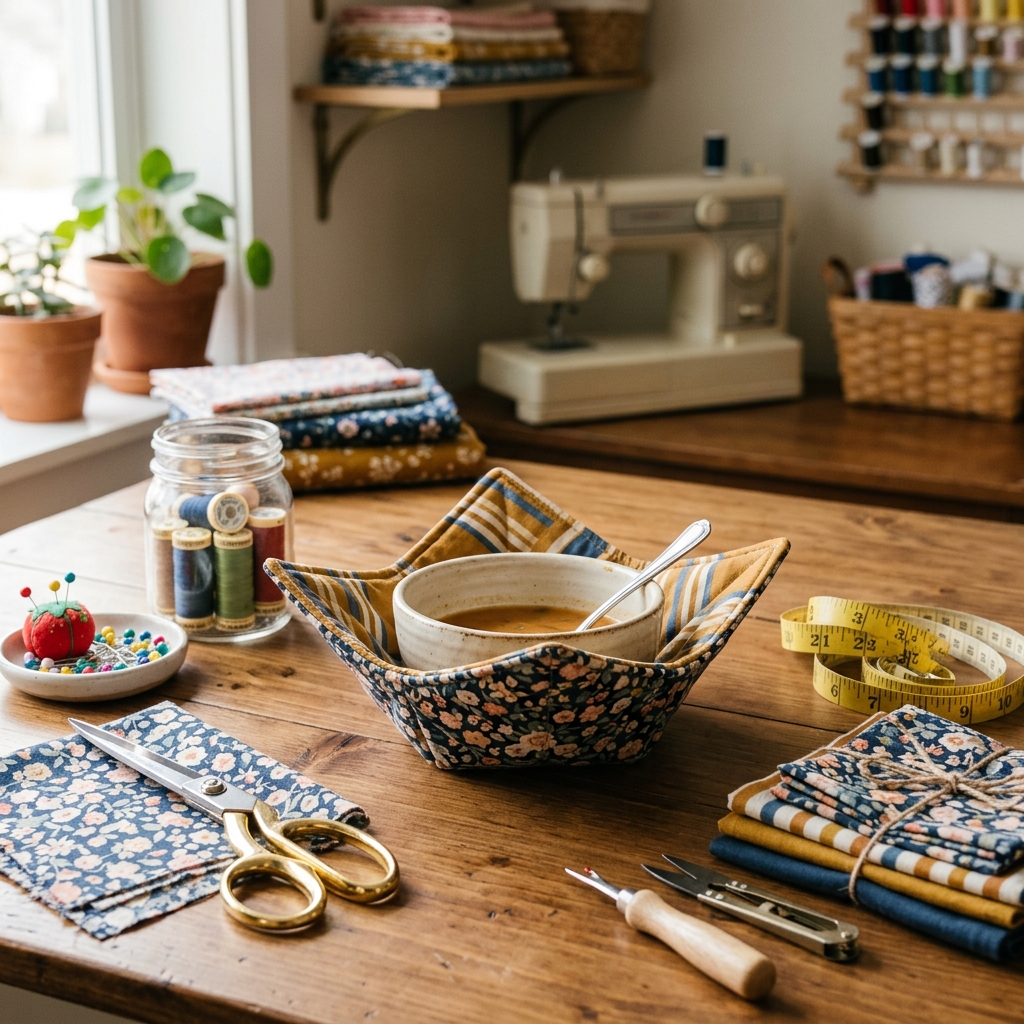
What Makes a Bowl Cozy Reversible
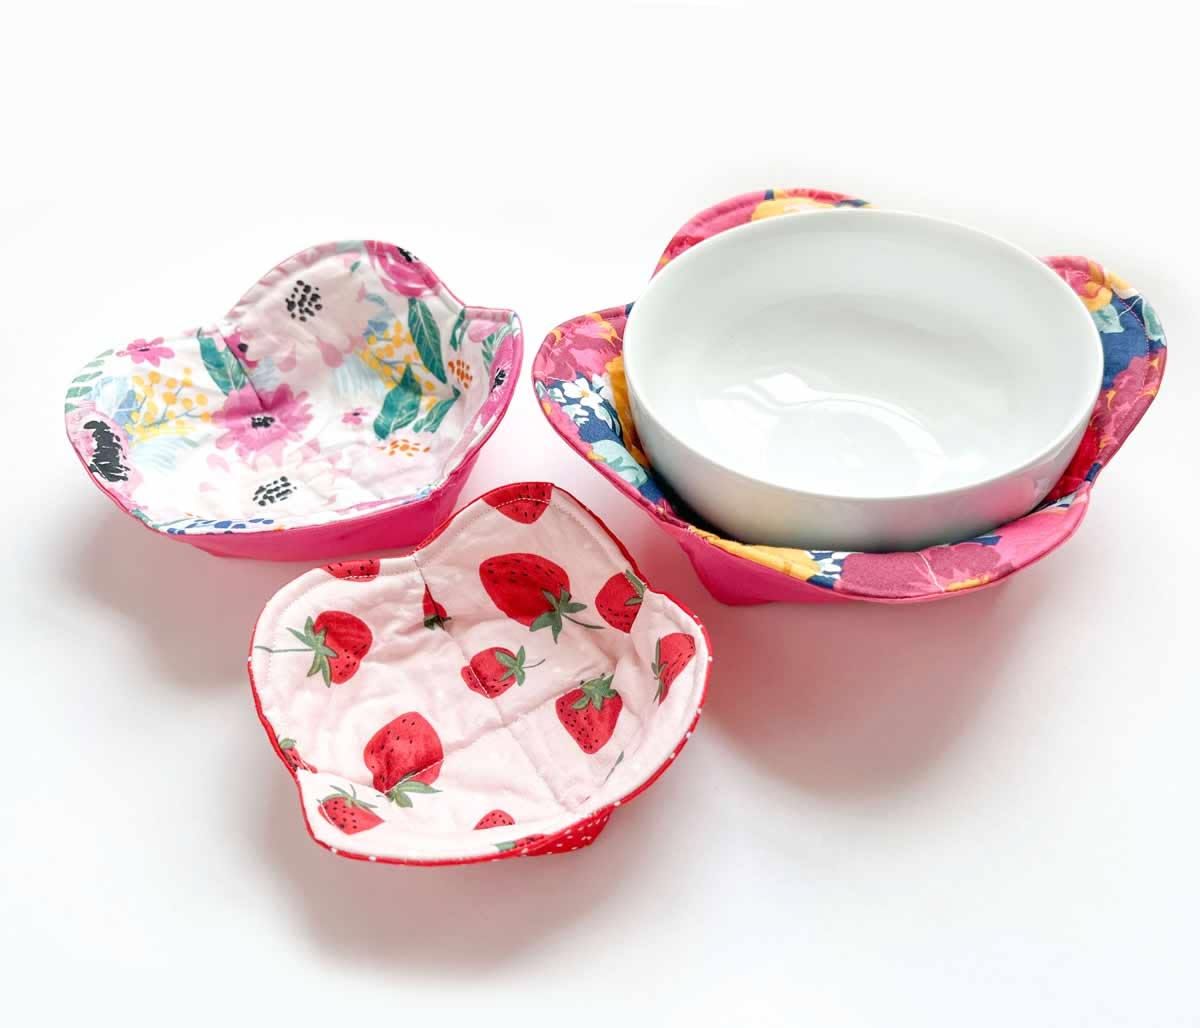
Photo credit: @ Didi
The word reversible gets used a lot in bowl cozy tutorials, but not every cozy that calls itself reversible actually holds up when you flip it over.
So before you cut any fabric, let’s talk about what reversible really means here.
Reversible Does Not Just Mean Two Fabrics
Most bowl cozies are made with two fabrics. That part is standard. But two fabrics alone does not make a cozy reversible.
If you flip it over and the seams are raw, the binding only looks neat on one side, or the stitching is exposed, that cozy is not reversible. It just has a back and a front.
A genuinely reversible bowl cozy is clean and intentional on both sides. Either side you use looks like the right side. That gives you two usable surfaces from one project, which means more style options and a cozy that wears evenly over time instead of one side taking all the use.
Small difference in construction. Big difference in the finished result.
To avoid wasting money on unnecessary tools, 11 Essential Sewing Tools for Sewists That Help Improve Accuracy and Stay Budget-Friendly helps you focus only on affordable essentials that actually improve your sewing results.
Materials You’ll Need for This DIY Reversible Bowl Cozy Sewing Tutorial
Before you start sewing, get everything together. It saves you from stopping mid-project to hunt things down.
Fabric and Filling
- Two 100% cotton fabric squares, each cut to 8.5″ × 8.5″, this size fits a standard soup or cereal bowl comfortably
- One batting square, also 8.5″ × 8.5″ — cotton batting or Insulbrite, whichever you chose from the previous section
- Binding strips cut 2.5″ wide, enough to total around 36″ in length
- Thread — 100% cotton thread is ideal, but polyester thread works fine too
Sewing Supplies
- Sewing machine with a standard presser foot
- Fabric scissors
- Ruler or measuring tape
- Tailor’s chalk or a fabric marker
- Sewing pins or clips
- Iron and ironing board
Building real confidence with Beginner’s Guide to Sewing Machine Basics You’ll Actually Use helps you finally understand your machine in a practical way, so you can stop guessing and start sewing with control and ease.
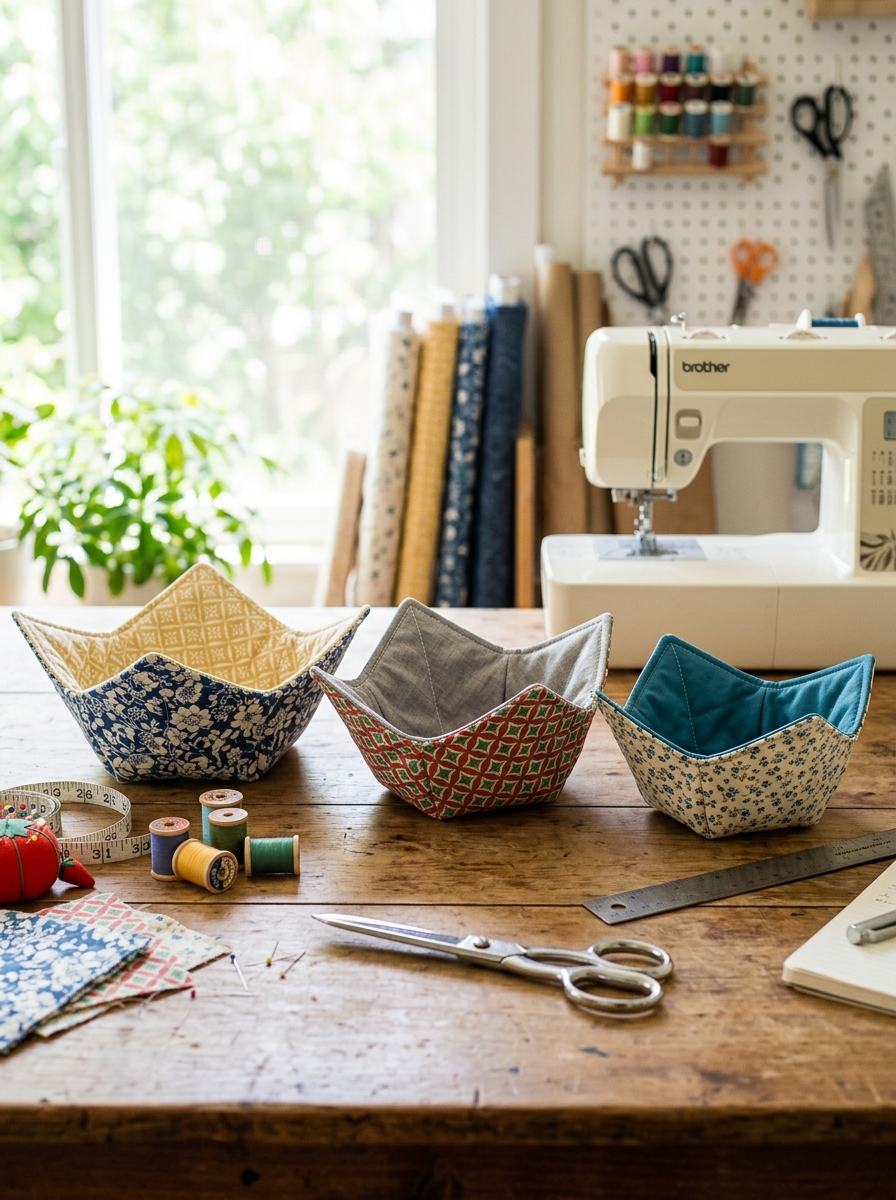
Step-by-Step: How to Sew Your Reversible Bowl Cozy
How to make video credit:@ Rebecca Plank
Step 1: Cut Your Fabric and Batting
Cut all four pieces to 10″ × 10″:
- Two cotton fabric squares
- Two batting squares
One fabric square is your outside fabric, the one people will see most. The other is your inside fabric. Set them aside separately so you do not mix them up while sewing.
Step 2: Layer and Quilt Each Piece
Take one fabric square and lay it flat with the wrong side facing up. Place one batting square directly on top of it and smooth it flat so there are no wrinkles or bubbles between the layers.
If your batting is fusible, meaning it has a slightly rough, adhesive side, press it onto the fabric with a hot iron for a few seconds until it bonds. If it is regular batting, pin the two layers together around the edges so they stay in place while you sew.
Repeat this for your second fabric and batting square. You will have two layered pieces when done.
Now quilt each piece. To do this, sew a diagonal line from one corner to the opposite corner, then sew another diagonal line from the remaining two corners so you have an X across the whole square. Add a few more parallel lines on each side of the X about an inch apart.
This stitching is what holds your batting permanently in place. Without it, the batting shifts and bunches inside after the first wash and your cozy loses its shape.
Step 3: Mark Your Darts
The darts are what transform your flat fabric square into a cozy that actually curves and hugs your bowl. Do not skip this step or rush through it.
Take one quilted piece and fold it in half so two corners meet. You will be working on the folded corner, the corner where the fold is, not the open edges.
At that folded corner, make two marks with your fabric chalk:
- First mark: measure 1 inch along the fold from the corner tip and mark that point
- Second mark: measure 2 inches up the folded edge from the same corner tip and mark that point
Now draw a straight line connecting those two marks. That line is your dart, a small triangle shape at the corner.
Repeat this on all four corners of both quilted pieces. You will have eight darts total, four on each piece.
Step 4: Sew the Darts
Sew slowly and carefully along each dart line you marked. When you reach the end of each line, backstitch a few stitches to secure it so it does not unravel with use.
Once all darts are sewn, trim the small triangle of excess fabric at each corner. Cut close to your stitching line but not too close, leave about a quarter inch between your cut and your stitches. Cutting too close can cause the seam to fray and weaken over time.
When you open each piece flat after sewing the darts, you will notice the fabric naturally curves upward at the corners into a shallow bowl shape. That is exactly right. Both pieces should look identical at this point.
Step 5: Assemble the Cozy
Place both quilted bowl pieces together with the right sides facing each other, meaning the pretty sides of both fabrics are touching on the inside and the batting sides are facing outward.
Pin all the way around the curved edge to keep everything aligned while you sew.
Sew around the entire edge using a quarter inch seam allowance. Go slowly around the curved sections so your stitching stays even.
Before you finish sewing all the way around, stop and leave a 3 inch gap unsewn along one of the flatter straight edges. This gap is your turning opening, you will pull the whole cozy through it in the next step. Mark the gap with two pins so you remember exactly where it is.
Step 6: Turn and Finish
Reach into the turning gap and carefully pull the cozy through to the right side out. Take your time here, pull gently and work the fabric through bit by bit so you do not stress the seams.
Once fully turned, use a blunt tool like a chopstick or the capped end of a pen to gently push out any corners or edges that did not turn fully. Run it along the inside edge all the way around until everything lies smooth and even.
Press the entire cozy flat with your iron. Pay extra attention to the turning gap, fold the raw edges inward neatly and press them flat so they are ready to be closed.
Finally, topstitch all the way around the outer edge of the cozy about an eighth of an inch from the edge. This one line of stitching does three things, it closes your turning gap permanently, it strengthens all the seams, and it gives your cozy a clean and polished finish.
Your reversible bowl cozy is done.
The Mistake That Ruins Everything
Skipping Step 2 — the quilting.
It feels unnecessary when you are looking at a flat, neat sandwich of fabric. Everything seems held together fine.
But without those quilting lines locking the batting in place, one trip through the washing machine is enough to shift everything. You end up with a lumpy, uneven cozy that does not sit right around your bowl.
Quilt the layers. It takes a few extra minutes and it is the difference between a cozy that lasts and one that disappoints you after the first use.
If your goal is to turn creativity into income, exploring Sewing Skills That Actually Make You Money (Even If You’re Just Starting) shows how simple techniques can be turned into sellable items even without advanced experience.
The Only Fabric That Works (And the Ones That Will Melt or Catch Fire)
This is the part most tutorials skip over quickly. But fabric choice here is a safety decision, not just a style one. So let’s talk about it properly.
Cotton.
The only fabric you should use for a bowl cozy is 100% cotton. Your cozy sits against a hot bowl, goes near a microwave, and gets washed regularly. Cotton handles all of that well.
Polyester melts under heat. Polyester blends can scorch or release fumes even if they look and feel fine at first. So when you are picking fabric, check the label. If it does not say 100% cotton, leave it out of this project.
Which Cotton Works Best
Quilting cotton is your best option. It has a tight, close weave which holds up well to heat and washing. Batik cotton works the same way. Both are easy to find at any fabric shop.
Avoid anything thin or loosely woven. A simple way to check, hold the fabric up to light. If you can see through it easily, it is too thin for a bowl cozy.
And when fabric leftovers start piling up, What to Do With Fabric Scraps: Sewing Hacks That Turn Leftovers Into Keep-Worthy Gifts gives you smart, creative ways to turn small pieces into meaningful and usable projects instead of throwing them away.
Cotton Batting or Insulbrite — Which One Do You Need

The middle layer of your cozy does the most work. You have two good options.
-
Cotton Batting:
absorbs heat from the bowl and holds it within the fibres. It is affordable, easy to find, and washes well. If you are making your first bowl cozy, start here.
-
Insulbrite:
reflects heat instead of absorbing it. It is the same material used in oven mitts. It works well in bowl cozies and is a good choice if you also want your cozy to protect surfaces like a trivet.
Both are safe. Cotton batting is the simpler choice for beginners.
No Label? Do the Burn Test
Snip a small thread from your fabric. Hold it with tweezers and briefly touch a flame to it, then pull the flame away.
Cotton burns cleanly, smells like paper, and the ash crumbles easily. It stops burning once the flame is gone.
Polyester melts, smells chemical, and leaves a hard little bead at the end. It may keep glowing after the flame is removed.
If your fabric behaves like polyester, set it aside. If it burns clean like cotton, you are good to go.
Many sewists overlook everyday opportunities, but Kitchen Sewing Projects That Save Money, Reduce Waste, and Make Great Gifts reveals how useful items around the home can become practical, giftable creations instead of store-bought expenses.
Sizing Variations: Making It Fit More Than One Bowl
The 8.5″ square is your standard size and it fits most everyday bowls well. But once you get comfortable with the project, it is worth knowing how to adjust the size for other bowls in your kitchen.
The Three Common Sizes
7″ square — fits espresso cups and ramekins. Good for a small dessert dish or a single-serve baking dish straight from the oven.
8.5″ square — your everyday size. Fits cereal bowls, soup bowls, and oatmeal bowls without any adjustment.
10″ square — fits pasta bowls and larger serving dishes. If you regularly eat from wide, shallow bowls, this is your size.
How to Size Any Bowl You Own
You do not have to guess. Measure the diameter of your bowl across the top opening, then add 2.5″ to that number. That is your square size.
So if your bowl measures 6″ across, you cut 8.5″ squares. If it measures 7.5″ across, you cut 10″ squares.
That extra 2.5″ gives the cozy enough fabric to fold up around the sides of the bowl and hold its shape when you pick it up. Too little and the cozy sits flat like a mat. Too much and it flops over loosely and does not grip.
Measure once, cut right, and your cozy will fit like it was made for that bowl, because it was.
One Last Thing
This reversible bowl cozy sewing tutorial exists for one reason, to get you making something useful with fabric you probably already have.
You now know the right materials, the correct construction order, and the mistakes to avoid. Everything you need is already here.
Cut your fabric and start sewing. It is simpler than you think once you begin.
And if you make one, share it. We would love to see yours.
FAQ
Can I Use Fleece Instead of Cotton?
No. Fleece is polyester. It melts under heat and is not safe for this project. Stick with 100% cotton.
What If I Don’t Have A Sewing Machine?
You can hand stitch the quilting and the binding, but the binding step will take more time and patience. It is doable — just slower.
Is it Safe To Leave The Cozy On The Bowl Inside the Microwave?
Yes, that is exactly how it is used. Just keep microwave intervals to three minutes or less before checking.
Can I Use It As A Hot Pad For Pots?
No. A bowl cozy is not built for stovetop heat. That level of heat needs a proper pot holder or oven mitt.