Hand embroidery projects for beginners — 19 simple ideas arranged from easiest to most satisfying. Real stitches, real results, no experience needed.”
Most people think embroidery takes years to master. It doesn’t. It takes the right projects.
Here’s what nobody tells you when you’re staring at a hoop and a needle wondering where to start: you don’t need a library of techniques. You need maybe three stitches; Running stitch. Backstitch. Stem stitch. Learn those, and you have everything you need to finish dozens of projects before you ever have to open a new tutorial.
That’s the real promise here, not that you’ll become an expert overnight, but that you’ll make things you’re genuinely proud of, starting this week. The results don’t care how long you’ve been at it, but care whether you chose the right starting point.
Everything on this list was chosen with that in mind. It’s arranged from the simplest (we’re talking first-day simple) to slightly more satisfying, the kind of project that makes you pause and think I made that. So it doesn’t matter where you’re at right now.
There’s something on this list with your name on it.
Before you dive in, if you’re completely new and want a quick rundown of the stitches you’ll be using, check out our beginner’s guide first on How to Start Embroidery as a Beginner -Step-by-Step Guide for Complete Beginners, it’ll take you twenty minutes and make everything below click faster.
Ready? Let’s get into it.
What You Need for Every Project
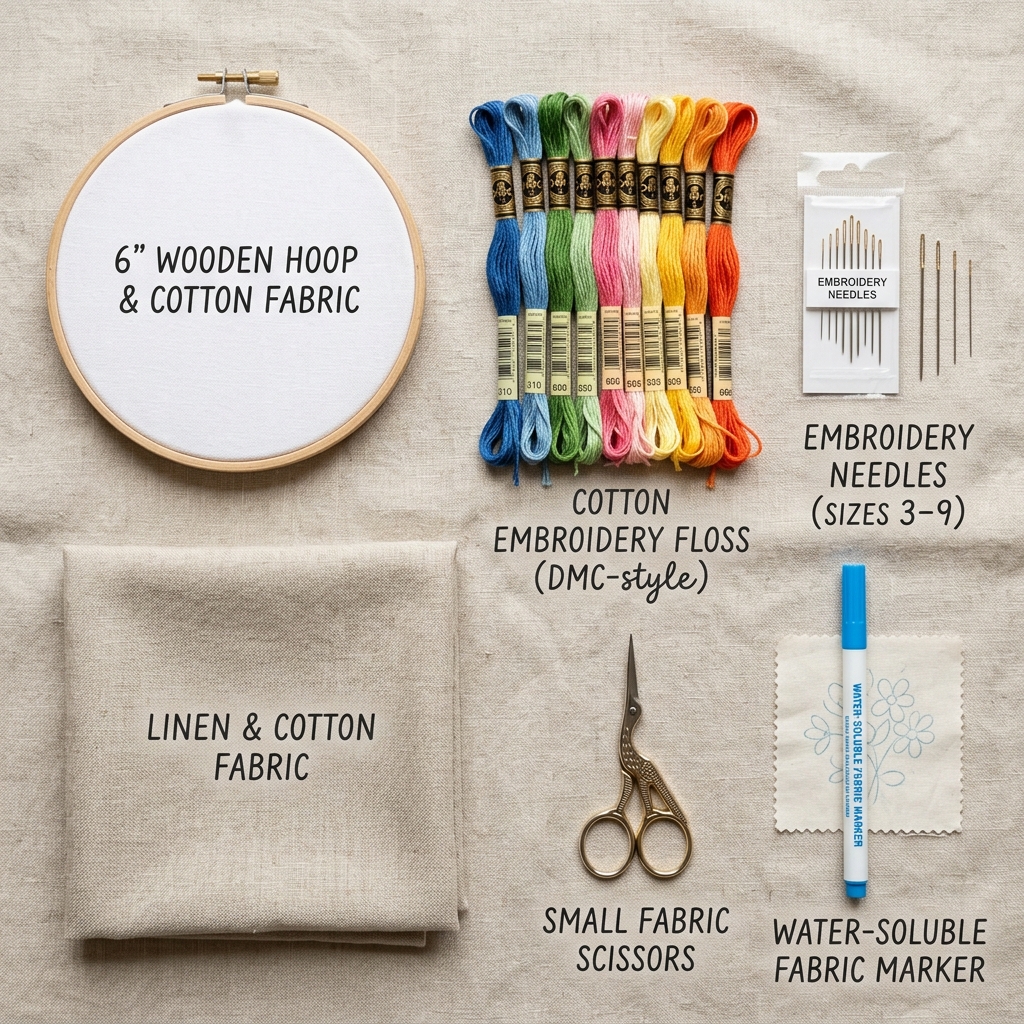
You really don’t need much. Just grab these six things and you’re ready for every project below.
- Embroidery Hoop — 6-inch is the sweet spot for beginners. Wooden or plastic both work fine.
- Cotton Embroidery floss — DMC is your best bet. It’s affordable and available almost everywhere in the world.
- Embroidery Needles — sizes 3–9 for hand embroidery. A mixed pack covers you.
- Cotton or Linen Fabric — quilting cotton is ideal. Cheap, widely available, and behaves well under a hoop.
- Small Scissors — dedicated fabric scissors make a difference. Don’t use your kitchen pair.
- Water-soluble Fabric Marker — for tracing your designs onto fabric. It washes out clean when you’re done.
Little-known tip: Keep your fabric drum-tight in the hoop, and re-tighten it every 15 minutes as you work.
Fabric loosens as you stitch, and that slack is exactly what causes puckering and uneven stitches. Most people only figure this out after ruining a project. Now you know before you start.
For a more decorative craft path, How to Make Resin Jewelry with Real Flowers That Looks Professional at Home shows how to turn natural elements into elegant handmade accessories.
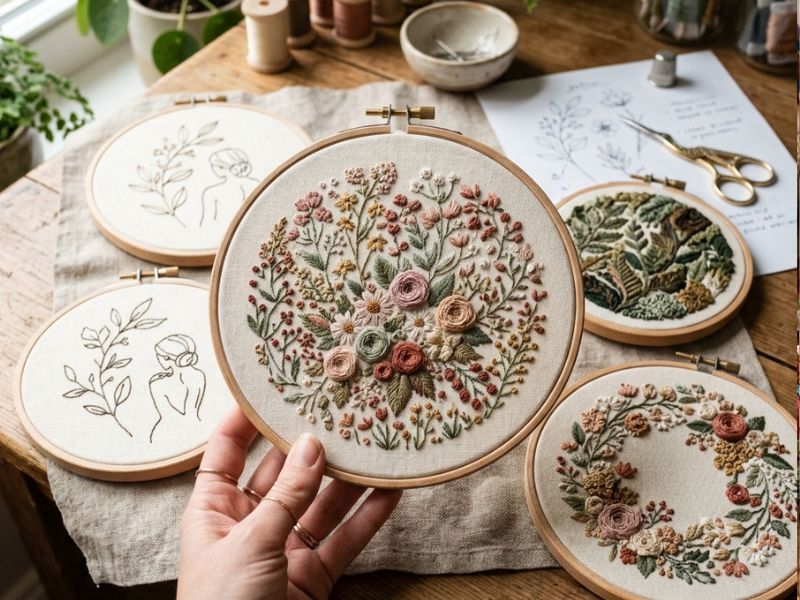
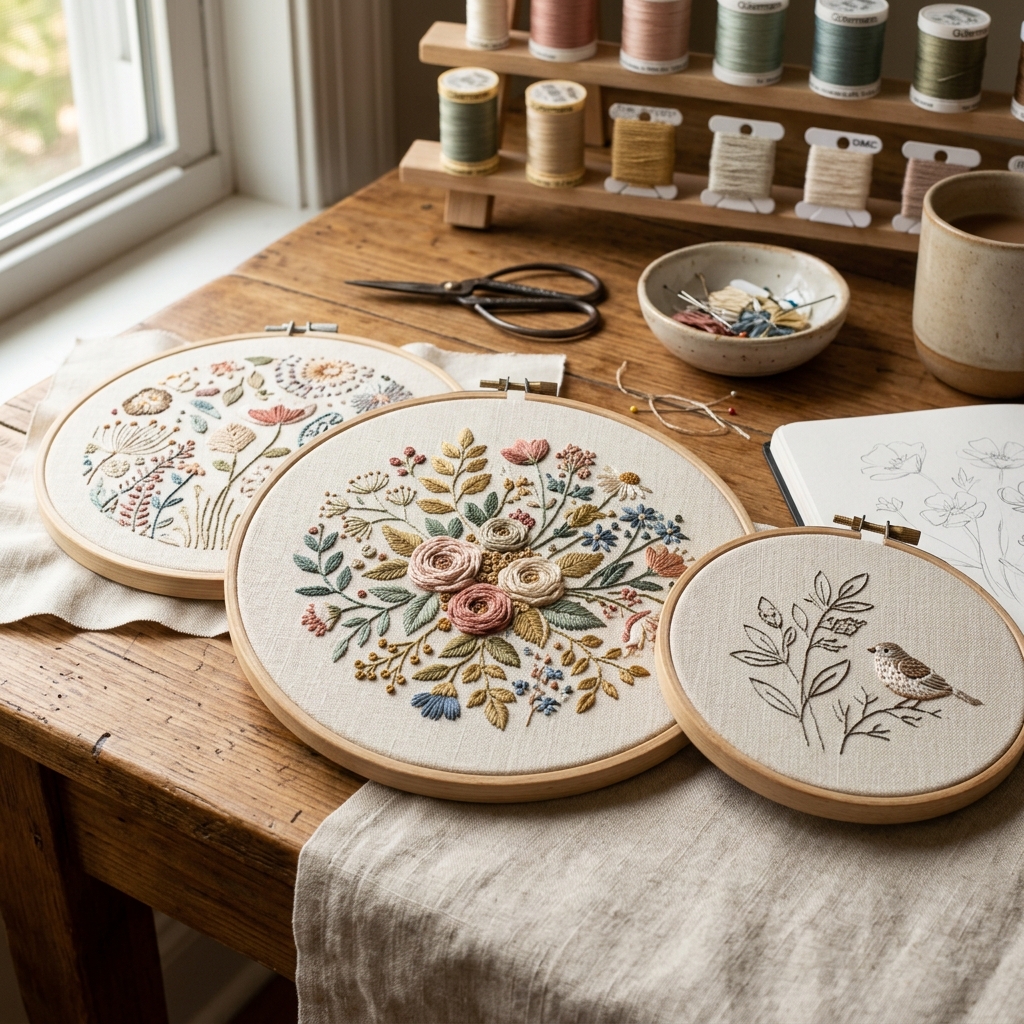
1. Hoop Art
These live on your wall and look like they came from a boutique. Nobody needs to know how long they actually took.
1. Simple Wildflower Bouquet Hoop
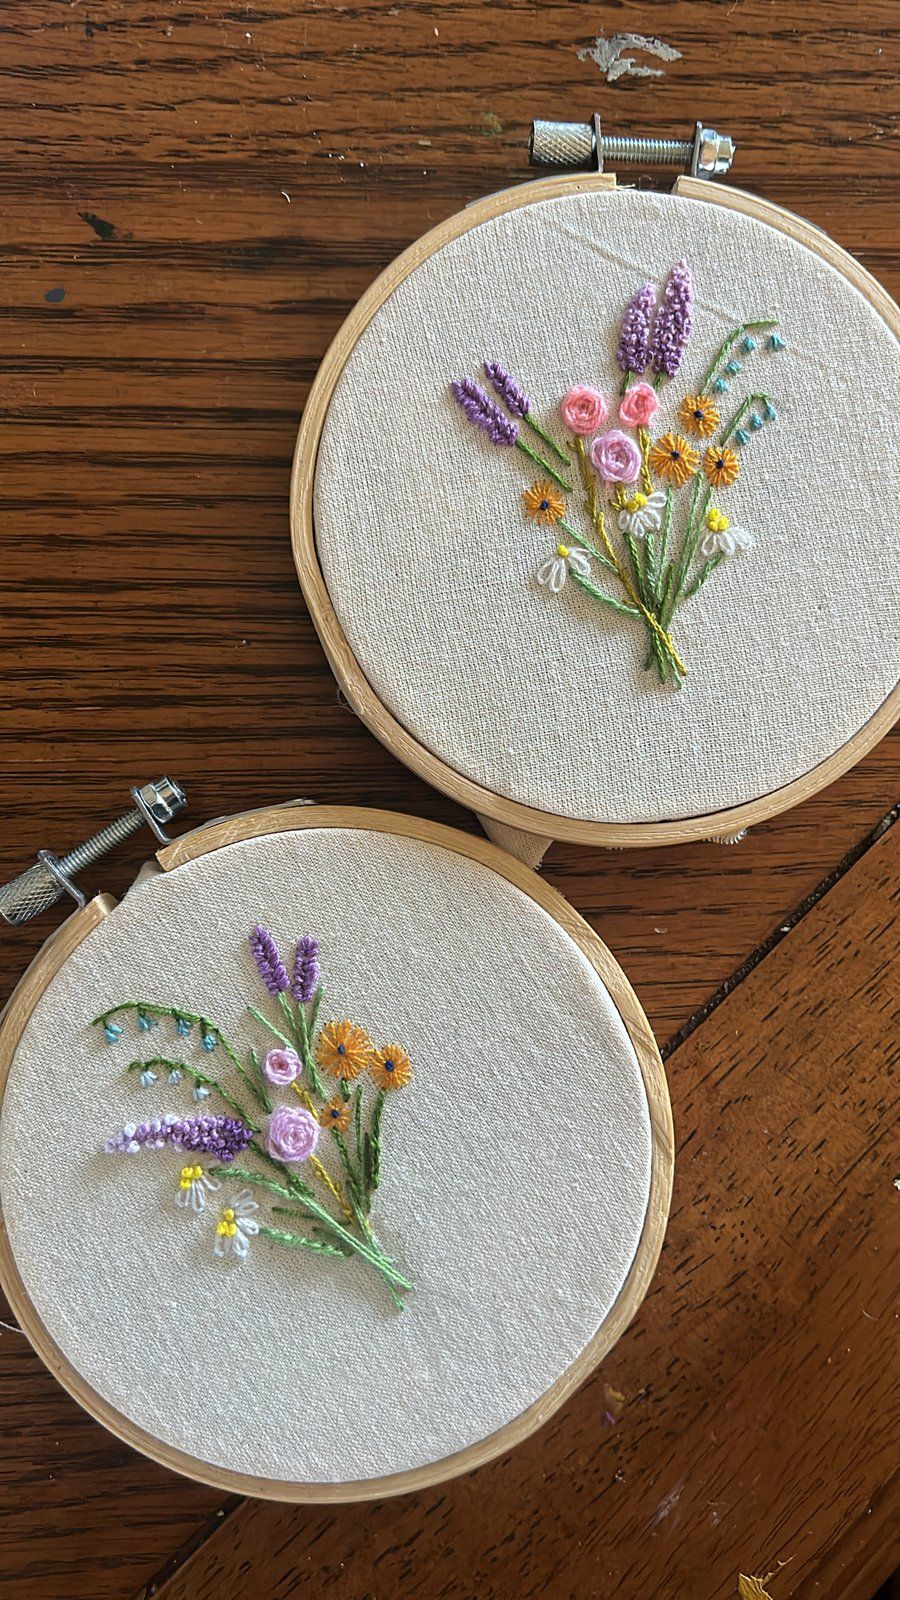
Stitches: Lazy daisy for petals, stem stitch for stems, French knots for flower centres.
Why it looks hard but isn’t: Lazy daisy is one of those stitches that gives you immediate results — each petal is one loop and suddenly you have a flower. Stack a few together with some stem stitch stalks and French knot centres and you have a bouquet that looks like it took real skill. It didn’t. It took patience and the right stitch.
What you do with it: Leave it in the hoop and hang it straight on the wall. It’s ready the moment you tie off your last thread.
2. Single Botanical Leaf (Monstera or Fern)
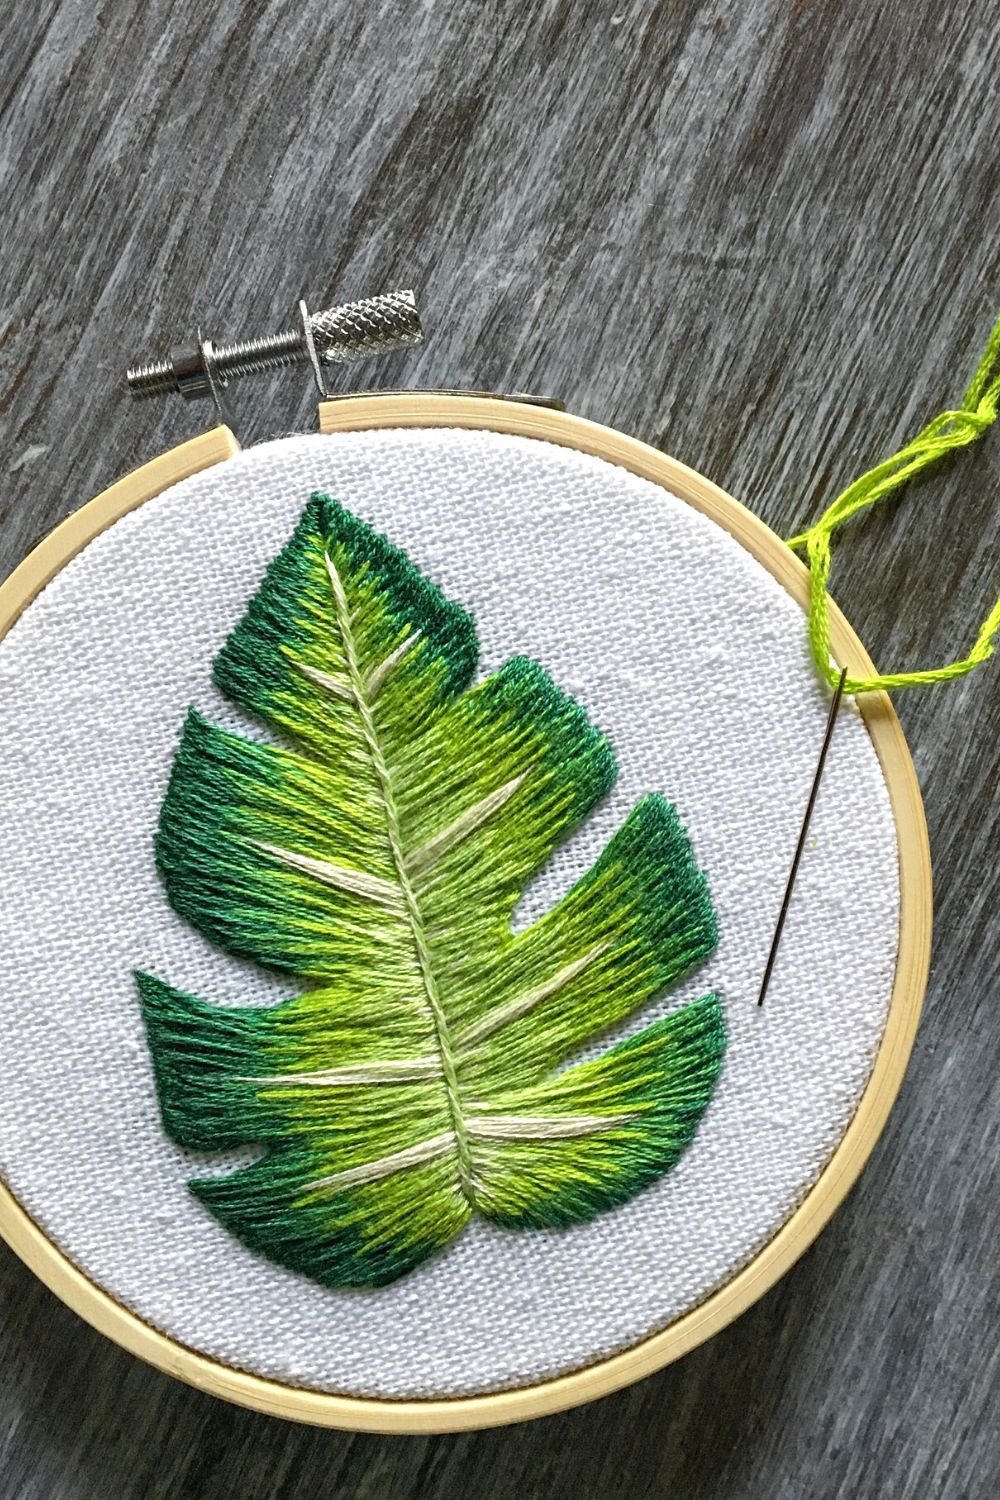
Stitches: Stem stitch for the outline, satin stitch to fill.
Why it looks hard but isn’t: There’s something about a single botanical leaf that looks expensive and intentional. One monstera leaf outlined in stem stitch and filled with satin stitch in a 4-inch hoop is a complete piece. Nothing missing. Nothing extra needed. Simplicity is doing all the work here and it works every single time.
What you do with it: Hang it, gift it, or stitch the same design onto a tote bag pocket. It translates to almost anything.
3. Constellation Hoop Art
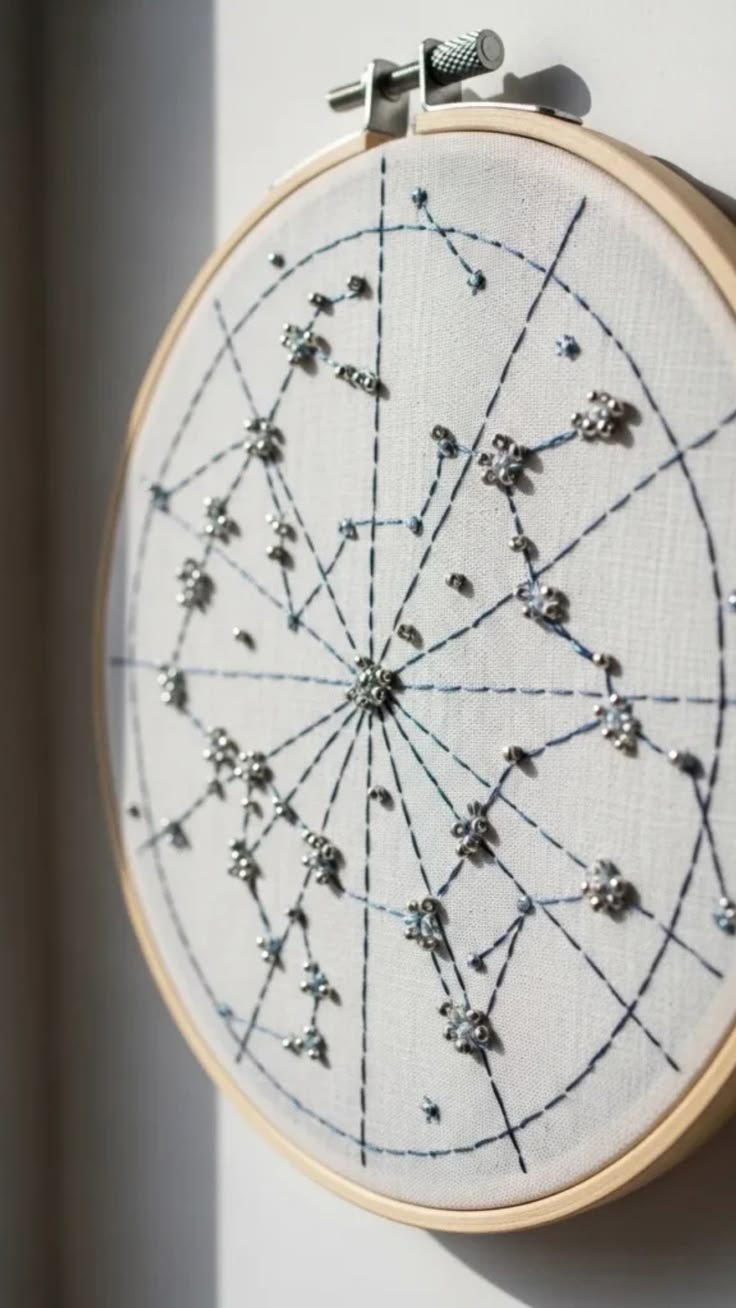
Stitches: French knots for stars, backstitch for connecting lines.
Why it looks hard but isn’t: Every star is one French knot. The lines between them are just backstitch. What makes this piece look impressive isn’t the technique, it’s the concept. Pick a constellation that means something to you or the person you’re making it for and the emotional weight does the rest.
What you do with it: It’s one of the best personalised gifts you can make. Someone’s birth constellation stitched and framed hits differently than anything you’d find in a shop.
4. Abstract Geometric Shapes
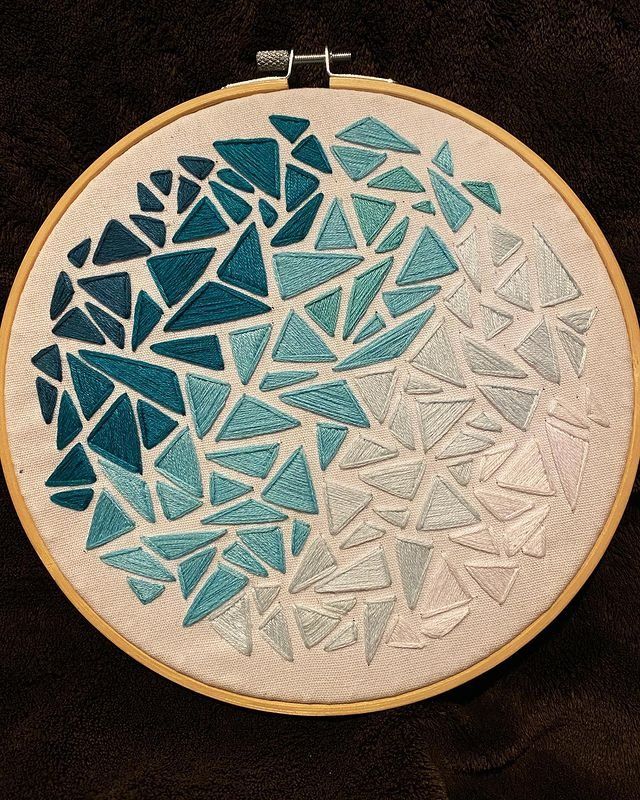
Photo credit: @ embroyderyanddoddles
Stitches: Running stitch, backstitch.
Why it looks hard but isn’t: Bold colours and clean lines make this look more complex than it is.
A geometric heart, diamond, or star needs two stitches and a steady hand. That’s the whole secret. No blending, no shading, just satisfying lines that come together quicker than you’d expect.
What you do with it: Frame it as hoop art or turn it into a patch for a jacket or bag. Geometric pieces are endlessly versatile and always look intentional.
5. Inspirational Word or Quote Hoop
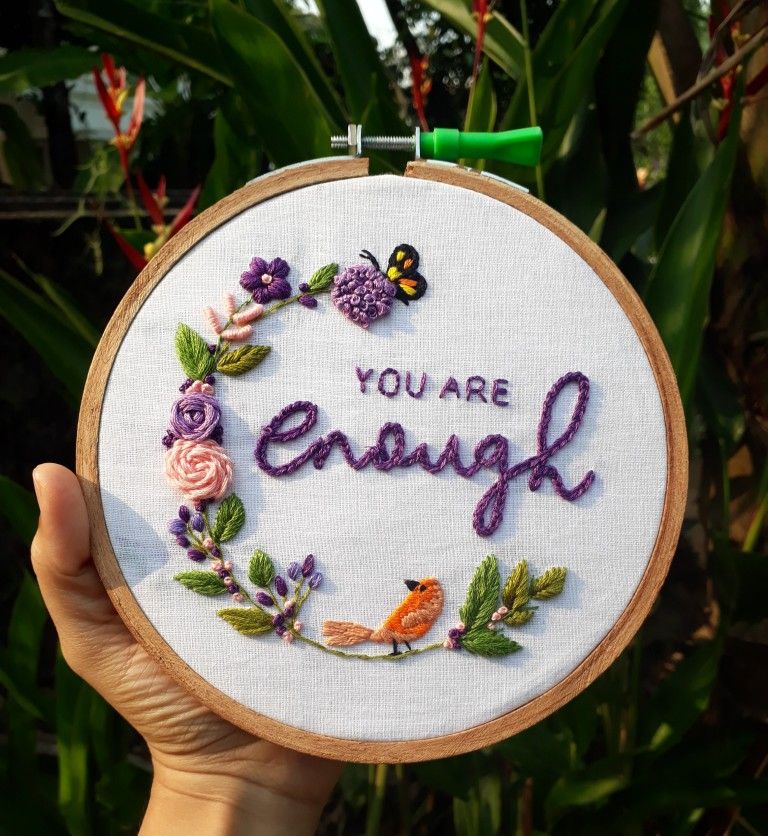
Photo credit: @ Kavya Nandu
Stitches: Backstitch for lettering.
Why it looks hard but isn’t: Lettering looks like the hardest thing to stitch until you try it. Trace your word lightly with your water-soluble marker, follow the line with backstitch, and watch it take shape letter by letter.
The marker washes away. The words stay. It’s slower than the other projects but the payoff is personal in a way nothing else on this list is.
What you do with it: Pick a quote that actually means something to you, people feel that when they read it on your wall. It also makes one of the most thoughtful handmade gifts you can give someone.
Once you’re comfortable with creative DIY projects, you can expand into home décor by learning How to Make Scented Candles at Home That Look and Smell Professional– Step-by-Step Guide, which walks you through making polished, gift-worthy candles.
2. Wearables You’ll Actually Use
Hand embroidery projects aren’t just for frames and walls. Some of the most satisfying work you’ll do is on things you already own and wear every day.
This category is about personalising what’s already in your wardrobe, and the thing is fabric like denim and cotton is forgiving, stable, and perfect for practising real stitches on real surfaces.
6. Floral Patch on a Denim Jacket Pocket
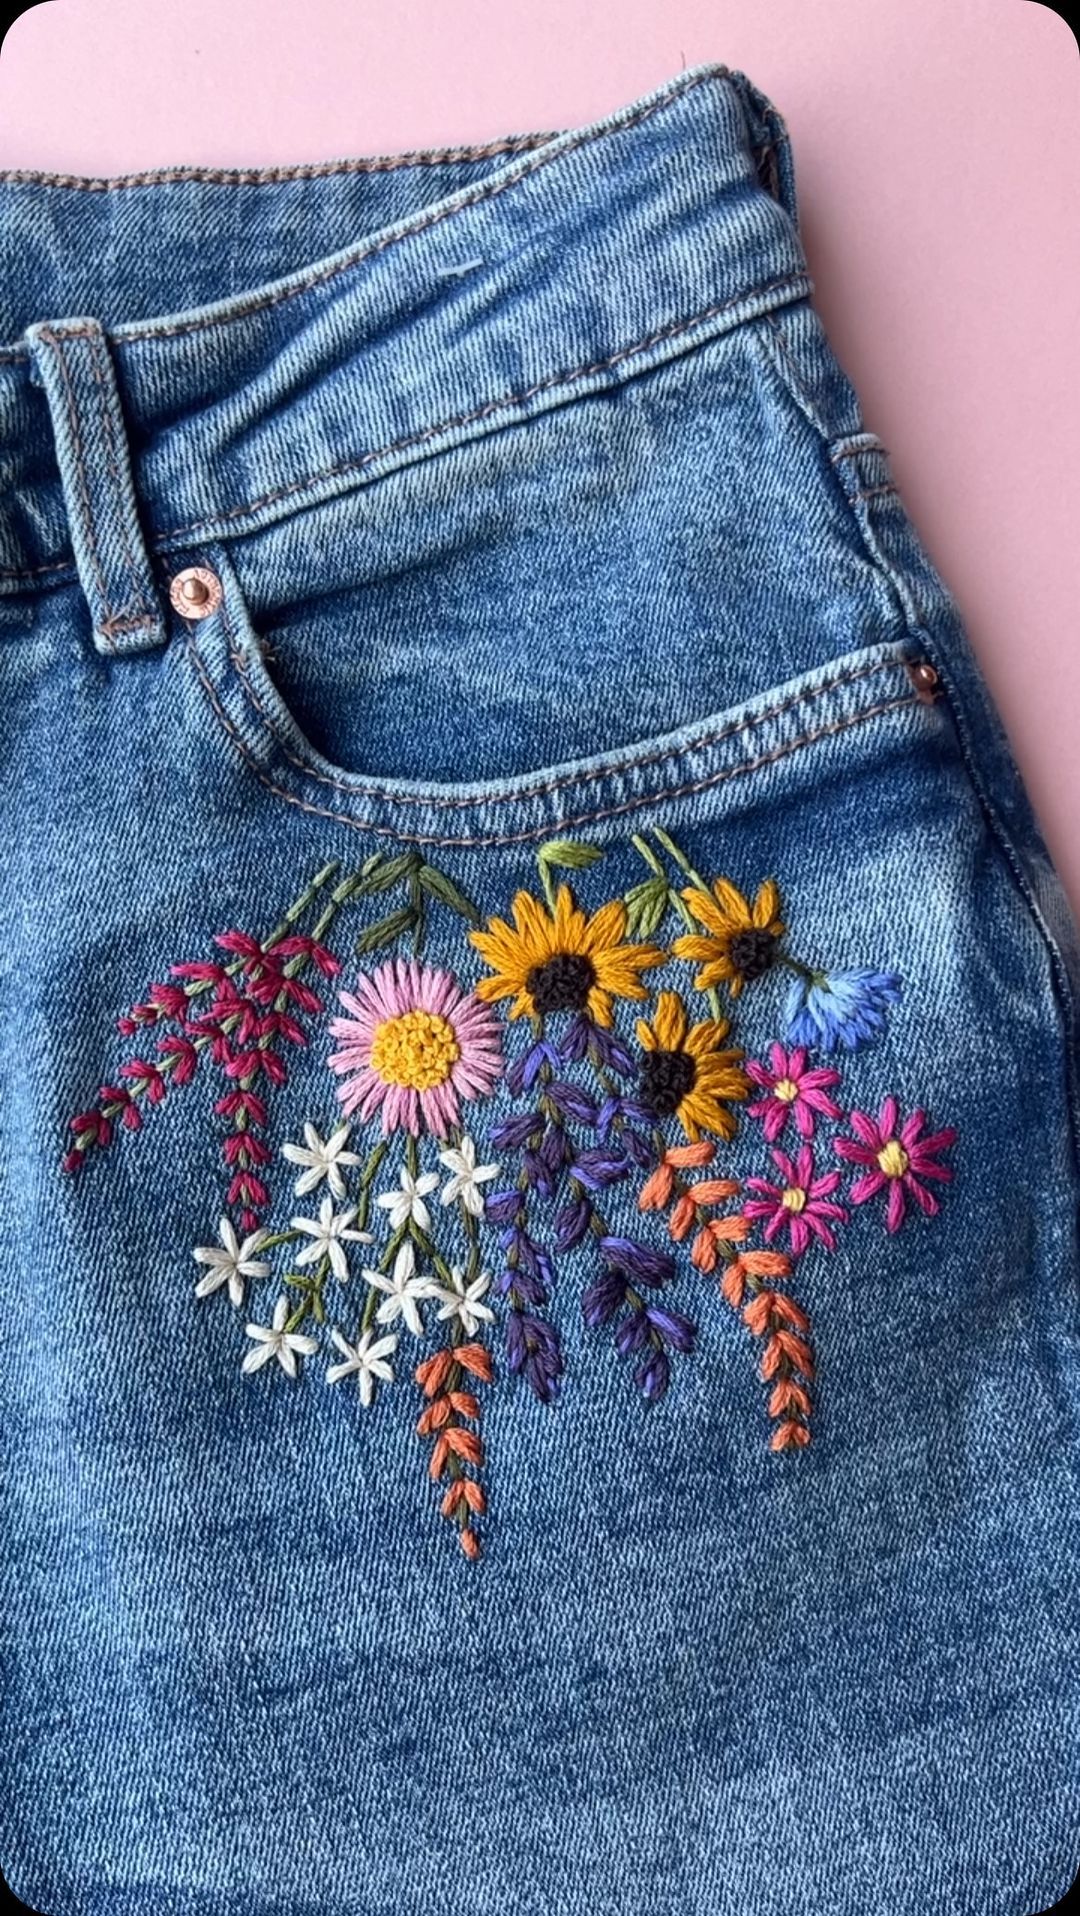
Photo credit: @ Toni Ross
Stitches: Stem stitch, lazy daisy, French knots.
Why it looks hard but isn’t: Denim is one of the most beginner-friendly fabrics you can stitch on. It’s thick, it holds its shape, and it doesn’t shift or pucker the way lighter fabrics can.
A small flower cluster, a few lazy daisy petals, some French knot centres, a stem stitch stalk, sits beautifully on a jacket pocket and transforms the whole piece. You’re not covering the jacket. You’re adding one small detail that makes it look entirely yours.
What you do with it: Wear it. That’s the whole point. Hand embroidery projects like this one are meant to live in the world, not behind glass.
7. Monogram on a Plain Tote Bag
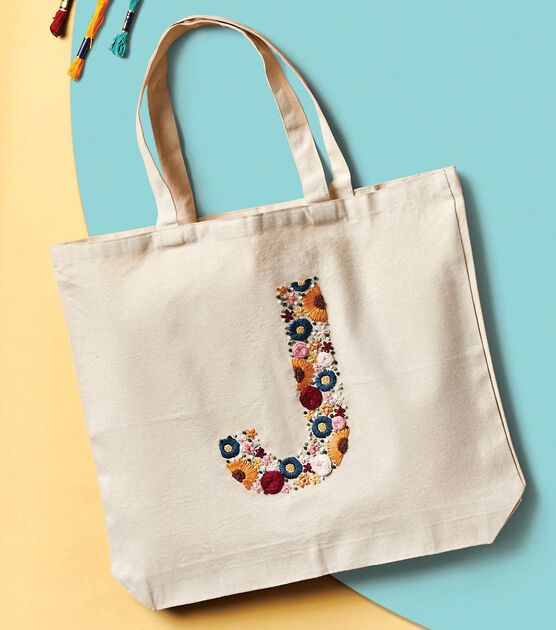
Photo credit: @ Bree Juarez
Stitches: Backstitch or chain stitch for letters.
Why it looks hard but isn’t: A plain cotton tote is one of the best surfaces a beginner can work on. It’s flat, it’s stable, it hoops easily, and it doesn’t fight you.
Stitching your initials onto it in backstitch or chain stitch takes one sitting and turns a £1 bag into something that looks considered and handmade. Chain stitch gives you thicker, bolder letters. Backstitch gives you something cleaner and finer. Either works.
What you do with it: Use it daily or give it as a gift. A monogrammed tote is one of those hand embroidery projects that looks like you spent far more effort than you did.
8. Small Embroidered Patch on a T-Shirt Pocket
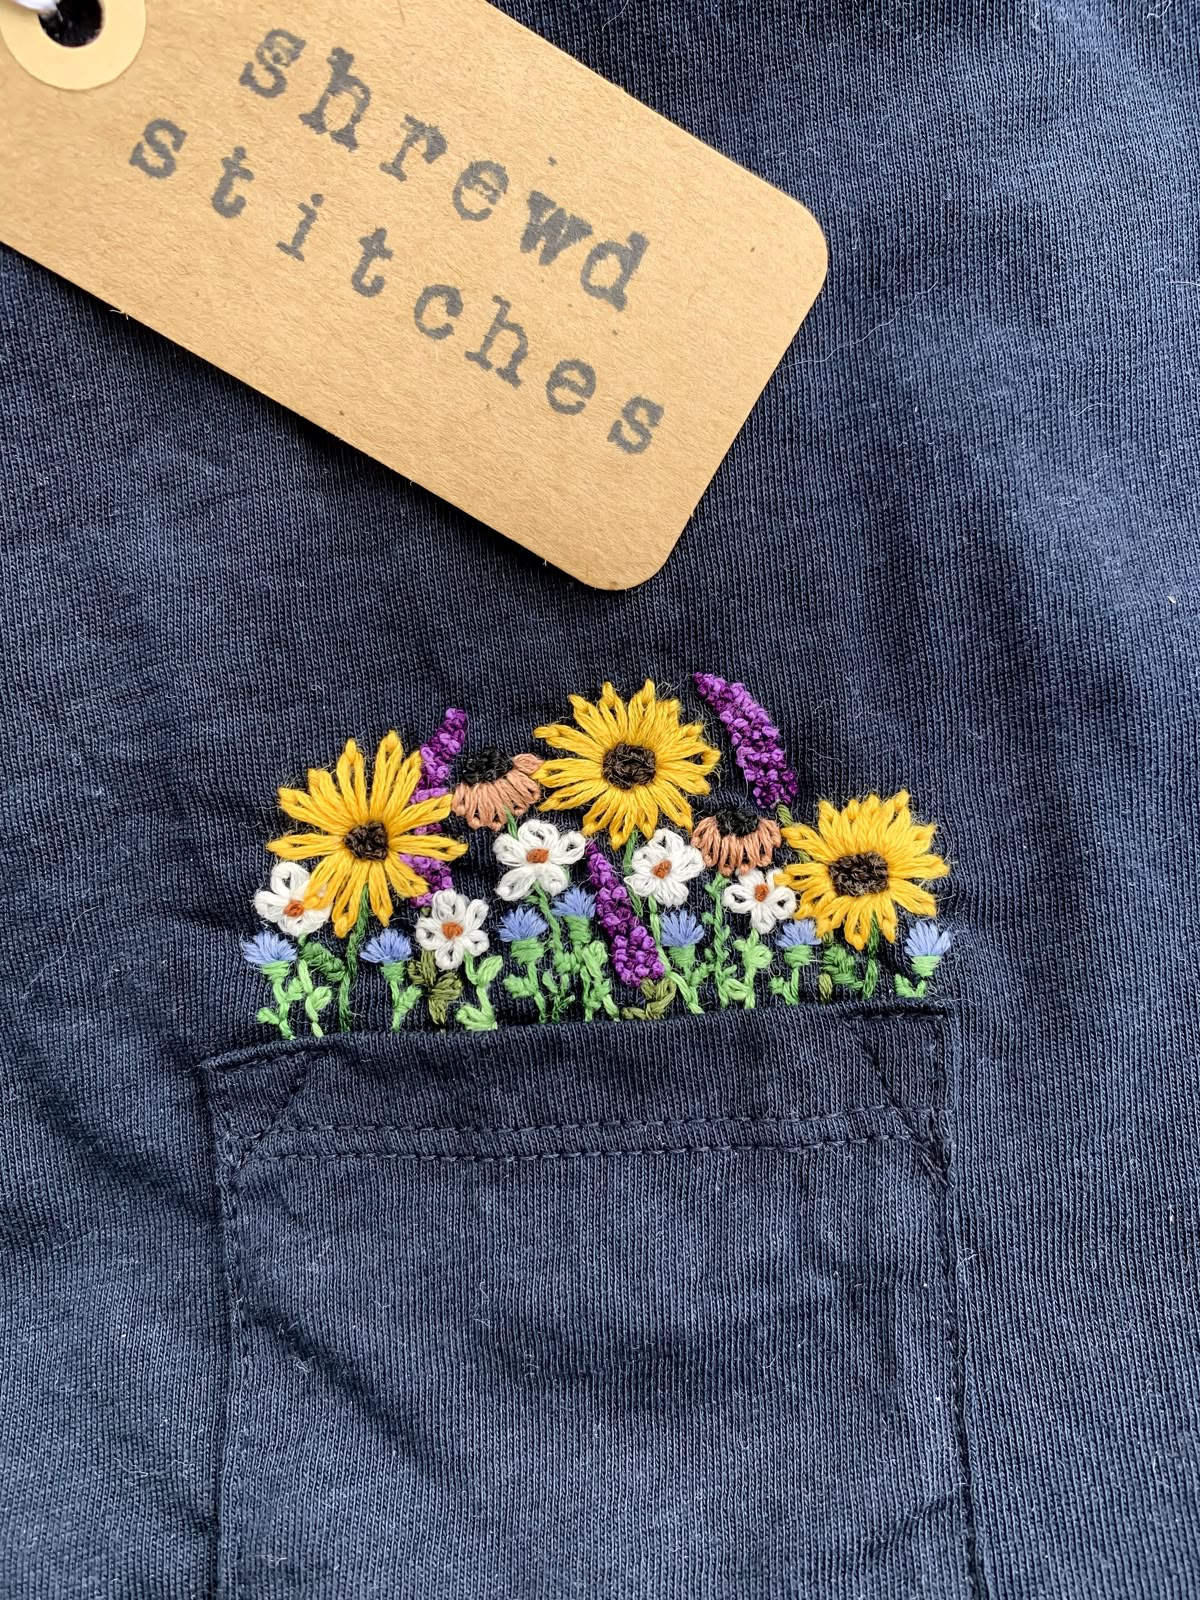
Photo credit: @ TJ
Stitches: Satin stitch, backstitch.
Why it looks hard but isn’t: This project teaches you something important, how to handle fabric outside the controlled environment of a hoop. A t-shirt moves differently than a piece of quilting cotton stretched tight.
Working on a chest pocket keeps the design area small and manageable, which means you’re learning to adapt without being overwhelmed. Satin stitch fills your motif cleanly, backstitch handles any outline work, and the finished result looks intentional and sharp.
What you do with it: A small sun, flower, or geometric shape on a plain white tee elevates the whole shirt. It’s the kind of detail people notice and ask about.
9. Embroidered Cuffs on a Plain Shirt
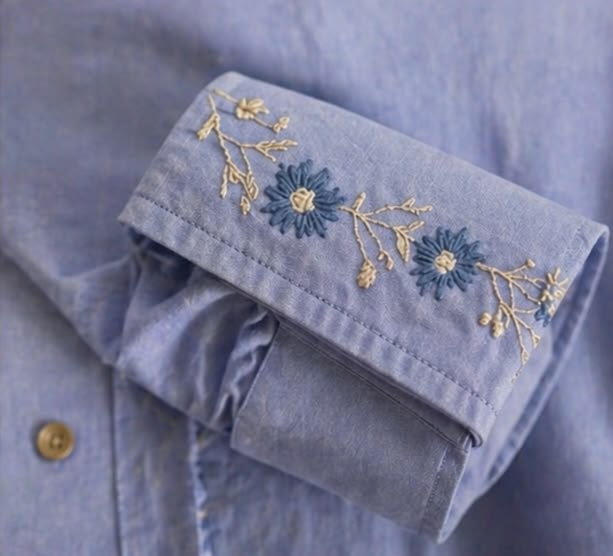
Photo credit: @ Irena Art Lab
Stitches: Running stitch border, small lazy daisy flowers.
Why it looks hard but isn’t: This is one of those hand embroidery projects that takes under an hour and looks like it took a weekend.
A running stitch border along the cuff edge is rhythmic, meditative work, just needle in, needle out, following the hem.
Add a few small lazy daisy flowers at intervals and suddenly a plain white shirt looks like something from a slow fashion brand. The repetition here is a feature, not a flaw. It’s how you build consistency and confidence at the same time.
What you do with it: Wear it exactly as it is. The cuffs do all the talking.
10. Small Motif on a Hat or Cap
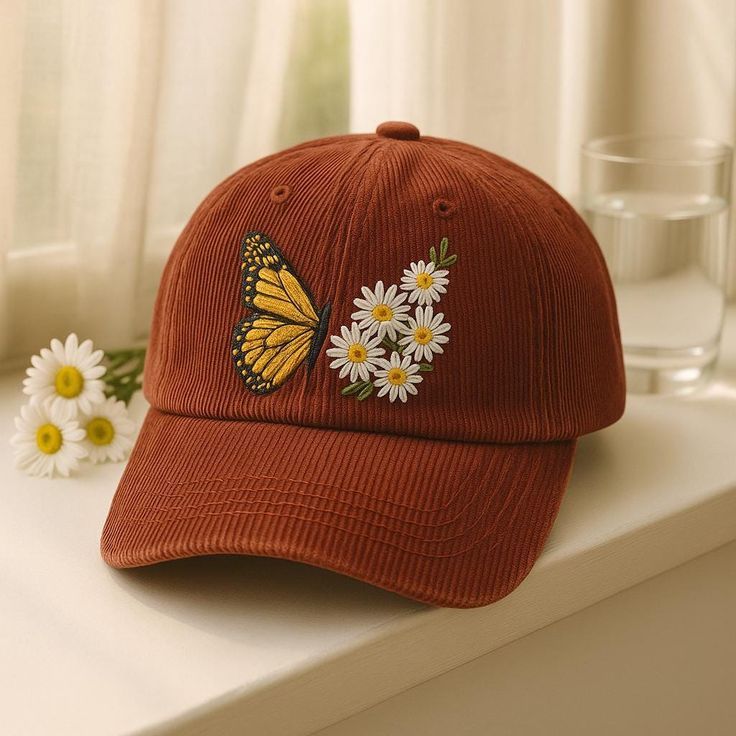
Photo credit: @ fashiondairy
Stitches: Backstitch, satin stitch.
Why it looks hard but isn’t: Hats feel tricky because of the curve, but keep your motif small, a word, a simple shape, a tiny icon, and the curve stops being a problem. Backstitch handles outlines and text cleanly.
Satin stitch fills any solid area with smooth, dense colour. The design is quick, the impact is high, and it’s one of those hand embroidery projects that makes people do a double take because custom embroidered hats look expensive. Yours won’t be.
What you do with it: It becomes your most-worn accessory. Or a gift that looks like it cost three times what it did.
If you’re exploring sellable craft ideas, 10 Cricut Crafts Beginners Always Struggle With- And How to Make and Sell Them helps you avoid common mistakes and turn beginner projects into profitable products.
3. Practical Home Items
These are hand embroidery projects that don’t just look good, they live in your home and get used.
A stitched tea towel in your kitchen, embroidered pillowcases on your bed, personalised napkins on your table. This category is where your craft starts making your everyday surroundings feel more intentional and more you.
11. Embroidered Tea Towel or Kitchen Cloth
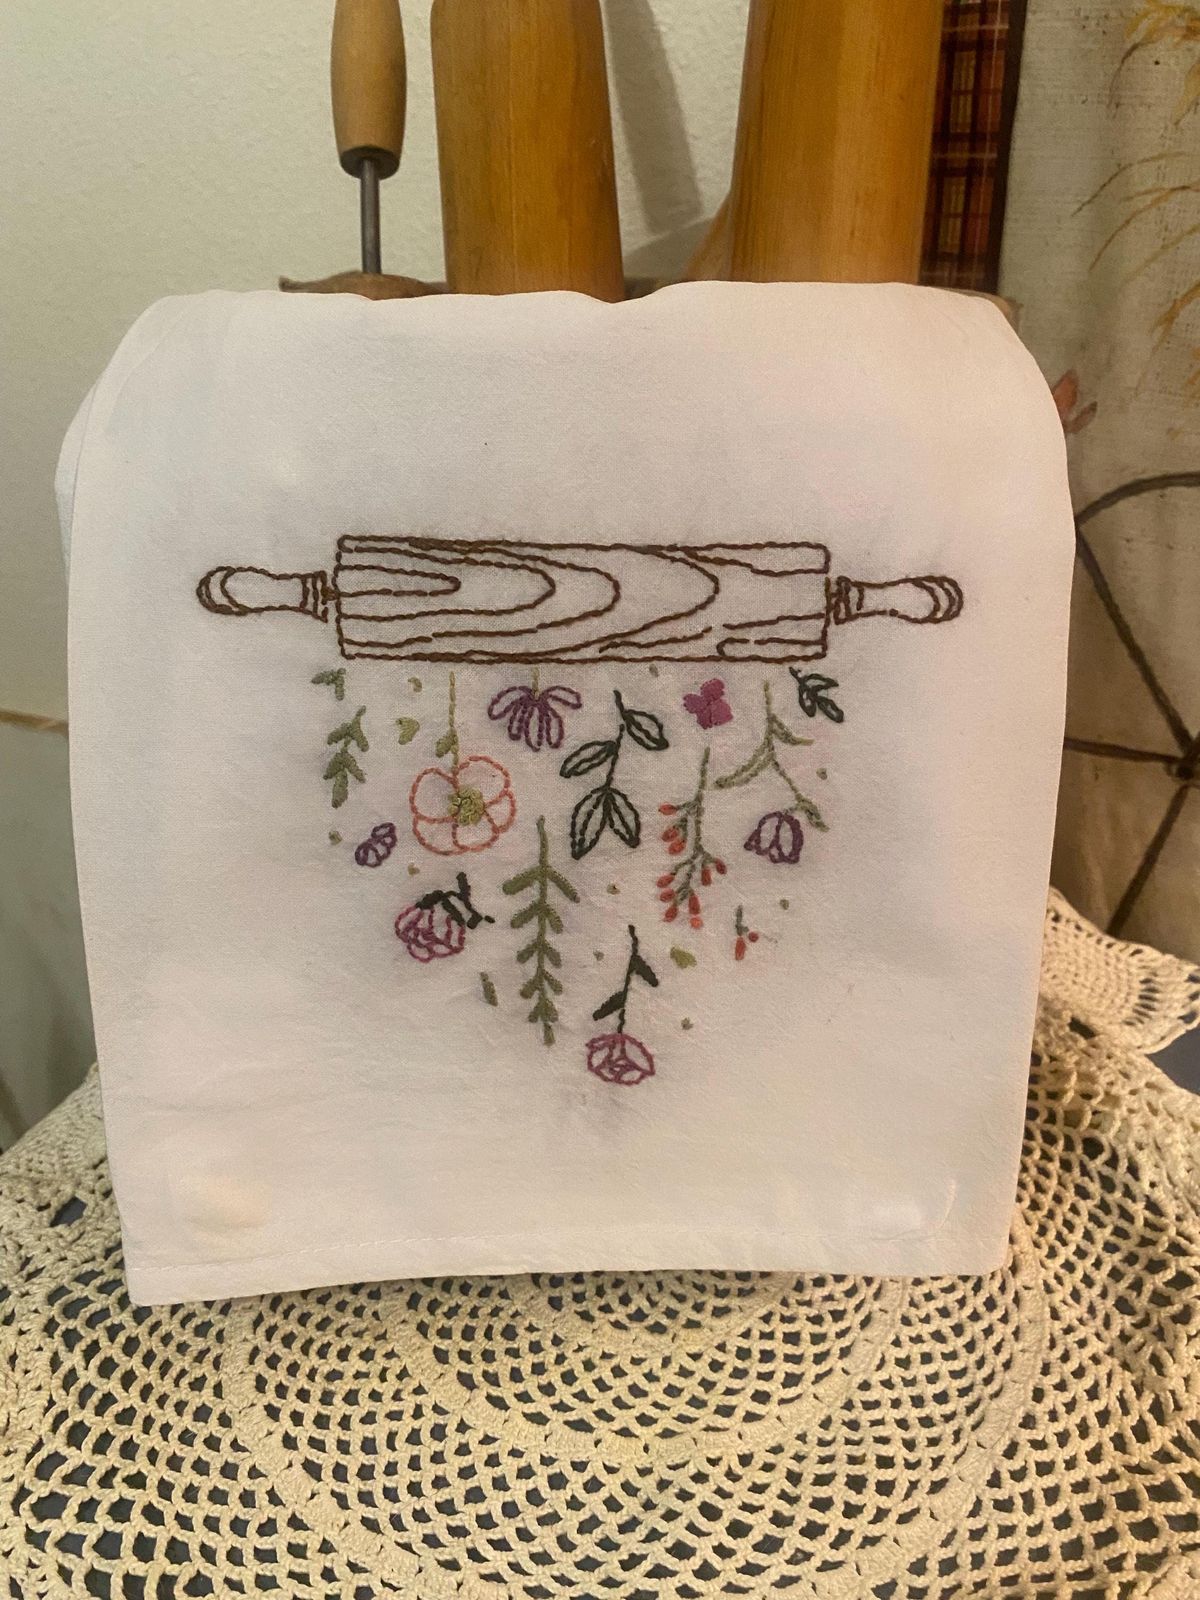
Photo credit: @ RosehillCottageArt
Stitches: Backstitch lettering, simple fruit or herb motifs.
Why it looks hard but isn’t: Flour sack towels and kitchen linens are genuinely one of the best surfaces to practise on.
They lie completely flat, take transfer designs easily, and because they’re already a utility item, there’s no pressure to make it perfect. Stitch a lemon, a sprig of rosemary, or a simple word like kitchen or home in backstitch and the result is immediately useful and immediately charming.
What you do with it: Hang it in your kitchen or gift a set. Hand embroidery projects on kitchen linens are some of the most appreciated handmade gifts you can give, practical and personal at the same time.
12. Pillowcase With a Simple Floral Border
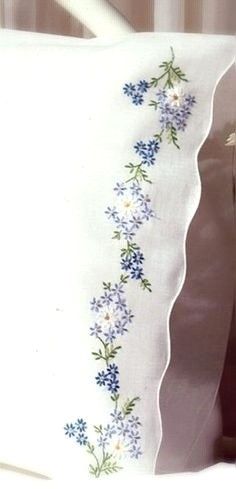
Photo credit: @ Rose🌹
Stitches: Stem stitch, lazy daisy, running stitch.
Why it looks hard but isn’t: A border pattern is repetitive by nature and that repetition is exactly what makes this project so valuable for a beginner.
You’re doing the same stitches over and over in a line, stem stitch for the vine, lazy daisy for the flowers, running stitch to frame it, and by the time you reach the end, your tension is visibly more even than when you started. You can literally see yourself improving as you go.
What you do with it: Sleep on it. A hand-stitched floral border on a plain white pillowcase makes your bed look like something out of a slow living editorial.
13. Embroidered Napkins or Table Linens

Photo credit: @ 𝙼𝚊𝚛𝚒𝚔𝚊 𝙺𝚊𝚝𝚎
Stitches: Running stitch, satin stitch corner motif.
Why it looks hard but isn’t: This is one of those hand embroidery projects where the simplicity is the whole point. A clean running stitch border around a napkin edge takes minutes.
Add a small satin stitch motif, a leaf, a diamond, a tiny flower, in one corner and you have something that looks boutique. Make a set of four with matching details and it looks like a considered, expensive purchase. Nobody will guess it was a running stitch and an afternoon.
What you do with it: Set your table with them or wrap them as a housewarming gift. A matched set of hand-stitched napkins is the kind of gift people keep for years.
14. Bookmarks With Pressed Flower Designs
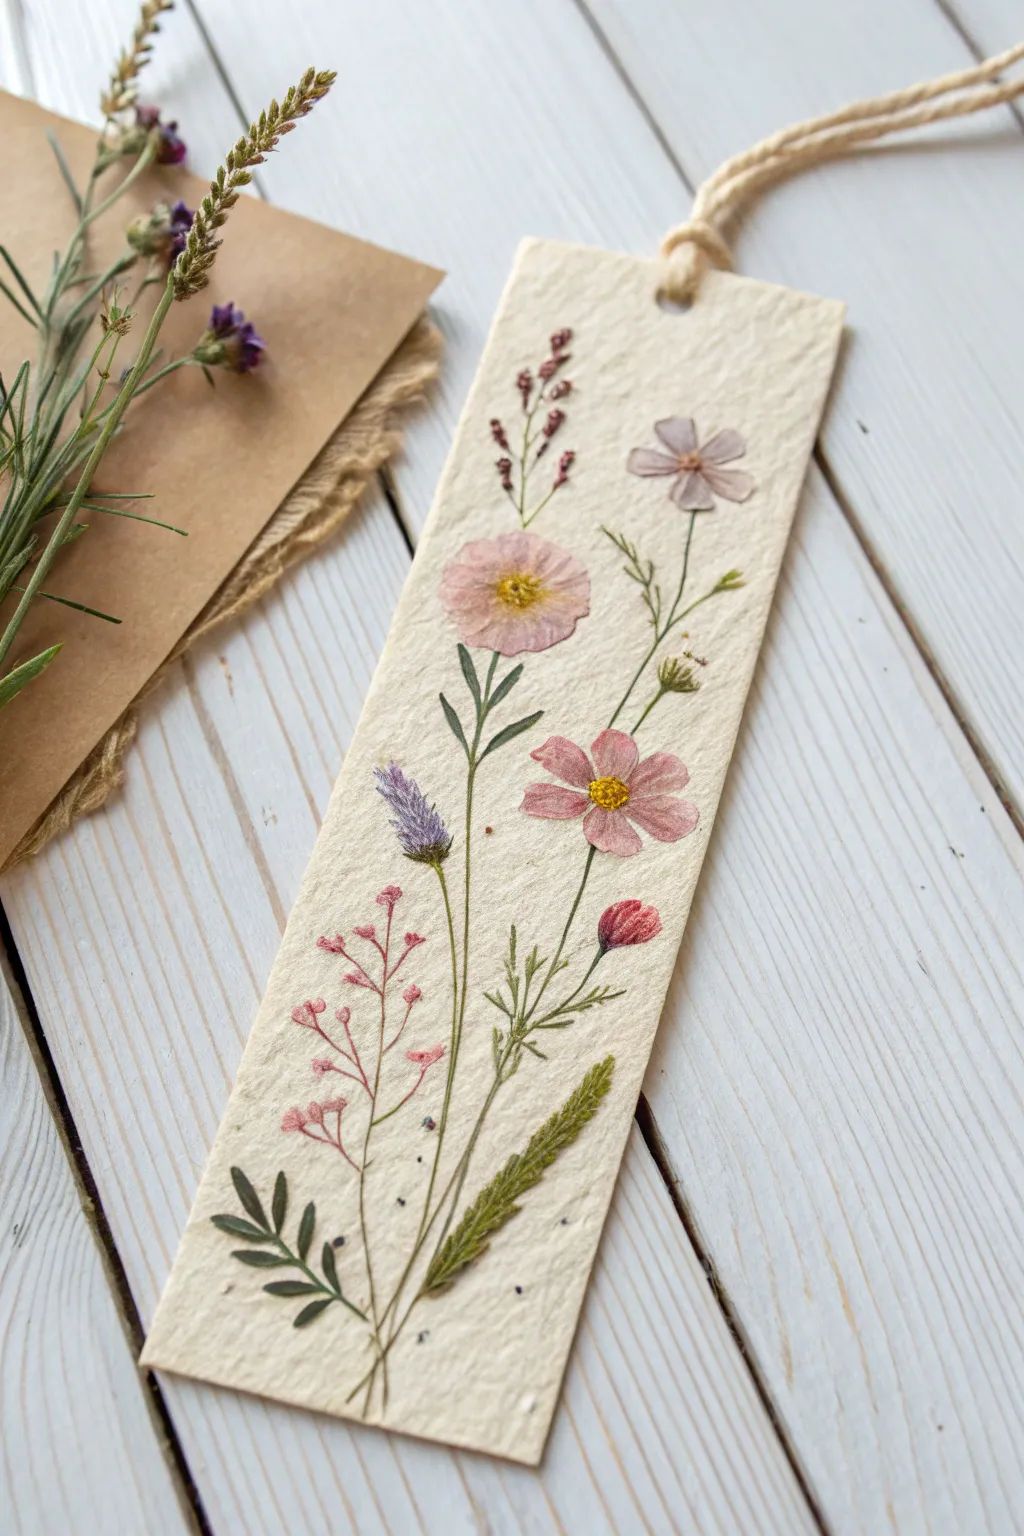
Photo credit: @ Casolia
Stitches: Stem stitch, satin stitch, French knots.
Why it looks hard but isn’t: A bookmark is tiny, which means it’s fast, and fast means you finish it.
That matters more than people realise when you’re building a new skill. Stem stitch gives you the delicate stalks, satin stitch fills the petals, French knots become the centres or scattered buds.
The small scale forces precision in the best way. You’re not covering a large area, you’re making every stitch count.
What you do with it: Keep it in your current read or gift it tucked inside a book. Among hand embroidery projects for gifts, this one punches well above its size.
15. Mini Hoop Ornaments
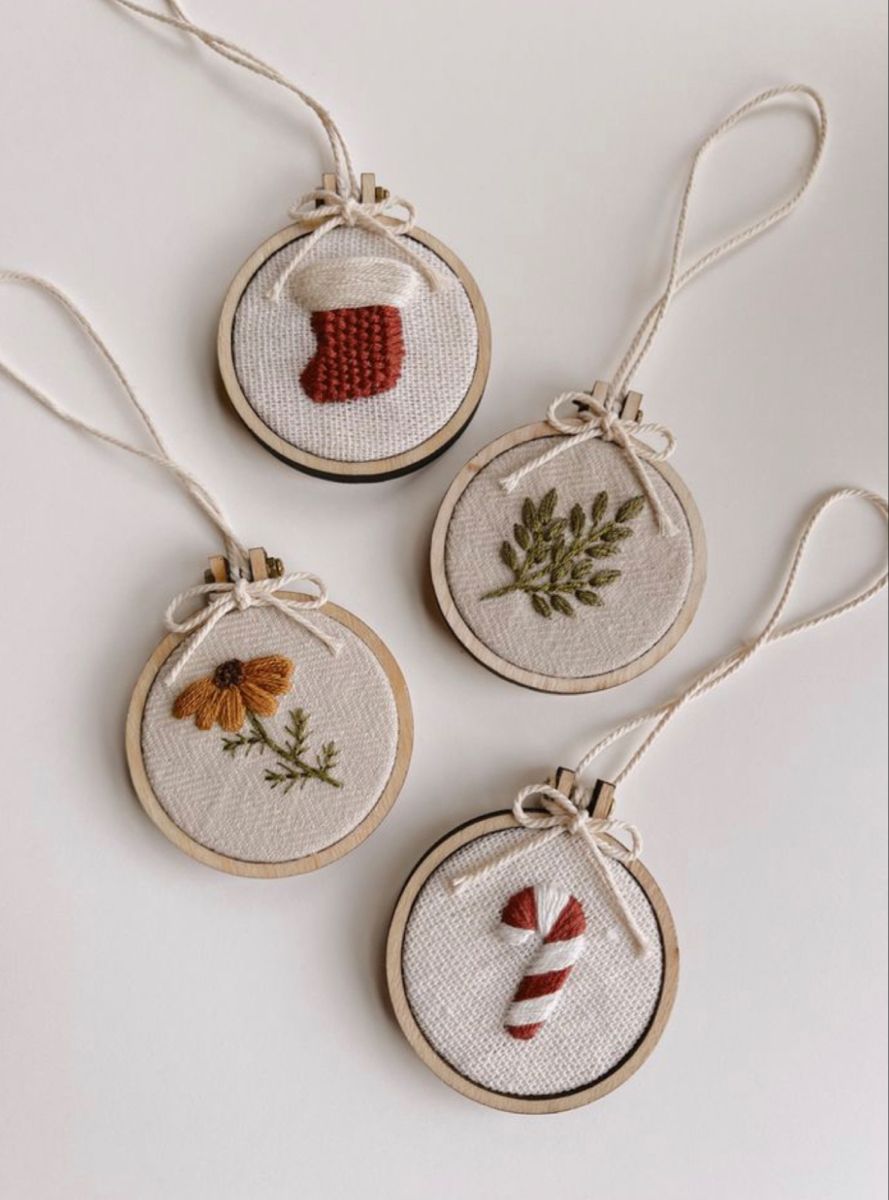
Photo credit: @ Unknown
Stitches: Backstitch, French knots, lazy daisy.
Why it looks hard but isn’t: Working in a 3-inch hoop feels almost like a puzzle, everything is compact and contained. A small snowflake in backstitch, a monogram letter, a tiny floral cluster in lazy daisy and French knots.
Each one takes an hour or less and the finished result is a proper little keepsake. The small scale means there’s nowhere to hide sloppy stitches, which quietly pushes your accuracy up every single time.
What you do with it: Hang them as Christmas ornaments, use them as gift tags, attach them as bag charms, or string a few together as a garland. One of the most versatile hand embroidery projects on this entire list.
4. Gifts That Look Like You Spent Real Money
These are the hand embroidery projects people pick up, turn over in their hands, and ask you made this yourself?
This category is about gifts that carry real emotional weight, the kind people keep in a drawer for decades, not recycle at the next gift exchange. The techniques are ones you’ll have already practised earlier on this list. What changes here is the intention behind them.
16. Embroidered Handkerchief With Name or Date
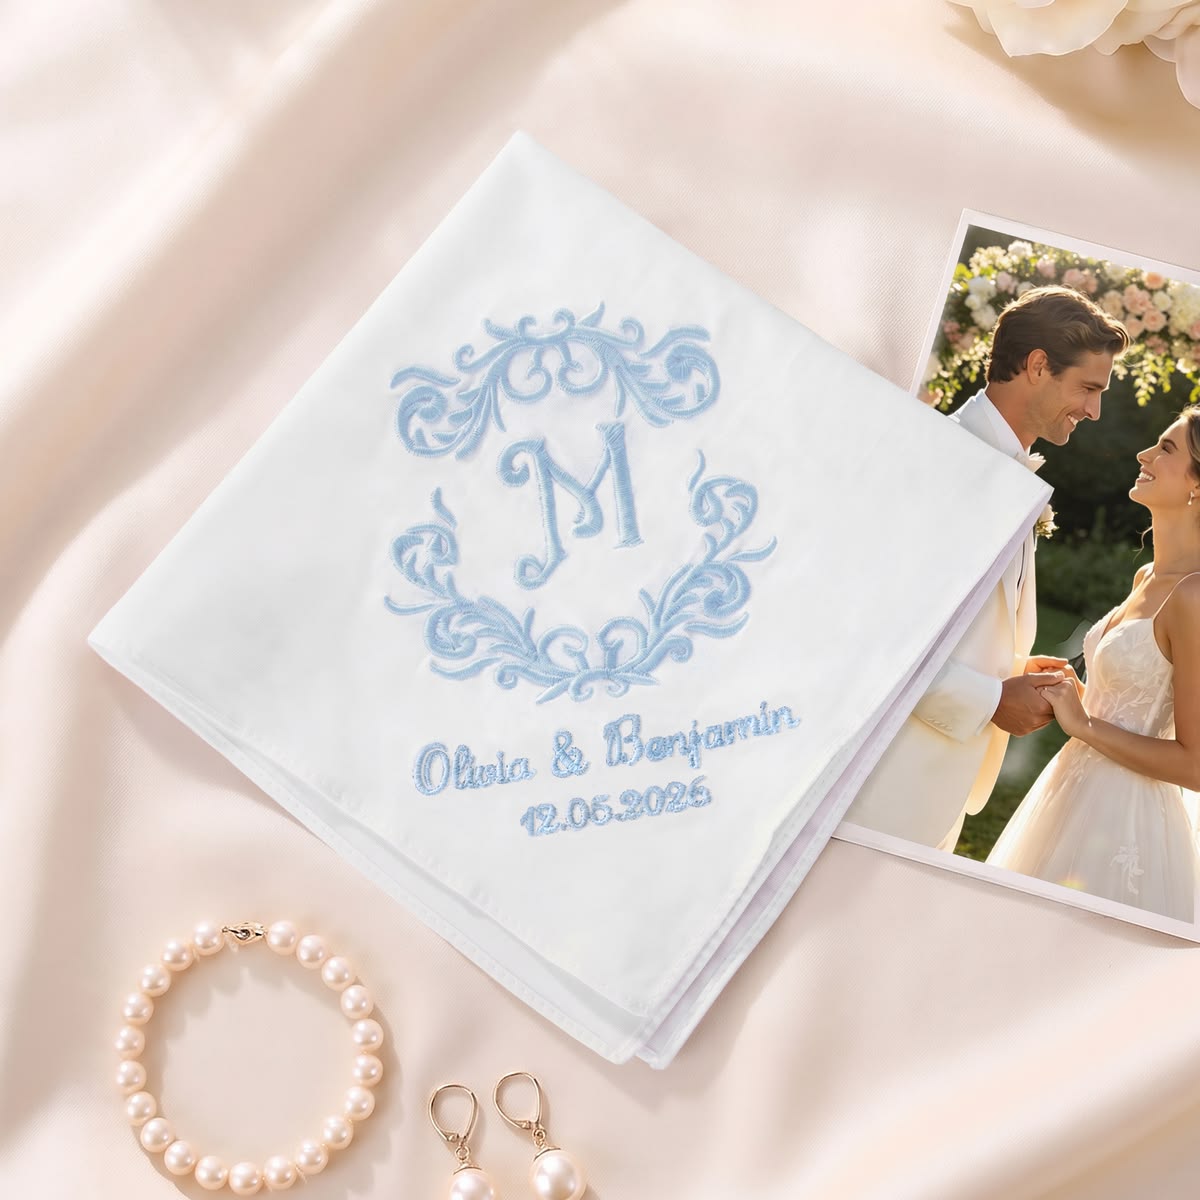
Photo credit: @ Callie DE
Stitches: Backstitch lettering, satin stitch border.
Why it looks hard but isn’t: A plain white handkerchief is one of the most quietly powerful surfaces you can stitch on. Backstitch lettering gives you clean, readable text, a name, a date, a set of initials, and a simple satin stitch border frames it without competing.
The stitching itself isn’t complicated. What makes this project special is what you put on it. A wedding date. A new baby’s name. A grandmother’s initials. That’s where the value comes from, not the technique.
What you do with it: This is the hand embroidery project you make when you want to give someone something they’ll keep for the rest of their life. Tuck it into a small box with tissue paper and it looks like a boutique heirloom gift. Because it is.
17. Embroidered Baby Onesie
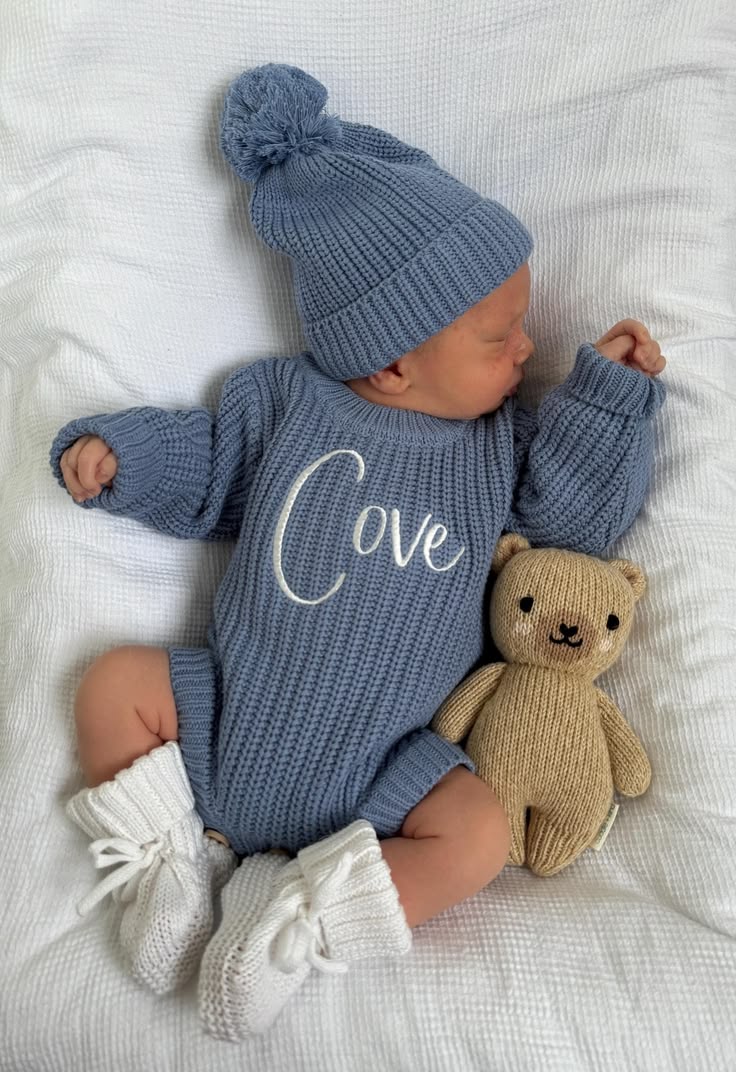
Photo credit: @ Art & Design
Stitches: Stem stitch, lazy daisy, French knots.
Why it looks hard but isn’t: Small motifs on baby clothing carry an outsized amount of charm. A tiny snail in a stem stitch. A little elephant outlined and filled. A cluster of leaves with French knot details.
The motifs are small, which keeps the project manageable, and baby jersey fabric is softer and more forgiving than it looks once it’s hooped correctly. The key is keeping your design compact and your stitches neat, both things you’ll have built up naturally by this point in the list.
What you do with it: Pair it with a plain muslin wrap or a set of socks and you have a new baby gift that looks considered, handmade, and genuinely special. Hand embroidery projects on baby clothing carry enormous perceived value, and this one deserves every bit of it.
18. Wildflower Meadow on a Linen Pouch
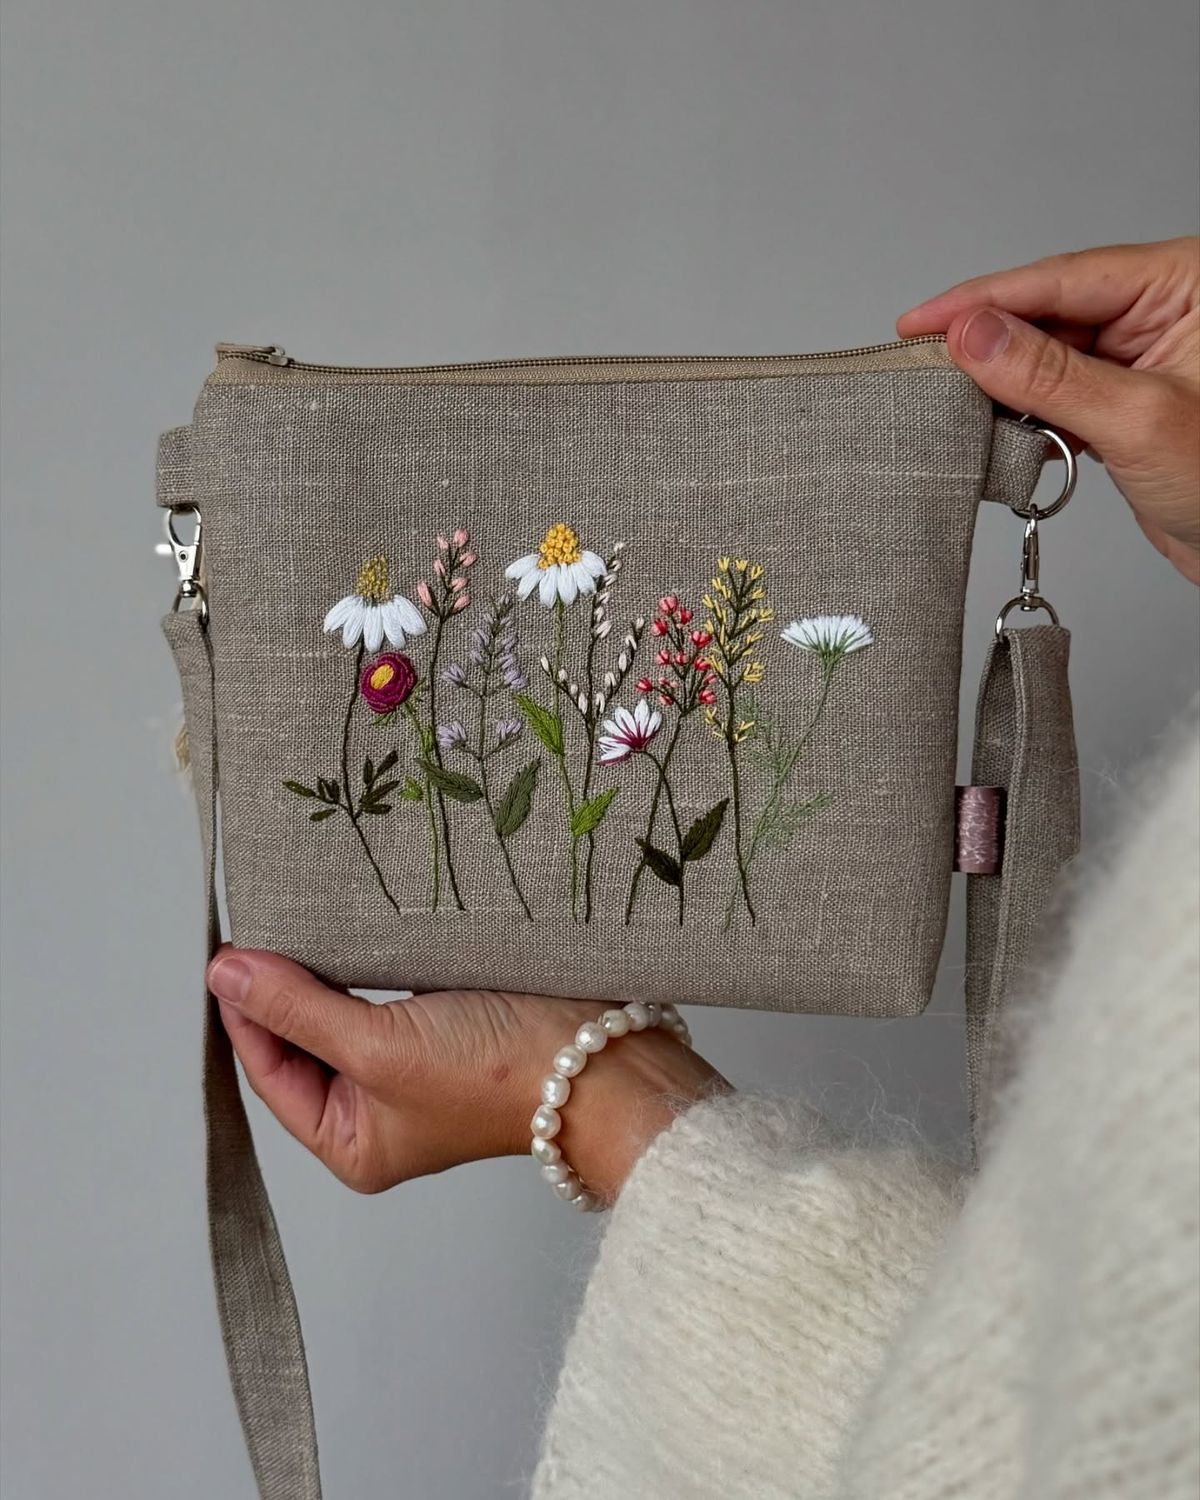
Photo credit: @ IH
Stitches: Stem stitch, lazy daisy, satin stitch, French knots.
Why it looks hard but isn’t: By the time you reach this project you will have used every single one of these stitches already.
What makes this feel like a step up is how they work together. Stem stitch builds the stalks and branches, lazy daisy opens the petals, satin stitch fills the leaves with solid colour, French knots scatter like wildflower buds across the surface. The combination looks lush and layered without being technically difficult.
A plain drawstring linen pouch becomes something that looks like it came from a high end gift shop.
What you do with it: Fill it with a small candle, some tea bags, or a piece of jewellery and gift it exactly as it is. The pouch is the gift. Everything inside is a bonus.
19. Embroidered Sweatshirt With Botanical Motif
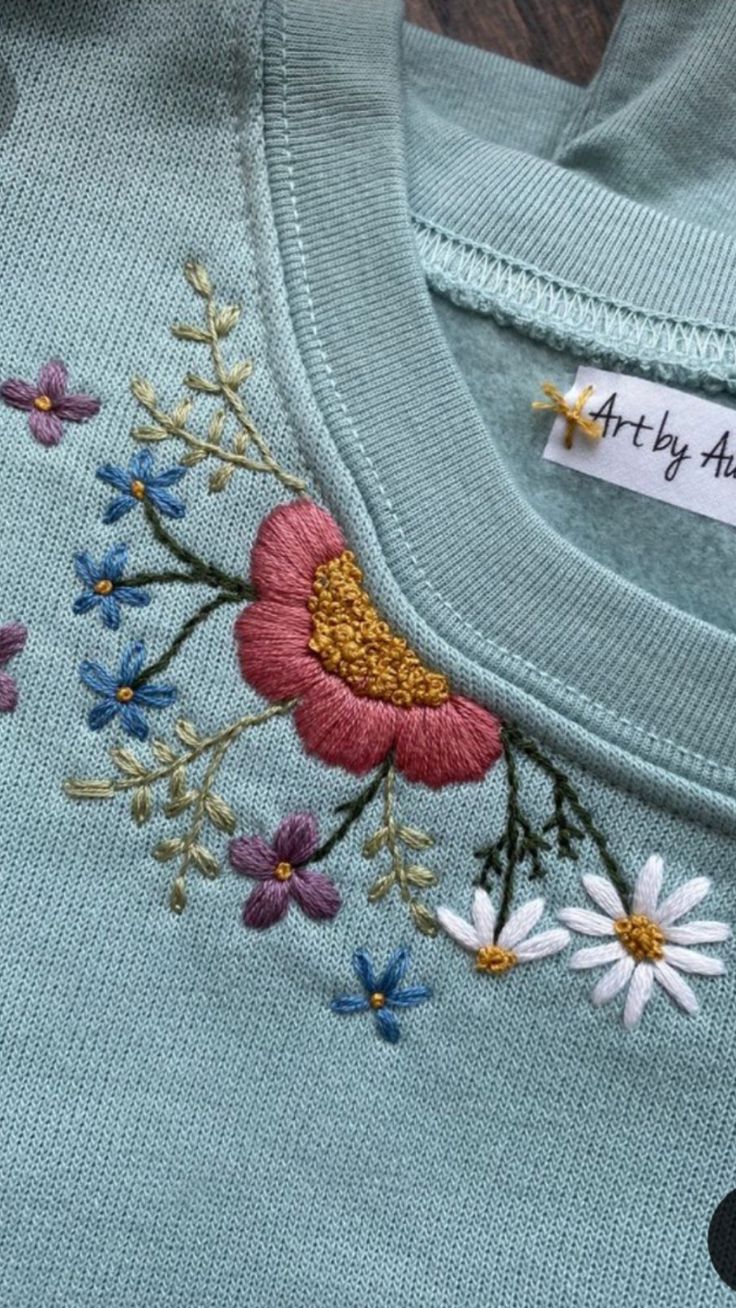
Photo credit: @ Ambiya khatun
Stitches: Stem stitch, satin stitch leaves, French knots for berries.
Why it looks hard but isn’t: A botanical motif, a branch, some leaves, a few berry clusters, sits naturally on the chest or sleeve of a sweatshirt and looks like something you’d pay full price for in a slow fashion boutique.
Stem stitch handles the branches with clean flowing lines, satin stitch fills the leaves with smooth solid colour, and French knots become the berries with one twist of the needle.
The sweatshirt fabric requires a stabiliser on the inside to stop it stretching as you stitch, that one extra step is the only real difference between this and everything else you’ve already done.
What you do with it: Wear it or gift it. Among all the hand embroidery projects on this list, this is the one that gets the most where you get that reaction, and the most satisfaction when you get to say you made it yourself.
DIY lovers exploring cozy aesthetics will enjoy Grandmacore DIY Projects That Make Your Home Look Like It Has a 100-Year Story, featuring slow, intentional crafts that add charm and history to your home.
4 Things That Separate Results From Frustration
Most embroidery posts give you a project list and wish you luck. This isn’t that. These four things are what actually determine whether your finished piece looks clean and intentional or puckered and uneven, and almost nobody puts them in writing.
1. Always Work With A Hoop. No Exceptions.
This isn’t a suggestion, it’s the foundation of clean embroidery. When fabric isn’t held taut, every stitch you make pulls it slightly, and that tension builds up into puckering that you cannot fix once it’s there.
Even experienced embroiderers who could technically stitch without one still use a hoop. It keeps your fabric stable, your stitches even, and your finished piece flat. If something looks off in your work and you can’t figure out why, check your hoop first. Re-tighten it. That’s usually the answer.
2. Split Your Floss. Use 2 To 3 Strands, Not All 6.
This is the single most common mistake beginners make, and it happens because nobody tells them not to. Embroidery floss comes twisted together as six strands. Most people pull it straight off the skein and stitch with all six.
The result is thick, heavy, slightly clumsy work that covers detail instead of creating it. Separate your floss and use two or three strands instead. Two strands gives you delicate, precise work perfect for lettering and fine details.
Three strands gives you a slightly bolder line with more coverage. The difference in your results will be immediate and visible. High contrast colours at two to three strands read sharper, sit cleaner, and look far more intentional than six strands ever will on a small project.
3. Let Your Stitches Sit. Don’t Pull Them Tight.
Thread tension is the most common technical mistake in hand embroidery and the hardest one to self-diagnose because it feels like you’re doing the right thing. Pulling your thread snug feels secure. It isn’t. Stitches are meant to lie on top of the fabric, not sink into it.
When you pull too tight, the fabric distorts around the stitch and you get a puckered, uneven surface that no amount of pressing will fully fix. The right tension feels almost too loose the first time you try it. Your stitch should land gently on the surface and stay there.
If your fabric is pulling toward the stitch, you’re pulling too hard. Ease off and let the thread do the work.
4. Transfer Your Design Before You Stitch A Single Thing.
Freehand drawing directly onto fabric is not a beginner skill, it’s not really an intermediate skill either. You don’t need it. A water-soluble marker or a friction pen lets you trace your design onto the fabric cleanly and accurately before you pick up your needle.
Stitch over the lines. When you’re done, a little cold water makes the marker disappear completely, leaving only your embroidery behind.
This one step removes the fear of ruining your fabric with a wrong mark, gives you clean guide lines to follow, and makes the difference between a design that sits where you intended it and one that drifted two centimetres to the left. Transfer your design. Every single time.
Ready? Start Here.
Every hand embroidery projects journey starts with one decision, which is picking up the needle and beginning. Don’t overthink it.
If you’re brand new, start with the wildflower bouquet hoop. Three stitches, one afternoon, something beautiful on your wall by evening. If you’d rather make something useful first, the embroidered tea towel is your project, flat, forgiving, and done before you know it.
You don’t need to be ready. You just need to start.
→ Still sorting your supplies? Head back to our beginner guide and get set up in twenty minutes.