Sewing thread tangling underneath? That messy bird’s nest may not be a bobbin problem. Find the real cause before you make it worse.
One minute, your stitches look fine. The next, you lift the fabric and find a messy wad of thread underneath.
You pull it out, rethread the bobbin, try again, and somehow the machine creates another one.
That can be especially frustrating because the place where the thread is tangled is not always where the problem starts. And if you keep changing the wrong setting, you can spend more time fighting your sewing machine than actually sewing.
Before you blame the bobbin or reach for the tension dial again, there are a few things worth checking first.
These eight fixes will help you work out what is actually causing the bird’s nest and get your stitches back under control.
Choosing the right needle starts with understanding the material underneath it, so Understanding Fabrics for Sewing: Choosing the Right Material for Every Project is a useful next step.
Read the Bird’s Nest Before You Touch the Machine

In sewing, a bird’s nest is the informal name for the messy cluster of tangled or looped thread that gathers underneath your fabric.
It can look as though a small bundle of thread has been stuffed around the bobbin area.
The name describes what you see, not necessarily what caused it. That distinction matters because the thread may be tangled underneath while the actual problem started somewhere else in the machine.
Before you start turning dials or taking the bobbin case apart, look at how and when the tangle formed.
1. The thread is loose and looping underneath
When the underside is covered with loose loops while the top looks relatively normal, check the upper-thread path first. The thread may not be properly seated in the tension mechanism or may have missed part of the threading path.
2. It tangles within the first few stitches
If the tangle appears almost immediately after you start sewing, pay attention to what happened before the needle made those first stitches.
Check how the upper and bobbin threads were positioned, whether the machine was threaded correctly, and whether the loose thread tails were pulled into the needle plate as you began.
A problem that appears only at startup can have a different cause from one that develops farther along the seam.
3. The thread has wrapped itself around the bobbin area
Stop sewing rather than trying to power through the tangle. Remove the fabric carefully, cut the thread where necessary, and clear the jam before inspecting the bobbin, bobbin case, hook area and upper-thread path.
Once the thread is wound around these parts, it can become difficult to tell what caused the original problem.
4. It only happens with one fabric, thread or stitch
That pattern is useful.
If the machine sews normally with one setup but creates a tangle with another, don’t immediately assume the tension is faulty. Look at the needle, thread, fabric, stitch length and presser-foot combination.
A machine that behaves perfectly on lightweight cotton may need a different setup for thick fabric or a dense stitch.
The aim is not to change everything until the tangle disappears. The way the thread tangles can give you clues about where to look first.
A needle can make a big difference, but so can the machine itself. Compare your options in Industrial vs Domestic Sewing Machines: Which One Should You Buy as a Beginner.
Fixes for the Sewing Thread Tangling Underneath
1. Rethread the Upper Thread With the Presser Foot Up

If thread is tangling underneath the fabric, start with the upper thread, even though the mess is nowhere near the spool.
Completely remove the thread and rethread the machine from the beginning.
Don’t simply pull more thread through the existing path; you want to make sure it actually passes through every part of the machine that controls it.
Rethread it this way
- Raise the presser foot. This is important because, on machines that use conventional tension discs, lifting the foot releases the tension discs so the thread can seat properly between them.
- Raise the needle to its highest position. This also helps put the take-up lever in the correct position for threading.
- Remove the old thread completely.
- Starting at the spool, follow your machine’s numbered or marked threading path.
- Make sure the thread passes through the upper tension area rather than sitting outside it.
- Check that the thread catches the take-up lever. Missing this step can leave the upper thread without the normal movement and control it needs during stitching.
- Continue through the remaining thread guides and thread the needle according to your machine’s instructions.
Don’t skip the tension check
Here’s a simple way to tell whether the upper thread is actually sitting in the tension path.
With the presser foot raised, gently pull the thread. On machines with conventional tension discs, it should move relatively freely. Lower the presser foot and pull again; you should feel noticeably more resistance.
That difference is useful. It tells you the thread is engaging with the tension mechanism rather than simply running through the machine without being controlled.
If there is little or no change in resistance when you lower the presser foot, stop and check the threading path again before adjusting the tension dial.
One important detail: sewing machines vary. Some newer machines use different tension mechanisms or threading systems, so follow your machine’s manual if its threading procedure differs.
Once you have rethreaded it correctly, test the machine on a scrap of fabric before returning to your actual project.
If the bird’s nest disappears, you have likely corrected the thread-control problem without touching the tension setting.
Once your machine is set up correctly, Beginner’s Guide to Sewing Machine Basics You’ll Actually Use covers the everyday skills that make sewing easier.
2. Find the Missing Take-Up Lever or Thread Guide

You can thread a sewing machine almost correctly and still end up with a bird’s nest underneath.
One of the easiest parts to overlook is the take-up lever, the moving lever in the upper threading path that rises and falls as the needle mechanism moves. Your machine may also have several smaller thread guides between the spool and the needle.
These parts form the machine’s intended upper-thread path.
The take-up lever has a specific job within that path: as it moves during the stitch cycle, it takes up slack in the upper thread at the appropriate point and helps tighten the stitch after the bobbin mechanism has formed the loop.
If the upper thread misses the take-up lever or one of the required guides, the machine is no longer handling the thread along its intended path.
Depending on the machine and the rest of the threading setup, that can leave excess slack and contribute to loops or sewing thread tangling underneath the fabric.
Check the threading path, not just the needle
Remove the upper thread completely and follow your machine’s threading diagram from the spool to the needle.
Look specifically for:
- the tension area
- the take-up lever
- every numbered or marked thread guide
- the final guide near the needle
Don’t assume that seeing the thread close to a guide means it has actually passed through it. Some guides have an opening or hook that the thread must pass through in a particular way.
The take-up lever can be especially easy to miss because it may sit inside the machine’s upper housing.
Turn the handwheel slowly if necessary so you can see the lever’s position and confirm that the thread has actually engaged with it.
Follow your machine’s manual rather than forcing the thread into a lever or guide that is difficult to access.
Use the tension-path test
Before threading the needle, gently pull the upper thread.
With the presser foot raised, the thread should move relatively freely on machines that use conventional tension discs.
Lower the presser foot and pull again. You should normally feel more resistance because the tension mechanism is now applying pressure to the thread.
If raising and lowering the presser foot makes little difference, don’t immediately change the tension setting. Recheck the upper-thread path first.
The thread may not be seated correctly in the tension mechanism, or your machine may use a different tension system.
Once the take-up lever and guides are correctly threaded, test the machine on a scrap of fabric. Sew slowly for several stitches and check both sides of the fabric.
If the bird’s nest has disappeared, you have corrected a problem in the upper-thread path. If the thread still tangles underneath, move on to the next check rather than repeatedly adjusting the tension dial.
The goal is not simply to make the machine sew again. It is to make sure the upper thread is following the complete path the machine was designed to use.
For fewer avoidable mistakes, 15 Sewing Hacks for Beginners Who Want Neater, More Professional Results has practical ways to improve your results.
3. Check Whether the Upper Thread Is Actually Reaching the Tension Mechanism

Seeing the thread in the right general area does not mean the machine is actually controlling it.
The upper thread needs to pass through the machine’s tension system correctly.
On a conventional mechanical tension system, this usually means the thread sits between the tension discs or follows the manufacturer’s specified tension path.
If it slips outside that path, the tension setting may have little effect on the thread.
That can leave the upper thread with too much slack as the stitch forms, which is one reason sewing thread tangling underneath can appear even when the bobbin itself is perfectly fine.
Use the tension-disc test
On a sewing machine with a conventional upper-tension system, the presser foot controls whether the tension discs are engaged.
To check this, thread the upper thread through the machine but do not thread the needle yet.
Raise the presser foot and gently pull the thread between the tension area and the needle. It should move with relatively little resistance because the tension discs are released.
Now lower the presser foot and pull the same thread again. You should feel more resistance because the tension discs have engaged and are gripping the thread.
The change in resistance is what matters, not a particular amount of force.
If the thread feels almost the same with the foot raised and lowered, stop before adjusting the tension dial.
Remove the thread and rethread the machine carefully, making sure it follows the correct path through the tension area.
Do not use this test to diagnose every sewing machine. Some newer machines use different tension systems, so the behavior may not be identical. If your machine’s manual gives a different threading or tension procedure, follow that instead.
Struggling with skipped stitches? Why Your Sewing Machine Keeps Skipping Stitches (And 7 Easy Fixes That Work Fast) looks at the common causes before you assume the machine needs repair.
Look for things that can interfere with the thread path
While checking the tension area, look for:
- thread sitting outside the tension discs or specified tension path
- lint or accumulated debris around the tension mechanism
- thread caught on another part of the machine
- damaged or rough thread that does not feed smoothly
- a threading route that differs from the one shown in your machine’s manual
Don’t insert tools or try to force anything into the tension mechanism to clean it. If your machine’s manual provides a specific cleaning procedure, follow that instead.
Don’t “fix” poor tension engagement by changing the number
This is where many troubleshooting attempts go sideways.
If the thread is not properly seated in the tension mechanism, changing the tension from, say, 4 to 6 does not correct the underlying problem. You are changing the setting on a system the thread may not be engaging with properly in the first place.
Rethread first. Then sew a few stitches on scrap fabric and examine both sides.
If the upper thread now forms balanced stitches without producing the tangled mass underneath, the problem was likely in the thread path rather than the tension setting itself.
The tension dial adjusts thread tension; it cannot compensate for thread that has missed the tension mechanism altogether.
There’s also a more detailed troubleshooting guide in Sewing Machine Skipping Stitches? 9 Checks That Can Point You to the Real Problem Before You Book a Repair.
4. Check the Bobbin—But Diagnose It

Because the tangled thread appears underneath the fabric, it is easy to assume the bobbin is the problem.
Sometimes it is. But a bird’s nest underneath can also come from the upper thread, so replacing or adjusting the bobbin without checking it first may not solve anything.
Start by removing the bobbin and checking the parts that control how the lower thread feeds.
Check that the bobbin is the right type
Use the bobbin specified for your sewing machine. Bobbins can look almost identical while differing in size, shape, height, or material.
A bobbin that does not fit the machine correctly may not sit at the right height or feed thread properly. That can contribute to poor stitching and sewing thread tangling underneath.
If you are unsure, check your machine’s manual rather than assuming a bobbin that fits the compartment is automatically compatible.
Check the way the bobbin is inserted
Look at the threading diagram for your machine and compare it with how the bobbin is currently installed.
Depending on the machine, the bobbin thread may need to unwind in a particular direction and pass through specific guides or a tension slot. The correct direction and threading route vary between machines, so don’t rely on a general “the thread should unwind clockwise” or “counterclockwise” rule.
Remove the bobbin and reinstall it exactly as your manual shows.
Inspect the bobbin for damage
Look closely at the bobbin itself.
Check for:
- cracks or splits
- bent or damaged edges
- rough spots
- thread wound unevenly or too loosely
- a bobbin that is overfilled
- thread caught underneath or around the bobbin
A damaged or poorly wound bobbin may not rotate or release thread smoothly.
Check the bobbin case and surrounding area
If your machine has a removable bobbin case, inspect it for lint, loose thread or visible damage. On a drop-in bobbin machine, check the bobbin area and surrounding race according to the manufacturer’s cleaning instructions.
If you find a thread jam, turn off the machine before removing it. Cut stubborn thread rather than pulling hard on the fabric or forcing the handwheel.
Don’t assume that every thread nest means the bobbin case needs adjusting.
Some machines have factory-set bobbin tension, and changing it without knowing the manufacturer’s procedure can create another problem.
Know when the bobbin is actually a likely culprit
The bobbin deserves more attention when you find something specific: the wrong bobbin, incorrect insertion, incorrect threading, damaged components, uneven winding or a clear obstruction in the bobbin area.
If the bobbin looks correct and is installed exactly as the machine specifies, don’t keep changing it simply because the thread is tangled underneath. Go back to the upper-thread path and the other possible causes.
The important point is that sewing thread tangling underneath does not automatically mean the lower thread caused the problem.
The bobbin is responsible for supplying the lower thread, but the upper and lower threads have to work together correctly for the machine to form a balanced stitch.
The right presser foot matters too, especially when fabric keeps shifting or behaving badly. See Sewing Machine Presser Feet: How to Choose the Right One for Your Project.
5. Check the Needle Before Assuming It’s Thread Tension

A needle can cause stitching problems that look like a tension issue, especially when the thread starts looping, skipping or pulling unevenly.
Before changing the tension setting, check the needle itself.
It is one of the easiest parts to overlook because the needle may look perfectly fine while it is slightly bent, blunt, damaged or simply unsuitable for the fabric and thread you are using.
Start with the needle’s condition
Turn off the machine and remove the needle so you can inspect it properly.
Look for:
- a bent needle
- a blunt or damaged tip
- scratches or rough spots
- a needle that is not seated correctly
- a needle that is installed in the wrong direction for your machine
Even a small bend can affect how the needle carries the upper thread down and brings it back up during stitch formation.
If you are unsure whether the needle is damaged, replacing it with a new, appropriate needle is often a simpler test than trying to judge a tiny defect by eye.
Check whether the needle suits the project
The needle also needs to match the fabric and thread.
A very fine needle can struggle with heavier thread or dense fabric, while a needle that is too large can leave unnecessarily large holes and affect how the thread passes through the fabric.
Check your machine or needle manufacturer’s recommendations for the appropriate needle type and size for the fabric and thread you are using.
For example, a needle designed for woven fabrics is not automatically the best choice for stretch fabric. Likewise, thicker fabrics may require a different needle size from lightweight cotton.
Make sure the needle is installed correctly
A needle can be the correct type and still cause trouble if it is not fully inserted or is facing the wrong direction.
Push the needle fully upward into the needle clamp and tighten it according to your machine’s instructions. The flat side and orientation vary by machine, so use your manual rather than assuming every sewing machine takes the needle the same way.
Good results also depend on having the right equipment close at hand. 11 Essential Sewing Tools for Sewists That Help Improve Accuracy and Are Budget-Friendly covers the basics worth keeping in your sewing kit.
Don’t change tension to compensate for a needle problem
If the needle is bent, damaged, incorrectly installed or unsuitable for the project, changing the upper tension does not correct the underlying problem.
Replace or correctly install the needle first, then test the machine on a scrap of the same fabric.
If the stitches improve, you have learned something important: the problem was not necessarily the tension setting at all.
Tension is only one part of stitch formation. The needle, thread, fabric and machine threading all have to work together, so check the simple mechanical causes before turning the tension dial.
Ready to start a project? How to Cut Fabric Without Wasting It: A Beginner’s Guide to Cutting Confidently the First Time can help you avoid costly cutting mistakes.
6. Check the Thread Path Outside the Machine

Not every thread problem starts inside the machine. Sometimes the upper thread is being pulled, snagged or fed unevenly before it reaches the tension mechanism.
Look at the thread from the spool to the first guide and check whether anything is interfering with its movement.
Check how the spool is sitting
Make sure the spool is positioned correctly on the spool pin and that you are using the spool holder or cap specified for your machine.
The thread should be able to unwind smoothly as you sew. If the spool catches, tilts or rubs against something, the thread can feed unevenly and affect stitch formation.
Different sewing machines use different spool arrangements, so follow the threading instructions for your particular model.
Look for places where the thread can catch
Run your finger along the thread path from the spool and look for anything that could snag the thread, such as:
- a rough edge on the spool
- a cracked or unsuitable spool cap
- thread caught around the spool pin
- the thread crossing or wrapping around another object
- a guide that the thread has accidentally missed
- a spool that is unwinding unevenly
A small snag can create inconsistent thread feeding. The machine may sew normally for a few stitches and then suddenly pull excess thread into the stitch area.
Check the thread itself
The thread can also be part of the problem.
Old, damaged or poor-quality thread may have uneven thickness, excessive lint or weak sections that affect how smoothly it feeds through the machine.
Look at the thread as it unwinds. If it repeatedly catches, frays or breaks before reaching the needle, replace it with a suitable, good-quality thread and test again.
Also check that the thread weight is appropriate for your needle and project. A mismatch between sewing thread and needle size can create poor stitch formation even when the machine is threaded correctly.
Test the spool without changing the machine settings
If you suspect the spool is causing inconsistent feeding, stop the machine and recheck the spool setup rather than immediately adjusting thread tension.
Make sure the spool can turn freely and that the thread follows the machine’s specified path from the spool to the first guide.
Then sew several stitches slowly on scrap fabric.
If the thread now feeds smoothly and the stitching improves, the problem may have been uneven thread feeding rather than incorrect tension.
This is why checking the thread path outside the machine matters: the tension dial can only control the thread once the thread has reached the machine’s tension system correctly.
When commercial patterns feel confusing, How to Read Sewing Patterns Without Feeling Lost breaks down what those markings and instructions actually mean.
7. Look at the Sewing Setup, Not Just the Thread

Sometimes sewing thread tangling underneath has nothing to do with the tension setting.
The combination of fabric, needle, thread, presser foot, stitch and sewing speed can affect how consistently your machine forms a stitch.
The useful clue is often when the thread bunching underneath fabric starts. If the machine sews normally until you change the fabric, stitch or number of layers, that change can tell you where to look.
You can also save time by choosing projects with clear instructions through How to Find Sewing Patterns That Are Easy to Follow and Beginner-Friendly (Save Hours of Frustration).
Start With What Changed
Don’t start changing settings at random. Match the troubleshooting step to the symptom you are seeing.
✅ If the problem happens only with one fabric:
Check the needle and fabric combination first. Lightweight fabric, stretch fabric, dense woven fabric and heavy materials place different demands on the needle. A needle that works well on cotton may not be the right choice for every fabric.
✅ If the thread starts tangling when you sew several layers:
Look at the needle, fabric thickness, presser foot and stitch length.
Check that the needle is appropriate for the material and that the presser foot and stitch are suitable for the technique. Test the machine on a scrap containing the same number of layers.
✅ If the problem starts when you reach a thick seam:
Check the needle, fabric thickness and presser foot setup. A sudden change in thickness can affect how the fabric sits beneath the foot and how the needle enters the material.
✅ If it happens only with one stitch:
Check the stitch type, stitch length and presser foot before changing thread tension. Some decorative and specialty stitches have specific foot or setup requirements.
✅ If the machine sews normally at slow speed but creates a sewing machine bird’s nest when you sew faster:
Test sewing speed and fabric handling first. Slow the machine down and let the feed dogs move the fabric instead of pulling or pushing it. If the problem disappears, you have useful evidence that speed or fabric handling is contributing to the problem.
✅ If the problem happens regardless of the fabric, stitch or sewing speed:
Go back to the machine itself. Recheck the upper-thread path, tension mechanism, bobbin and needle before changing project-specific settings.
Check the Stitch Length
A very short stitch places many needle penetrations close together, which may not suit every fabric or sewing situation.
If you are testing a seam, use a stitch length appropriate for the fabric and project. Check your machine’s manual for recommended settings rather than changing the thread tension to compensate for a stitch setting that does not suit the material.
Check the Presser Foot
The presser foot holds the fabric against the feed dogs while the machine moves it through the stitch area.
Using the wrong foot can interfere with fabric movement or make a particular technique harder to sew correctly. This matters especially with zippers, buttonholes, bulky layers and specialty stitches.
Don’t change the presser foot simply because you see thread looping underneath. First ask whether the foot actually matches the stitch or technique you are using.
Let the Feed Dogs Move the Fabric
Avoid pulling or pushing the fabric aggressively while sewing. The feed dogs are designed to move the fabric beneath the presser foot.
If you need to guide the fabric, use light guidance. Forcing the fabric can affect needle movement, stitch formation and fabric feeding.
Test One Variable at a Time
Once you identify the most likely cause, change one thing and test again on scrap fabric.
For example, suppose thread bunching underneath fabric happens only when you sew across several layers of denim. Don’t replace the needle, change the stitch length, switch the presser foot and adjust thread tension at the same time.
Start with the needle and test. If the problem remains, move to the next likely variable.
This gives you useful information after every test. If you change five things and the sewing machine bird’s nest disappears, you won’t know which change actually fixed it.
The goal is not to find one “perfect” sewing machine setting. It is to identify which part of the needle, thread, fabric, stitch or machine setup is affecting the stitch, and correct that specific problem rather than changing settings blindly.
Want to recreate a favourite garment? How to Copy a Pattern From Clothes You Already Own (Without Taking Them Apart) shows how to work from something that already fits.
8. Stop Adjusting Settings and Check for a Mechanical Problem
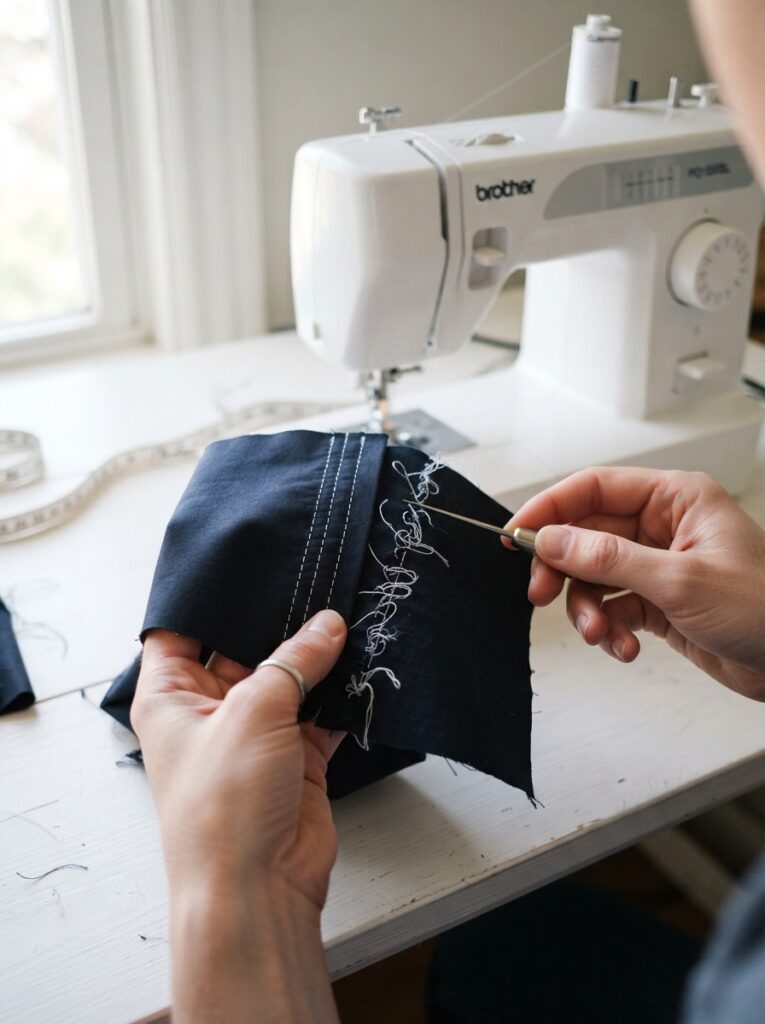
There comes a point when changing the thread, sewing machine thread tension or stitch settings stops being troubleshooting and starts becoming guesswork.
If you have correctly threaded the machine, checked the bobbin, replaced a questionable needle and tested the setup on suitable fabric, but the sewing machine bird’s nest keeps returning, consider whether a mechanical problem is interfering with stitch formation.
Look for Signs That Point Beyond Thread Tension
A mechanical problem becomes more likely when you notice:
- the handwheel feels unusually stiff or difficult to turn
- the needle strikes the needle plate, presser foot or another part of the machine
- the needle keeps bending or breaking without an obvious fabric-related reason
- the machine makes an unusual grinding, knocking or scraping sound
- thread repeatedly catches on a rough or damaged area
- the bobbin area shows visible damage
- thread tangling in the bobbin case continues with different needles, threads and fabrics
- the same thread bunching underneath fabric continues after you have followed the correct threading and bobbin procedures
These signs do not identify one specific fault. They tell you that repeatedly adjusting the tension is unlikely to fix the underlying problem.
Check What You Can Safely See
Turn off the machine and inspect the accessible areas around the needle plate, bobbin area and presser foot.
Look for loose thread, obvious lint buildup, a damaged needle, or visible scratches, burrs or other damage that could catch the thread.
Do not remove covers, adjust internal screws or dismantle the hook or tension mechanism just because you see a problem.
Sewing machines vary, and some adjustments, particularly bobbin tension and timing, require specific procedures.
Use your machine’s manual for any cleaning or adjustment it allows you to perform yourself.
Use the Problem to Decide What to Do Next
Does the problem happen with every fabric and thread?
→ Yes: Recheck the upper threading, bobbin and needle. If they are correct, a mechanical problem becomes more likely.
→ No: Look at the fabric, needle, thread or stitch setup that triggers the problem.
Does correct rethreading fix the problem?
→ Yes: The upper-thread path was likely involved.
→ No: Continue with the bobbin, needle and sewing-setup checks.
Does changing the needle or sewing setup fix it?
→ Yes: Keep the setup that suits that particular project.
→ No: Stop changing settings simply to see what happens.
Is the needle hitting something, the handwheel unusually stiff, or the machine making a new mechanical noise?
→ Yes: Stop sewing and have the machine inspected.
→ No: Finish the basic troubleshooting checks before deciding whether servicing is necessary.
The purpose of this decision path is to narrow down the cause, not to find a setting that temporarily hides the symptom.
Small sewing problems do not always mean a project is ruined. 15 Smart and Easy Sewing Fixes for Clothes and Fabrics You Keep Throwing Away can help you rescue more of them.
When to Have the Machine Serviced
Have the machine inspected by a qualified sewing-machine technician or authorized service centre when:
- the same problem continues after you have correctly rethreaded the machine and checked the bobbin and needle
- the needle repeatedly hits the needle plate or presser foot
- the handwheel remains stiff or difficult to turn
- you hear grinding, knocking or scraping that was not there before
- you find visible damage around the bobbin, hook or needle-plate area
- the machine develops the same stitching fault with different needles, threads and fabrics
At that point, stop adjusting the sewing machine thread tension or making internal adjustments yourself.
A technician can inspect parts you cannot safely diagnose from the outside, including the hook mechanism, timing and internal tension components.
If none of these warning signs are present, finish the basic checks first. But if upper thread tangling underneath, thread bunching or another recurring stitching fault continues after those checks, servicing is the sensible next step.
Good troubleshooting is knowing when to stop changing settings and find out whether the machine itself needs attention.
A twisted waistband can be especially frustrating after washing. Elastic Waistbands Keep Twisting After Washing — Here’s What’s Actually Going Wrong explains where that problem can start.
The 3-Minute Scrap-Fabric Test: Confirm the Fix for Sewing Thread Tangling Underneath

Before returning to your project, give the machine a quick controlled test. Use a scrap of the same or similar fabric and the same thread and needle combination you plan to use.
This helps you confirm that the sewing thread tangling underneath has actually stopped instead of assuming the last adjustment fixed it.
- Clear the old tangled thread. Remove any loose thread from around the needle plate and bobbin area.
- Rethread the machine from the beginning. Follow the machine’s normal threading path rather than correcting only the part you think caused the problem.
- Check the bobbin. Make sure it is the correct type, properly wound, inserted and threaded according to your machine’s instructions.
- Start with the machine’s normal or recommended tension setting. Don’t begin by turning the tension dial up or down unless your machine’s instructions call for it.
- Sew several straight stitches slowly. Give the machine enough stitches to show whether the problem has actually returned.
- Stop and inspect both sides of the fabric. Look underneath for loops, loose thread, bunching or another developing bird’s nest, then check the top for uneven or loose stitches.
- Change one thing at a time if the problem remains. Test again after each change so you can see whether that specific adjustment made a difference.
This matters because changing several things at once can hide the real cause:
Change the tension → change the needle → change the bobbin → change the stitch length → change everything → still don’t know what fixed it.
A controlled scrap-fabric test gives you a much better answer. Change one variable, test it, and observe the result.
Once the stitches look consistent on both sides, you can return to your actual project with much more confidence that the fix worked.
Sewing does not have to stop because your hands struggle with repetitive movements. Sewing With Arthritis: 11 Tools and Techniques That Take the Strain Out of Stitching focuses on making the process easier on your hands.
What Counts as Good Stitches?
You don’t need perfectly identical stitches to know that your machine is sewing correctly. You’re looking for a consistent stitch formation on both sides of the fabric.
On the top, the stitches should:
- look even rather than randomly loose or tight
- sit neatly along the seam line
- have no large loops of thread
- show no obvious gaps between stitches
On the underside, look for:
- evenly formed stitches rather than loose loops
- no thread gathering into a bird’s nest
- no long sections of loose upper thread
- no bobbin thread being pulled into obvious loops on top
The two threads should lock together within the layers of the fabric, rather than sitting loosely on one surface.
Also check the fabric itself. It should not be puckering, pulling into ridges or showing large holes from the needle.
A few stitches that look slightly different at the beginning or end are not automatically a problem. What matters is whether the stitching becomes consistent once the machine is sewing normally.
If the top looks fine but you still see loose loops or sewing thread tangling underneath, don’t assume the stitches are good just because the visible side looks neat. Always turn the fabric over and check both sides before returning to your project.
Starting later in life? How to Learn to Sew as an Adult When You Feel Like You Are Already Too Late offers a more realistic starting point for adult beginners.
Know the Difference Between Normal Loops and Problem Loops

Not every visible loop means something is wrong.
A sewing machine has to form a loop during each stitch so the upper thread can interlock with the bobbin thread. The problem is when that thread is not being controlled and pulled into the correct stitch formation.
Here is the distinction:
-
Normal stitch formation:
The upper and bobbin threads meet and lock together within the fabric layers. From the top and underside, the stitches look neat and consistent. You should not see large loose loops hanging from either side.
-
Loose loops underneath:
You see small or large loops of thread on the underside of the fabric instead of a neat row of stitches. This often points you back to the upper-thread path, tension engagement or threading, especially if the top looks relatively normal.
-
A bird’s nest:
Instead of just a few loose loops, several strands of thread gather into a messy, tangled mass underneath the fabric, often around the needle plate or bobbin area. This is a more severe version of the same visible symptom and can quickly stop the machine.
-
Loops on top of the fabric:
If the loops appear on the top rather than underneath, don’t automatically apply the same diagnosis. The visible side of the stitch can give you a different clue about how the upper and bobbin threads are interacting.
The key question during your scrap-fabric test is not simply “Do I see a loop?” It is:
Are the threads locking together neatly inside the fabric, or is loose thread sitting on one side of the fabric?
That distinction helps you decide whether you are looking at normal stitch formation or a problem that needs troubleshooting.
Once your sewing skills become stronger, Sewing Skills That Actually Make You Money (Even If You’re Just Starting) shows which abilities can become useful income-generating services.
When the Underside Looks Different From a True Bird’s Nest

A messy underside does not always mean your sewing machine has a tension problem.
The shape, location and timing of the thread problem can tell you more than simply seeing loose thread underneath. Compare what you see with these patterns before reaching for the tension dial.
Loose loops underneath
If the underside has repeated loops of upper thread but the thread has not formed a large tangled mass, check the upper-thread path first.
The upper thread may not be passing correctly through the tension mechanism, take-up lever or another required guide. When the machine cannot control the upper thread properly, it can leave excess thread underneath as each stitch forms.
This is different from a bobbin that has simply “gone wrong” because the problem may begin in the upper threading even though you only see it underneath.
A few thread tails bunched at the beginning
A small cluster of thread at the first few stitches is not necessarily the same as a bird’s nest developing throughout the seam.
Look at how you started sewing. The upper and bobbin thread tails may not have been positioned according to your machine’s instructions, or they may have been pulled into the first stitches.
Try clearing the tails, following your machine’s recommended starting technique and sewing again on scrap fabric.
If the rest of the seam forms normally, the problem may have been limited to the start of the seam rather than the machine’s ongoing thread control.
Bobbin thread appearing on top
This is a different clue.
If the bobbin thread is clearly being pulled to the top surface, inspect the bobbin threading and upper-thread tension relationship rather than assuming that the problem underneath is the same one.
Check that the bobbin is the correct type and is inserted and threaded according to your machine’s instructions. Then check the upper-thread path before changing tension settings.
The important point is that which thread is appearing where matters. Don’t adjust tension blindly without first checking that both threads are following their intended paths.
Fabric puckering
Puckered fabric can look like a stitching problem, but it is not the same thing as a bird’s nest.
If the stitches are formed normally but the fabric pulls into ridges or gathers along the seam, look at the fabric, needle, thread, stitch length and tension combination.
Lightweight or stretchy fabrics can react differently from stable woven fabrics, and some projects may also need appropriate stabilization.
If there is no loose or tangled thread underneath, don’t treat puckering as proof that your machine is creating sewing thread tangling underneath.
Thread wrapped around the bobbin or hook area
This is more than a loose-loop problem.
If thread has actually wound around the bobbin case, hook area or another part of the sewing mechanism, stop sewing before trying to continue the seam. Turn the machine off and clear the obstruction carefully, following your machine’s instructions.
Don’t yank the fabric away or force the handwheel if the thread is tightly jammed. Cut stubborn thread where necessary rather than pulling hard against the machine.
Once the jam is cleared, find out why it happened before sewing again. Check the upper threading, bobbin installation, needle and other basic setup points instead of assuming the jam itself was the cause.
Use the underside as a clue
The goal is not to memorize a different tension setting for every type of messy stitch. It is to learn to read the symptom before changing anything.
- Loose loops underneath: check upper threading and tension engagement.
- A few tails bunched at the start: check how the seam was started.
- Bobbin thread showing on top: check bobbin and upper-thread paths.
- Fabric puckering: examine the fabric, needle, thread, stitch and tension combination.
- Thread wrapped around the bobbin or hook: stop and clear the physical jam before continuing.
That small distinction can save a lot of unnecessary troubleshooting. Not every imperfect stitch is a tension problem, and not every messy underside is a bird’s nest.
For anyone thinking beyond occasional projects, Struggling to Make Money From Home Sewing? Launch a Profitable Sewing Side Hustle takes that idea a step further.
And getting clients takes more than being good with a machine. Why You’re Probably Not Getting Clients for Your Sewing Business — Even Though You’re Skilled tackles the business side of sewing.
Conclusion
Sewing thread tangling underneath can look like a bobbin problem, but the tangle itself is only the symptom. What matters is finding where thread control went wrong instead of changing settings at random.
Work through the checks, test the machine on scrap fabric, and give yourself a clear answer before putting it back on your project.
Still getting a bird’s nest? Go back to the symptom that started the problem, test one variable at a time, and let the machine show you what needs attention.
FAQ
1. Why does my sewing machine tangle thread when I start sewing?
The first few stitches can tangle when the thread tails get pulled into the stitch area. Hold the thread tails behind the presser foot as you begin, following your machine’s recommended starting method.
2. Should I stop sewing when my machine starts making a bird’s nest?
Yes. Continuing to sew through a growing tangle can pull the fabric, bend the needle or make the jam worse. Stop, turn off the machine, clear the thread carefully and find the cause before continuing.
3. Why does my sewing machine sew fine and then suddenly bunch the thread?
A sudden change can come from the thread catching on the spool, a missed guide, an incorrectly seated bobbin or a needle that has shifted or become damaged. Stop and check what changed instead of immediately adjusting tension.
4. Can old sewing thread cause thread to bunch underneath?
Yes. Thread that has become weak, rough, brittle or uneven can feed poorly and contribute to stitching problems. If the problem follows one spool while another suitable spool works normally, replace the questionable thread.
5. Why does my thread keep getting caught on the spool?
The thread may be catching on the spool edge, spool cap, pin or another part of the thread path. The upper thread needs to unwind smoothly; even a small snag can affect how much thread reaches the needle.