Wrong cord, tangled knots, uneven fringe, macramé for beginners goes wrong fast. Here’s what you should know before you start.
There is a craft that requires no machine, no needle, no loom, and no prior experience, just cord and your two hands, and people are selling it on Etsy for hundreds of dollars a piece.
Macramé is one of those crafts that looks far more complicated than it actually is, which is both the reason most people hesitate to try it and the reason those who do start feel like they stumbled onto a secret.
Once you understand how it works, what the cord types mean, which three knots carry almost every project, and why your first attempt probably did not go the way you expected, the whole thing clicks into place fast.
This post is the starting point. The actual foundation, what macramé is, what you need to buy, what not to waste money on, and which knots to learn before you touch a single project.
If you have been curious about macramé but did not know where to begin, or if you already tried it once and walked away more confused than when you started, this is one post to read.
Ready for your next beginner-friendly project? See How to Make a Macramé Plant Hanger: A Beginner’s Guide to Cord, Knots, and Getting It Right First Time for a simple introduction to cords, knots, and stylish plant displays.
What Is Macramé, Really?
Macramé is a textile craft made entirely from hand-tied knots. You take a length of cord, tie it into knots using a specific sequence, repeat that sequence, and a pattern emerges. That is the whole craft.
The finished piece, whether it is a wall hanging, a plant hanger, or a bracelet, is held together entirely by the tension of those knots. Not glue.
Macramé Is Not the Same as Knitting, Crochet, or Weaving
This is the confusion that sends most beginners down the wrong path, yunno buying the wrong materials, watching the wrong tutorials, wondering why nothing looks right. So let’s clear it up properly.
- Knitting uses two needles and a single continuous strand of yarn. The needles form loops that interlock into rows of fabric. Drop a stitch and the whole thing can unravel.
- Crochet uses one hooked needle and a single strand of yarn. The hook pulls loops through other loops to build the fabric stitch by stitch.
- Weaving is done on a loom, a frame that holds vertical threads in place while you pass horizontal threads over and under them to create fabric.
- Macramé uses none of those tools. Macramé does not require any special tools, it relies solely on manual knot-tying techniques. Your hands are the only instrument. You tie one knot, then another, then another. The pattern comes from which knot you tie, in which direction, and in what order
Enjoy decorating your home as much as making things? Next, explore these DIY Farmhouse Planter Ideas That Don’t Look Cheap and Fit Every Space for more beginner-friendly projects that focus on creativity rather than precision.
A Brief History of Macramé
Macramé is not a new trend. It is one of the oldest textile crafts in the world, and the fact that it has survived centuries, fallen out of fashion multiple times, and come back each time stronger says something important about it.
Here is the short, accurate version of how it travelled through history to land in your hands today.
-
13th century — Where it began
Macramé is believed to have originated with 13th-century Arab weavers who knotted the excess thread and yarn along the edges of hand-loomed fabrics into decorative fringes on bath towels, shawls, and veils.
It was practical first, a way to stop fabric from unravelling, and decorative second. The Spanish word macramé is derived from the Arabic migramah, believed to mean “striped towel,” “ornamental fringe,” or “embroidered veil.”
-
15th to 17th century — It crosses into Europe
The Moors introduced the Arabic knot-tying technique to Spain, which they occupied up until the 15th century, and it eventually made its way to France and Italy.
Sailors picked it up on long voyages, already skilled at rope work, they used macramé to pass the time and sold or bartered their finished pieces at ports, which is how the craft spread as far as China and the Americas. In the 17th century, Queen Mary II of England taught the art of macramé to her ladies-in-waiting.
-
Victorian era — Peak elegance
Macramé was most popular in the Victorian era, adorning most homes in items such as tablecloths, bedspreads, and curtains. It was considered a refined, domestic skill, something every well-kept household displayed.
-
1970s — The golden age
After fading in the early 1900s, macramé exploded back in the 1970s. Plant hangers, light fixtures, purses, and wall art rendered in jute or traditional white string showed up everywhere during this era. It became a symbol of handmade, earthy creativity.
-
Today — The third revival
Macramé is back again, driven by the global rise of boho home décor, DIY culture, and the demand for handmade goods on platforms like Etsy.
Artists and crafters are now using macramé techniques to create everything from jewelry to large-scale installations, but its essence remains the same, a celebration of creativity, patience, and the magic of turning a few simple cords into something extraordinary.
If you are already thinking about turning your macramé into income, 30 Summer Crafts to Make and Sell at Craft Fairs This Year is a good place to see where macramé fits alongside other high-selling handmade products.
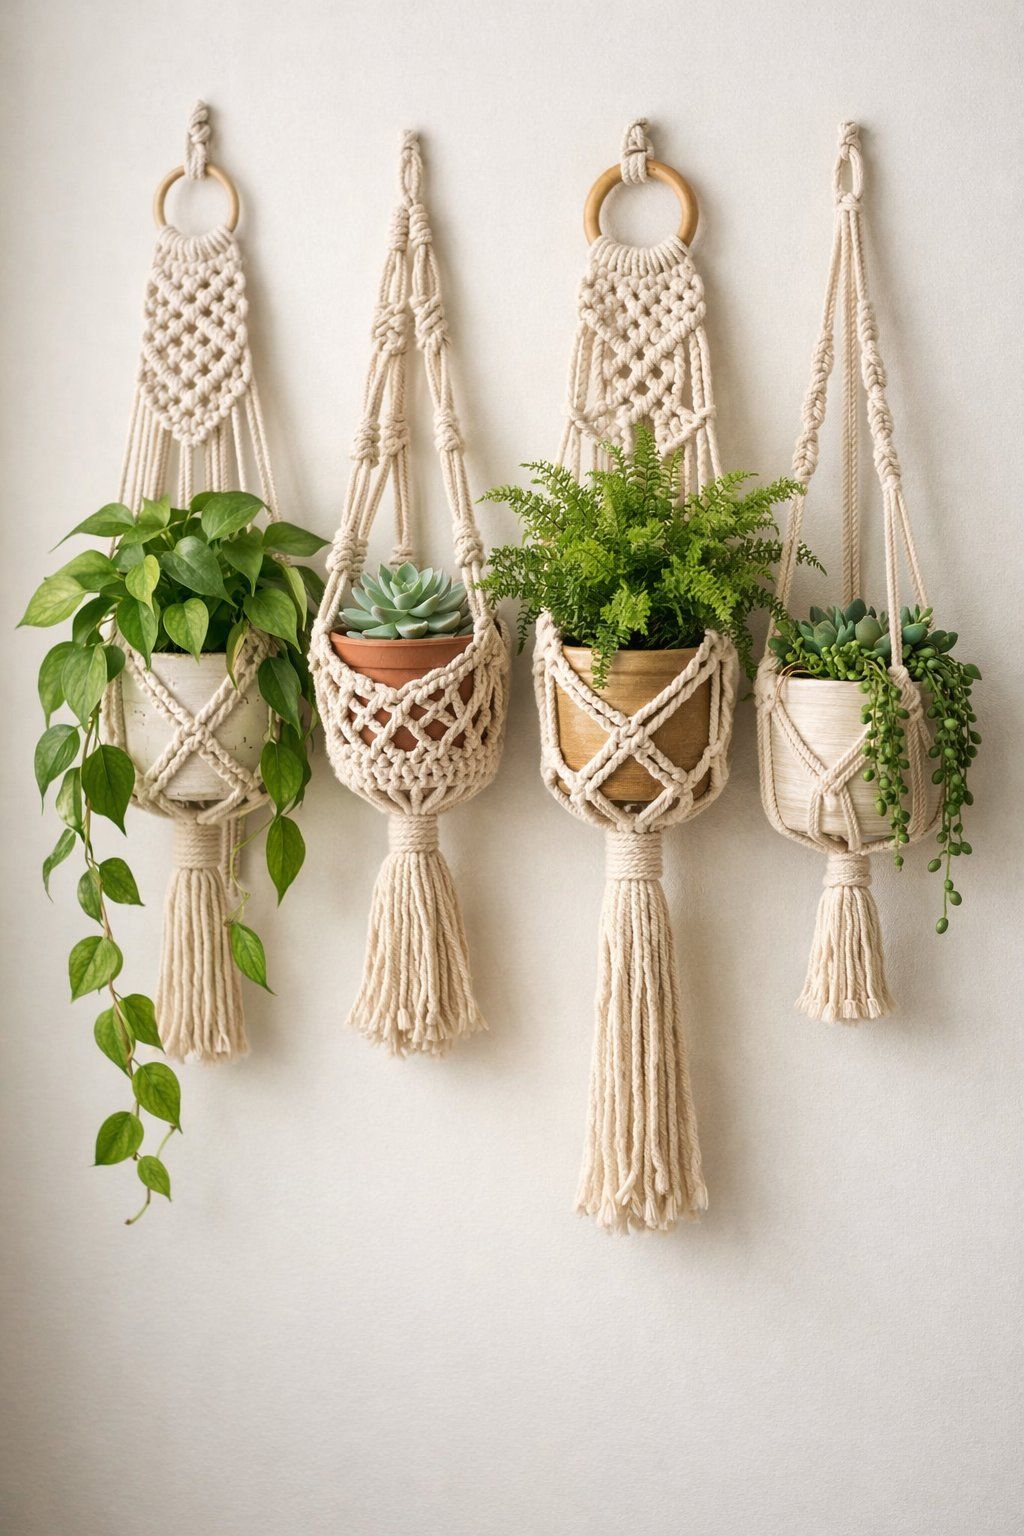
What Can You Actually Make with Macramé?
Before you buy a single thing, it helps to know what this craft can actually produce, because it goes well beyond the wall hangings and plant hangers you have probably seen online. .
Here is a clear breakdown of what is possible, grouped by category.
1. Home Décor
These are the most searched, most pinned, and most recognisable macramé projects:
- Wall hangings
- Plant hangers
- Curtains and room dividers
- Dream catchers
- Tablecloths and table runners
- Coasters
A single wall hanging can transform a bare wall. A plant hanger costs very little to make and takes under an hour for a beginner to complete. These are the projects that most people start with, and for good reason.
2. Wearables and Accessories
Macramé is not just for walls. You can use macramé to create necklaces, bracelets, earrings, and clothing items, all using the same core knots, just with finer cord and smaller scale.
- Bracelets and anklets
- Necklaces and pendants
- Earrings
- Bags and purses
- Belts
These are also some of the fastest projects to complete, which makes them ideal if you want a finished piece quickly while you are still building confidence.
3. Small Functional Items
- Tassels and fringe trim
- Keychains
- Bookmarks
- Coasters
These are beginner-friendly in the best way, small enough to finish in one sitting, useful enough to keep or give as a gift, and simple enough to practice your knots without committing to a large project.
New to crafting altogether and still building your toolkit? 15 Must-Have Crafting Tools Beginners Often Forget covers the basics that make every DIY project, including macramé, go smoother from the start.
What You Need to Start — And What You Don’t

One of the biggest advantages of macramé for beginners is how little you actually need to get started. No machine. No but what you do buy matters, because the wrong cord is the reason most first projects go wrong before a single knot is even tied.
Here is exactly what to get
1. The Cord — Your Most Important Decision
Most beginner macramé mistakes and frustrations are blamed on knotting technique when the real issue is often the cord itself. So before anything else, understand what you are choosing between.
There are three cord types and they behave completely differently:
-
Single-strand cord
Single-strand cord is made of many individual fibres loosely twisted together into one continuous rope. It is the most popular cord type in macramé. Also It is soft and slightly fuzzy, very forgiving of tension variation, and ideal for beginners.
It unravels beautifully into fluffy, cloud-like fringe when you unbraid the twist and brush it out. This is the cord behind most of the boho wall hangings you see online.
-
3-ply twisted rope
3-ply rope is composed of three single-strand ropes twisted together to form one rope. Its strength and sturdiness make it perfect for bearing significant weight, plant hangers, macramé bags, clothes, and various home decorations.
When you unravel the fringe on twisted rope, it creates a natural wave rather than a fluffy cloud. Some people love that look. Others find it hard to work with. Know which finish you want before you buy.
-
Braided cord
Braided cord is made with fibres interlocked in a diagonal weave pattern. The result is a smooth, firm surface. It does not unravel into fringe, the interlocked weave holds together.
It produces very sharp, precise knot edges and is best for macramé bags, accessories, and projects where you want very clean, structured results.
The beginner shortcut:
When in doubt, start with 3mm or 4mm single-strand cotton cord. It is the most forgiving of the three, soft on your hands, easy to knot, and gives you that signature fluffy fringe on your first project without any extra effort.
If macramé sparks a wider interest in making things to sell, Low-Cost Craft Business Ideas for Beginners That Require No Expensive Tools or Skills is worth reading next, macramé fits squarely into that category.’
Cord Size — What the Millimetres Mean
Cord thickness is not just about aesthetics. It directly affects the size of your knots, the weight your project can hold, and how long it takes to finish. Here is a simple breakdown:
- 1mm–2mm — jewellery, keychains, bookmarks, fine detail work
- 3mm–5mm — wall hangings, plant hangers, bags, placemats, the sweet spot for most beginner projects
- 6mm–12mm — large statement wall hangings, chunky sculptural pieces, outdoor installations
Cord thickness matters just as much as cord type, and sizes range from 1mm all the way to 10mm. If you are starting out, 3mm or 4mm puts you right in the middle, thick enough to see your knots clearly, thin enough to work comfortably with your hands.
Once you are comfortable with cord and knots, 12 Easy Seasonal Craft Projects to Make All Year Round shows how to keep your making consistent across every month of the year.
How Much Cord to Cut

This is where most beginners run into trouble. Macramé uses far more cord than it appears to from the outside.
In most cases, your macramé cord needs to be roughly four times the length of your project. When your cord is folded in half with a lark’s head knot to create two cords, go for eight times the length. A few things that affect this:
- The more knots in the pattern, the more cord you need
- Thicker cord uses more length per knot than thinner cord
- Braided cords and 3-ply ropes take up more length per knot than single-strand cord
The safest approach: always cut more than you think you need. Running out of cord halfway through a project, with no way to add more invisibly, is one of the most frustrating beginner experiences, and it is entirely avoidable.
The Tools
You do not need a starter kit, a subscription box, or any specialist equipment. Here is the complete list of what you actually need:
- Sharp fabric scissors, not kitchen scissors, not craft scissors. Cotton frays badly when crushed instead of cut cleanly. One good pair of fabric scissors makes a visible difference in your finished edges.
- A measuring tape, for cutting your cord lengths accurately before you start
- A wooden dowel, metal ring, or piece of driftwood, this is what you mount your cords onto at the top of most projects. A $2 wooden dowel from a craft store works perfectly.
- A stiff-bristled brush or wide-tooth comb, for brushing out fringe at the end of your project. A pet slicker brush works just as well as anything sold specifically for macramé.
- Tape or clips, to hold your work in place while you knot, especially helpful when you are starting out.
If you enjoy working with your hands and want to explore beyond fiber arts 11 Wood Burning Crafts You Can Make at Home with Basic Tools That Turn into Income is another beginner-friendly craft with strong selling potential.
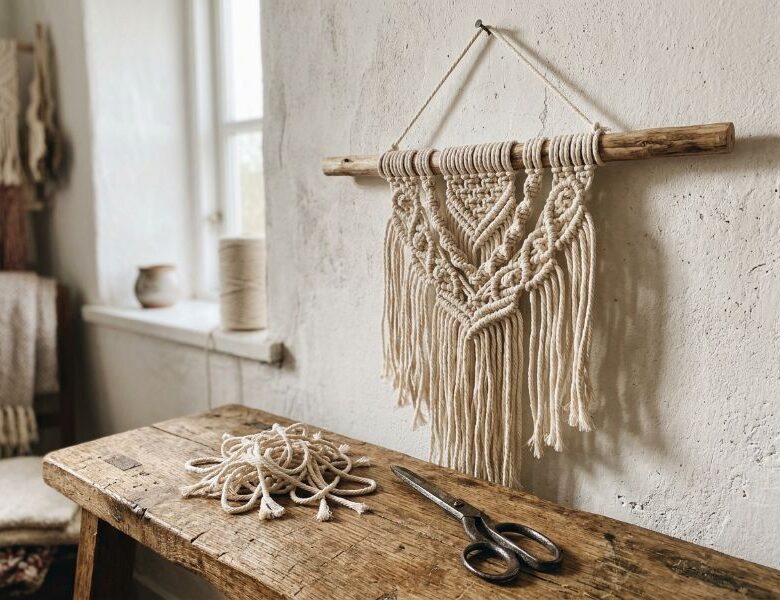
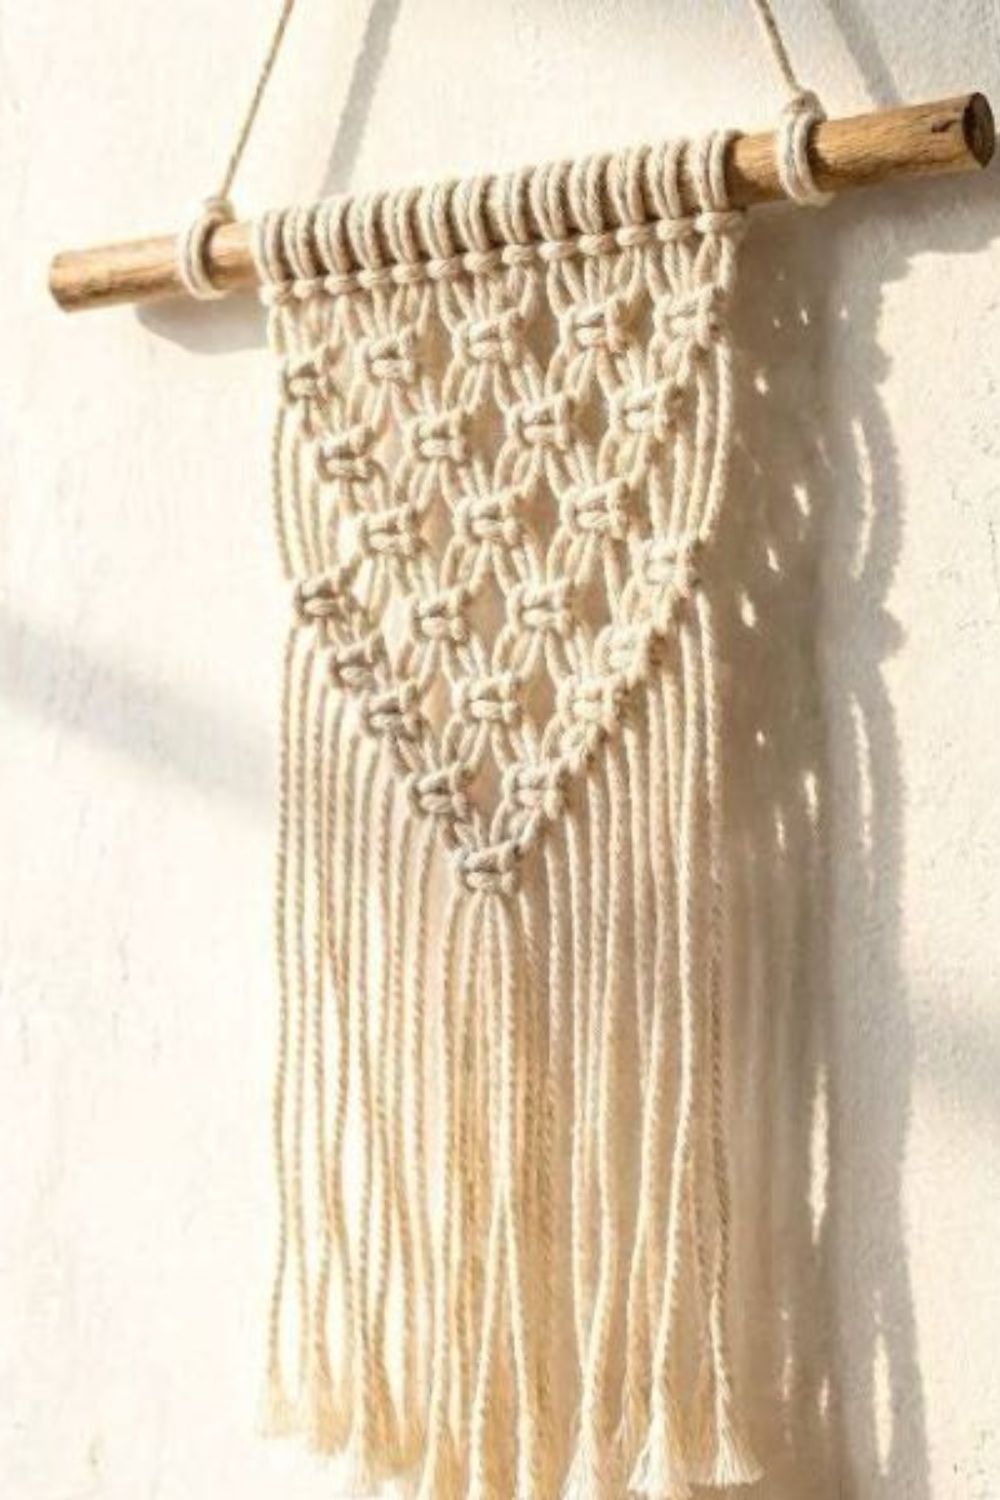
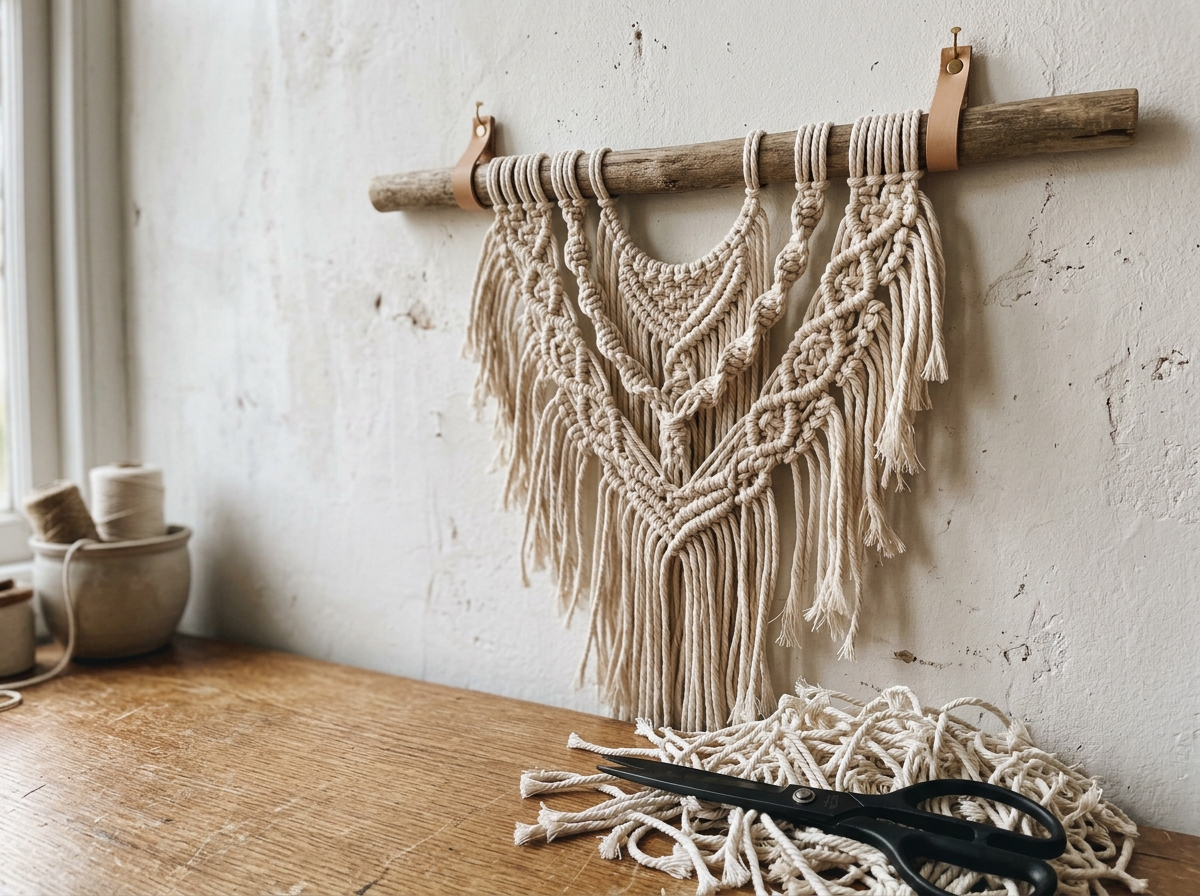
The 3 Knots Every Beginner Needs to Know First
Here is something most tutorials don’t tell you upfront: the majority of macramé for beginners projects, wall hangings, plant hangers, keychains, coasters, are built from just three knots. Learn these three until they feel automatic before you attempt anything else.
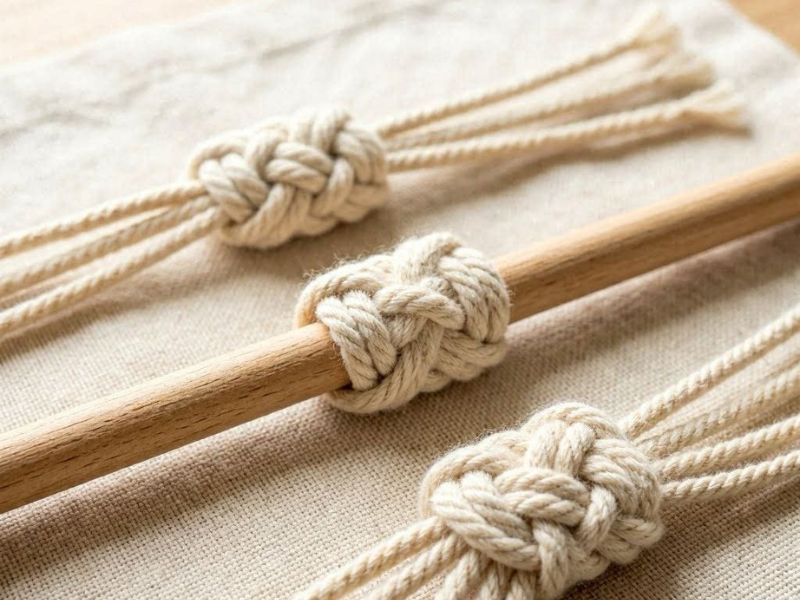
1. The Lark’s Head Knot
This is your starting knot, the one that attaches your cord to your dowel or ring before any project begins.
- Fold your cord in half
- Place the folded loop over the top of the dowel
- Pull both loose ends down through the loop
- Pull tight
You will do this once per cord at the start of every project. After that, you will barely think about it again, but without it, nothing else holds.
2. The Square Knot
The square knot is the workhorse of macramé. Most patterns you see online are built almost entirely from this one knot repeated in different arrangements.
It uses four cords, two working cords on the outside and two filler cords sitting in the middle doing nothing. The outside cords do all the work.
The one thing beginners get wrong: tying from the same side every single time. That does not create a square pattern, it creates a spiral twist. To get clean, even rows, alternate sides with every knot.
3. The Double Half Hitch
One cord acts as the holding cord stretched horizontally across your work. Every other cord wraps around it twice, that is one double half hitch. Repeat across all cords and those wraps form a clean, defined horizontal line across your piece.
The technique itself is straightforward. The tricky part is tension, keeping each wrap pulled to exactly the same tightness so the line stays straight and even. This is normal. It takes a few rows to feel it click.
For beginners curious about other crafts that sell well from home, 12 Polymer Clay Crafts You Can Make and Sell from Home pairs well with macramé, both require minimal equipment and have high perceived value.
The Mistakes Beginners Make (and How to Avoid Them)
Most macramé for beginners frustrations come down to the same handful of mistakes, none of which are about talent or skill. Here are the ones worth knowing before you start.
Underestimating How Much Cord You Need
This is the most common one. Macramé consumes far more cord than it looks like from the outside. A rough rule of thumb is 4–5 times the finished length for each working cord, and always buy 20–30% more than you think you need. Running out halfway through a project with no way to add more invisibly is entirely avoidable.
Jumping Into a Large Project Without Practising First
Sitting down to make a large wall hanging as your very first attempt is how most beginners end up frustrated and walking away. Spend 15–20 minutes tying the three core knots on a spare length of cord before you touch your actual project. You will immediately feel the difference in your tension and confidence.
Using the Wrong Cord for the Wrong Project
This one is responsible for more failed first projects than any knotting error:
- Braided cord — firm and structured, best for bags, keychains, and pieces that need to hold their shape
- Twisted 3-ply cord — strong and durable, ideal for plant hangers and anything bearing weight
- Single-strand cord — soft and fluid, perfect for wall hangings, feathers, and anything with fringe
Using a soft single-strand cord for a plant hanger that needs to carry weight, or buying braided cord expecting fluffy fringe at the bottom, these are the mismatches that make a project look wrong even when the knots are tied correctly.
Not Securing the Ends
Loose cord ends fray fast, especially with single-strand cotton. A small knot at the end of each cord before you start, or a tiny wrap of masking tape, keeps everything tidy while you work and stops fraying mid-project.
Macramé fits naturally into a home that values texture, imperfection, and handmade character — if that aesthetic speaks to you, 11 Wabi-Sabi DIY Home Decor Projects for a Naturally Imperfect Home shows exactly how to carry that feeling through your entire space.
Your First Project
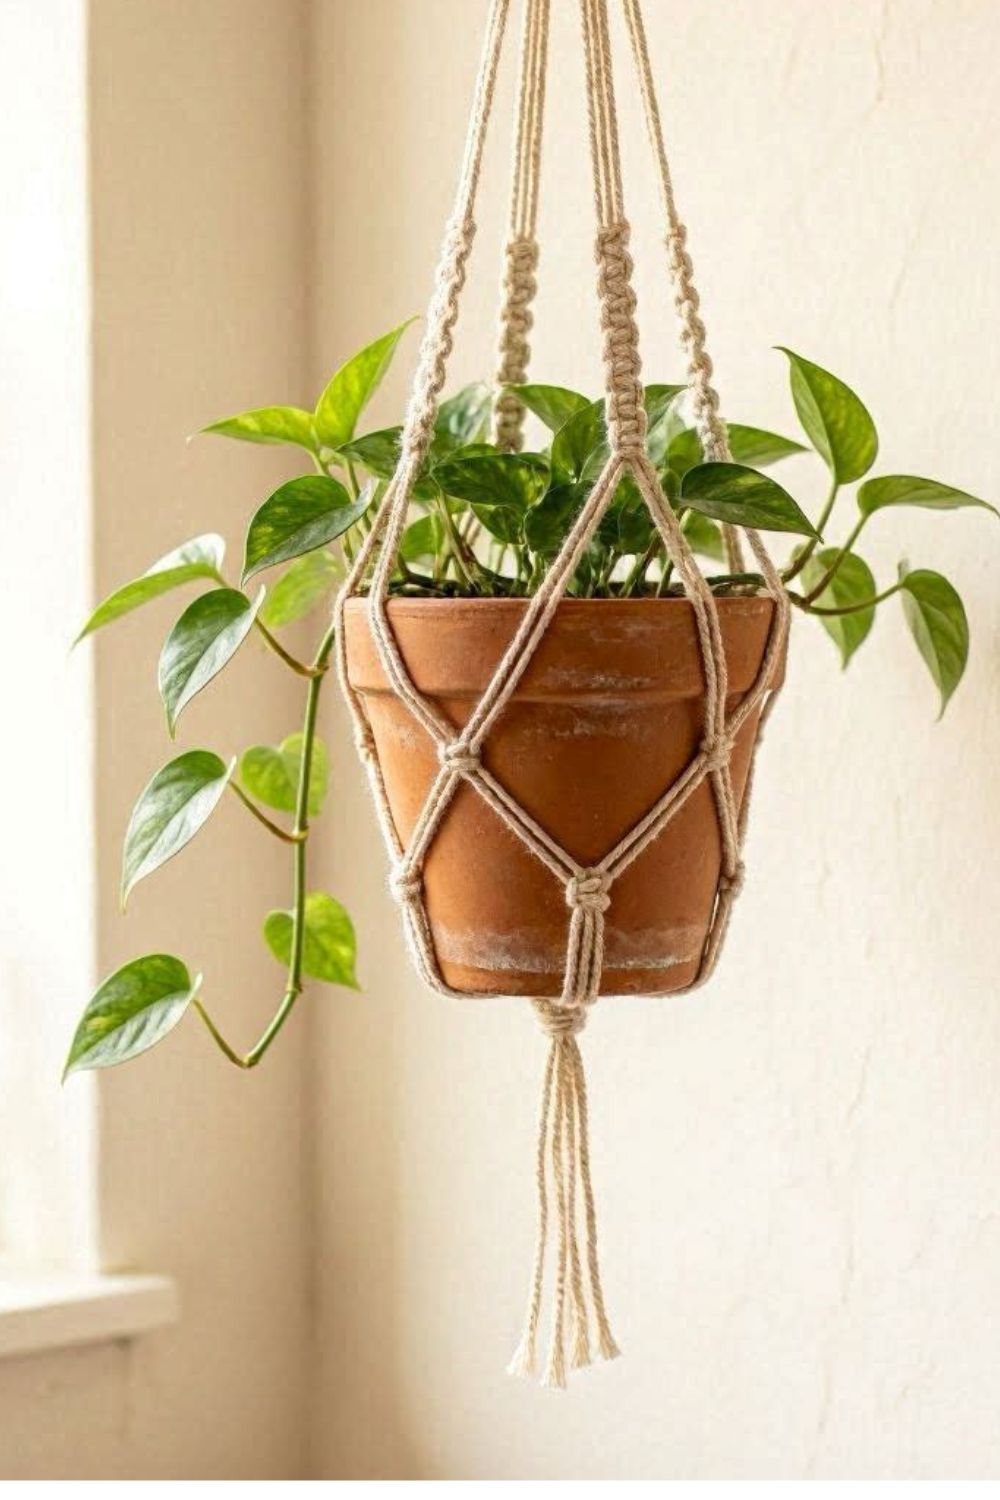
Start with a simple macramé plant hanger.
Not because it is the easiest thing in existence, but because it uses only the square knot, it finishes in under an hour, and you end up with something genuinely useful that you can hang in your home immediately. That matters more than people realise. Finishing a first project, actually completing it, is what keeps most beginners going.
A basic plant hanger requires nothing beyond a length of 3mm single-strand cotton cord, a metal ring to mount it on, and the square knot you already know. No dowel. No complex pattern. Just cord, knots, and a pot that needs a home.
Start there. Finish it. Then move to a wall hanging.
A finished macramé wall hanging costs a fraction of what similar pieces sell for in home décor stores — and that is exactly the kind of thinking behind How to Decorate Your Home When You’re Broke But Have Good Taste.
Conclusion
Macramé for beginners is not about being naturally creative or artistic. It is about starting with the right information, and now you have it.
You know what macramé actually is and how it differs from every other fiber craft.
Also you know which cord to buy first, what size to start with, and how much to cut before you tie a single knot. You know the three knots that build almost every project you will ever make. And you know exactly what your first project should be and why.
That is the foundation most people skip entirel, and then wonder why their first attempt went wrong.
The next step is simple. Get your cord, mount it on a ring, and tie your first plant hanger. Everything else builds from there.
When you are ready to go further, the next post in this series covers macramé knots for beginners in detail — every variation, every common error, and exactly how to fix them.
Frequently Asked Questions
1. Is macramé hard to learn?
No, but it does require patience in the first hour. The knots themselves are simple and repetitive. What takes time is developing consistent tension so your rows sit evenly.
Most beginners feel comfortable with the square knot within a single practice session. The learning curve is short. The skill ceiling is as high as you want it to go.
2. How long does it take to finish a beginner macramé project?
A simple plant hanger takes 45 minutes to an hour for a first-timer. A small wall hanging takes two to three hours depending on the pattern and fringe length. The more knots in the design, the longer it takes, but most beginner projects are designed to be completable in one sitting.
3. What is the best macramé cord for beginners?
3mm single-strand natural cotton cord. It is soft on your hands, forgiving of uneven tension, knots cleanly, and brushes out into beautiful fringe. It is also widely available and affordable. Start here before experimenting with other cord types.
4. Can I do macramé without a dowel?
Yes. A wooden dowel is the most common mounting option but it is not the only one. Metal rings, driftwood, a thick branch from outside, a curtain rod, or even a wire hanger work just as well depending on the project.
5. What is the difference between macramé rope, cord, and string?
These three terms are used interchangeably. In practice:
- String — the thinnest option, a single strand, best for jewellery and fine detail work
- Cord — the most common type, available in single-strand or braided construction, covers most beginner projects
- Rope — typically refers to 3-ply twisted cord, the strongest of the three, best for plant hangers and anything carrying weight
When a tutorial says “cord,” single-strand cotton in 3mm or 4mm is almost always what they mean.