Need crafts for seniors in bed or wheelchairs? These 8 lap-tray ideas make crafting easier without taking away the joy of creating.
A craft can look “easy” on paper and still be completely impractical when the person making it is in bed or using a wheelchair.
The problem isn’t always the craft itself. It may be the tiny pieces that roll off the tray, the need to reach across a large workspace, a pair of scissors that requires more hand strength than expected, or simply having to stop every few minutes because the materials are out of reach.
That is why choosing crafts for seniors in bed or wheelchairs requires more thought than picking the simplest project from a craft list.
A good activity needs to fit the person’s available space, movement, energy and hand function while still allowing them to make meaningful choices.
A lap tray can provide a useful working surface, but it doesn’t magically make every craft accessible. The goal is to choose projects that can be prepared and adapted so the senior can take part as independently as their abilities allow—even when someone else needs to handle the more difficult physical steps.
Here are eight craft ideas selected with that principle in mind, along with practical ways to make each one more manageable on a lap tray.
Before Choosing a Craft, Match the Project to the Person — Not the Other Way Around
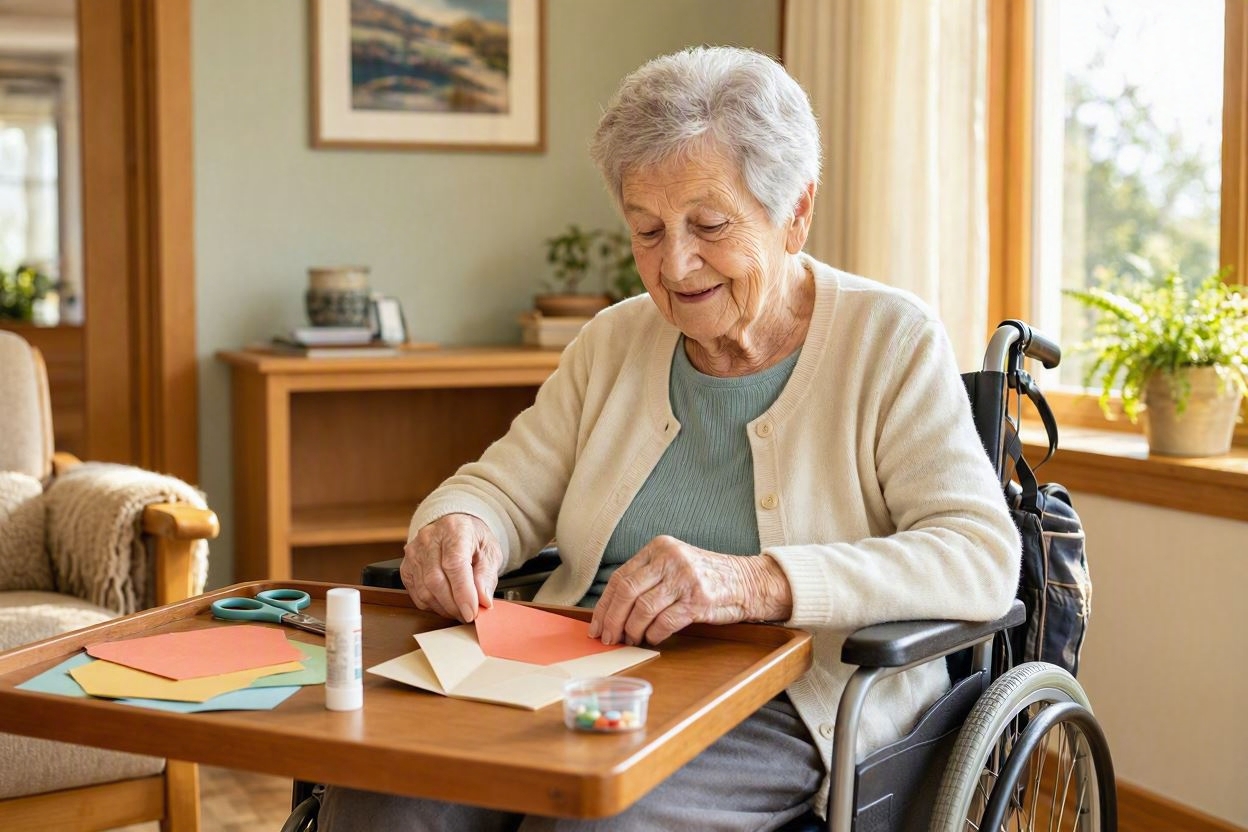
Two seniors can use wheelchairs and still have completely different abilities when it comes to crafting.
One person may be able to cut paper, paint and handle small objects independently, while another may have limited grip strength, reduced reach or tire quickly.
A senior who spends most of the day in bed may also have different needs from someone who can sit upright comfortably for an extended period.
That is why the best starting point isn’t “Which craft is easiest?” It is “What can this person comfortably and safely participate in?”
Start With Their Reach
Look at how far the person can comfortably reach without leaning, twisting or repeatedly repositioning. Keep the most frequently used materials within that comfortable range.
A project that requires reaching across a large table may become frustrating on a lap tray, particularly when pieces keep moving out of reach.
Arrange supplies in a small container or shallow tray so the person doesn’t have to keep asking someone to retrieve them.
Consider What Their Hands Can Actually Manage
Craft instructions often assume a certain amount of grip and finger control. In reality, a senior may be comfortable holding a paintbrush but struggle to squeeze a glue bottle, manipulate embroidery thread or cut thick card.
Think about the specific movements the project requires:
- Gripping: Can they hold the tool securely?
- Pinching: Can they pick up and position small pieces?
- Pressing: Can they apply enough pressure to stick, stamp or shape something?
- Two-handed use: Does the project require both hands working together?
- Repetition: Will the same movement become tiring after several minutes?
This helps you modify the difficult part rather than ruling out the entire activity.
Look at Vision Before Choosing Small Details
Tiny beads, thin thread and small decorative pieces may look manageable to an experienced crafter but become difficult when vision is reduced.
Larger pieces, strong contrast between the material and the work surface, and clearly defined shapes can make the same project easier to see and manipulate.
This doesn’t mean every senior needs oversized materials. The point is to match the size and visual complexity to the person’s actual vision and dexterity.
Account for Energy, Not Just Ability
Someone may be physically capable of completing a craft but unable to sustain the activity for long.
A project can therefore be designed in stages. For example, a caregiver might prepare the materials during one session, while the senior arranges and assembles them during another.
There is no requirement to finish a craft in one sitting.
Pacing and breaking activities into smaller steps are commonly recommended approaches for people who experience limited energy or fatigue.
The goal is to avoid turning a relaxing activity into something physically exhausting.
Decide Which Parts Need Help—and Which Parts Should Stay With the Senior
Needing assistance with one step does not mean the senior has to surrender the whole activity.
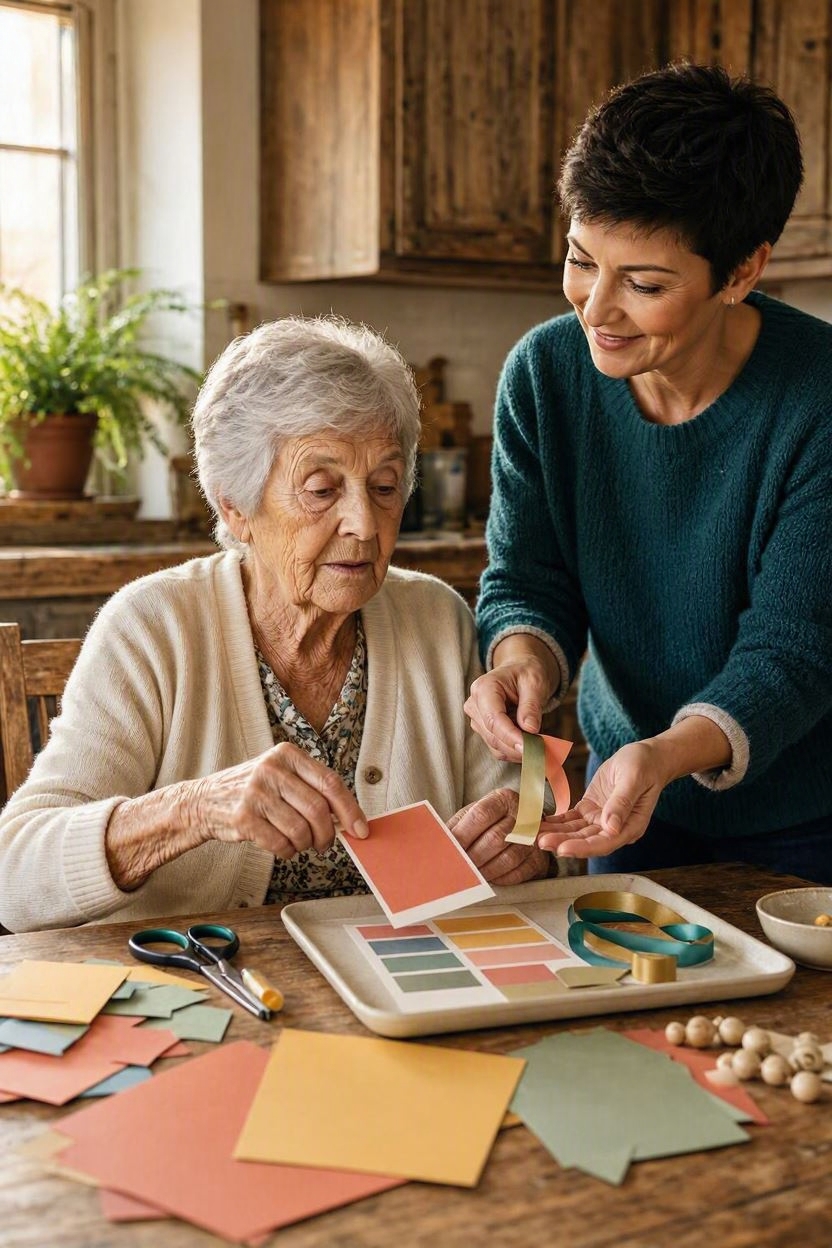
A useful approach is to separate the physical work from the creative decisions.
A helper might:
- open packaging
- cut difficult shapes
- prepare glue
- stabilize the work surface
- retrieve dropped materials
The senior can still:
- choose colours
- select photographs or patterns
- decide where pieces go
- direct the sequence
- make changes to the design
- decide when the project is finished
That distinction matters because independent participation is not the same as doing everything without help.
Ask One Simple Question Before You Begin
Instead of assuming what the senior can or cannot do, let them tell you.
Ask:
“Which part of this would you like to do yourself, and which part would you like me to help with?”
That question changes the role of the helper. Rather than taking over because a task looks difficult, you give the senior an opportunity to identify where they want assistance.
The craft should adapt around the person, not force the person to struggle through a project simply because the original instructions were written for someone working at a conventional tab.
If hand stiffness or pain makes sewing difficult, Sewing With Arthritis: 11 Tools and Techniques That Take the Strain Out of Stitching shares practical ways to reduce strain while still enjoying sewing.
Crafts for Seniors in Bed or Wheelchairs
1. Large-Piece Greeting Card Collage
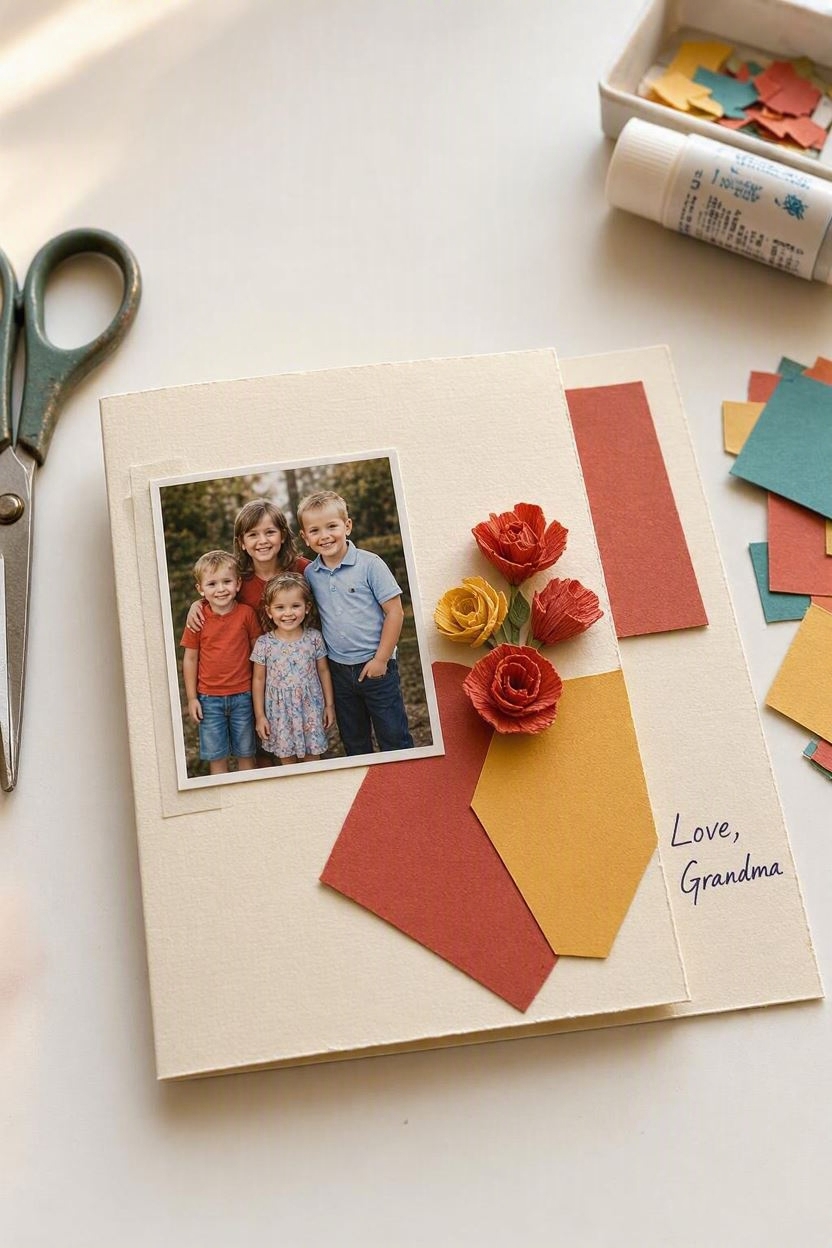
A greeting card collage is a good place to start because the finished piece has a purpose: it can be given to a family member, friend, neighbour or caregiver. That makes the activity about more than keeping busy.
The senior gets to decide what the card says and looks like, while the physical preparation can be adjusted around their abilities.
The key is to make the pieces large enough to handle comfortably rather than covering the card with tiny decorations that are difficult to pick up or position.
What You’ll Need
- A blank folded card or a piece of lightweight cardstock folded in half
- Pre-cut coloured paper, cardstock or felt shapes
- Large stickers or flat decorative pieces
- A glue stick or adhesive dots
- A pencil or marker
- A shallow tray or small container to hold the pieces
Avoid putting the entire pile of materials directly on the lap tray. A shallow container keeps loose pieces from sliding away and makes it easier to see what is available.
How to Make It
1. Prepare the pieces before the activity.
Cut circles, leaves, flowers, stars, hearts or other simple shapes in different colours. The shapes do not need to be perfectly uniform. If cutting is difficult for the senior, this is a useful task for the helper to do beforehand.
2. Let the senior choose the design
Place a small selection of shapes within comfortable reach and ask what they would like to use. They can choose the colours, decide where the pieces should go and change the arrangement before anything is glued down.
3. Arrange the pieces first
Let the senior experiment with the design on the card without adhesive. This removes the pressure of getting the placement right on the first attempt.
4. Attach the pieces
Use a glue stick or adhesive dots rather than requiring the senior to squeeze a small bottle of liquid glue. If applying adhesive is difficult, the helper can do this step while the senior directs where each piece should go.
5. Add a personal message
The senior can write the message themselves if comfortable. If writing is difficult, they can dictate the words while someone else writes them. They can still choose the greeting, wording and where it appears on the card.
Why It Works on a Lap Tray
This project has a small working area, and most of the materials can remain within the boundaries of the tray.
The pieces are also flat and lightweight, so there is less need to lift or manipulate bulky objects.
More importantly, the craft can be divided into separate jobs. The helper can prepare the shapes and adhesive, while the senior remains responsible for the creative decisions.
That makes it possible to adjust the amount of physical assistance without taking away the person’s role in making the card.
Make It Easier Without Taking Over
If the senior has difficulty picking up individual pieces, use larger shapes or pieces with an easy-to-grip edge. If reaching is limited, place only the materials needed for the current step on the tray instead of filling the entire surface.
For someone who tires quickly, stop after the design has been arranged and return to the gluing stage later.
And if writing is difficult, don’t make handwriting the measure of whether the person participated.
Choosing the message and dictating it can still leave that important decision in their hands.
A Simple Variation
Turn the card into a memory card using a printed photograph, a favourite colour combination or a familiar theme such as gardening, cooking, music or a favourite place.
The senior can decide which photograph or images belong on the card and how they should be arranged. This makes the project more personal without requiring a more complicated craft.
The finished card can then be given to someone they care about, , a small outcome, but one that gives the activity a reason beyond simply filling time.
2. Watercolour Painting With a Water Brush
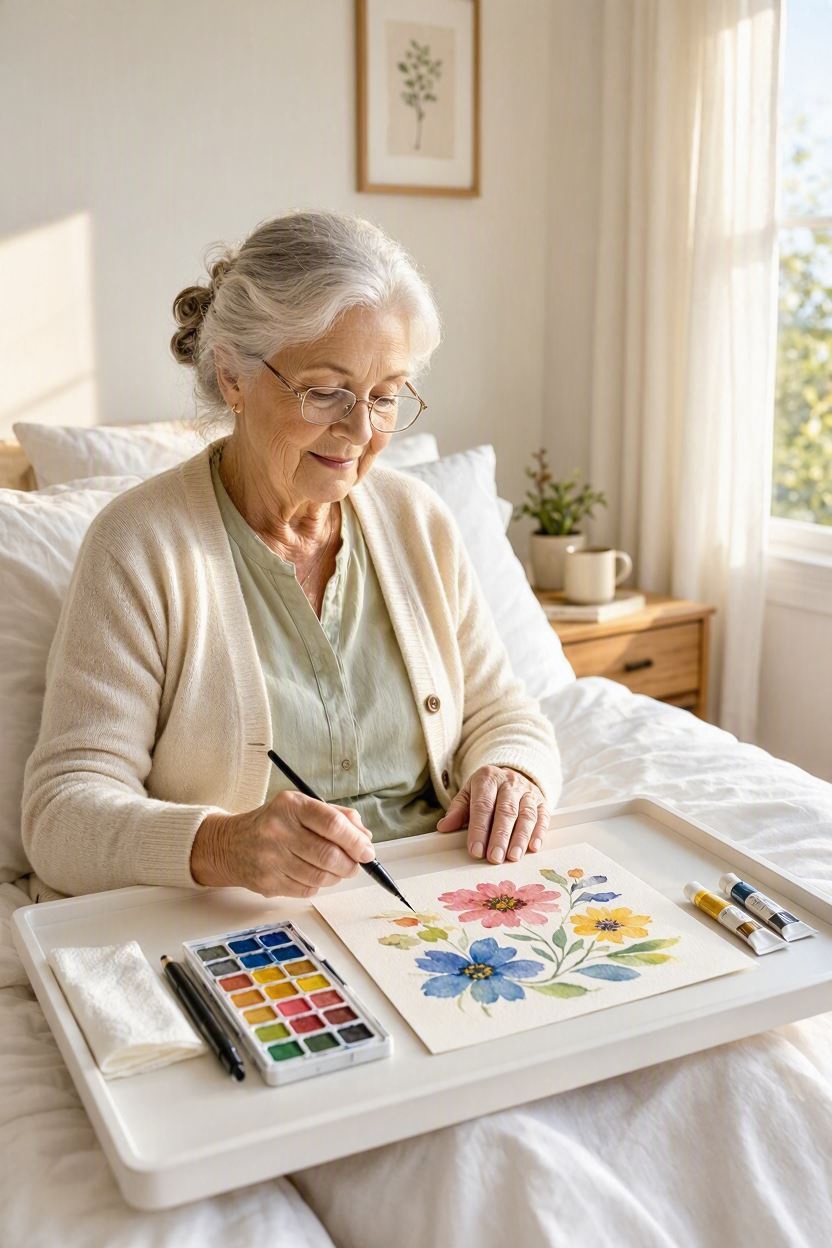
Watercolour painting can work surprisingly well for crafts for seniors in bed or wheelchairs when the setup is kept small and the materials are chosen carefully.
Instead of a traditional water cup beside the painting, a refillable water brush holds water inside its handle and releases it through the brush tip.
That small change matters on a lap tray. There is less equipment competing for space, and there is no open cup of water that can easily tip if the tray is moved or bumped.
The project can also be scaled to match the senior’s ability. Someone with good hand control can paint freely, while someone who tires easily can work on a small pre-drawn design.
What You’ll Need
- Watercolour paper or heavyweight mixed-media paper
- A small set of watercolour paints
- One refillable water brush
- Pencil, if a light outline is helpful
- Paper towel for controlling excess water
- A shallow tray or container for keeping supplies together
A small sheet of paper is usually more practical than a large page when working from a lap tray. It keeps the painting area within easy reach and reduces the amount of arm movement needed.
Why Use a Water Brush?
A traditional watercolour setup usually needs a separate container of clean water. A water brush combines the water reservoir and brush into one tool.
It does not eliminate every accessibility issue, the senior still needs enough grip and control to hold and guide the brush—but it can simplify the workspace.
For someone who has difficulty squeezing a conventional paint tube or handling several containers, the helper can prepare the palette and fill the water brush before the activity begins.
A Better Way to Choose the Painting
Don’t automatically hand the senior a blank sheet and expect them to create a detailed painting.
Give them choices that match their abilities.
They might paint:
- Large flowers
- Simple leaves
- Colour blocks
- A sunset
- Geometric patterns
- A familiar landscape
- A lightly outlined picture
For someone with limited visual detail, larger shapes and clear boundaries are easier to work with than intricate illustrations.
How to Make It
1. Prepare a Small Painting Area
Place the paper securely on the lap tray and keep the palette and water brush within comfortable reach. Avoid covering the entire tray with supplies.
If the paper slides easily, the helper can stabilize it or use a suitable non-slip surface underneath.
2. Fill the Water Brush Before Starting
Fill the brush according to the manufacturer’s instructions and test it on scrap paper. The aim is to have enough moisture to activate the paint without flooding the paper.
This preparation can be done by the helper if opening, filling or squeezing the brush is difficult.
3. Let the Senior Choose the Colours
Rather than deciding which colours they should use, offer a manageable selection and let them choose.
This is a small but important part of independent participation: the senior is making the creative decisions rather than simply following someone else’s instructions.
4. Start With Large Areas
Begin with broad shapes instead of tiny details. The senior can fill a flower, sky, leaf or geometric section using comfortable brush movements.
If their hand becomes tired, the painting can be left unfinished and continued later.
5. Add Details Only If Comfortable
Fine details are optional. Someone with good control may enjoy adding lines, dots or patterns, while someone with limited dexterity may prefer the painting without them.
There is no need to turn a simple activity into a test of precision.
How to Adapt It for Different Abilities
If holding a thin brush is difficult, a larger-handled brush may provide a more comfortable grip.
The Alzheimer’s Society also recommends adapting art activities around a person’s abilities, including considering larger-grip brushes where appropriate.
If the senior has difficulty controlling the brush, the helper can outline larger areas beforehand.
If vision is the main limitation, use strong contrast between the paper and the painted shapes and avoid very small details.
If fatigue becomes noticeable, stop rather than encouraging the person to finish the picture. The activity is supposed to remain manageable, not become another task they have to push through.
A Meaningful Variation
Instead of painting a random picture, choose something connected to the senior’s life, a favourite flower, a familiar landscape, a house they remember, or colours associated with a special occasion.
The finished painting doesn’t have to be technically impressive. What matters is that the senior had a genuine role in deciding what to paint, which colours to use and when the piece was finished.
3. Pre-Cut Fabric Collage — No Sewing Required
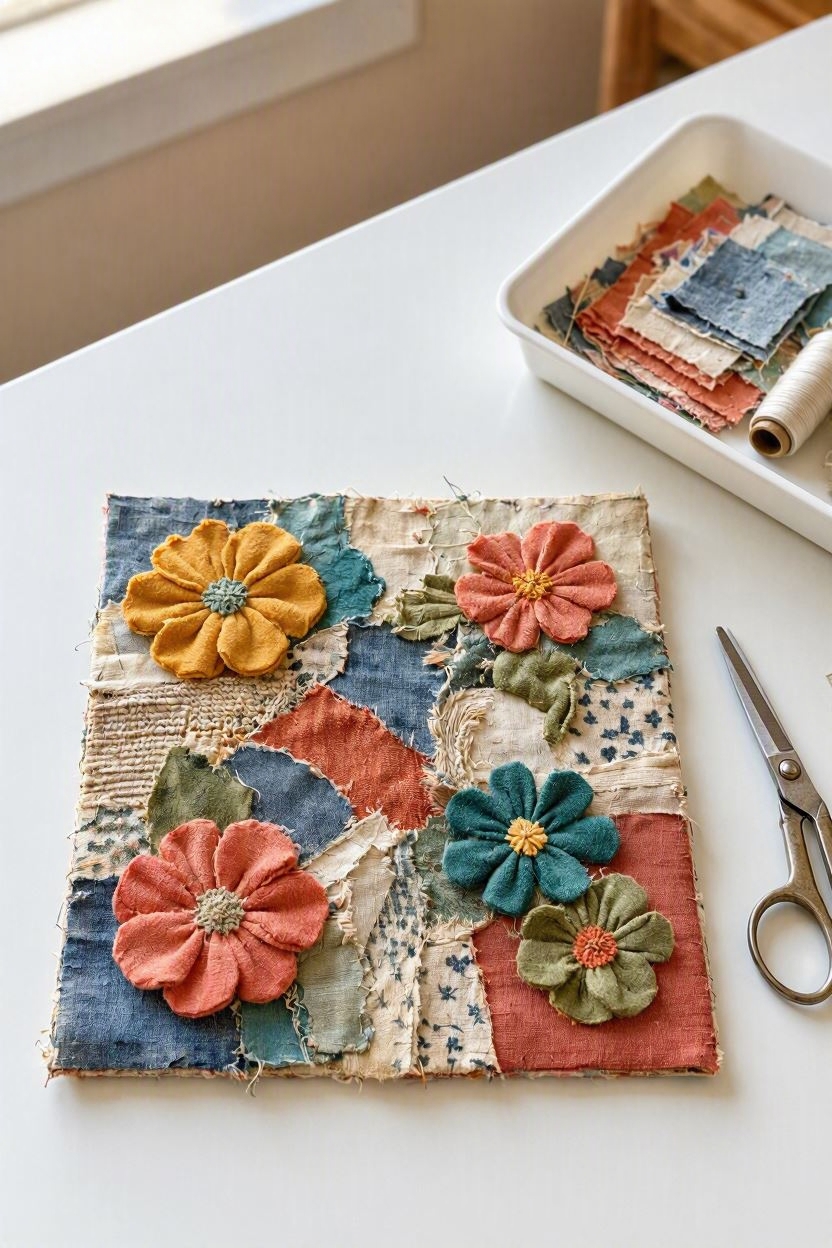
If a senior has always enjoyed sewing, quilting or working with fabric, a collage can preserve some of that creative experience without requiring a sewing machine, needle or detailed hand stitching.
The idea is simple: use pieces of fabric to build a picture or pattern on a firm backing.
The senior chooses the colours and arrangement, while a helper can handle the cutting or any step that requires more hand strength.
What You’ll Need
- A piece of cardstock, felt or lightweight canvas as the backing
- Pre-cut fabric pieces in different colours and textures
- Fabric-safe adhesive or suitable craft glue
- A shallow tray for holding the fabric pieces
- Pencil for lightly marking a design, if needed
Choose fabrics that are easy to distinguish by colour and texture. Cotton, felt and other stable fabrics are generally easier to arrange than slippery or very lightweight materials.
How to Make It
1. Prepare the Fabric Pieces
Cut the fabric into larger shapes such as squares, leaves, circles, strips or simple flower petals. The pieces should be large enough to pick up and position without requiring precise finger movements.
This is a good preparation task for a helper if the senior finds cutting difficult.
2. Give the Senior a Small Selection
Don’t cover the lap tray with dozens of fabric scraps. Start with a few colours and textures and add more if needed.
A smaller selection makes it easier to see the available choices and keeps loose fabric from taking over the work area.
3. Build the Design Before Gluing
Let the senior move the pieces around until they are happy with the arrangement.
They might create a flower, abstract pattern, landscape or simple geometric design. There is no need for the pieces to form a complicated picture.
4. Attach the Fabric
Once the arrangement is decided, apply the adhesive and press the pieces into place.
If squeezing a glue bottle is difficult, use a glue stick where it is suitable for the materials, adhesive dots, or have the helper apply the adhesive while the senior positions the fabric.
5. Leave the Piece Flat to Dry
Keep the finished collage on a stable surface while the adhesive dries. Avoid moving it around unnecessarily while the pieces are still loose.
Why This Works as a Seated Craft
The project has a small working footprint and doesn’t require continuous use of both hands. It can also be paused between stages.
Most importantly, it can be adapted without removing the senior from the creative process.
Someone else can cut the fabric, prepare the backing or handle the adhesive while the senior remains responsible for choosing the colours and arranging the design.
A Personal Variation
Use fabric from meaningful clothing, old sewing projects or textiles connected to family memories. Only use fabric that is appropriate to repurpose and that the owner is happy to cut.
The senior can choose which pieces belong in the collage and how they should be arranged, turning a simple fabric project into something personally significant.
4. Cardboard-Loom Yarn Weaving
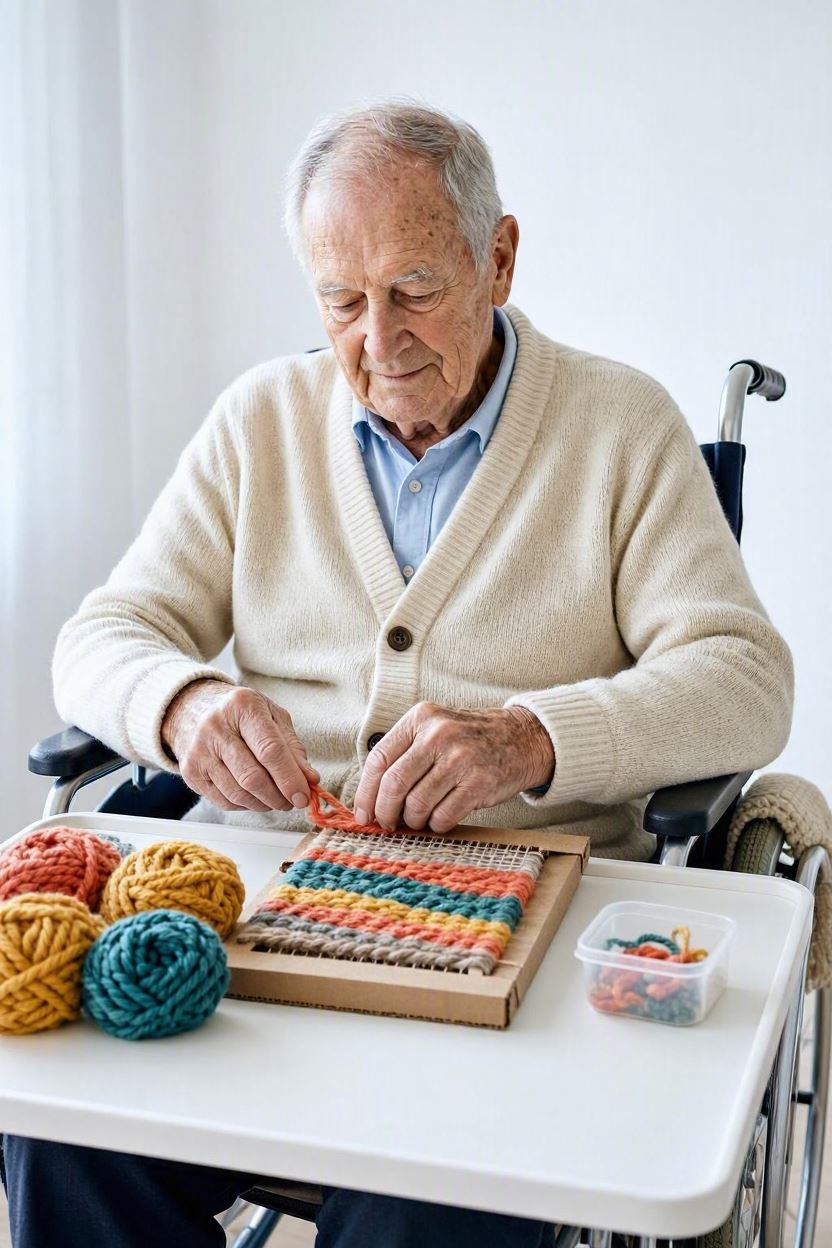
Traditional weaving can involve a large loom, complicated setup and repeated hand movements that aren’t practical for someone working from a wheelchair or bed.
A small cardboard loom reduces the scale of the project and lets the senior concentrate on the basic over-and-under movement.
Using thicker yarn or fabric strips can also make the materials easier to see and handle than fine thread.
What You’ll Need
- A piece of sturdy cardboard
- Scissors for preparing the loom
- Chunky yarn or wide fabric strips
- Tape
- A shallow container for the yarn
- A blunt yarn needle, if needed and appropriate for the senior’s abilities
The helper can prepare the cardboard loom before the activity so that the senior isn’t required to manage the cutting and measuring.
How to Make It
1. Prepare the Cardboard Loom
Cut a rectangular piece of sturdy cardboard and make evenly spaced notches along the top and bottom edges.
Wrap yarn vertically through the notches to create the warp threads. Secure the ends on the back with tape so they don’t come loose while weaving.
The gaps should be wide enough for the chosen yarn to pass through comfortably.
2. Choose Two or Three Colours
Offer a small selection of chunky yarn rather than a large pile of different colours.
The senior can decide which colours to use and what order they should appear in. This keeps the creative decision-making with them while reducing clutter on the lap tray.
3. Begin the Over-and-Under Pattern
Pass the yarn horizontally across the warp threads, going over one thread and under the next.
On the following row, reverse the pattern so the yarn passes under the threads that were previously above it.
A blunt yarn needle can make this easier for someone who has enough hand control to use one safely.
4. Push Each Row Into Place
After completing a row, gently push it toward the previous row to keep the weaving reasonably compact.
Don’t insist on perfect tension. A relaxed, uneven weave can still become an attractive finished piece.
5. Stop When the Senior Is Ready
The project doesn’t have to fill the entire loom. If the senior becomes tired, the loom can be put aside and continued later.
Make the Weaving More Manageable
Use chunky, smooth yarn rather than very fine yarn if the senior has difficulty seeing or manipulating thin materials.
If threading the yarn is frustrating, the helper can start the first few rows and leave the senior with the repetitive weaving section.
For someone who struggles with two-handed tasks, hold the loom securely or place it on a non-slip surface so the senior doesn’t have to spend their energy stabilizing it.
What Makes This Different From Ordinary Weaving
The goal isn’t to reproduce the complexity of traditional loom weaving.
It is to reduce the physical and spatial demands while keeping the satisfying parts of the activity: choosing colours, following a pattern and watching the fabric gradually take shape.
That makes a small cardboard loom a useful adaptation for someone who enjoys textiles but needs a much smaller, more manageable workspace.
5. Sticker-Mosaic or Large-Shape Mosaic Art
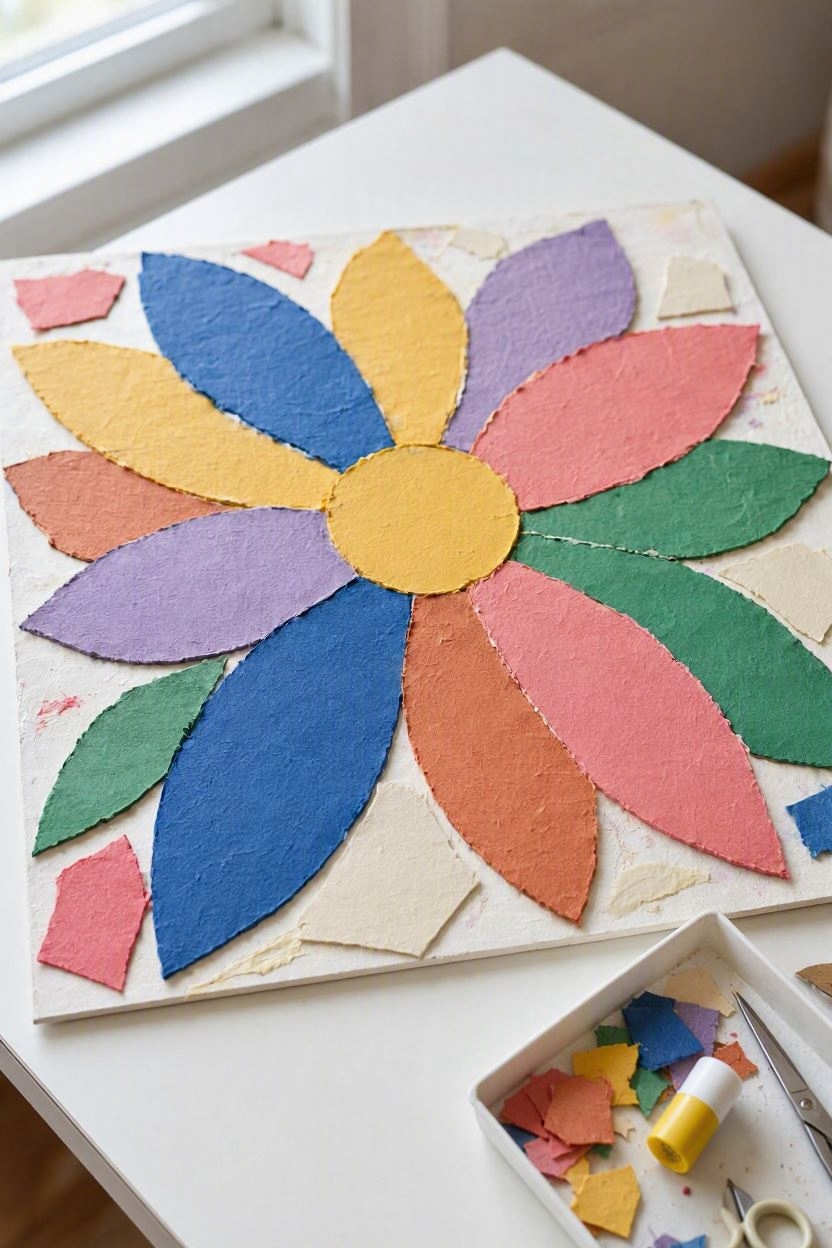
Mosaic crafts often involve tiny tiles, beads or pieces that can be difficult to pick up and position from a lap tray.
A more accessible version uses large paper shapes, foam pieces or stickers so the senior can still create a patterned picture without having to manage lots of tiny components.
For crafts for seniors in bed or wheelchairs, this is useful because the project can stay almost entirely within the tray’s working area, and the pieces can be prepared before the activity begins.
What You’ll Need
- A sheet of sturdy cardstock or lightweight cardboard
- Large stickers, foam shapes or pre-cut paper squares
- A pencil
- A simple printed pattern or outline, if desired
- A shallow tray or container for the pieces
Choose pieces that are easy to distinguish and pick up. Large, flat shapes are generally more manageable than tiny beads or loose mosaic tiles.
How to Make It
1. Choose a Simple Base Design
Start with a large outline such as a flower, heart, butterfly, geometric shape or abstract pattern.
You can draw the outline directly onto the cardstock or print a simple template.
Avoid very detailed patterns. The purpose is to create something the senior can work with comfortably rather than reproduce a complicated mosaic.
2. Prepare the Pieces
Place a small selection of stickers or shapes into a shallow container.
If you’re using paper pieces, cut them before the activity. Keep the number of pieces manageable so the lap tray doesn’t become crowded.
For someone with limited vision or hand control, choose larger pieces with clear contrast against the backing.
3. Let the Senior Decide Where They Go
This is the most important part of the activity.
The senior can choose which colours to use, where the pieces should be placed and whether the pattern should follow the outline or become something more abstract.
There is no need to correct every piece that sits slightly outside the line.
4. Attach the Pieces
Peel and stick the stickers directly onto the backing. For paper or foam pieces, use an adhesive method that the senior can comfortably manage.
If peeling backing from stickers is difficult, the helper can lift the edge first and leave the senior to position the piece.
5. Fill the Design in Sections
Rather than spreading all the pieces over the tray, work on one area at a time.
This reduces clutter and keeps the materials within a comfortable reach.
Why It Works for a Lap Tray
The materials are lightweight, the project requires very little equipment and the design can be completed in small sections.
It also offers an easy way to adjust the physical demand. Larger pieces require less precise finger movements than tiny mosaic tiles, while stickers can eliminate the need to squeeze and spread glue.
A More Personal Variation
Turn a photograph, favourite flower or familiar object into a simple large-shape outline and let the senior fill it with coloured pieces.
For someone who has difficulty seeing small details, keep the image bold and simple rather than trying to reproduce every feature of the original.
The finished piece can become wall art, a card front or a small decorative panel.
6. Air-Dry Clay Texture Tiles
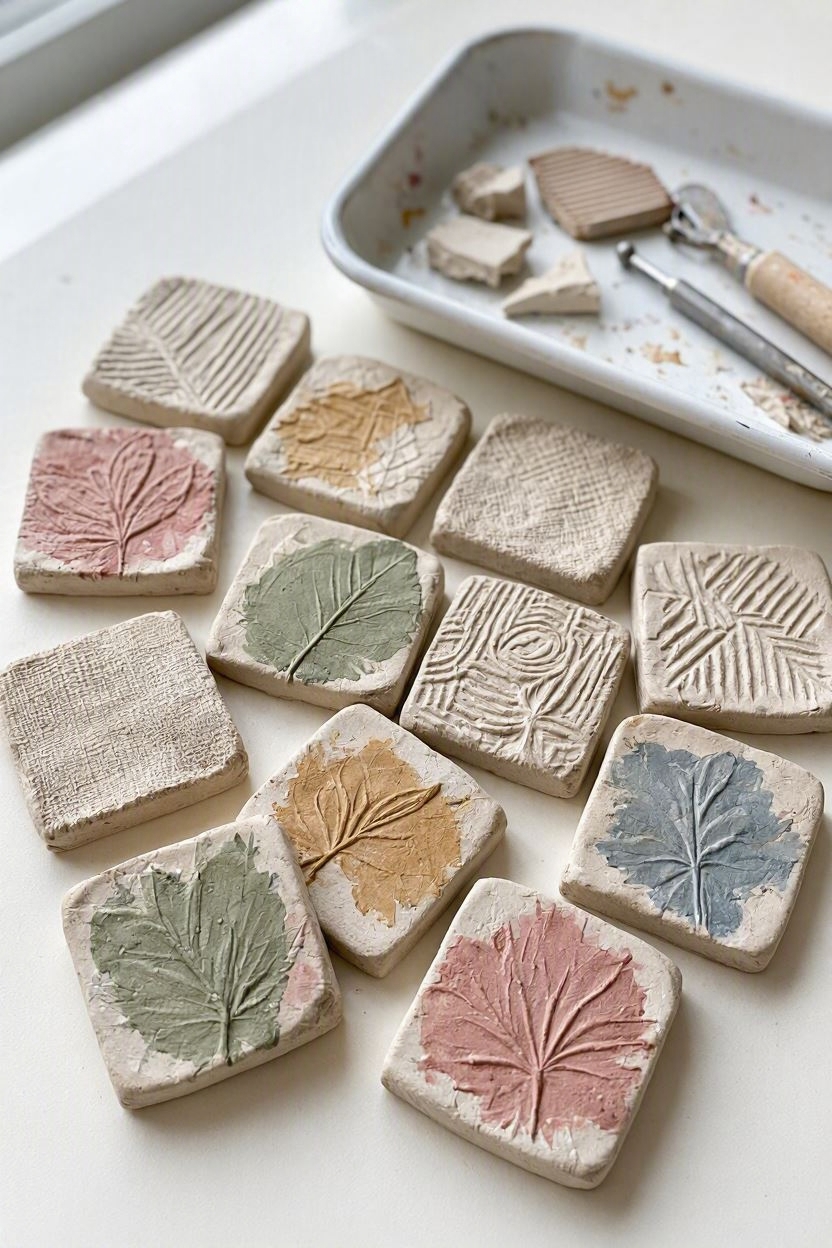
Air-dry clay offers a very different experience from paper and fabric crafts because the senior can press, imprint and shape a soft material rather than simply arranging flat pieces.
However, this is one craft where the person’s hand ability matters.
Clay requires some pushing and pressing, so it shouldn’t automatically be presented as suitable for every senior in bed or wheelchair.
What You’ll Need
- A small amount of soft air-dry clay
- A smooth work surface or disposable craft mat
- A rolling tool, if comfortable to use
- Texture objects such as lace, textured fabric, leaves or large buttons
- A small cup or container for keeping tools together
- Acrylic paint, if the senior wants to colour the dried tile
Avoid very small objects that are difficult to handle or that could create a choking hazard for someone who may have difficulty safely managing small items.
How to Make It
1. Prepare a Small Piece of Clay
Give the senior only enough clay to make one small tile at a time.
A large lump can be unnecessarily difficult to manipulate and takes up valuable workspace on a lap tray.
The helper can soften or portion the clay beforehand if needed.
2. Flatten the Clay
Place the clay on the work surface and flatten it into a small, reasonably even shape.
The senior can do this themselves if pressing is comfortable. Otherwise, the helper can prepare the clay and leave the texture-making stage for the senior.
3. Choose a Texture
Offer several safe texture options and let the senior decide which one they want to use.
They might choose:
- Lace
- Fabric
- A leaf
- A large-button pattern
- A textured comb
- A simple craft stamp
Press the chosen object into the clay to create an impression.
4. Build the Pattern
The senior can repeat the texture across the surface or combine several impressions.
They don’t need to cover every part of the clay. Leaving some smooth areas can make the texture more visible.
5. Leave It Flat to Dry
Place the finished tile somewhere stable and allow it to dry according to the clay manufacturer’s instructions.
Don’t rush this stage. Drying time varies between products and depends partly on the thickness of the clay.
6. Add Colour Later, If Desired
Once completely dry, the tile can be painted with acrylic craft paint if the senior enjoys painting.
This turns one project into two separate activities: creating the texture and later deciding how to colour it.
How to Adapt It for Different Abilities
If the senior has good hand strength, they may enjoy rolling and pressing the clay themselves.
If pressing is difficult, prepare the clay first and let them choose and position the texture tool while the helper applies the necessary pressure.
If gripping is limited, choose larger texture objects that are easier to hold rather than small stamps.
And if the person experiences pain or significant fatigue while manipulating the clay, don’t push through it simply to finish the tile.
This is a craft to adapt, or replace, according to the person’s comfort.
Why Include Clay When the Article Is About Lap-Tray Crafts?
Because accessibility doesn’t mean every activity has to be paper-based.
A small clay tile gives the senior a chance to work with texture, pressure and three-dimensional material while keeping the project compact.
It also demonstrates an important principle behind these crafts for seniors in bed or wheelchairs: the same craft can be made more accessible by changing its scale, materials and division of labour rather than removing the creative activity altogether.
For seniors who are interested in learning a new skill later in life, How to Learn to Sew as an Adult When You Feel Like You Are Already Too Late offers a gentle place to start.
7. Large-Bead Elastic Jewelry
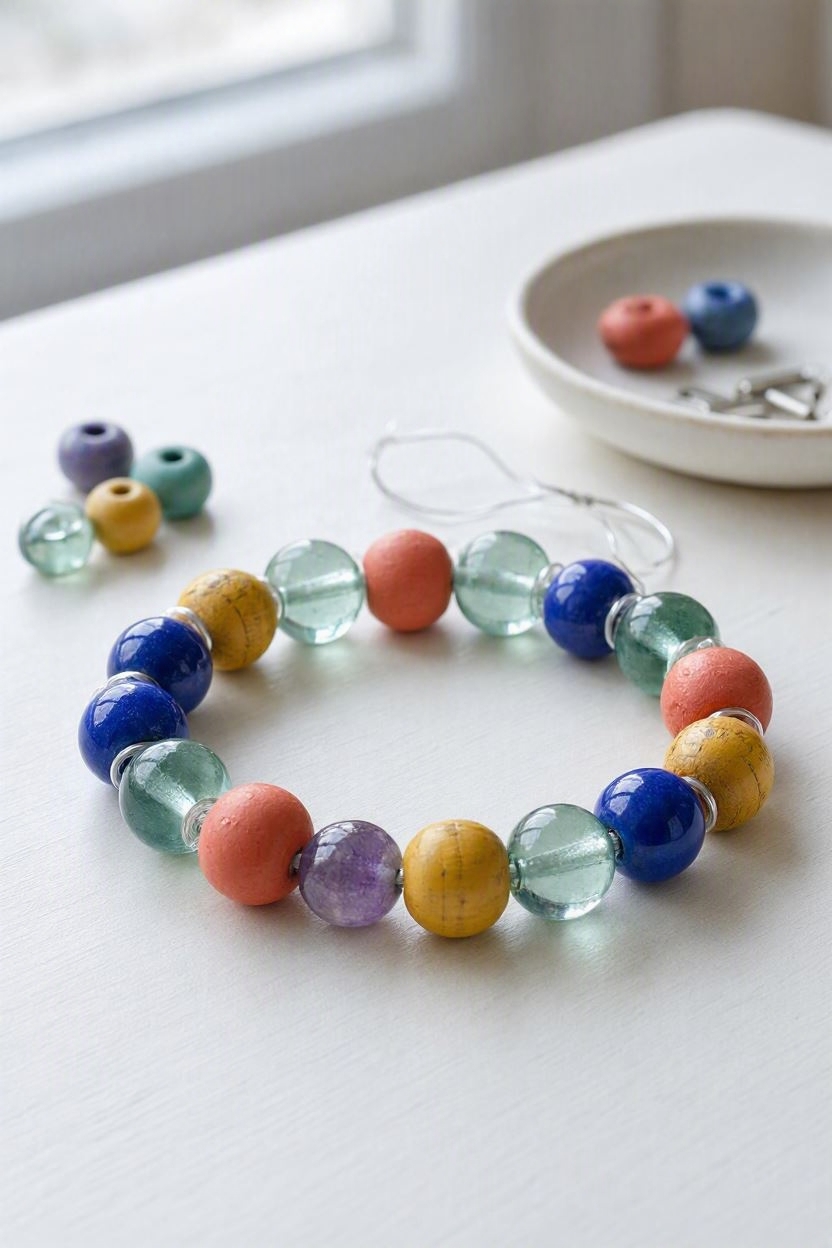
Making a simple bracelet or stretch necklace can give a senior the familiar satisfaction of stringing beads without requiring a clasp, needle or complicated jewellery-making technique.
The important adjustment is bead size: use larger, easy-to-handle beads rather than tiny seed beads that demand precise finger movements.
This can work well when the senior enjoys choosing colours and patterns but has difficulty managing the smaller components used in traditional jewellery making.
What You’ll Need
- Large craft beads with generously sized holes
- Pre-cut elastic cord
- A shallow container or bead tray
- Tape
- Scissors for the helper to prepare the cord
- A bead mat or non-slip surface, if available
Choose beads that are large enough for the senior to see and grasp comfortably. The exact size should depend on the person’s vision, hand control and ability to handle small objects.
Safety Advice: loose beads are not appropriate for everyone. Keep them away from anyone who may put small objects in their mouth or have difficulty safely handling them. Supervision should also be appropriate to the person’s abilities.
How to Make It
1. Prepare the Elastic
Cut a length of elastic appropriate for the intended piece, leaving enough extra length for tying.
The helper can handle the cutting if the senior has difficulty using scissors or measuring the cord.
2. Secure One End
Tape one end of the elastic to the work surface, leaving the other end free.
This simple step prevents the beads from sliding off the opposite end while the senior works.
3. Choose a Colour Pattern
Put a manageable selection of beads within comfortable reach.
Let the senior decide whether they want alternating colours, a repeating pattern or a completely mixed design. They can also choose which beads they like rather than following a predetermined pattern.
4. Thread the Beads
The senior slides each bead onto the elastic one at a time.
Large beads with wide holes are easier to see and may require less precision than small jewellery beads. If threading becomes difficult, the helper can hold the elastic steady while the senior places the beads.
5. Check the Fit Before Tying
Once enough beads have been added, check the size before making the final knot.
For a bracelet, it should not be so tight that it leaves pressure marks or restricts comfortable movement.
6. Secure the Finished Piece
The helper can tie the elastic securely if the senior cannot manage the knot. Trim the excess only after checking that the knot is secure.
Make It More Accessible
If individual beads are difficult to pick up, use larger beads with contrasting colours and place only a few choices on the work surface at a time.
If the senior has difficulty stabilizing the elastic, a helper can hold it or keep the end secured while the senior concentrates on choosing and threading the beads.
For someone with limited endurance, make a shorter piece rather than expecting them to complete a long necklace in one sitting.
Keep the Creative Part With the Senior
The physical steps can be shared, but the senior doesn’t have to give up control of the design.
They can decide:
- Which colours to use
- Which bead comes next
- How the pattern should repeat
- When the piece looks finished
- Who the finished jewellery is intended for
That makes the activity about creating something personal, rather than simply practising a repetitive hand movement.
8. Large-Scale Paper Weaving or Braiding
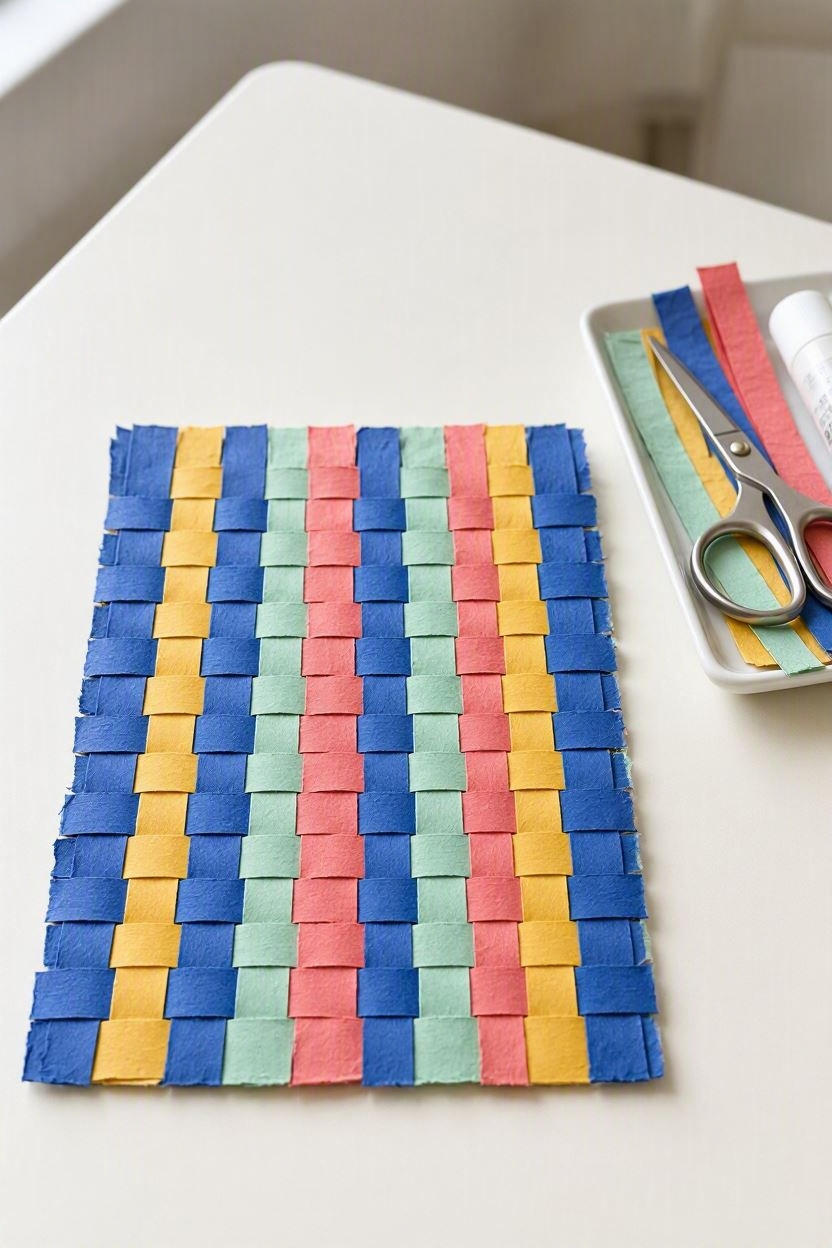
Paper weaving is often taught with narrow strips and precise over-and-under movements, but those small strips can be frustrating on a lap tray.
A larger version uses wide strips of paper so the pattern is easier to see and the materials are easier to handle.
For crafts for seniors in bed or wheelchairs, this is useful because the project can remain flat, lightweight and relatively contained while still giving the senior meaningful choices throughout the process.
What You’ll Need
- Two or more sheets of contrasting coloured paper
- Cardstock for the base
- Scissors
- Pencil and ruler
- Glue stick or suitable adhesive
- A shallow tray for holding the paper strips
The helper can prepare the strips before the activity if measuring and cutting are difficult.
How to Make It
1. Prepare the Base
Cut a piece of cardstock to a manageable size. Avoid making it so large that the senior has to reach repeatedly across the lap tray.
You can also prepare a simple paper loom by cutting evenly spaced slits into the base, leaving an uncut border around the edges.
2. Cut Wide Paper Strips
Cut contrasting paper into relatively wide strips rather than narrow ones.
The exact width can be adjusted according to the senior’s vision and hand control. The goal is to make the strips easy to distinguish and manipulate without making the project unnecessarily bulky.
3. Place the First Strips
Position the strips through the prepared slits or across the base, depending on the weaving method being used.
The senior can choose which colour goes first and how the colours should alternate.
4. Weave the Cross-Strips
Take a second set of strips and pass them over one strip and under the next.
On the following row, reverse the sequence so the strip passes under where it previously went over.
A helper can stabilize the paper while the senior guides the strip through the pattern if holding both pieces at once is difficult.
5. Adjust the Rows
Gently move each new strip closer to the previous one to reduce large gaps.
The senior doesn’t need to create perfectly even rows. Slight variations can become part of the finished design.
6. Secure the Edges
Once the weaving is complete, trim or fold the loose ends and secure them to the back of the cardstock with adhesive.
If this finishing step requires more precision than the senior can comfortably manage, it can be done by the helper after the senior has completed the creative portion.
Why It Works on a Lap Tray
The project is flat rather than three-dimensional, so it doesn’t require much vertical space. Wide paper strips are also easier to see and manipulate than fine thread.
The activity can be stopped after a few rows and continued later, which is useful when the senior’s energy varies throughout the day.
A Braided Alternative
If weaving feels too complicated, use three wide strips of paper or fabric to make a simple braid.
Secure one end first, then the senior can help cross the strips repeatedly in the same sequence. Wider strips make the pattern easier to see and reduce the precision required compared with narrow cord or thread.
Make It Personal
Instead of making a random colour pattern, choose colours connected to something meaningful to the senior—a favourite room, a holiday, a sports team, a garden or a piece of clothing they remember.
The finished weaving can become a small wall decoration, card panel or decorative piece.
The value of the project isn’t whether the weave is perfectly even.
The senior has still made the important decisions about colour, pattern and design, while the physical steps can be adapted around what they are comfortably able to do.
The Lap Tray Setup
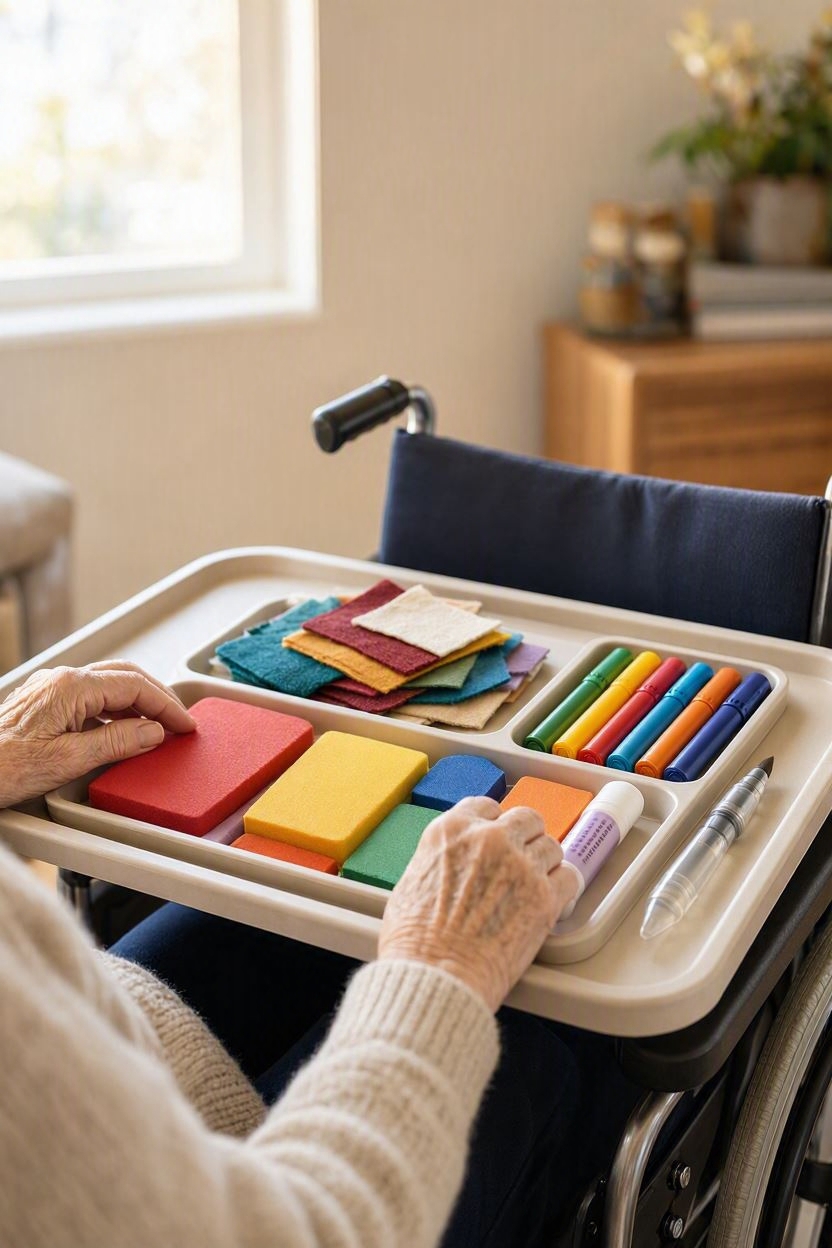
A lap tray should make the craft easier to reach, not simply give you another surface to fill with supplies.
Keep only the materials needed for the current step on the tray, place frequently used items within comfortable reach, and use a shallow container to stop loose pieces from rolling away.
For wheelchair users, remember that not every lap tray is designed for the same purpose or weight.
Don’t use it as a support for standing or transferring, and avoid placing heavy items on it.
For someone crafting in bed, a stable bed tray or overbed table may be more appropriate than balancing materials directly on the person’s legs.
Most importantly, leave enough clear space for the senior to move the materials themselves. A crowded tray can turn a simple craft into a task that requires constant help.
The goal is simple: set up the workspace so the senior can reach, choose and create as much as their abilities allow.
How to Adapt the Same Craft Without Making It Feel Like a Different Activity
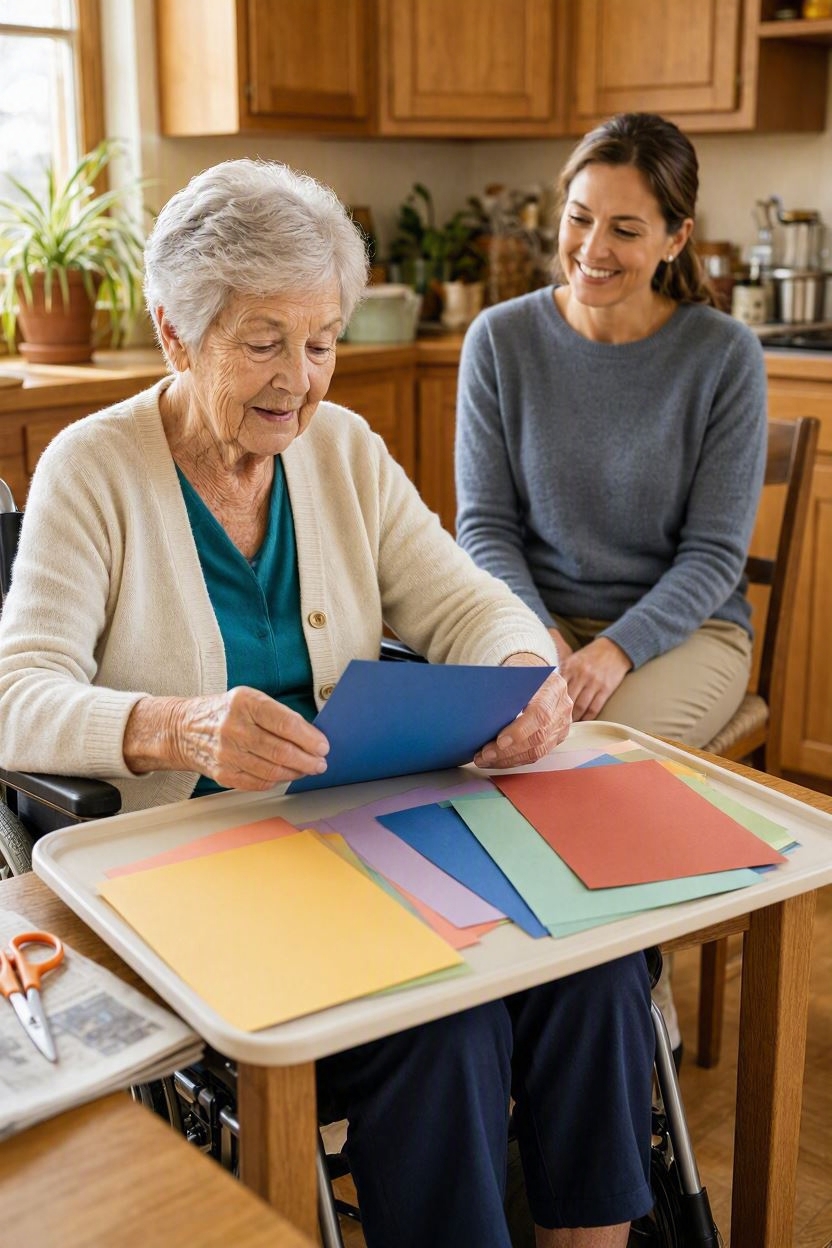
Adapting a craft should remove an unnecessary physical barrier—not remove the part the senior actually enjoys.
Someone who loves painting shouldn’t have to stop painting because holding a small brush is difficult; the tool, paper size or setup can be changed instead.
For crafts for seniors in bed or wheelchairs, think about which part of the activity the senior can comfortably own and which parts can be prepared or assisted.
✅ Let the Senior Keep the Creative Decisions
A helper can cut fabric, open packaging, prepare clay or stabilize the work surface. The senior can still decide:
- Which colours to use
- How pieces should be arranged
- What pattern to follow
- What the finished project should look like
- When they want to stop
That distinction is important. Supporting independent participation doesn’t mean expecting the senior to complete every physical step alone.
✅ Change the Material Before Changing the Craft
Small adjustments can preserve the original activity:
- Use large beads instead of tiny beads.
- Use thicker yarn instead of fine thread.
- Use a larger-handled brush.
- Use stickers instead of liquid glue where appropriate.
- Pre-cut paper or fabric.
- Use larger shapes instead of intricate pieces.
The senior is still doing the same type of creative activity; you’ve simply reduced the physical precision or strength it requires.
✅ Break the Craft Into Short Stages
A project doesn’t have to be completed in one sitting. Materials can be prepared beforehand, the main creative work completed later, and finishing touches left for another session.
This is particularly useful when energy or concentration varies. The aim is to make crafts for seniors in bed or wheelchairs sustainable and enjoyable rather than turning them into another task they have to push through.
✅ Use a “Helper Does, Senior Decides” Approach
When a physical step isn’t manageable, don’t automatically take over the entire project.
Instead:
Helper does: cutting, opening, stabilizing, preparing adhesive or handling difficult finishing steps.
Senior decides: colours, arrangement, pattern, subject, placement and when the project is complete.
That way, assistance changes how the craft is done, not whose craft it is.
What to Avoid on a Lap Tray — Even If the Craft Looks “Easy”
A craft can be labelled “easy” and still be a poor fit for a lap tray. The real question is how much reaching, gripping, bending, pressure and cleanup the activity requires.
Be cautious with:
- Tiny loose pieces that are difficult to see or pick up.
- Heavy materials that add unnecessary weight to the tray.
- Projects requiring repeated reaching beyond the person’s comfortable range.
- Open containers of water or paint that could spill easily.
- Hot glue guns or other hot tools unless their use is appropriate and safely supervised.
- Sharp tools when the senior has difficulty with hand control or vision.
- Strong-smelling products such as some adhesives or solvents, particularly in poorly ventilated rooms.
- Crowded setups that leave little room for the senior to actually work.
For crafts for seniors in bed or wheelchairs, simplifying the setup is often more useful than simplifying the finished project.
A senior may be perfectly capable of choosing and arranging fabric pieces, for example, but still need someone else to cut them.
The aim isn’t to remove every challenge. It is to remove the barriers that prevent the person from participating comfortably and safely.
If traditional crafts need a little adapting, Can You Still Craft With Arthritis? 10 Gentle DIY Projects for Seniors With Stiff, Aching Hands has gentler project ideas designed around stiff or aching hands.
When a Senior Needs More Than a Craft Adjustment
Not every difficulty can be solved by switching to larger beads or using a smaller piece of paper.
If a senior experiences persistent pain, significant fatigue, difficulty maintaining a comfortable position, major difficulty controlling their hands, or problems seeing or reaching the work safely, it may be better to stop and reconsider the setup rather than keep modifying the craft.
A qualified occupational therapist can assess how a person manages everyday activities and whether changes to positioning, equipment or the environment could make participation safer and more manageable.
This is particularly important with wheelchair users. A lap tray is not a substitute for a proper seating or positioning assessment, and different wheelchairs and trays have different purposes and limitations.
The same applies to someone spending much of the day in bed.
If the person cannot maintain a comfortable working position, an appropriate bed or overbed work surface may be more useful than trying to balance a craft directly on their lap.
And remember: needing physical help does not mean the person has to lose control of the activity. The senior can still choose the project, colours, materials and pace while another person handles the physically difficult parts.
That is the real goal of accessible crafting, not pretending every craft can be made completely independent, but finding a safe way for the person to remain meaningfully involved.
Conclusion
The best crafts for seniors in bed or wheelchairs aren’t necessarily the simplest projects.
They’re the ones that leave room for the person to make choices, create at their own pace and enjoy the finished result without the activity becoming physically overwhelming.
A lap tray can provide enough space for surprisingly meaningful projects when the materials and setup are chosen thoughtfully.
Start with what the senior enjoys, adapt the parts that create difficulty, and let their abilities—not the original craft instructions, guide the process.
Choose one of the eight ideas, prepare only what is needed, and let the senior take the lead on the creative decisions.