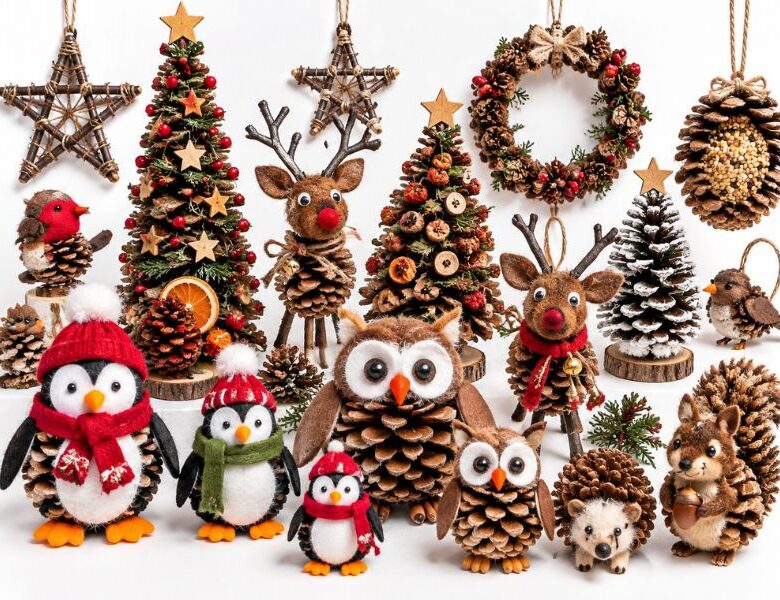
That pile of pinecones and twigs from every walk finally has a use. These Christmas nature crafts for kids turn foraged finds into keepsakes.
Another pocket empties out onto the kitchen counter, and it’s the usual haul, three pinecones, a handful of twigs, something that might be a seed pod.
It happens after every walk, every trip to the park, every visit to a grandparent with a garden.
The pile by the back door keeps growing, and none of it feels right to throw away, because a child chose it, carried it home, and asked to keep it.
That pile is actually a head start on some of the best Christmas nature crafts for kids, using what’s already sitting by the back door.
Below are twelve ways to turn this year’s pinecones, twigs, and winter finds into ornaments, feeders, and keepsakes, plus how to get them clean, dry, and bug-free first, since a fresh pinecone straight off the ground isn’t ready for the tree yet.
When the nightly Christmas routine starts feeling like another task on the list, Elf on the Shelf Alternatives for Parents Tired of Coming Up With Ideas Every Night: 9 Low-Effort Traditions Kids Still Love keeps the fun going without requiring a fresh idea every evening.
How to Clean and Prep Pinecones and Twigs Before Crafting
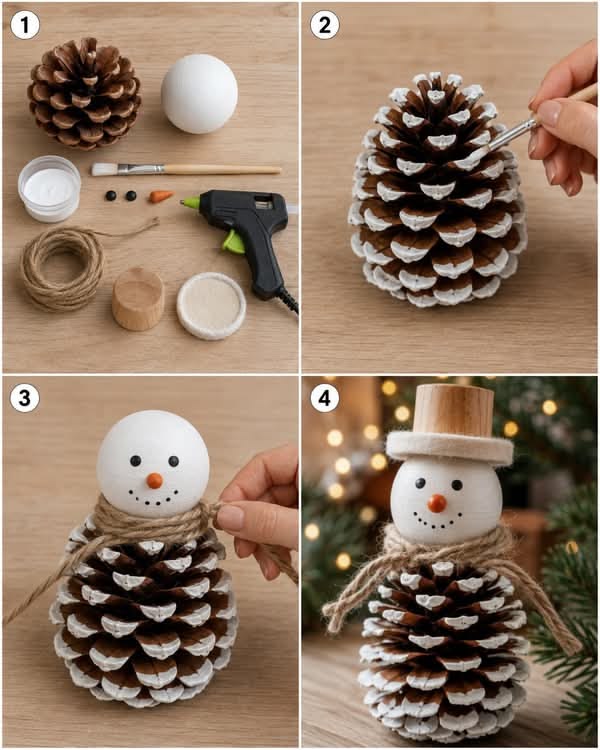
Fresh pinecones look ready to use straight off the ground, but they usually carry tiny insects, sap residue, and trapped moisture, none of which belong on a shelf or a Christmas tree indoors.
A quick clean before crafting solves this in under two hours, most of it hands-off.
- Mix roughly 1 cup of white vinegar per gallon of water (about 240 ml per 4 liters) and soak the pinecones for 20–30 minutes. The vinegar loosens dirt and sap and helps kill off any insects hiding between the scales.
- Rinse well, then spread the cones on a foil-lined baking sheet and bake at 200°F (about 95°C) for 1–2 hours, turning once halfway through. The heat finishes off any remaining bugs, melts leftover sap, and dries the cones fully.
- Watch for the cones to reopen during baking, closed, damp cones will fan back out as they dry, which is exactly what should happen.
Closed pinecones aren’t damaged goods. Pinecone scales respond to humidity the same way they do in the wild: closing to protect seeds when it’s wet, opening to release them once it’s dry.
A little heat simply speeds up a process the cone already knows how to do.
Twigs need less work, a quick wipe to remove loose bark and dirt is usually enough, though a fully dry twig snaps more cleanly for stars and frames than a damp one.
For storage between collecting and crafting, keep cleaned pinecones and twigs in an open basket or paper bag rather than a sealed container.
Trapped moisture is what leads to mold, and airflow is the simplest way to prevent it.
Christmas crafts can also help children follow the story behind the celebration, and 12 Nativity Crafts That Walk Kids Through the Story of Jesus’ Birth, at Home or Sunday School takes them through the story one craft at a time.
The Science Behind the Scales: Pinecone Weather Crafts
A pinecone reacts to the weather before people can.
Long before humidity sensors and forecasts, pinecones were doing this job in forests worldwide, and two simple crafts let kids watch the mechanism at work firsthand.
1. Pinecone Weather Station
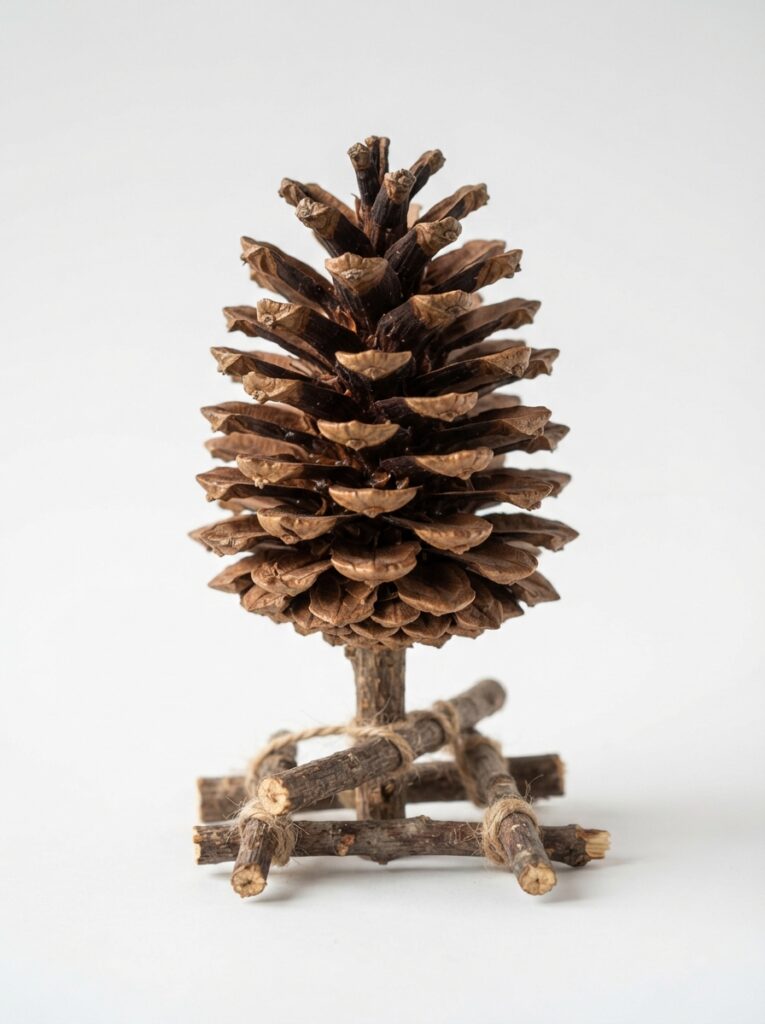
Pinecone scales aren’t decorative, they’re a seed-dispersal mechanism. Each scale is made of two layers of fibers that absorb moisture at different rates.
When humidity rises, the outer layer swells faster than the inner one, pulling the scale closed to protect the seeds inside from getting waterlogged and dropping uselessly close to the parent tree.
When the air dries out, the layers even out again and the scale reopens, allowing wind to carry the lightweight seeds farther away, timing that gives them a better chance at reaching open ground.
A cleaned, unpainted pinecone still does this indoors, which makes it a genuine hygrometer, not just a lookalike.
- Place one on a small dish or twig stand near a window, away from radiators or heating vents that would dry it artificially
- Add a label ,”Today’s Weather” works well, so checking it becomes a daily habit rather than a one-time novelty
- Keep a simple log: open scales generally track with drier air, closed scales with rising humidity or approaching rain
Skip any paint, glitter, or varnish on this cone.
A sealed surface blocks moisture from reaching the fibers at all, and the scales stop moving, which quietly defeats the entire point of the craft.
A coworker gift exchange gets awkward when you barely know the person you picked, which makes Corporate Secret Santa Gifts for a Coworker You Barely Know: 9 Safe Ideas Under $20 worth having on hand.
2. Pinecone Float-and-Close Ornament
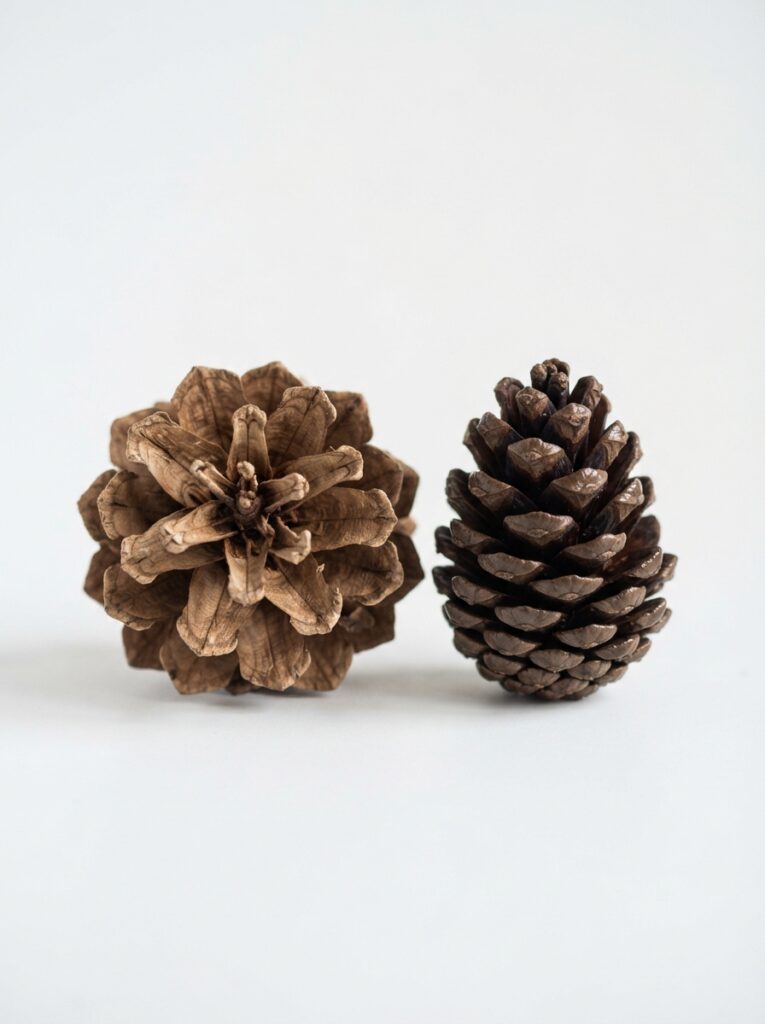
This one turns the same mechanism into something to watch happen in real time, then keep as an ornament afterward.
- Take two matched pinecones, similar in size, and drop one into a bowl of warm water
- Watch closely over the next several minutes, the scales will visibly draw inward and close as the outer fibers absorb water and swell
- Set the closed, wet cone aside to air-dry over a day or two; it will reopen gradually as the moisture leaves, no oven needed for this step
- Keep the second, untouched cone as the “before”, open and dry, for comparison
Once both cones have completed the cycle, attach each to a small twig or dowel with wire or twine, spaced a short distance apart, and hang them together.
What results is a small, visual record of a real biological process, one cone open, one closed, built entirely from something that started as a stray find in a coat pocket.
The dessert table can be the part guests remember long after dinner, especially with ideas from 10 Showstopping Christmas Desserts to Make This Holiday Season.
Feeding the Birds: Functional Pinecone and Twig Crafts
Not every craft on this list is meant to sit on a shelf.
These two turn foraged pinecones and twigs into something with a real job outdoors, feeding the birds that stick around through winter, when their usual food sources are hardest to find.
3. Suet-and-Seed Pinecone Bird Feeders
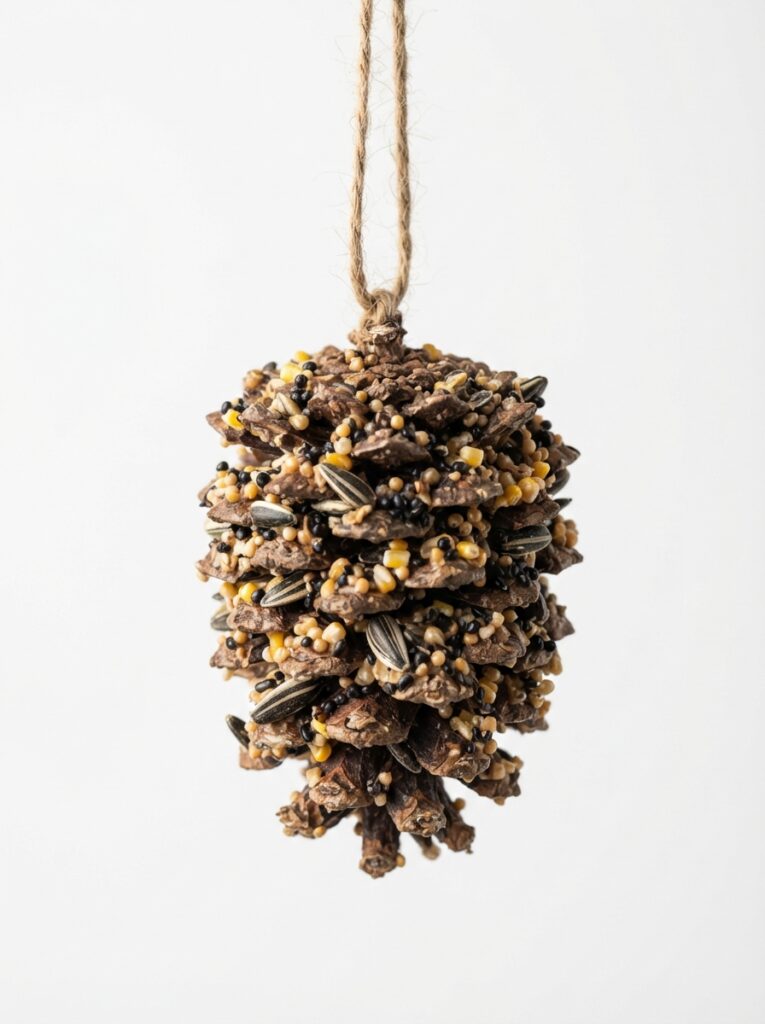
Insects, berries, and seed heads that birds rely on most of the year largely disappear in winter, right as cold weather raises the amount of energy birds need just to stay warm.
A suet-and-seed pinecone feeder fills that gap, this is one of the few Christmas nature crafts for kids that does something useful for local wildlife rather than just decorating a room.
- Tie a length of string or twine around the top of a cleaned, dry pinecone for hanging before adding anything else
- Coat the pinecone in a thin layer of natural peanut butter or plain rendered suet, working it into the gaps between the scales with a spoon or butter knife
- Roll the coated cone in birdseed, making sure it presses into every crevice, then let it firm up for an hour before hanging outside
A couple of things matter for accuracy here: skip peanut butter brands with added salt, sugar, or xylitol, since xylitol is toxic to many animals and salt isn’t good for birds in the quantities they’d get from a feeder.
Mixing the peanut butter with a little cornmeal also helps, it keeps the coating from becoming too sticky and reduces the risk of it clinging to a bird’s beak or feathers.
Not every child wants creepy ghosts and scary faces at Halloween, and Halloween Crafts for Kids Who Don’t Like Scary Decorations: 15 Cute Ideas Without the Creepy Stuff keeps the season playful instead.
4. Twig-Frame Suet Cake Feeder
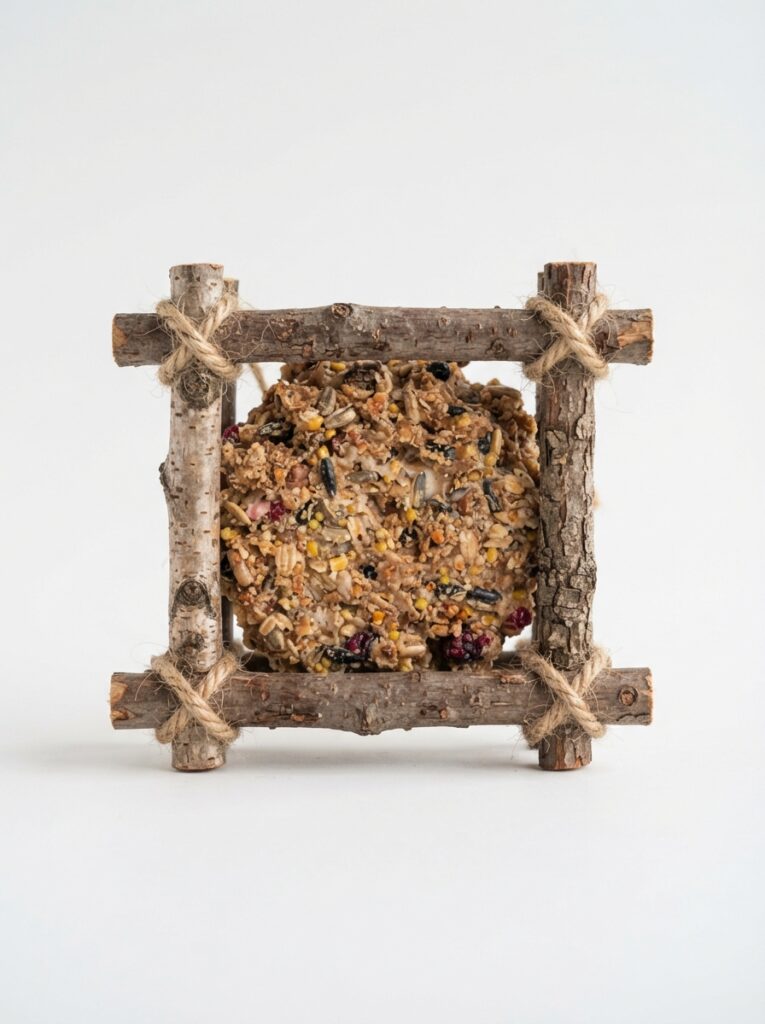
This version swaps the pinecone base for a small twig frame, which holds a suet cake, either store-bought or homemade from rendered fat, seed, and dried fruit.
- Collect four straight twigs of roughly equal length and lash them into a square using twine, tying tightly at each corner
- Add a horizontal twig or two across the middle of the frame for extra support if the suet cake is on the heavier side
- Rest a store-bought suet cake against the frame and secure it with more twine woven around both, or press a homemade suet mixture directly into the twig grid while it’s still soft, then let it harden before hanging
Hang either feeder somewhere visible from a window, and this stops being a one-off craft and turns into an ongoing nature-watching activity, a reason to look outside every morning and see who’s stopped by.
Esther’s story has plenty of moments children can turn into hands-on projects, from her crown to the events surrounding Purim, as shown in Esther Craft Ideas: 13 Crafts That Retell Her Story for Kids, From Her Crown to Purim.
Twig-Building Crafts: Stars and Ladders
Twigs collected on a walk turn into something sturdier than they look once they’re lashed together properly.
These two ideas focus on a single skill, tying twigs at fixed points to build a shape, which makes them some of the more hands-on Christmas nature crafts for kids on this list, closer to basic construction than simple gluing.
5. Twine-Lashed Twig Stars
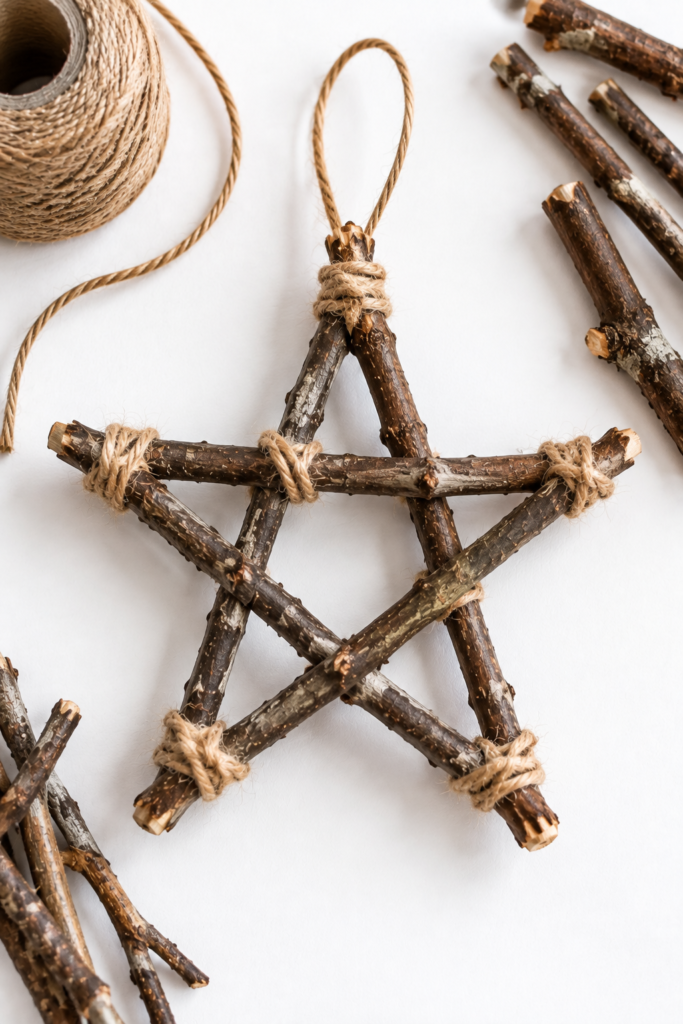
This is a traditional rustic star-tying technique used across a number of folk craft traditions, built entirely from twigs and twine.
- Select five or six twigs of roughly matching length and thickness, trimmed straight at both ends
- Lay the twigs out in a star pattern, overlapping each end over the next
- At each overlap point, wrap twine tightly several times and knot it off, working around the star until every joint is secure
- Add a loop of twine at the top point for hanging, or leave it flat to lean against a mantel or windowsill
Thinner, more flexible twigs (like willow or birch) hold this shape more easily than thick, stiff ones, so it’s worth sorting twigs by flexibility before starting.
That difficult question about why nobody else stopped is exactly where a craft can open up a deeper conversation, and 7 Good Samaritan Craft Ideas for Kids Who Ask “Why Didn’t Anyone Else Stop?” gives you a starting point.
6. Twig Ladder Ornament
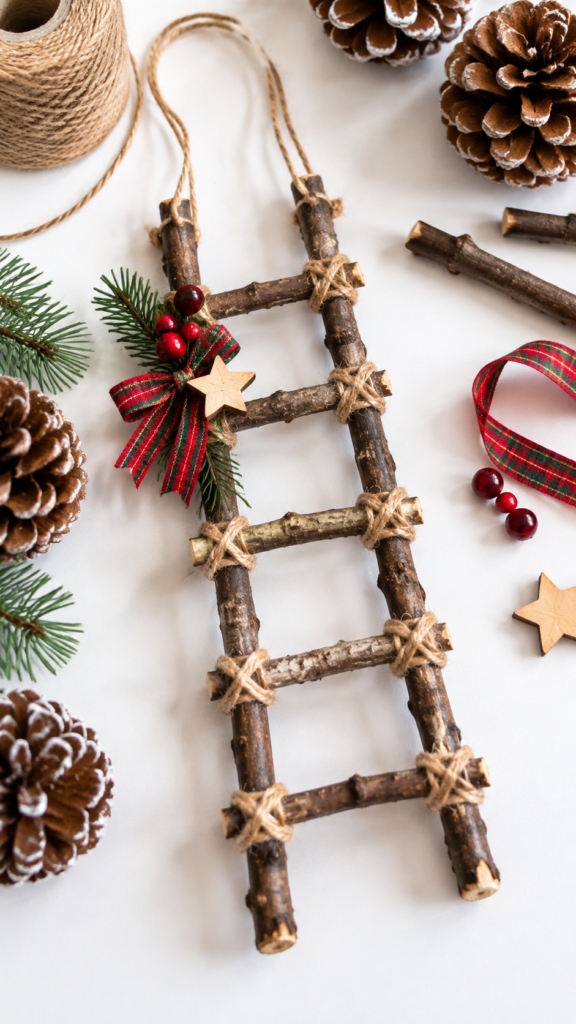
A smaller-scale building project using the same lashing technique, this time in a simple frame.
- Choose two longer, straighter twigs for the sides of the ladder
- Cut several shorter twigs to equal lengths for the rungs
- Lay the two side twigs parallel, then lash each rung across at even intervals with twine, working from top to bottom
- Finish with a loop of twine or ribbon at the top for hanging
Both crafts work well side by side on a tree or windowsill, and both give kids repeated practice at a real skill, measuring, spacing, and tying, rather than a one-off decorating step.
Noah’s story has more to it than animals getting onto a boat; Noah’s Ark Crafts for Kids: 9 Ideas That Walk Through the Whole Story, One Craft at a Time helps children follow the story in sequence.
Where Fabric Meets Forest
If you sew, even a little, this pairing is for you.
These two ideas use small hand-stitched touches, a few straight seams, no pattern required, to bring twigs, spices, and pine into your winter crafting instead of leaving fabric and nature-based decor as separate projects.
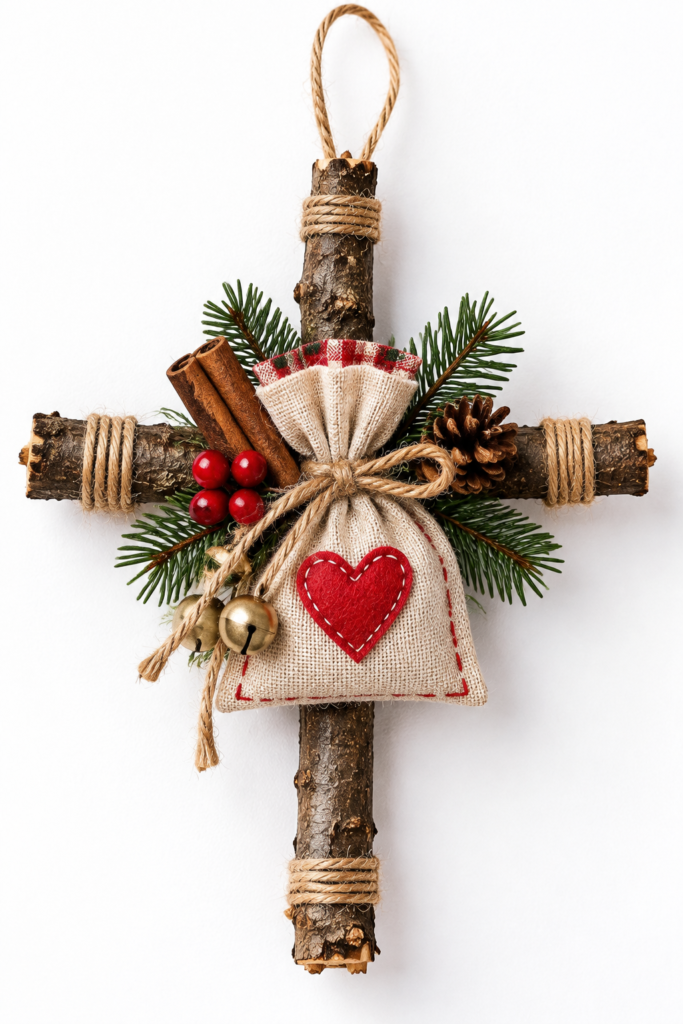
7. Fabric-Scrap Spice Sachets on a Twig Cross
Cloves aren’t just a holiday scent, the compound that gives them their smell, eugenol, is a natural insect deterrent.
That’s the same reason old-fashioned pomanders (fruit or fabric stuffed with cloves) were once hung in closets and linen drawers: they weren’t just decorative, they helped keep moths off stored fabric.
A small scrap-fabric pouch filled with whole cloves, broken cinnamon bark, and a pine sprig borrows that same logic.
The pine adds a fresh, resinous note that balances the sharper spice smell, and a loosely woven fabric like muslin or cotton scrap lets the scent actually pass through, a tightly woven synthetic scrap will mostly seal it in and mute the effect.
- Cut two small matching fabric scraps and stitch three sides closed, right sides together, then flip
- Fill loosely with whole cloves, broken cinnamon bark pieces, and one small pine sprig, don’t pack it tight, airflow is what carries the scent
- Hand-stitch the open edge shut and add a loop of twine or ribbon for hanging
- For the twig-cross version, wrap fabric scrap strips around two crossed twigs bound at the center, tucking the ends under previous wraps instead of gluing
Let go fabric glue or hot glue anywhere the spices touch the fabric, the heat and chemical smell from the glue will compete with and eventually overpower the clove and cinnamon scent.
Daniel’s night in the lions’ den gives children a natural opening to talk about courage and faith through Daniel and the Lion’s Den Craft: A Sunday School Activity for Kids That Teaches Courage and Faith.
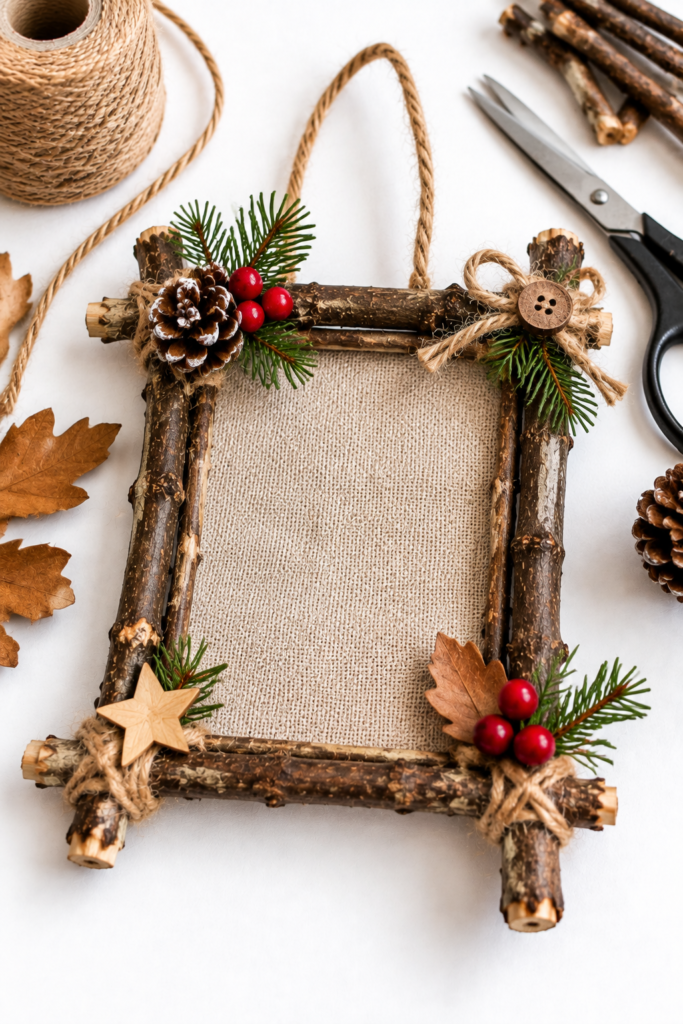
8. Twig-Frame Fabric Photo Ornaments
Freshly cut, “green” twigs still hold internal moisture.
Bring them straight indoors, glue them into a tight frame, and hang them somewhere warm, and that trapped moisture has nowhere to go, the twig can warp as it dries unevenly, and in humid rooms it can even develop mold spots under the bark.
Twigs that have been cut and left to dry for a couple of weeks first hold their shape once assembled.
- Choose four straight twigs of similar thickness, dried for at least 1–2 weeks after cutting
- Cut twigs to matching lengths for a square or rectangular frame, mitering the ends at 45 degrees if you want clean corners
- Glue the four twigs into a frame shape using a strong craft or wood glue, holding or clamping until set
- Cut a fabric or cardstock insert slightly smaller than the frame opening, mount the photo to it, and glue the insert to the back of the twig frame
- Add a hanging loop at the top twig before the glue fully cures
If you can only get fresh-cut twigs, dry them somewhere with airflow for a week or two first rather than assembling right away, it’s a small delay that keeps the frame from warping later.
Craft time can also introduce children to cultures and traditions beyond what they see every day through 12 African Art Projects for Kids That Teach Culture, Not Just Craft.
Sensory and Keepsake
These two lean less on how something looks and more on what it does once it’s made, filling a room with scent instead of sitting there as decoration, or catching window light instead of just hanging flat.
They’re also the kind of craft that holds up past the season: a scent-based garland or a pressed-greenery suncatcher doesn’t fade or wilt the way fresh-cut greenery does, so it works as a keepsake piece kids can make once and keep for more than one winter.
9. Cinnamon-Clove-Orange Pinecone Garland
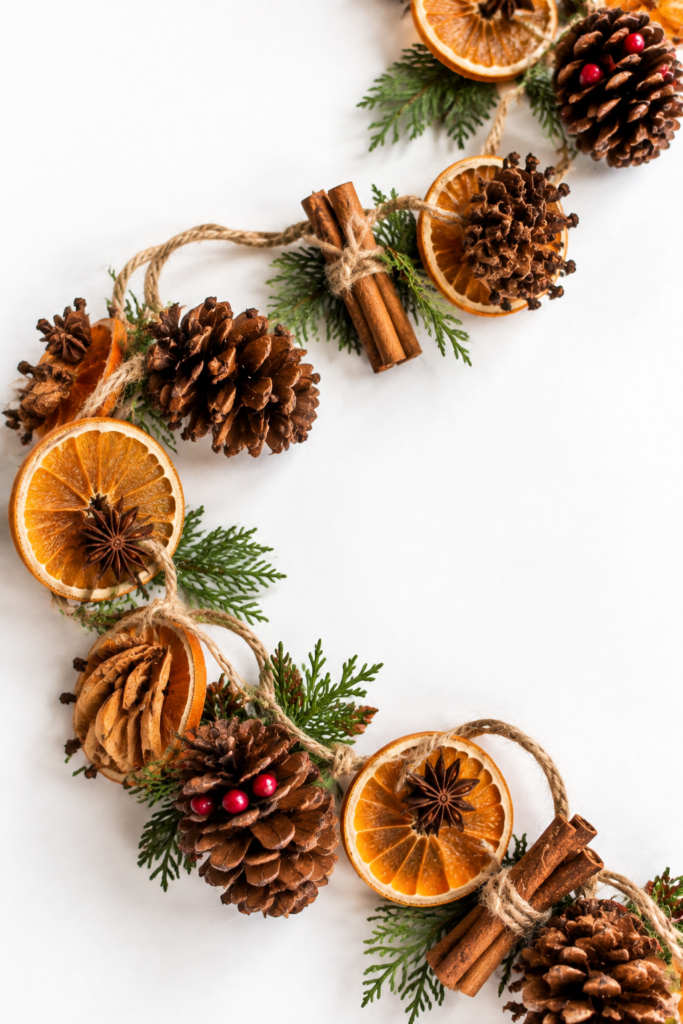
Dried orange slices and whole cloves are old pomander ingredients, but pinecones make a better anchor for this style of garland than fruit alone.
A pinecone’s scales sit slightly apart from each other in dry, heated winter air, which leaves natural gaps to tuck cloves into, no drilling or hot glue needed to hold them in place.
Don’t paint here entirely; the point of this one, like the pinecone weather station, is that scent does the decorating instead of color.
- Slice an orange thin (about ¼ inch) and dry the slices in a low oven (around 200°F) for 2–3 hours, flipping once, until they’re firm and no longer tacky
- Push whole cloves stem-first into the gaps between pinecone scales, spacing them evenly around each cone
- Thread jute twine through the top of each clove-studded pinecone and alternate with the dried orange slices along the garland
- Space pinecones and orange slices a few inches apart so the twine shows between pieces
Only use fully dried orange slices, any that are still slightly soft or leathery in the center will mold once hung in a warm room.
This is a good one for a Christmas nature crafts for kids lineup since there’s no paint or mess, just pressing cloves into gaps by hand.
Bright and cheerful projects can be just as appealing outside the Christmas season, especially these Sunflower Crafts for Kids: The Suncatcher and 14 More Easy Ideas They’ll Beg to Make Again.
10. Pressed Winter Greenery Suncatchers
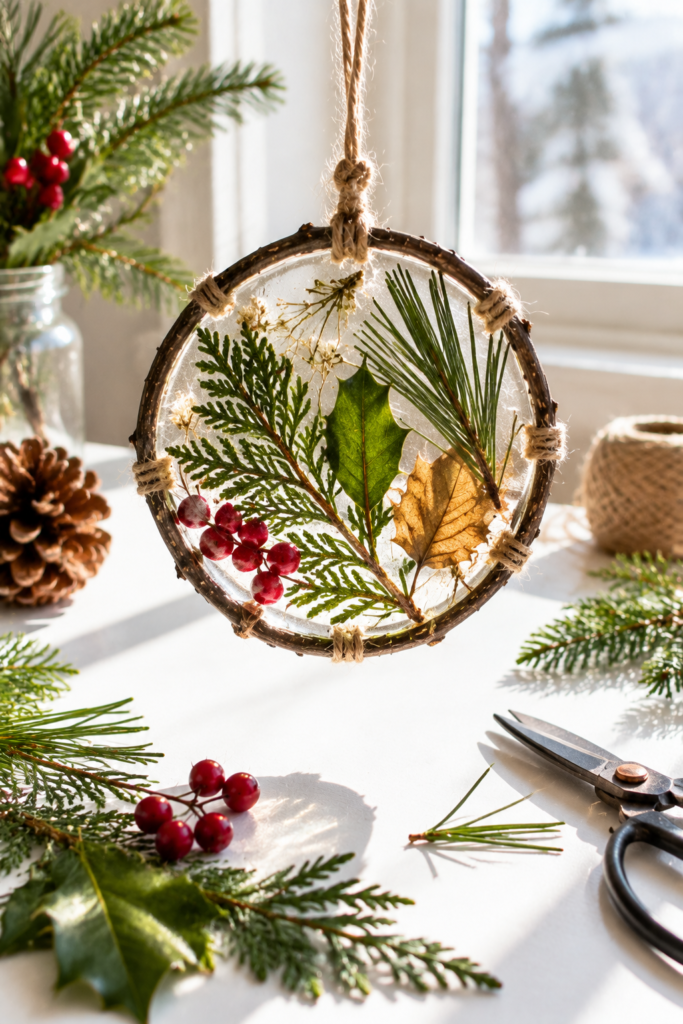
Evergreen needles and holly leaves stay green through winter because they’re coated in a waxy layer (cutin) that slows moisture loss, it’s the same trait that lets them skip the yearly leaf drop deciduous trees go through.
That thick coating means they take longer to flatten and dry than a thin maple or oak leaf, so pressing needs a bit more patience, but it also means the color holds well once pressed between layers.
- Press small sprigs of evergreen (cedar, pine, or spruce) or holly between the pages of a heavy book for 5–7 days, checking that they’ve flattened and dried before moving on
- Lay the pressed sprigs between two sheets of clear contact paper, sticky sides facing the greenery, and smooth out air bubbles from the center outward
- Trim around the edges, leaving a thin clear border, and punch a hole for hanging
- Hang in a window where light can pass through, that’s what makes it a suncatcher instead of a flat pressed-greenery craft
If you’re using holly, keep the berries out of this one entirely, they’re toxic if a child puts one in their mouth, and holly leaf edges are sharp enough that younger kids should have the pressing and trimming steps done for them.
Forgo holly altogether for the youngest crafters and stick with pine or cedar for a safer version of the same Christmas nature crafts for kids idea.
This last pair is about giving kids something to actually build and then keep somewhere visible, not just make and set aside.
One works basic measuring and pattern skills into a hands-on project, and the other solves the pile of pinecones and twigs that tends to build up by the end of a nature walk season, both good closing ideas for a Christmas nature crafts for kids roundup.
Messy play can keep children occupied when you want an activity that lasts a little longer, and Safe and Easy Slime Craft Ideas for Kids — Non-Toxic Projects That Keep Them Busy for Hours offers several ideas to try.
11. Twig Log Cabin Ornament
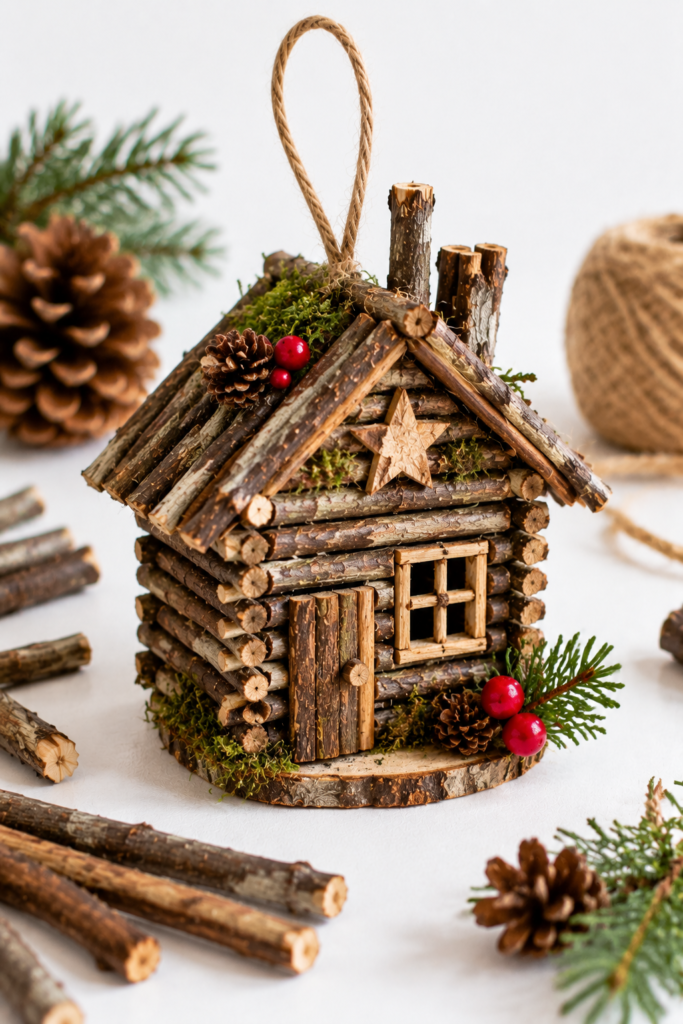
Log cabin construction, stacking pieces in alternating perpendicular layers, is one of the oldest building patterns there is, and it works at miniature scale with twigs just as well as it does with full logs.
Cutting each twig to match the one before it, then rotating direction for the next layer, is a simple, repeatable pattern that doubles as an early measuring exercise for kids, without ever feeling like a math lesson.
- Cut twigs into matching short lengths (roughly 1.5–2 inches works well) using pruning shears, sorting them into even sets
- Starting at a small box, matchbox, or thick cardstock base, glue two twigs parallel to each other along opposite edges
- Rotate 90 degrees and glue the next two twigs across the first pair, log-cabin style, continuing to alternate direction with each layer
- Add a small loop of twine at the top layer before the final glue dries for hanging
Let kids do the layering and gluing, but handle the twig-cutting step yourself or supervise closely, pruning shears aren’t sized for small hands, and matching lengths matters more here than in most twig crafts since uneven pieces will make the stack lean.
A simple coffee filter becomes something surprisingly pretty in Coffee Filter Butterfly Craft for Kids (Easy Stained Glass Effect Craft Idea).
12. Nature-Find Keepsake Jar
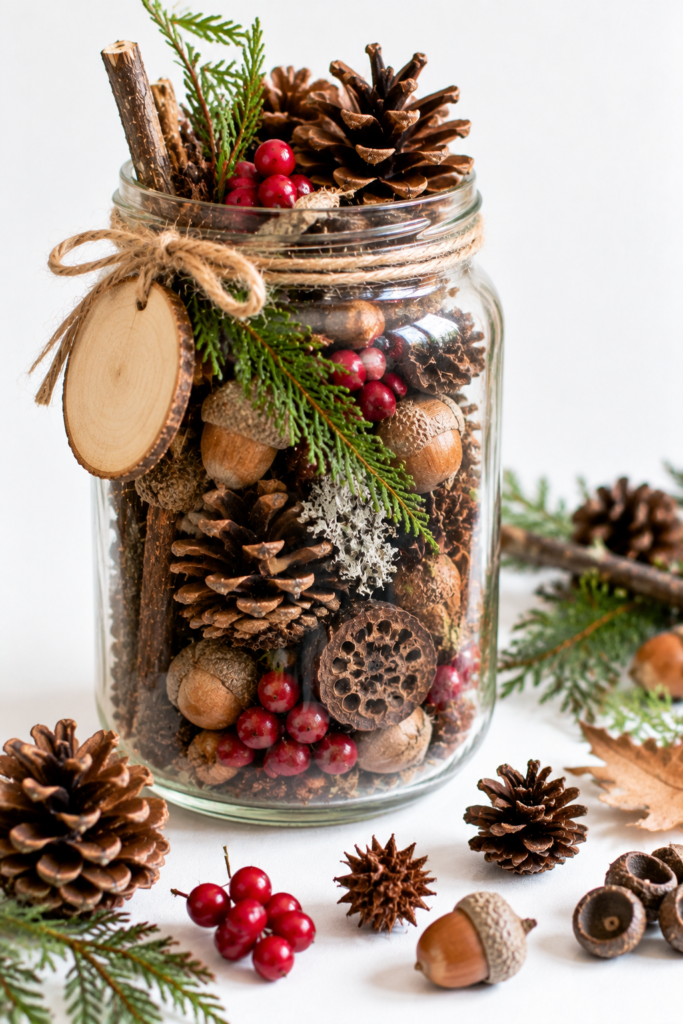
Most nature-craft ideas end with a used-up pinecone or a pile of twigs nobody knows what to do with once the project’s done.
This one flips that, i instead of consuming the material, it stores it.
A small jar layered with the season’s pinecones, twigs, and seed pods, labeled with the year, turns a walk’s worth of finds into a dated keepsake rather than clutter, which makes it one of the few Christmas nature crafts for kids that solves its own cleanup problem.
- Collect small, dry pinecones, twigs, and seed pods on a walk, choosing pieces small enough to fit through the jar opening
- Layer the finds by type in a clear jar (small pinecones on the bottom, twigs in the middle, seed pods on top) rather than mixing them randomly, so the layers stay visible
- Write the year and a short label (a place name or “our nature walk”) on a tag or the lid
- Seal the lid and store or display the jar somewhere visible, like a windowsill, as a yearly marker
Make sure everything going in is fully dry before sealing the jar, any lingering moisture in a twig or pinecone will fog the glass and can mold inside a closed jar, which defeats the keepsake part of the idea.
Before throwing out those empty cardboard rolls, see what children can turn them into with Toilet Paper Roll Crafts for Kids That Turn Everyday Waste into Fun, Skill-Building DIY Projects at Home.
Conclusion
Half of what’s in this list is stuff you already have, pinecones from the yard, cloves in your spice rack, scraps left over from another project.
That’s really the appeal of Christmas nature crafts for kids: no supply run, no pressure to make it look perfect, just an afternoon with what’s already around you.
Start with whichever one you already have the ingredients for, and let the rest sit until next winter.
You will find this of value:
Foam sheets are easy to shape into colourful projects, and Easy Foam Sheet Crafts for Kids That Keep Them Focused, Creative, and Productively Busy at Home gives you more ways to put them to use.
A few popsicle sticks can become much more than a pile of craft supplies in 13 Popsicle Stick Crafts for Kids That Actually Keep Them Busy and Boosts Creativity.