What really happened to Esther? These Esther Craft Ideas help kids follow her story from the palace to danger, courage, deliverance, and Purim.
A crown can make Esther look like just another queen in a Bible story. But her crown came with a story children need to understand.
Esther was a young Jewish woman living in the Persian Empire who became queen without knowing how important that position would become.
When danger eventually came for her people, she had to decide what she would do with the place she had been given.
That is why these Esther craft ideas go beyond making a paper crown and calling it a Bible lesson. Each craft connects to a part of Esther’s story, giving children something they can see, make, and use as you explain what happened in the biblical account.
Some crafts represent objects mentioned in the story, while others are visual teaching tools for ideas the Bible describes but does not represent as physical objects.
The mask, for example, can help children understand Esther’s hidden identity, but the Bible never says that Esther wore a mask.
As you work through the crafts, the goal is simple: help children see the story unfold instead of only hearing that Esther was a brave queen.
By the end, they should have a clearer picture of who Esther was, what happened to her people, and why her story has continued to be remembered.
If you’re teaching kids about helping others, 7 Good Samaritan Craft Ideas for Kids Who Ask “Why Didn’t Anyone Else Stop?” gives you hands-on ways to connect a Bible story with kindness and compassion.
How to Use the Crafts to Teach the Story Without Turning It Into a Lecture

You do not need to explain every detail of Esther before a child touches the craft. Let the craft give you a natural opening into one moment of the story.
Start with the object. Ask what the child thinks the crown, scepter, scroll, or banquet table might have to do with Esther.
Tell only the part of the story that fits. When making the scepter, for example, focus on Esther approaching the king without being summoned rather than retelling several chapters at once.
Ask one question that makes the child think. Try, “Why do you think Esther needed courage to do this?” or “What do you think Haman expected would happen?”
Let the craft become part of the retelling. Move the figures, unfold the scroll, or use the finished object as you explain what happened. This helps children connect a physical object with a specific event instead of remembering the craft as an unrelated activity.
The aim is not to turn craft time into a long lesson. Make something, talk about the moment it represents, ask a thoughtful question, and let the story unfold naturally.
Continue exploring Bible stories through crafts with Noah’s Ark Crafts for Kids: 9 Ideas That Walk Through the Whole Story, One Craft at a Time.
1. Esther’s Royal Crown
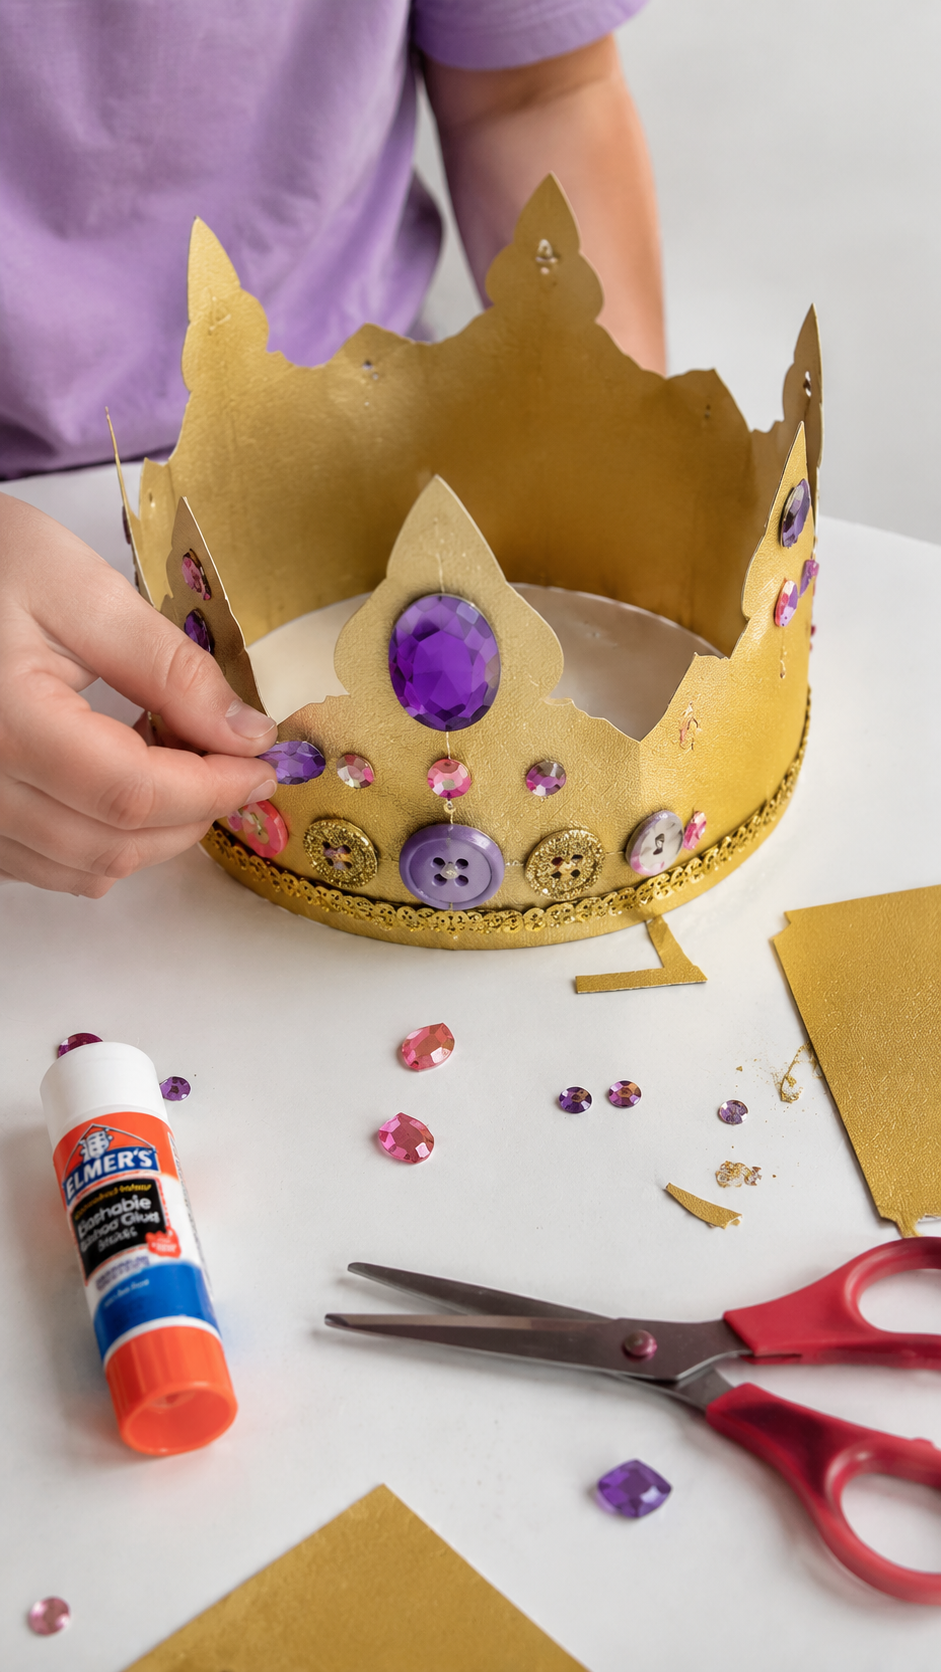
Esther wasn’t born into royalty. She was a Jewish orphan raised by her cousin Mordecai in Susa.
Her life changed when she was among the young women gathered for King Ahasuerus’s search for a new queen after Vashti was removed from her position. Esther found favor with the king and was chosen as queen.
That backstory matters because this isn’t simply a “princess crown” craft. It represents the unexpected position Esther now held inside the Persian royal court, even though she came from a Jewish family living in the Persian Empire.
What It Teaches
Esther’s crown wasn’t something she inherited from a royal family. It marked a dramatic change in her circumstances and placed her in a position that would become important when her people later faced danger.
As children decorate their crowns, you can ask:
“What do you think Esther’s life was like after becoming queen in a palace she didn’t grow up in?”
There is no need to tell children exactly how Esther felt because the Bible doesn’t describe her emotions at that moment. The question simply helps them think about the significance of the change in her life.
Materials
- Gold or yellow cardstock, or a clean cereal box covered with gold paper
- Craft jewels, sequins, or buttons
- Glue stick or craft glue
- Stapler or tape
- Optional: gold pipe cleaners for extra decoration
How to Make Esther’s Crown
- Cut a strip of cardstock long enough to fit around the child’s head, leaving about 1 inch of overlap.
- Draw simple crown points along the top edge and cut them out. Five points work well for a basic children’s crown.
- Let the child decorate the crown with craft jewels, sequins, buttons, or drawn details.
- Wrap the strip around the child’s head and secure the ends with tape or a stapler. An adult should handle the stapler and supervise any hot glue.
- While the child decorates, introduce the next important detail: although Esther was now queen, Mordecai had instructed her not to reveal that she was Jewish. Her identity remained hidden at this stage of the story.
The Bible Moment to Explain
Esther’s crowning is more than a stopping point in the story. She has moved from being a young Jewish woman raised by Mordecai to occupying a position inside the Persian palace. Yet she doesn’t know everything that this position will eventually require of her.
You can tell children:
“Esther had the crown, but she didn’t yet know what was going to happen next.”
That creates a natural bridge into the next part of her story without giving away the entire plot.
A Detail Worth Getting Right
The Bible does not describe what Esther’s crown looked like. It doesn’t give its color, shape, jewels, or design. So let children create their own version rather than presenting a particular crown as historically accurate.
The biblical fact that matters is simple: Esther became queen. The craft gives children a physical way to remember that moment.
For another craft that connects a Bible story with an important character lesson, try Daniel and the Lion’s Den Craft: A Sunday School Activity for Kids That Teaches Courage and Faith.
2. Mordecai and Haman: The Refusal to Bow

After Esther becomes queen, the story introduces Haman, whom King Ahasuerus promotes to a position above the other officials. The king commands the officials at the royal gate to bow down to Haman, but Mordecai refuses.
The text says that Mordecai’s refusal is connected to his identity as a Jew. When Haman learns that Mordecai will not bow to him, his anger grows far beyond this one disagreement.
That makes this a useful craft for showing children the first major conflict in Esther’s story. Before there is a royal decree or a threat against the Jewish people, there is a confrontation between one powerful official and one man who refuses to give him the honor he demands.
What It Teaches
This craft helps children understand that Haman’s later actions did not appear out of nowhere. The biblical story first shows his reaction to Mordecai’s refusal to bow.
You can explain that Mordecai did not simply forget to bow. The passage deliberately connects his refusal with his Jewish identity, which becomes important as Haman’s anger develops.
As children make the figures, you can ask:
“What do you think Haman felt when everyone else bowed but Mordecai did not?”
Then ask a second question if appropriate:
“Why do you think Mordecai refused?”
The Bible gives us part of the answer through Mordecai’s explanation of his Jewish identity, but it does not give a detailed explanation of everything that was happening in Mordecai’s mind. Avoid filling that gap with assumptions.
Materials
- White or colored cardstock
- Brown, black, or gray cardstock for the figures
- Scissors
- Glue stick
- Pencil or markers
- Small craft sticks or strips of cardstock
- Optional: gold paper for Haman’s clothing
How to Make the Mordecai and Haman Craft
- Cut two simple standing figures from cardstock—one to represent Mordecai and one to represent Haman.
- Give Haman a slightly more elaborate outfit to represent his high position in the king’s court.
- Create several smaller figures to represent the officials who were expected to bow to Haman.
- Position the smaller figures with their heads lowered while keeping Mordecai standing upright.
- Add a small sign or label identifying Haman and Mordecai so children can remember who is who.
- As the child plays with the figures, explain that the scene represents the moment when Mordecai refused to bow to Haman.
The Bible Moment to Explain
Esther 3 begins by introducing Haman’s promotion. The king’s officials at the royal gate were expected to bow when Haman passed by, but Mordecai would not do so. When the officials questioned him repeatedly, Mordecai told them that he was a Jew. Haman then learned about Mordecai’s refusal and became determined to act against him.
This is an important moment to pause on because the danger has not yet become a decree against the Jews. At this point in the story, the conflict has begun.
You can tell children:
“Mordecai’s refusal made Haman very angry. What happened next would affect far more people than Mordecai alone.”
That gives you a natural bridge into the next craft.
A Detail Worth Getting Right
The Bible does not say that Mordecai refused to bow simply because he was “brave” or because he wanted to challenge Haman.
It tells us that Mordecai would not bow and that he identified himself as a Jew when questioned about it. The text then describes Haman’s anger and his decision to target the Jewish people.
Also, don’t portray this craft as showing that all Jews refused to bow to Haman. The specific refusal described in the passage is Mordecai’s.
This is one of the Esther craft ideas where the finished activity can help children see the beginning of the conflict rather than simply remembering Haman as “the villain.”
Start with Creative Zacchaeus Crafts: More Than Just a Man in a Tree for hands-on ways to help kids understand Zacchaeus’s story, his encounter with Jesus, and the change that followed.
3. Haman’s Royal Decree Scroll
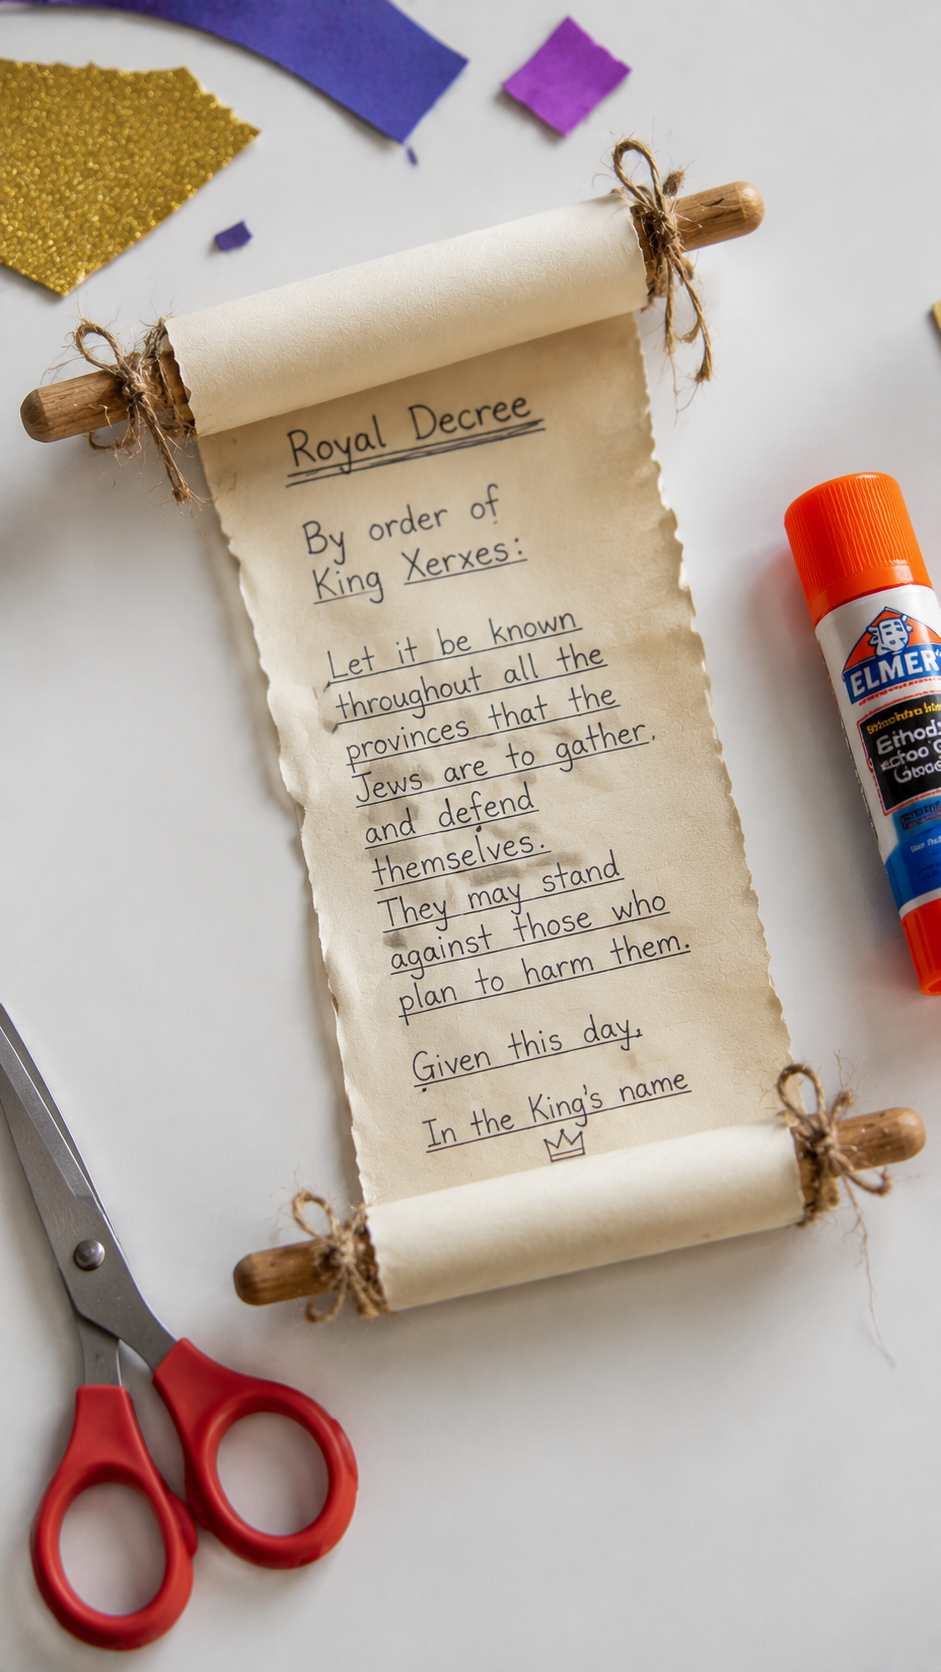
Haman’s anger toward Mordecai quickly becomes something much bigger. After learning that Mordecai is Jewish, Haman decides to destroy not only Mordecai but the Jewish people throughout the Persian Empire.
He approaches King Ahasuerus and persuades him to authorize a decree against them. The king’s scribes write the order, and couriers carry it throughout the provinces.
This is where the story changes from a conflict between two men into a threat against an entire people. A scroll is therefore one of the more meaningful Esther craft ideas because it represents the written royal decree that made the danger official.
What It Teaches
Children can easily understand that Haman was angry with Mordecai, but the decree helps them see how far that anger went. Haman used his position and the king’s authority to put an entire community in danger.
You can explain that the decree was not simply a personal threat from Haman. It was an official order sent throughout the Persian Empire.
As children make the scroll, ask:
“How would you feel if you received an official message saying that your whole community was in danger?”
The question helps children think about the seriousness of the situation without making the activity frightening.
Materials
- Cream, white, or brown cardstock
- 2 craft sticks or drinking straws
- Glue or tape
- Pencil or black marker
- Scissors
- Optional: string or yarn
How to Make the Royal Decree Scroll
- Cut a rectangle of cardstock approximately 8 × 5 inches.
- Draw several lines across the paper to represent writing in an official document.
- Roll both short ends of the paper inward toward the center.
- Attach a craft stick or drinking straw to each rolled end with glue or tape.
- Tie a small piece of string around the middle if desired.
- Write “The Royal Decree” on the outside rather than creating fictional wording and presenting it as the biblical decree.
The Bible Moment to Explain
Esther 3 says that the king’s scribes wrote the decree in the languages and scripts of the different provinces. Letters were then sent throughout the empire ordering the destruction of the Jews on the appointed day. The people of Susa were left confused by the order, while Haman and the king sat down to drink.
This is the point where the danger becomes official, widespread, and impossible for Esther’s position as queen to ignore forever.
You can tell children:
“Haman’s anger toward one man had become a threat against an entire people.”
A Detail Worth Getting Right
Don’t say that Haman personally wrote or delivered the decree. The biblical account says the king’s scribes wrote it and couriers carried it throughout the provinces.
Also, Esther 3 does not give us a short version of the decree suitable for copying onto a children’s craft, so it is better to label the scroll rather than invent a quotation.
Have a pile of broken crayons sitting around? Melted Crayon Art for Kids: What to Do With Broken Crayon Pieces shows how to turn them into a creative project instead of throwing them away.
4. Esther Discovers the Crisis

Esther is still inside the palace when the decree is issued. She does not immediately know what has happened. When Mordecai appears outside the king’s gate wearing sackcloth and mourning,
Esther hears about his distress and sends clothes for him, but he refuses them. She then sends Hathach, one of the king’s eunuchs assigned to serve her, to find out what is wrong.
This gives us a different kind of Esther craft idea, one centered on the moment when Esther finally learns that something is terribly wrong with her people.
What It Teaches
This moment helps children understand that Esther did not already know everything that was happening. She was living in the palace while Mordecai and the Jewish community were responding to the decree outside it.
That separation matters to the story.
Esther’s first response is to try to understand why Mordecai is mourning. Only after he explains the situation does she learn about the decree and receive his request that she go to the king on behalf of her people.
As children make the craft, ask:
“What do you think Esther thought when she first saw that Mordecai was in such distress?”
There is no need to give children a definite answer because the Bible does not tell us exactly what Esther was thinking.
Materials
- Cardstock
- Brown paper or a small paper bag
- Scissors
- Glue
- Markers or crayons
- Optional: small paper figures representing Esther, Mordecai, and Hathach
How to Make Esther’s Crisis Scene
- Cut three simple figures from cardstock to represent Esther, Mordecai, and Hathach.
- Give Mordecai a piece of rough brown paper to represent the sackcloth described in Esther 4.
- Place Mordecai outside a simple drawing of the palace or royal gate.
- Position Esther inside the palace and Hathach between them.
- Add a small speech bubble beside Esther saying “What has happened?”
- If desired, place the royal decree scroll from Craft 3 beside Mordecai so children can see what caused his mourning.
The Bible Moment to Explain
Mordecai tells Hathach about the decree and gives him a copy of the written order. He also asks Esther to go to the king and plead for her people.
This is the first time Esther is directly confronted with the full seriousness of what is happening. The story is now moving toward the difficult decision she will have to make about approaching the king.
You can tell children:
“Esther had become queen, but now she had to understand what that position meant for her people.”
A Detail Worth Getting Right
Mordecai’s mourning and Esther’s discovery of the crisis are two connected but distinct moments. Esther 4 first describes Mordecai’s mourning, then Esther’s attempt to find out what happened, and finally Mordecai’s explanation through Hathach.
Also, don’t say Esther immediately decided to approach the king after learning about the decree. That decision comes after Mordecai’s message and their exchange in Esther 4:10–17, which is the next stage of the story.
Add a cultural learning element to craft time with 12 African Art Projects for Kids That Teach Culture, Not Just Craft.
5. Esther’s Three-Day Fast

Esther now knows what is at stake, but she does not immediately rush into the king’s presence. She tells Mordecai to gather the Jews in Susa and have them fast for three days and nights.
Esther and her attendants will fast as well. Only after that does she plan to go to the king, even though approaching him without being summoned could put her life at risk.
This makes a three-day fasting craft a meaningful way to slow down the story. Esther’s next action does not begin with a dramatic speech or immediate confrontation. She first asks her community to fast with her.
What It Teaches
This craft can help children understand what fasting meant in this particular story. Esther’s request was not simply about skipping a meal. The passage connects the fast with the serious situation facing the Jewish people and with Esther’s decision to approach the king.
For younger children, you don’t need to ask them to imitate a three-day fast. Instead, explain what the Bible says happened and use the craft to help them remember the three-day period.
As they make it, ask:
“Why do you think Esther asked other people to fast with her before she went to the king?”
The Bible doesn’t give Esther’s private thoughts, so let children think about the situation without supplying an answer the text doesn’t give.
Materials
- Three sheets of cardstock or paper
- Markers or crayons
- Scissors
- Glue
- Ribbon or yarn
- Optional: three small paper circles or symbols representing the three days
How to Make the Three-Day Fast Craft
- Fold a sheet of cardstock into three sections, like a simple three-panel booklet.
- Label the panels Day 1, Day 2, and Day 3.
- Let children decorate each panel with simple symbols representing the Jewish community waiting and fasting.
- On the final panel, add a small drawing of Esther standing before the king’s throne.
- Write “Esther 4:16” on the bottom as a reference to the biblical passage.
- Use ribbon or yarn to tie the booklet closed when finished.
The Bible Moment to Explain
Mordecai agrees to Esther’s request and gathers the Jews to fast. Esther says that she and her attendants will fast as well. Then she says that she will go to the king, even though doing so without being summoned could result in death. Her words show that she understands the seriousness of what she is about to do.
You can tell children:
“Esther didn’t know what would happen when she went to the king, but she decided to go anyway.”
A Detail Worth Getting Right
The Bible says the Jews in Susa were to fast for three days, night or day, and Esther and her attendants would do the same.
It does not tell us exactly what they ate or drank during those three days, so avoid adding specific fasting rules that aren’t in the passage.
For a sensory activity that can keep little hands occupied, see Safe and Easy Slime Craft Ideas for Kids — Non-Toxic Projects That Keep Them Busy for Hours.
6. Esther Approaches the King

After the three-day fast, Esther puts on her royal robes and stands in the inner court of the palace, where the king can see her. This is the moment she has been preparing for.
The king sees Esther and extends the golden scepter toward her, allowing her to approach. Esther touches the top of the scepter.
The golden scepter makes a particularly useful craft because it represents the specific detail that made Esther’s approach so dangerous: she had not been summoned.
What It Teaches
Children may hear that Esther was “brave” without understanding what made this moment risky. The craft gives you a concrete way to explain that Esther could not simply walk into the king’s presence whenever she wanted.
The Bible says that anyone who approached the king in the inner court without being summoned could be put to death unless the king extended the golden scepter. Esther’s approach therefore carries real danger.
As children make the scepter, ask:
“What do you think Esther was hoping would happen when the king saw her?”
Materials
- Gold or yellow cardstock
- Cardboard tube or rolled cardstock
- Glue or tape
- Scissors
- Pencil
- Optional: foil, gold paper, or craft jewels
How to Make Esther’s Golden Scepter
- Cut a long rectangle of cardstock and roll it tightly into a tube to create the handle.
- Secure the edge with glue or tape.
- Cut a simple decorative shape from gold cardstock for the top of the scepter.
- Attach the top to the handle.
- Add a few paper jewels or simple patterns if desired.
- Place the finished scepter beside an Esther figure standing outside a simple paper throne or palace scene.
The Bible Moment to Explain
Esther approaches the king, and when he sees her, he extends the golden scepter toward her. Esther comes forward and touches it. The king then asks what she wants and tells her that her request will be considered, even offering her up to half of his kingdom.
But Esther does not immediately reveal Haman’s plot. Instead, she invites the king and Haman to a banquet.
You can tell children:
“Esther had finally reached the king. Now she had to decide what to say.”
That leads naturally into the next craft.
A Detail Worth Getting Right
Don’t describe the scepter as something Esther was holding. The king extended it toward her. Esther then approached and touched the top of it.
Kids who enjoy colorful paper crafts may also love Coffee Filter Butterfly Craft for Kids (Easy Stained Glass Effect Craft Idea).
7. Esther’s First Banquet Invitation
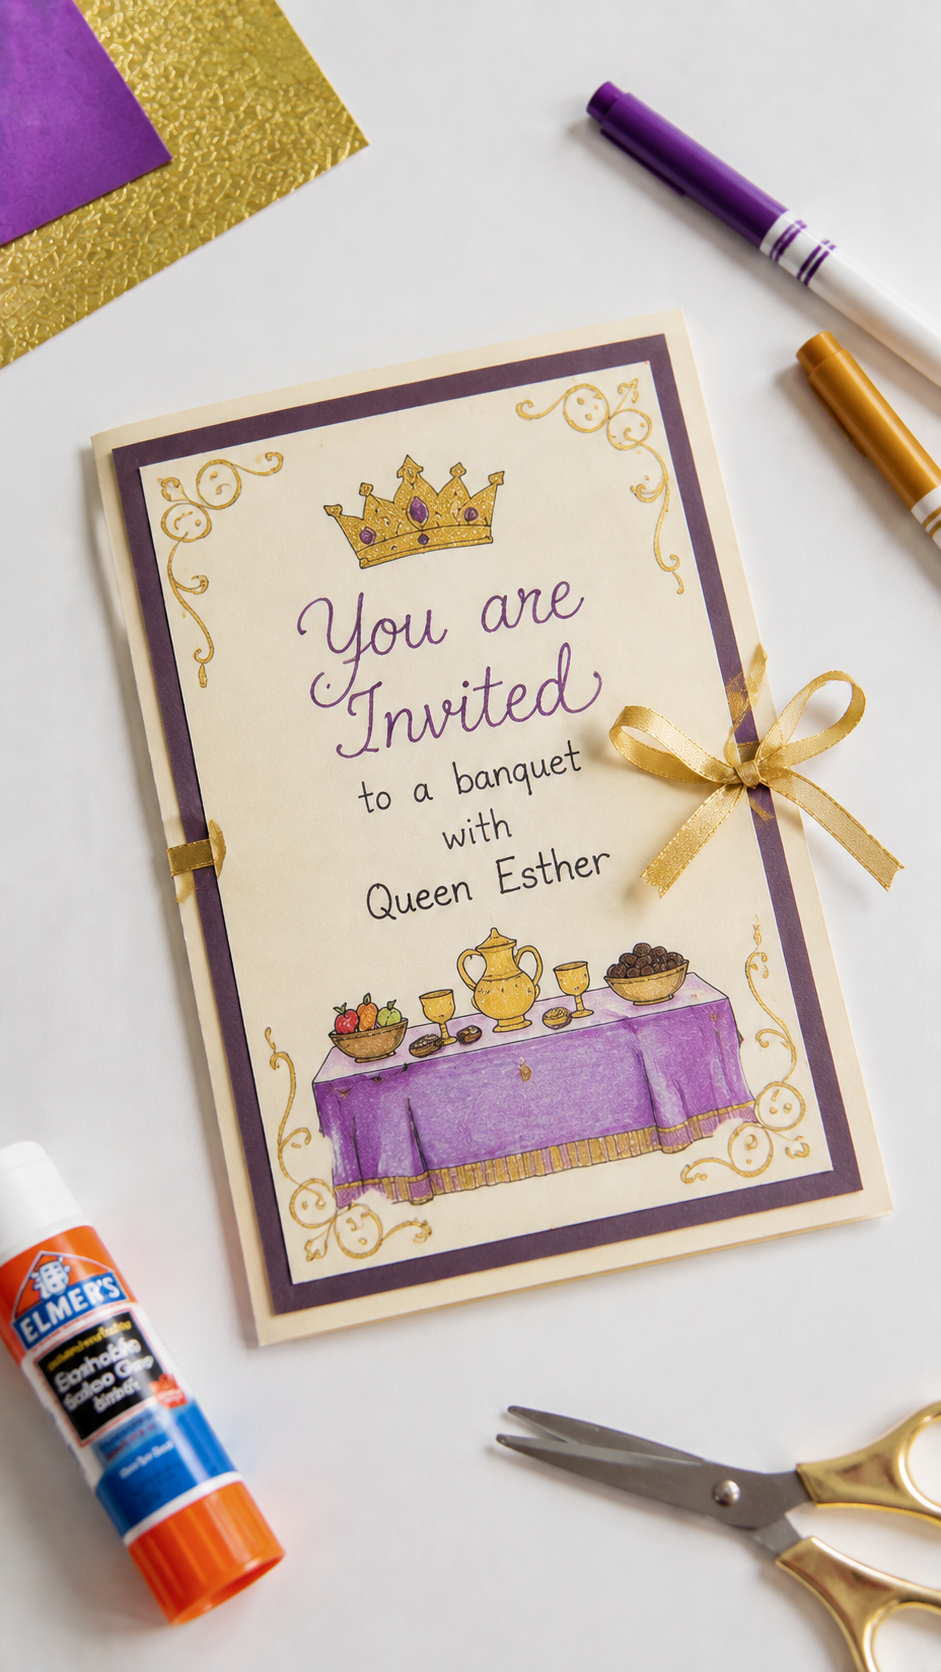
Esther survives her approach to the king, but she does not immediately accuse Haman or explain the entire crisis. When the king asks what she wants, Esther invites him and Haman to a banquet she has prepared.
At the banquet, the king again asks Esther about her request. Esther instead invites both men to another banquet the following day, promising that she will then answer the king’s question.
A banquet invitation therefore represents an important part of Esther’s strategy in the story. The invitation itself may look simple, but it moves the narrative toward the moment when Esther will finally reveal what Haman has planned.
What It Teaches
This craft gives children an opportunity to notice something that can easily be overlooked: Esther does not reveal everything at once.
She approaches the king, invites him and Haman to a banquet, and then creates another opportunity to speak with them.
That doesn’t mean we should invent Esther’s motives. The Bible records what she did but does not explain every reason behind the timing of her words.
As children make their invitations, ask:
“Why do you think Esther invited Haman to the banquet too?”
Let children suggest possibilities, then remind them that the Bible doesn’t explicitly tell us everything Esther was thinking.
Materials
- Cardstock or construction paper
- Scissors
- Pencil
- Markers or crayons
- Glue
- Optional: decorative paper, stickers, or ribbon
How to Make Esther’s Banquet Invitation
- Fold a piece of cardstock in half to make a small invitation card.
- On the front, write “Esther’s Banquet” and decorate it with simple borders or patterns.
- Inside, write a simple child-friendly invitation such as: “The king and Haman are invited to Esther’s banquet.”
- Add drawings of a table, cups, plates, or other banquet details.
- Let children decorate the invitation without presenting their decorations as historically accurate details from the Persian palace.
The Bible Moment to Explain
At the first banquet, the king again asks Esther what she wants.
Esther tells him that she has a request but invites him and Haman to another banquet the next day. The king agrees, and Haman leaves pleased, until he sees Mordecai at the king’s gate and becomes angry again.
This is where the story becomes especially tense because the second banquet has been arranged, but Esther’s request has still not been revealed.
You can tell children:
“Esther had the king’s attention, but she wasn’t ready to tell him everything yet.”
A Detail Worth Getting Right
There are two banquets, not one. Esther first invites the king and Haman to a banquet, and then she invites them to a second banquet the following day. Keeping those events separate helps children follow the actual sequence of Esther’s story.
Save those empty cardboard rolls for Toilet Paper Roll Crafts for Kids That Turn Everyday Waste into Fun, Skill-Building DIY Projects at Home.
8. Esther’s Second Banquet Table
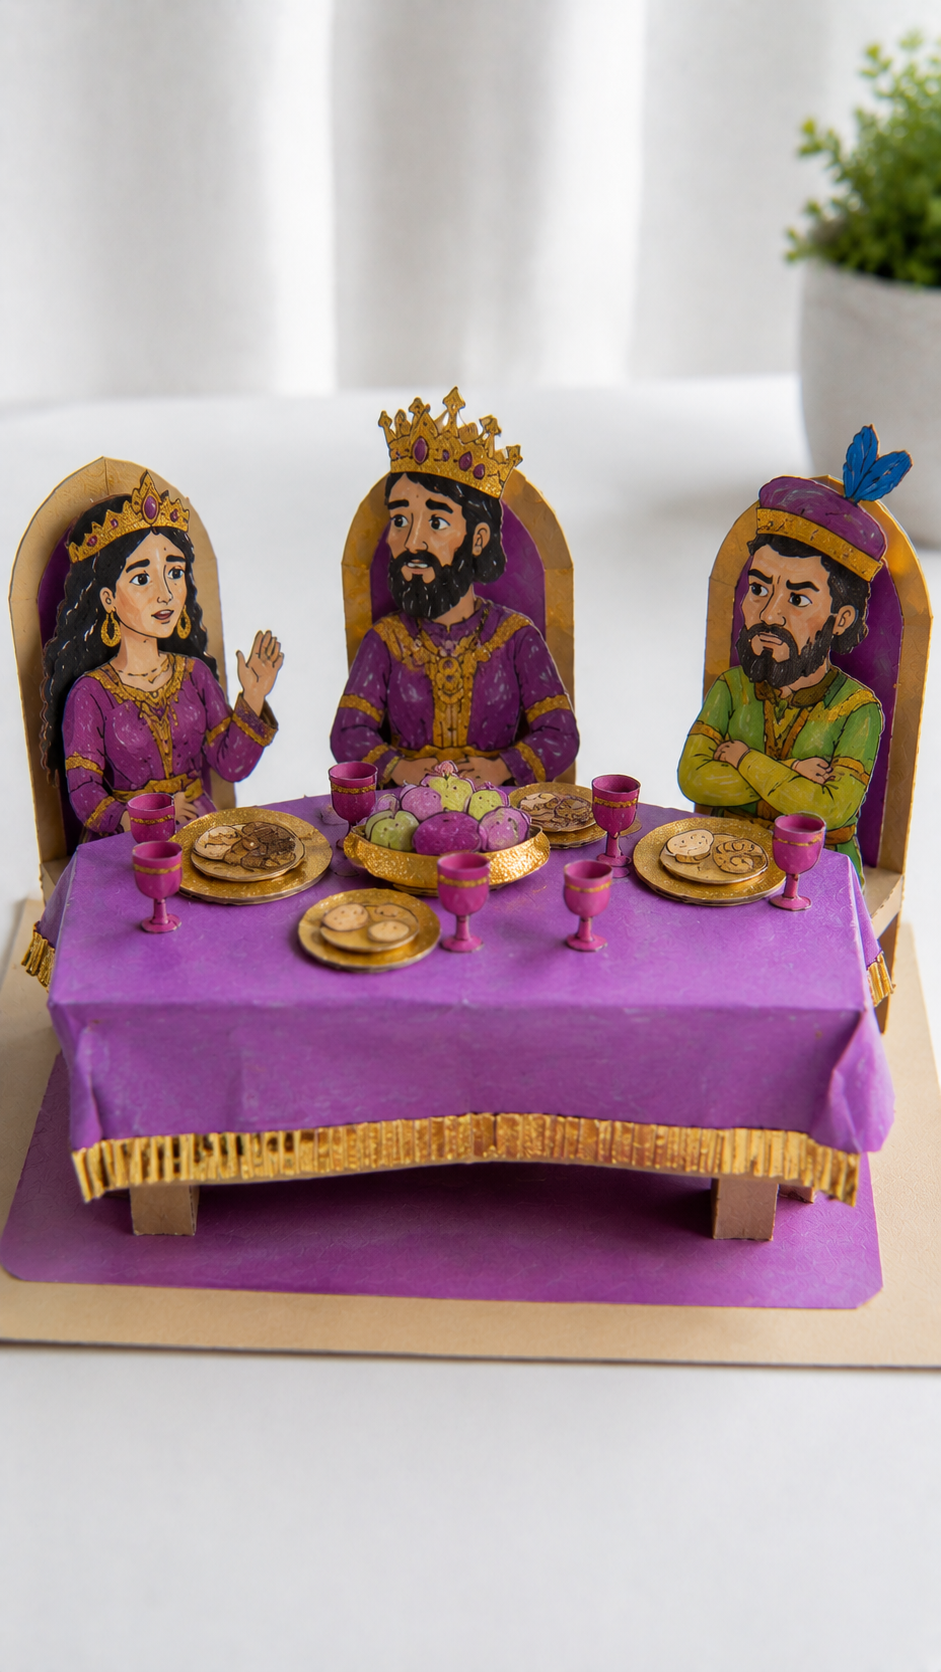
Esther has already approached the king and invited him and Haman to a banquet. At that first banquet, the king asks Esther what she wants, but she asks him and Haman to return for another banquet the following day.
When the second banquet begins, the king asks Esther again to tell him her request. This time, Esther is ready to reveal what is happening.
A simple banquet table can help children follow this part of the story because the two banquets are easy to blend together when the story is told quickly. This craft gives the second banquet its own place in the sequence.
What It Teaches
The second banquet gives children a chance to notice that Esther’s story does not unfold in one dramatic moment. She approaches the king, invites him and Haman to a banquet, waits, and then brings them together again.
As children make the table, ask:
“What do you think Esther was waiting for before she told the king about Haman?”
Be careful not to give a definite answer. The Bible tells us what Esther did, but it does not explain every reason for the timing of her approach.
Materials
- Cardstock or construction paper
- Small paper plate or cardstock circle
- Scissors
- Glue
- Markers or crayons
- Optional: small pieces of colored paper for plates and food
How to Make the Banquet Table
- Cut a rectangle of cardstock to represent the table.
- Fold or attach two strips underneath it to make simple table legs.
- Cut small circles from paper to represent plates.
- Add small paper shapes for cups and food.
- Make three simple figures for Esther, the king, and Haman.
- Place them around the table and explain that this represents the second banquet, when Esther is finally about to make her request.
The Bible Moment to Explain
At the second banquet, the king asks Esther what she wants. Esther tells him that she and her people have been sold to destruction and identifies Haman as the person responsible. She also reveals that she is Jewish.
You can tell children:
“Esther had waited until this moment to tell the king what was really happening.”
That leads directly into the next part of the story.
A Detail Worth Getting Right
The Bible does not give a detailed menu for Esther’s banquets or describe exactly what the table looked like.
So don’t present particular foods, dishes, or decorations as historically documented details. The table is simply a visual teaching tool for the banquet described in Esther 5 and 7.
If you have foam sheets on hand, Easy Foam Sheet Crafts for Kids That Keep Them Focused, Creative, and Productively Busy at Home has simple projects worth trying.
9. The King’s Sleepless Night
There is a surprising turn between Esther’s two banquets. After the first banquet, Haman goes home angry because Mordecai is still refusing to honor him. Haman’s family suggests preparing a tall pole for Mordecai.
But that night, the king cannot sleep. He orders the royal records to be read to him and discovers that Mordecai had previously exposed a plot against the king but had never been rewarded.
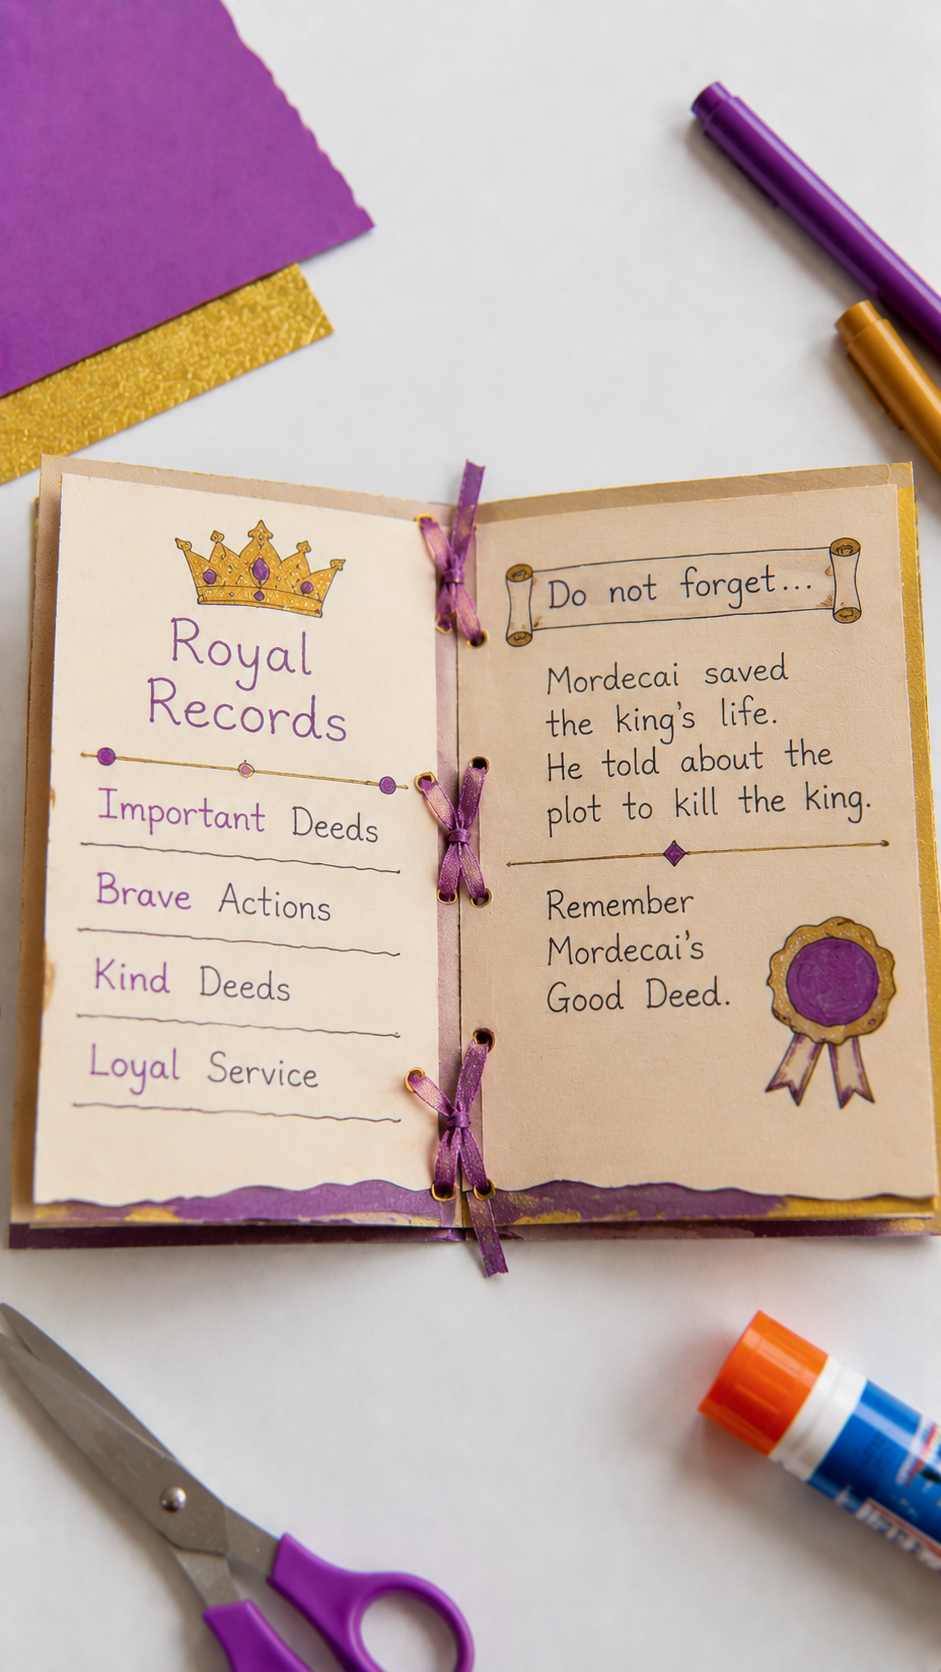
This is one of the most memorable reversals in Esther, making a simple royal record book craft more meaningful than trying to create a literal “sleepless night” object.
What It Teaches
Children can learn how one seemingly small detail becomes important later.
Mordecai had already helped protect the king, but the king’s records showed that he had received no reward. The discovery happens at precisely the point when Haman is seeking greater honor for himself.
The story then turns in an unexpected direction: when Haman arrives, the king asks what should be done for the person the king wants to honor. Haman assumes the king means him. Instead, the king orders Haman to honor Mordecai.
As children make the record book, ask:
“Why do you think it mattered that the king finally remembered what Mordecai had done?”
Materials
- Cardstock
- Construction paper
- Scissors
- Glue
- Hole punch
- Yarn or ribbon
- Markers
How to Make the Royal Record Book
- Cut several small rectangles of cardstock for the pages.
- Stack them together and punch two holes along one side.
- Tie the pages together with yarn or ribbon.
- Write “Royal Records” on the cover.
- Inside, write a simple sentence such as: “Mordecai warned the king about a plot.”
- Let children decorate the cover with simple royal symbols.
The Bible Moment to Explain
The king’s records remind him that Mordecai had exposed a plot against him. When Haman comes to the palace, the king asks what should be done for someone the king wishes to honor.
Haman describes an elaborate public honor, expecting that he will receive it. Instead, the king tells him to do those things for Mordecai. Haman must then lead Mordecai through the city on horseback and proclaim his honor.
You can tell children:
“Haman thought the honor was going to be for him. Instead, he had to honor Mordecai.”
A Detail Worth Getting Right
The Bible does not say that the king was kept awake by a supernatural force. It simply says that the king could not sleep and therefore ordered the royal records to be read to him.
We can point out the remarkable timing without claiming something the text does not explicitly say.
This is one of the Esther craft ideas where the important lesson is the reversal: Haman’s desire for honor ends up putting Mordecai in the place of honor.
For a mess-free option that uses inexpensive supplies, check out 13+ Pipe Cleaner Crafts for Kids That Are Simple, Fun, and Completely Mess-Free.
10. Esther Exposes Haman
At the second banquet, the king again asks Esther what she wants. Esther finally reveals the danger facing her and her people. She tells the king that she is Jewish and identifies Haman as the man responsible for the plan to destroy them.
This is the moment the story has been building toward. Esther’s crown, the decree, Mordecai’s mourning, the fasting, the dangerous approach to the king, and the two banquets all lead to this revelation.
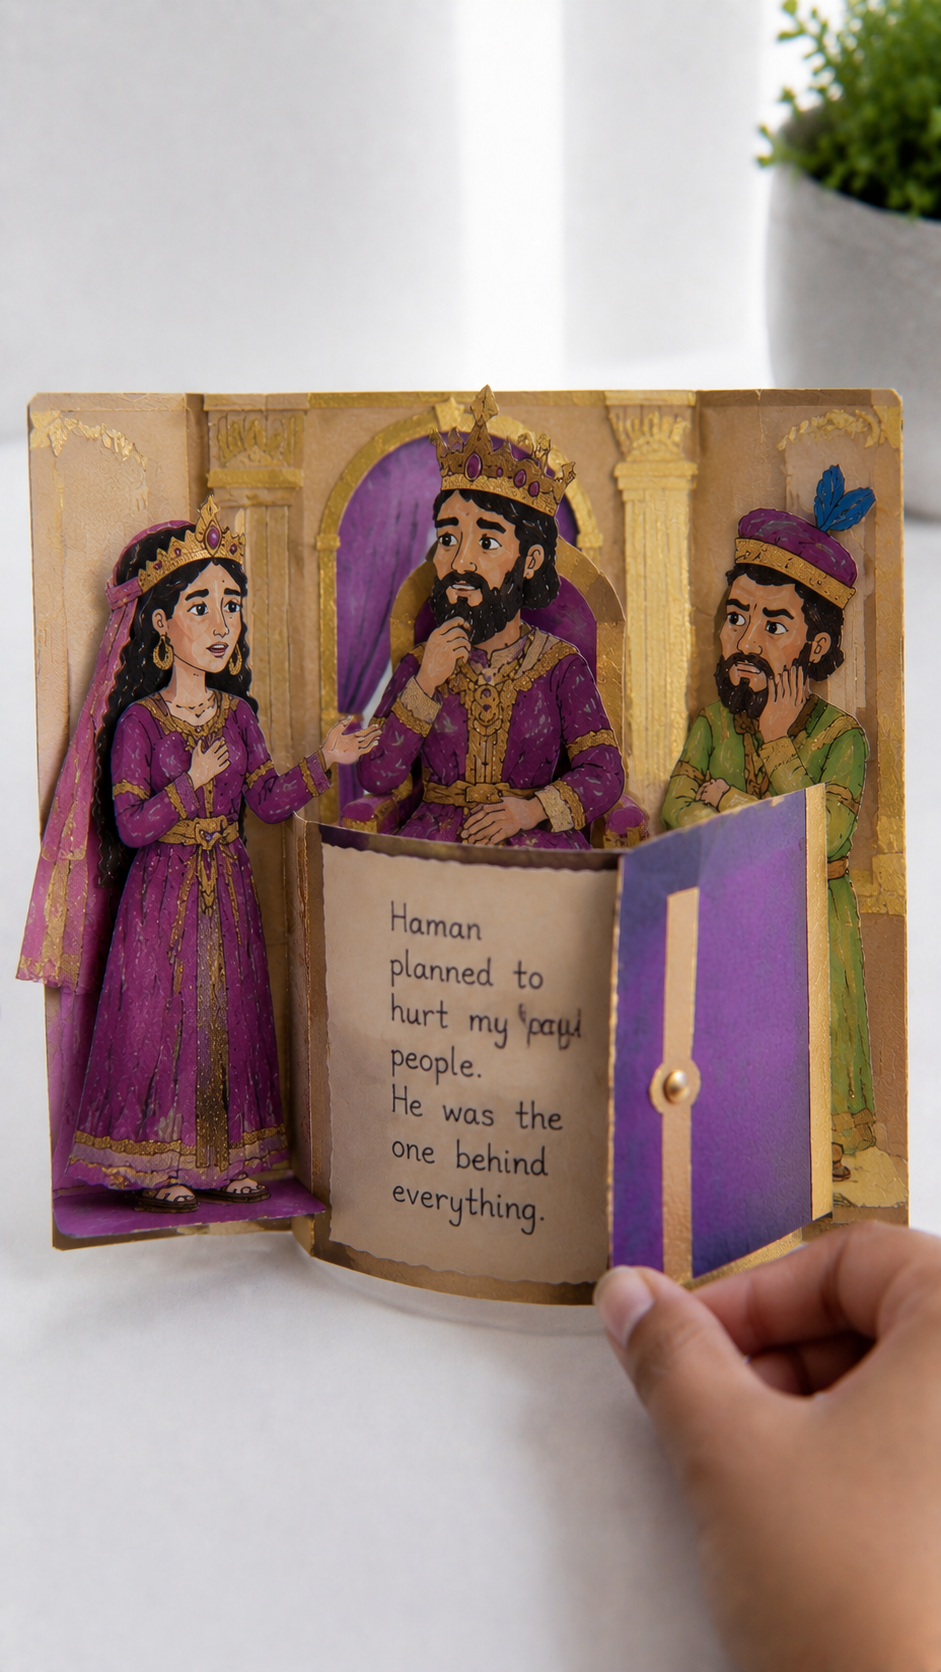
A reveal-the-message craft works well here because the important part is not a physical object from the biblical text. It is the moment Esther finally speaks openly about what has been happening.
What It Teaches
Esther had kept her Jewish identity hidden earlier in the story, following Mordecai’s instruction. Now, when she speaks to the king, she identifies herself with the people threatened by Haman’s decree.
This gives children an opportunity to think about the difference between knowing something is wrong and deciding when to speak about it.
As they make the craft, ask:
“Why was this an important moment for Esther to tell the king who she was?”
Let children answer from what they have learned rather than reducing the lesson to simply “Esther was brave.”
Materials
- Two sheets of cardstock
- Scissors
- Glue or tape
- Markers or crayons
- Optional: brass fastener
How to Make Esther’s Reveal Craft
- Cut one sheet of cardstock into a simple palace or banquet scene.
- Cut a second piece into a flap or opening panel.
- On the outside, write “What Esther Had Not Yet Told the King.”
- Under the flap, write: “I am Jewish, and my people are in danger.”
- Add simple drawings of Esther, the king, and Haman around the scene.
- Let children open the flap as you explain the moment when Esther reveals her identity and Haman’s plot.
The Bible Moment to Explain
Esther tells the king that she and her people have been sold to destruction and identifies Haman as the adversary responsible. The king becomes angry and asks who has dared to do this. Esther answers that it is Haman.
The story then moves immediately toward Haman’s downfall.
You can tell children:
“Esther finally told the king the truth about what was happening to her people.”
A Detail Worth Getting Right
Don’t say that Esther publicly revealed her Jewish identity earlier when she became queen.
Esther 2 specifically says that she had not revealed her people or family background because Mordecai had instructed her not to. Her revelation to the king happens later, at the second banquet.
Also, the Bible does not say Esther shouted at Haman, physically confronted him, or made a dramatic speech. The power of the scene comes from what she tells the king and the king’s reaction.
These three crafts now move the story naturally from the second banquet → the king’s sleepless night → Esther’s revelation, without skipping the important reversal in Esther 6.
11. Haman’s Downfall: The Turning Point
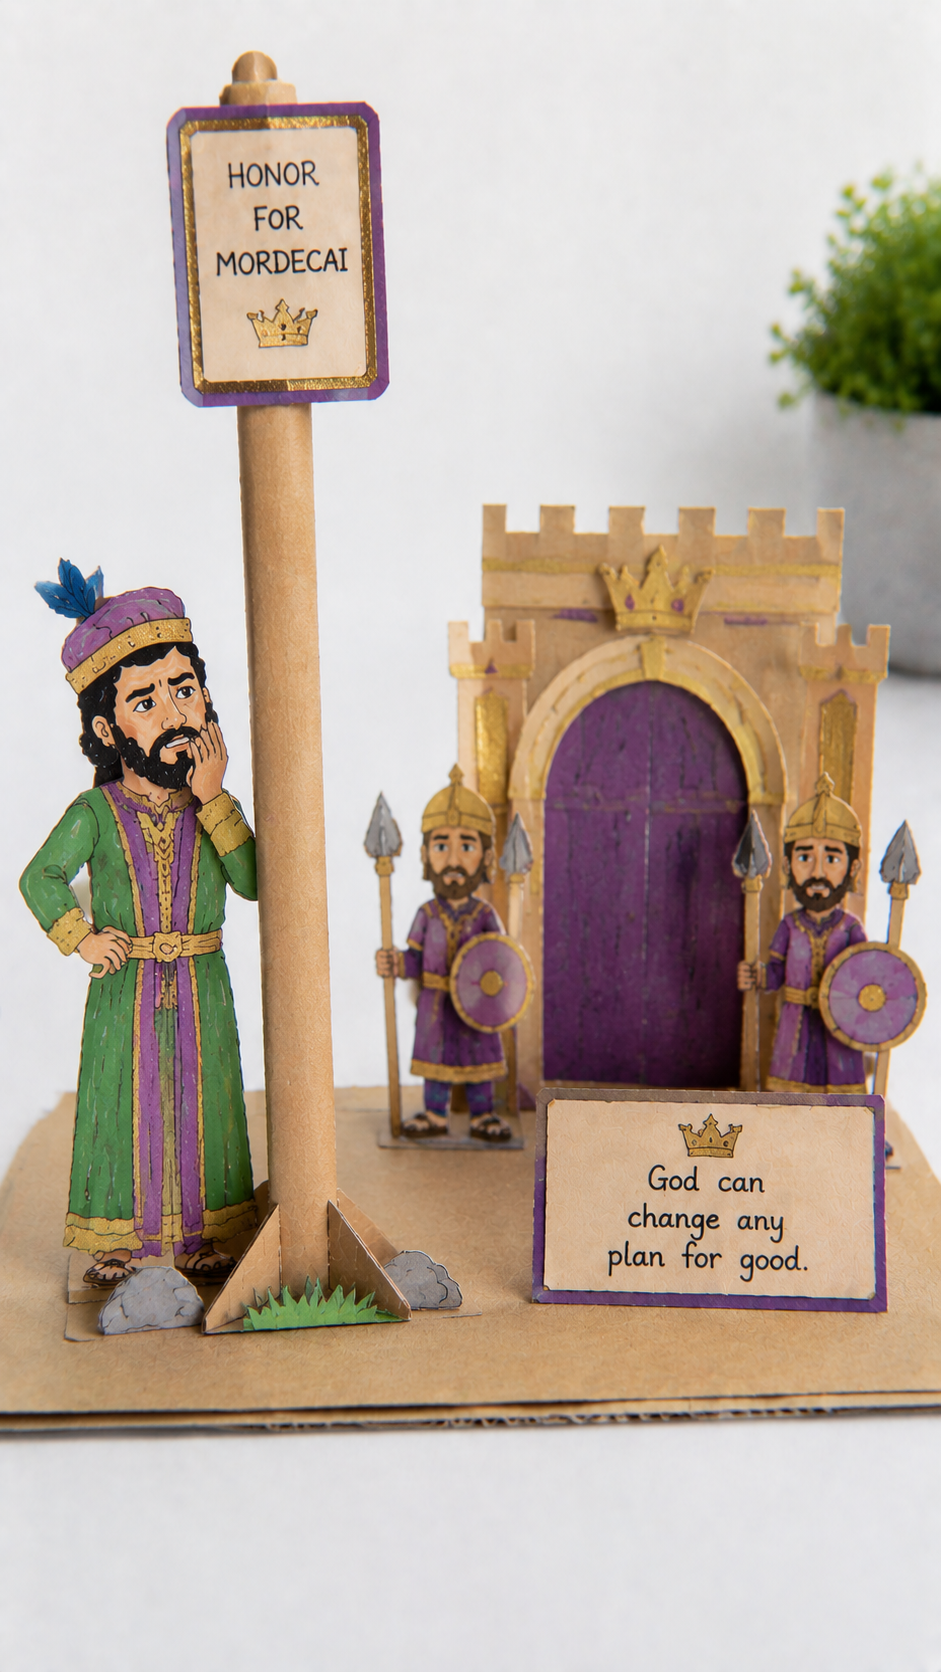
Esther has exposed Haman, and the king is furious. Haman realizes that his situation has changed completely and begins pleading with Esther for his life. When the king returns and sees Haman near Esther, his anger increases.
One of the king’s attendants then mentions the pole that Haman had prepared for Mordecai. The king orders Haman to be executed on it.
This is the point where Haman’s plan collapses. The man who had prepared a pole for Mordecai is executed on that very pole.
What It Teaches
Children can see the dramatic reversal in the story: Haman had planned to destroy Mordecai, but his own plan ultimately leads to his downfall.
This is also a useful place to explain that Mordecai was not the person who executed Haman. The king ordered Haman’s execution after Esther exposed his actions.
As children make the craft, ask:
“What changed between Haman’s plan against Mordecai and what eventually happened to Haman?”
Materials
- Cardstock
- Brown craft sticks
- Glue
- Scissors
- Markers
- Optional: small paper figures
How to Make the Turning-Point Scene
- Cut a simple figure of Haman from cardstock.
- Use two brown craft sticks to create a tall upright pole.
- Place Haman beside the pole rather than creating a graphic or frightening scene.
- Add a small crown or palace symbol to represent the king’s authority.
- Write “Haman’s plan turned against him” underneath the scene.
- If children are young, keep the focus on the story’s reversal rather than depicting the execution itself.
The Bible Moment to Explain
Esther 7 ends with the king ordering Haman to be hanged on the pole he had prepared for Mordecai. The king’s anger is no longer directed toward Esther or her people; Haman has been exposed as the person behind the threat.
You can tell children:
“The plan Haman made for Mordecai became part of Haman’s own downfall.”
A Detail Worth Getting Right
The text says Haman was hanged on the pole prepared for Mordecai. Don’t turn this into a graphic craft for children. The important biblical point is the reversal of Haman’s plan.
Also, this does not mean the danger to the Jewish people was completely over. Haman had been defeated, but the original royal decree was still in effect. That is why the story continues into Esther 8.
Craft time can also be as simple as grabbing a pack of sticks and trying 13 Popsicle Stick Crafts for Kids That Actually Keep Them Busy and Boosts Creativity.
12. The New Royal Decree
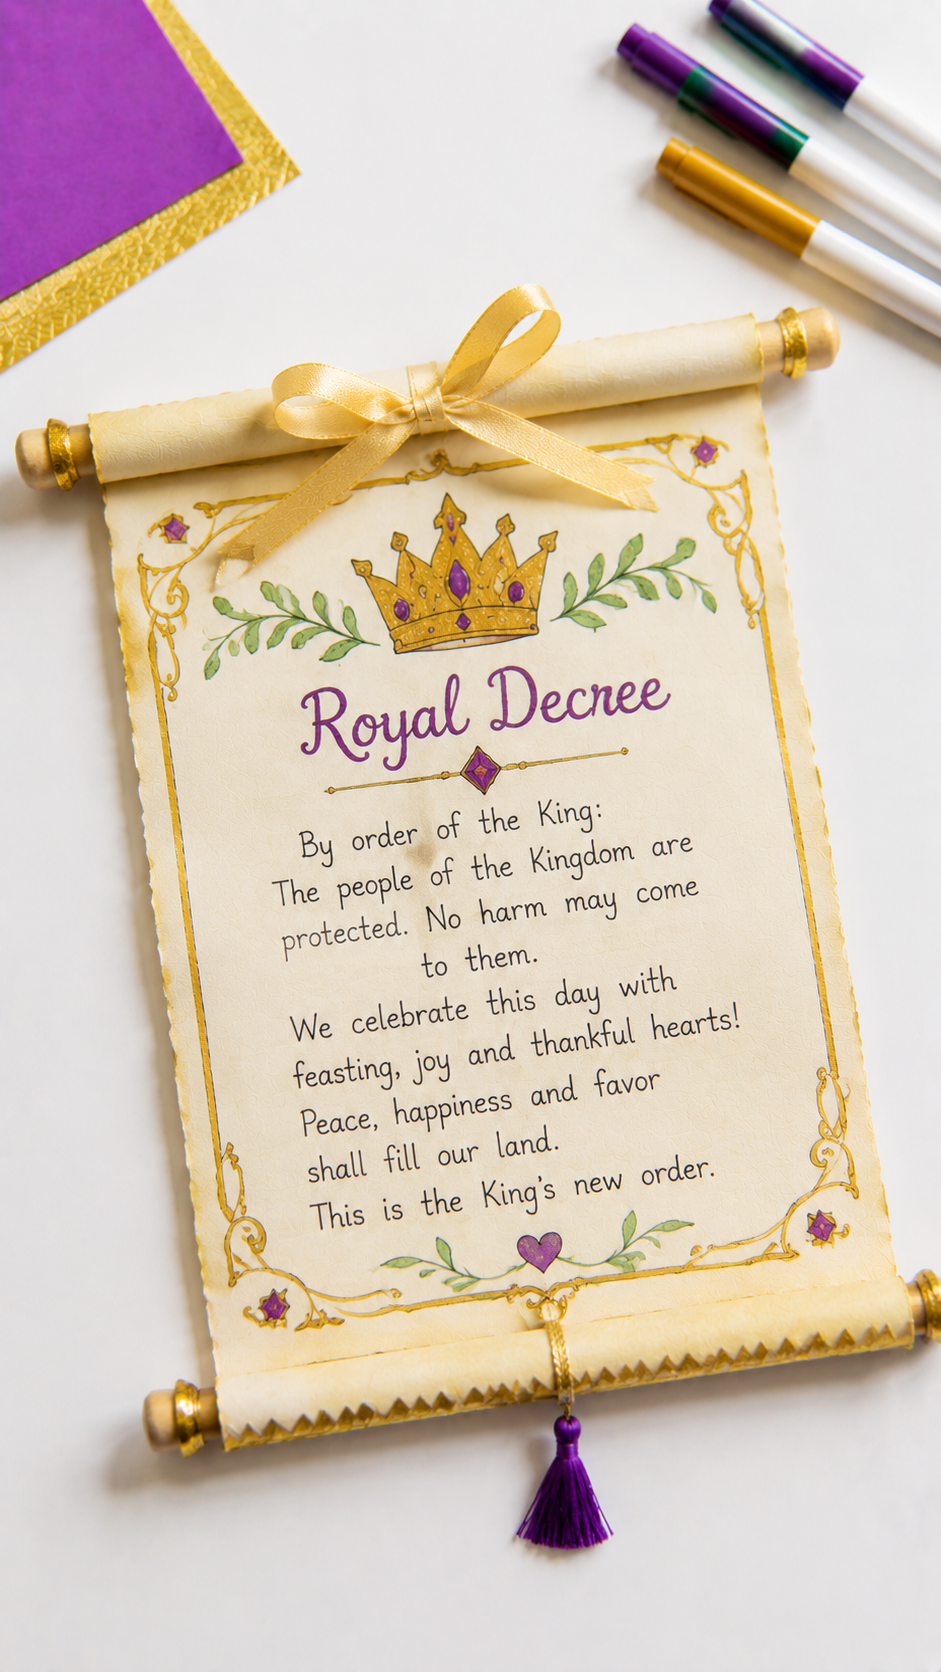
Haman is gone, but Esther’s people are still in danger because the original decree has not simply disappeared with him. Esther approaches the king again, this time pleading for her people.
The king gives Esther and Mordecai authority to write another decree in his name. The new decree allows the Jews throughout the empire to assemble and defend themselves against those who attack them.
This is an important detail for children to understand: Haman’s downfall did not automatically cancel the first decree. A new royal order was needed.
What It Teaches
This craft helps children understand why the story doesn’t end when Haman is defeated.
The first decree had been issued in the king’s name and could not simply be revoked. Esther therefore makes another appeal, and Mordecai works with the royal officials to issue a new decree.
As children make the craft, ask:
“Why did Esther need another decree after Haman was gone?”
This question helps them understand the difference between removing the person behind a plan and actually changing the legal situation created by the first decree.
Materials
- Two sheets of cardstock
- Scissors
- Glue
- Markers
- Two craft sticks
- Optional: red, blue, or gold paper for decoration
How to Make the New Decree Scroll
- Make a second scroll using the same basic method as the first decree scroll.
- Label the first side “First Decree” and the second “New Decree.”
- On the new-decree side, write a simple explanation such as “The Jews were permitted to assemble and defend themselves.”
- Decorate the scroll with simple royal borders.
- Place it beside the first decree scroll so children can compare the two.
- Explain that the second decree did not erase the first one; it gave the Jews a way to respond to the threat.
The Bible Moment to Explain
Mordecai’s new decree was written and sent throughout the empire. The Jews were permitted to gather and defend themselves against those who attacked them on the appointed day.
The text says that Mordecai left the king’s presence wearing royal clothing, and the Jewish people experienced relief and gladness.
The story then moves into the events of the appointed day, when the Jews defend themselves against those who seek to harm them.
You can tell children:
“Haman was gone, but Esther and Mordecai still needed a new royal order to protect their people.”
A Detail Worth Getting Right
Don’t describe the new decree as simply saying “the king cancelled Haman’s decree.” That is not what Esther 8 says. Instead, the king authorized Esther and Mordecai to issue another decree that gave the Jews permission to assemble and defend themselves.
That distinction is important because it explains why there had to be a second royal decree at all.
13. Purim Celebration Craft
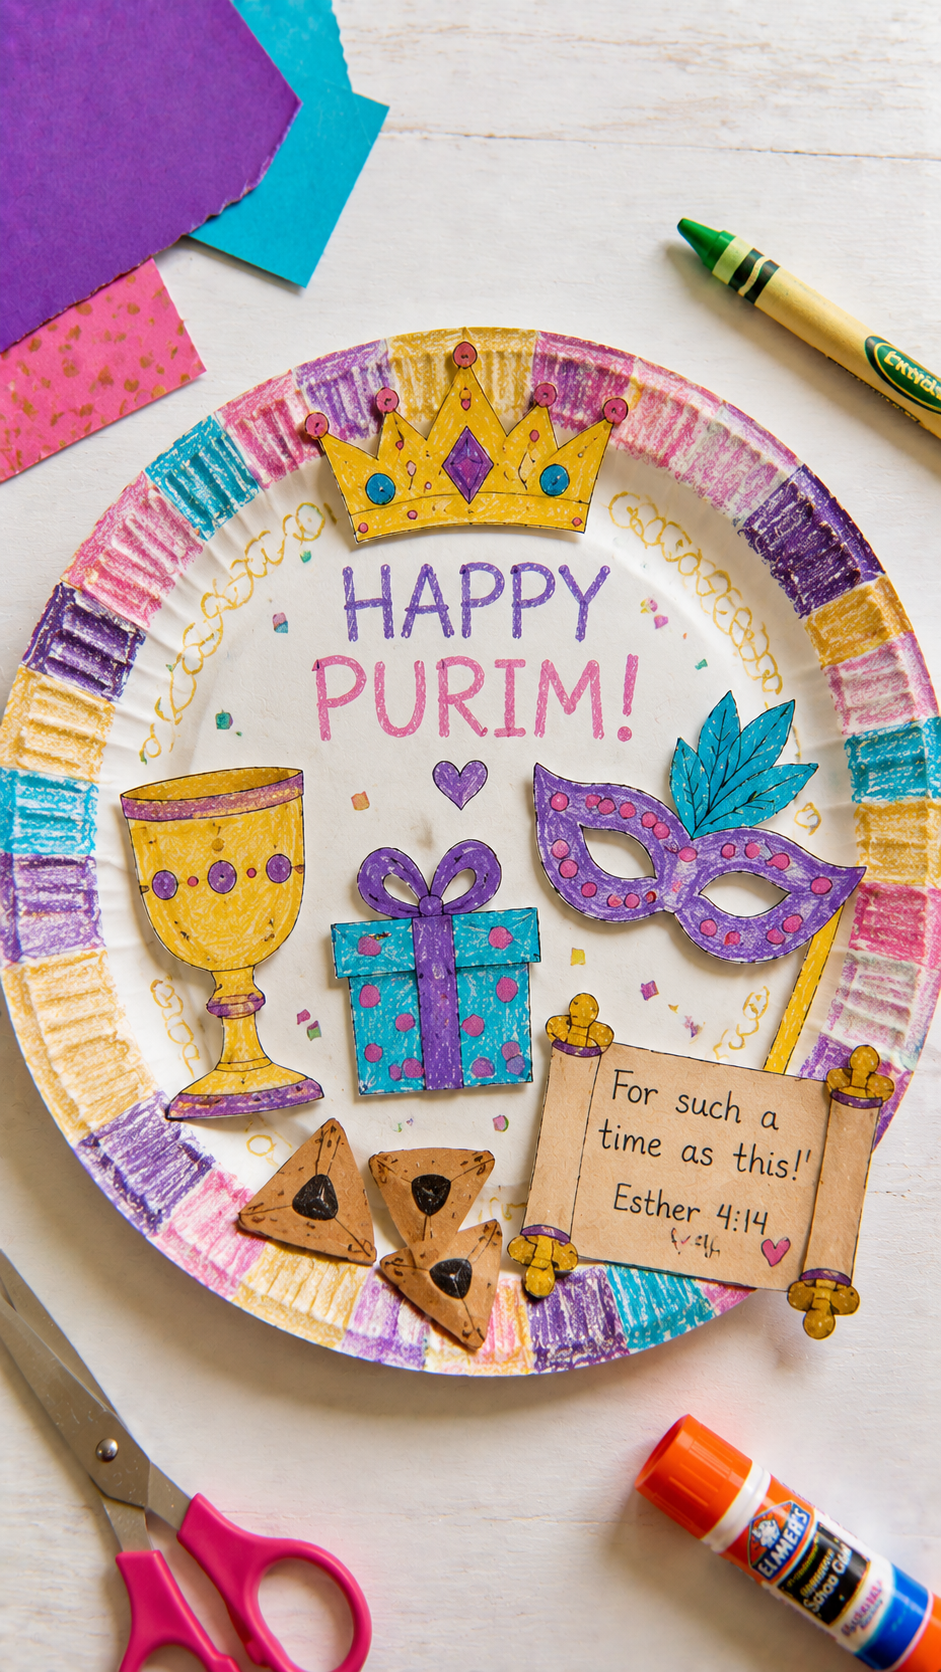
The story does not end with the Jews surviving the danger.
After the events of Esther 9, Mordecai sends letters establishing an annual celebration called Purim, named after the pur (lot) that Haman had cast when determining the date for his planned attack.
The celebration was to remember the days when the Jews gained relief from their enemies and their mourning was turned into joy.
This makes a Purim celebration craft a meaningful way to finish these Esther craft ideas because children can see that the story became something the Jewish people were instructed to remember every year.
What It Teaches
Purim is not simply a party added to the end of Esther’s story. It was established as a commemorative festival connected directly to the events recorded in the book.
The story describes days of feasting and gladness, the sending of gifts to one another, and giving gifts to the poor.
As children make their celebration craft, ask:
“Why would the Jewish people want to remember these events every year?”
That question brings the entire story back to its central movement: danger, deliverance, and remembrance.
Materials
- Paper plate or cardstock
- Markers or crayons
- Scissors
- Glue
- Ribbon or yarn
- Optional: colored paper for simple decorations
How to Make a Purim Celebration Plate
- Use a paper plate or cardstock circle as the base.
- Write “Purim” across the top.
- Draw simple symbols representing the celebration, such as a cup, a gift, or a table of food.
- Add the words “Joy,” “Feasting,” “Gifts,” and “Remember.”
- Decorate the edges with colorful paper shapes or drawings.
- At the bottom, write “Esther 9:22” as the Bible reference for the celebration.
The Bible Moment to Explain
Mordecai records these events and sends letters to establish Purim as a yearly observance. The people were to celebrate the days as a time of feasting and gladness, sending portions of food to one another and gifts to the poor. Esther also confirms the observance through a letter.
You can tell children:
“Purim helped the Jewish people remember how their mourning was turned into joy.”
That gives the craft a meaningful ending instead of simply ending the article with Esther becoming queen or Haman being defeated.
A Detail Worth Getting Right
Purim is not named after Esther or Mordecai. The name comes from the Hebrew word pur, referring to the lot Haman cast to determine the date of his planned attack.
Also, the Bible specifically connects Purim with feasting, gladness, sending food to one another, and gifts to the poor. Those details are more meaningful to teach than simply calling it “a celebration.”
This gives the article a satisfying ending: the crown begins Esther’s unexpected story, while Purim shows how the events were remembered long after the immediate crisis had passed.
And when the weather keeps everyone indoors, Indoor Activities for Kids on Rainy Days That Actually Keep Them Busy gives you more ideas beyond craft projects.
What Esther Craft Ideas Shouldn’t Teach Kids About Esther

Not every detail commonly attached to Esther’s story actually comes from the Bible. The crafts should help children understand what the text says without quietly turning guesses, traditions, or modern interpretations into biblical facts.
For example, Esther’s crown can be decorated with jewels, but the Bible never describes what her crown looked like. A banquet craft can show a table, but Scripture doesn’t give us a menu or detailed description of the palace decorations.
Likewise, we should avoid telling children exactly what Esther was thinking or feeling when the Bible doesn’t tell us.
The goal of these Esther craft ideas isn’t to fill in the gaps with made-up details. It is to give children something they can see and make while keeping the actual biblical events at the center.
When you’re ready for something completely different, Sunflower Crafts for Kids: The Suncatcher and 14 More Easy Ideas They’ll Beg to Make Again offers colorful projects that bring a little sunshine to craft time.
Conclusion
Esther’s story is much bigger than a crown, a palace, or a brave queen standing before a king. It moves through hidden identity, conflict, danger, fasting, difficult decisions, unexpected reversals, deliverance, and finally a tradition created so the people would remember what happened.
That is what makes these Esther craft ideas worth doing. A child can hold the crown, open the scroll, set the banquet table, or make a Purim craft, but each finished piece can point back to a moment in a story that asks bigger questions: What do you do when circumstances change? What happens when someone uses power unfairly? When should you speak up? How can one decision affect many people?
You don’t have to make all 13 crafts in one sitting. Choose the ones that match the part of Esther’s story you’re teaching, let the children ask questions, and resist the urge to explain every detail for them.
Sometimes the best Bible lesson begins when a child looks at a craft and asks, “But why did Esther do that?”
And that is where the story really comes alive.