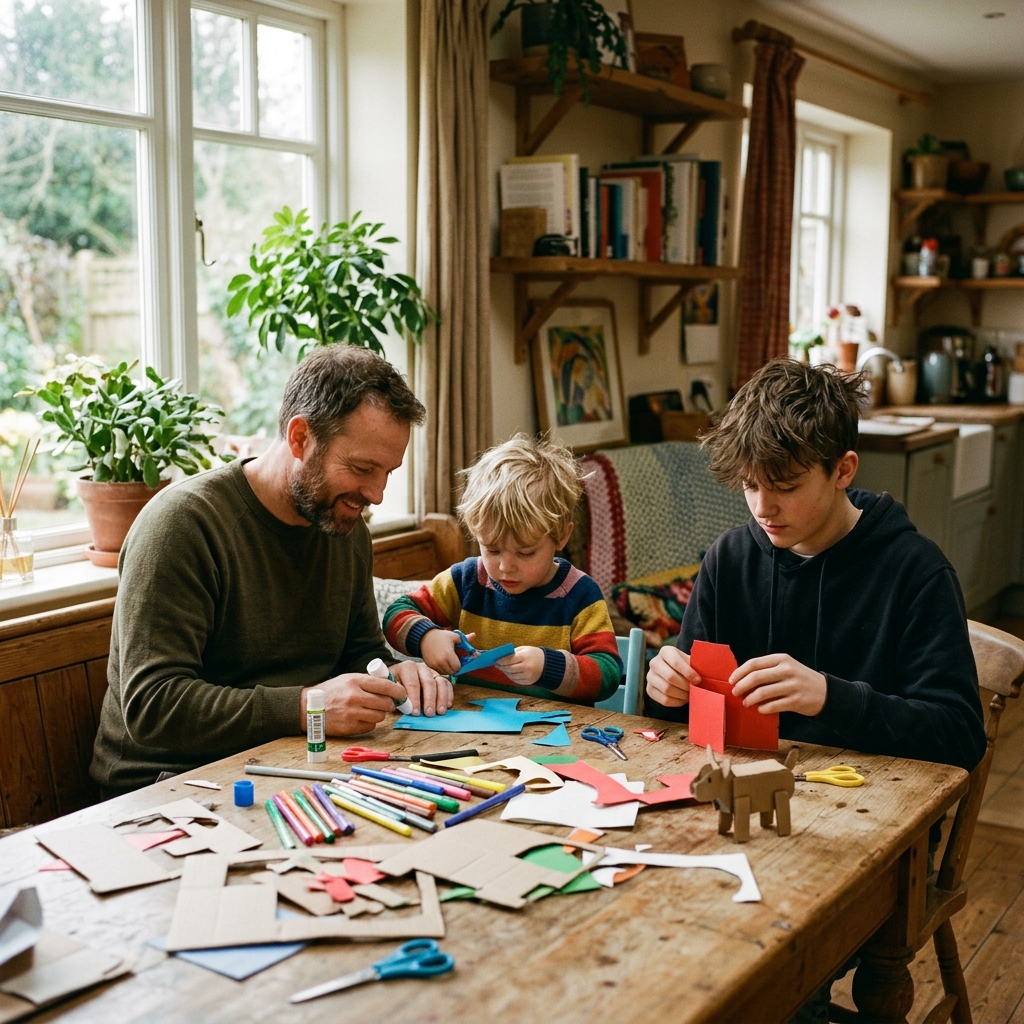
Ever wondered why some DIYs look polished while others don’t? These low budget craft ideas show how to make simple projects look refined and well-designed.
You sat down to make something simple, just a small DIY to save money.
In your head, it already looked clean, and houghtful. Something you’d actually be proud to use or give.
But when you finished… it didn’t feel that way.
The glue showed more than you expected.
Or the materials didn’t sit right.
And instead of looking intentional, it looked shabby.
That disappointment hits differently because you tried.
You gave it time, effort and still ended up with the thought of
“Why does mine look cheap?”
It’s frustrating, especially when you’ve seen people create beautiful things with what looks like the same basic materials.
So it starts to feel like maybe the difference is money.
Maybe they just spent more.
But that’s not it.
What you should know is that
It’s rarely about the budget.
But more about how the craft is put together, the small decisions, the finishing, the restraint.
The kind of details everyone notices.
Because a low-budget craft can either look:
- thoughtful and put-together
or - obvious and unfinished
And the line between both is thinner than you think.
In this guide, I’m going to show you what actually makes that difference.
Not just ideas, but:
- how to choose materials that don’t look flimsy
- how to finish your work so it feels clean, not rushed
- and simple craft ideas that hold up in real situations, events, gifts, and your own space
You don’t need more money.
You just need a better way to approach it.
Creating meaningful wedding gifts becomes easier with 11 Unique and Handmade Wedding Gift Sewing Projects That Will Impress Newlyweds, focused on personal, handcrafted ideas that feel special and memorable.
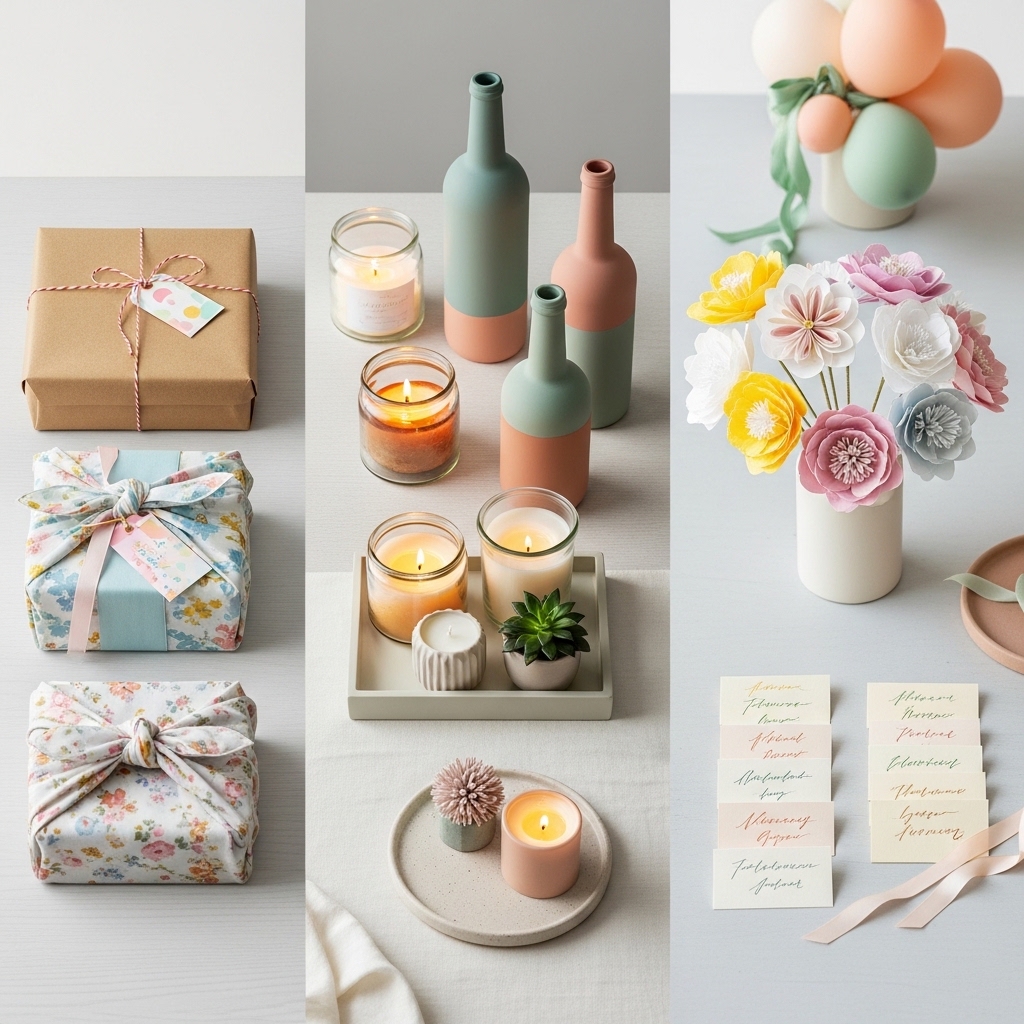
Low Budget Craft Ideas for Events
Low-budget event crafts don’t fail because they’re cheap, they fail because small details aren’t handled with intention. When you control color, spacing, and finishing, even simple materials can look well-designed.
Here are practical ideas you can actually use, broken down properly.
1. Paper Flower Centerpieces
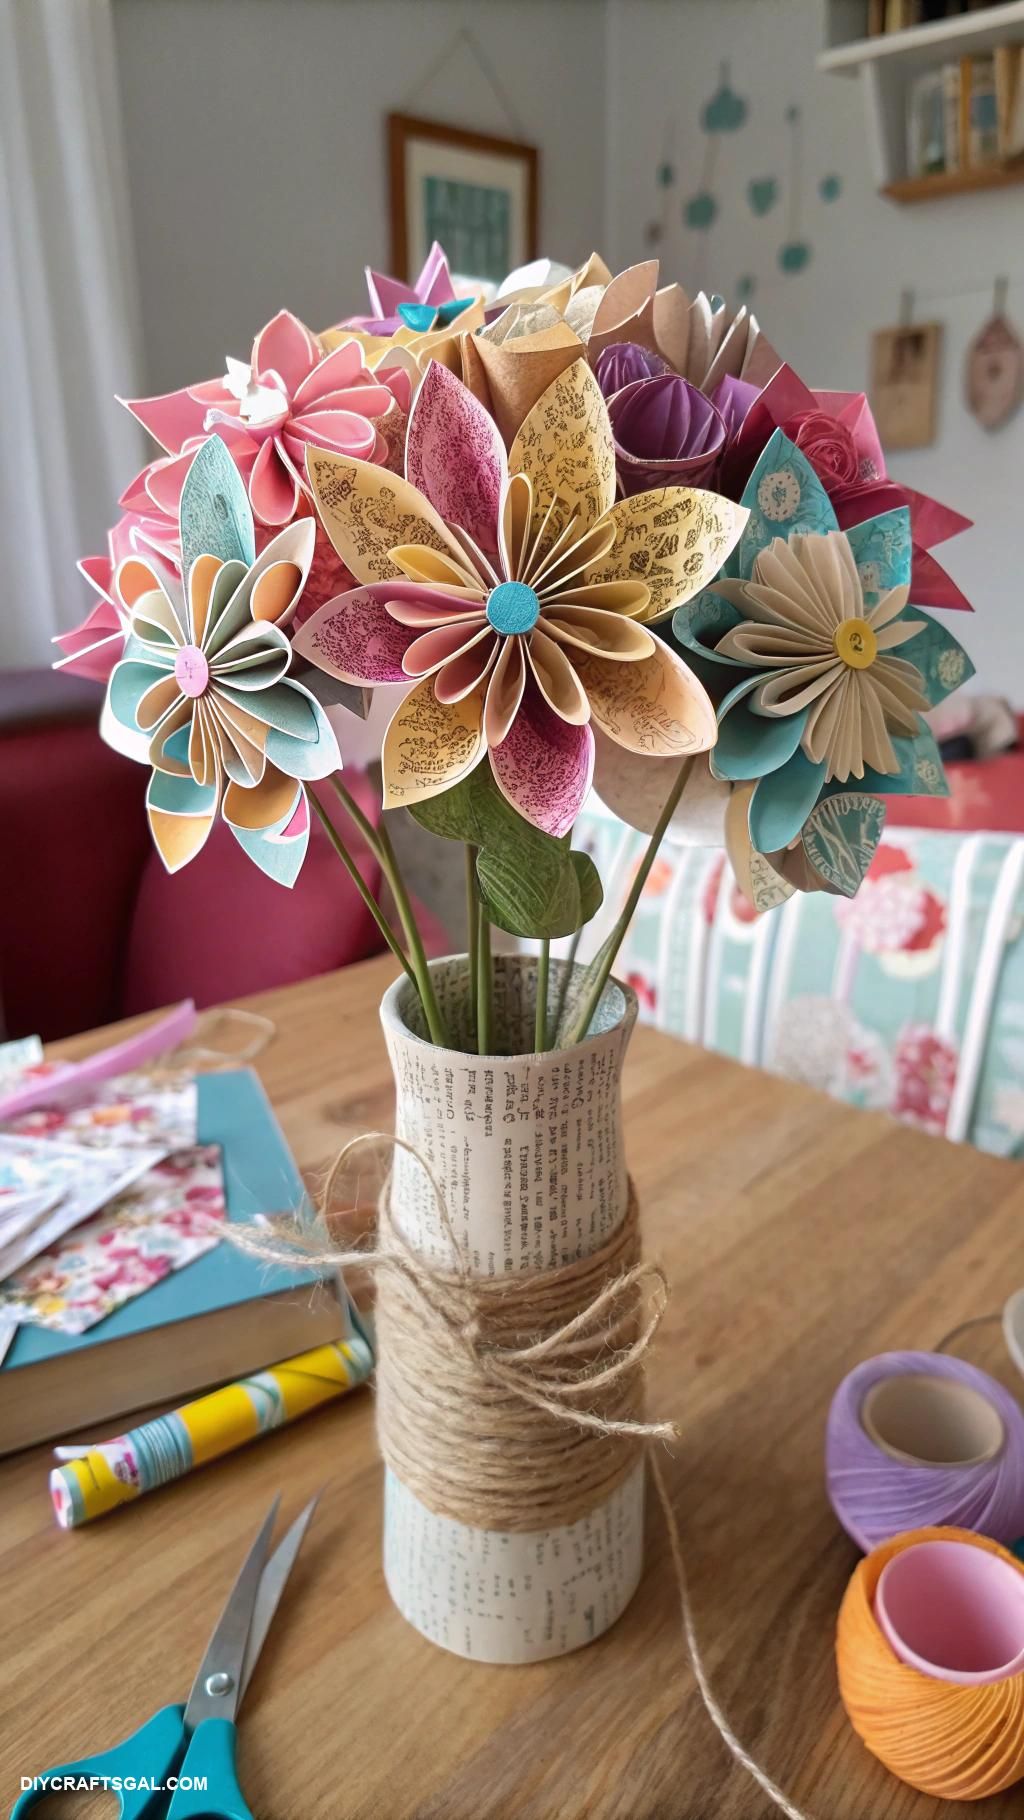
Paper flower centerpieces are handcrafted decorative arrangements made by shaping paper into layered flower designs and assembling them into a focal point for tables at events like birthdays, weddings, bridal showers, or small home gatherings.
They are usually placed in jars, vases, foam bases, or simple holders to create a styled centerpiece that replaces real flowers in a budget-friendly way.
What Makes It Visually Effective In Real Settings
Paper flower centerpieces work because they give you full control over structure, color, and repetition, three things that determine whether a table setup feels chaotic or intentionally styled.
Unlike real flowers, every element is placed with purpose, so the final arrangement can feel consistent across an entire event space. When spacing, height, and color rhythm are controlled, even simple paper materials begin to look curated rather than handmade.
Styling Principle That Elevates The Design
The real difference comes from restraint. Stick to a tight color story (for example, one dominant tone and one soft supporting shade), and build the arrangement in layers rather than spreading flowers evenly.
Grouping creates visual weight, which makes the centerpiece feel grounded and more “designed” instead of scattered.
Common Mistake That Weakens The Final Look
Most setups lose impact when too many colors or flower styles are introduced at once. Another common issue is spacing everything too evenly, which removes depth and makes the arrangement feel flat and overly “DIY” instead of intentional.
Handmade gifting ideas feel more intentional and profitable when you check out 10 Handmade Boho-Inspired Gift Ideas You Can Make and Sell From Home, which focuses on aesthetic, sellable crafts with a relaxed creative style.
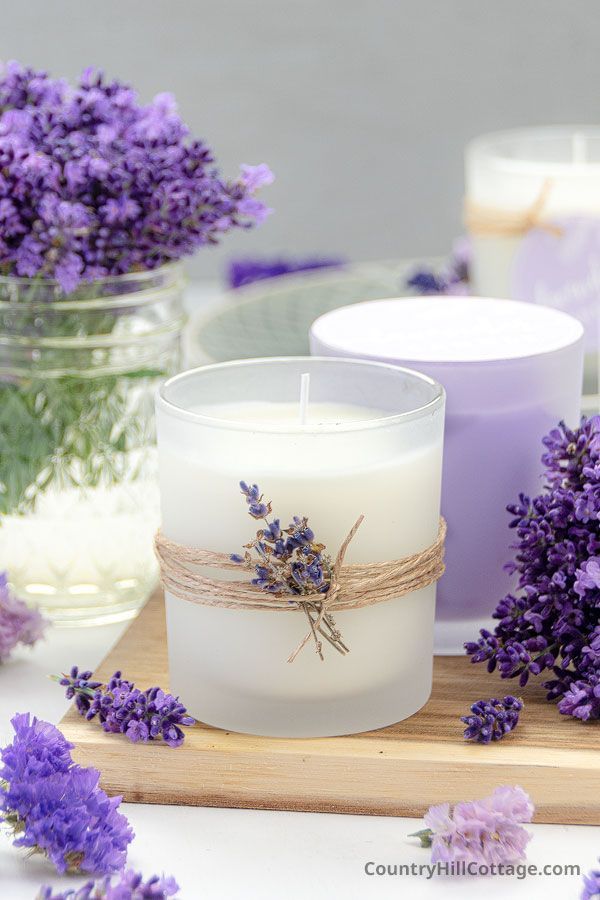
2. DIY Candle Holders (Jar-Based)
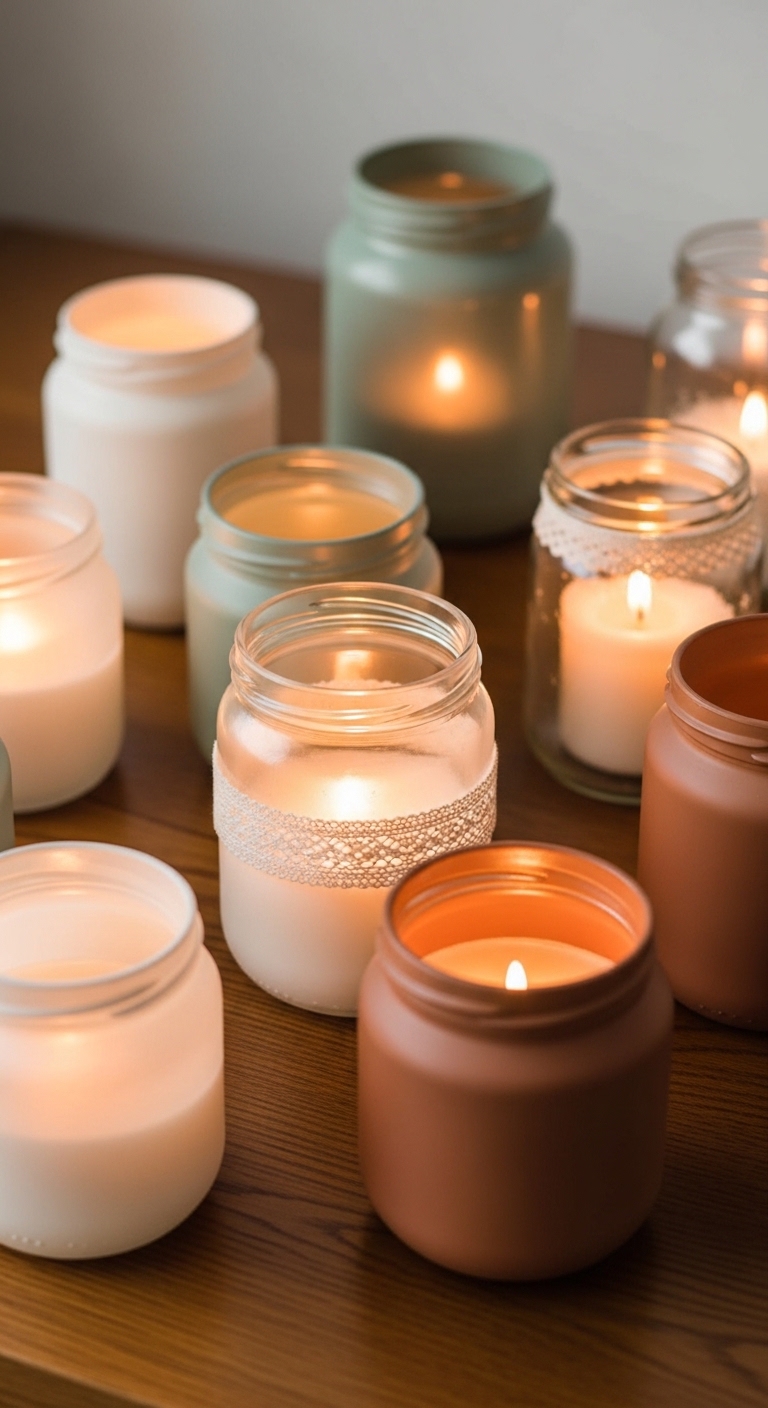
DIY candle holders (jar-based) are simple decorative pieces made by repurposing glass jars and turning them into candle containers for events, home decor, or small gatherings.
They are usually styled with a candle placed inside the jar and lightly enhanced using minimal materials like twine, paint, lace, or labels to create a soft, ambient lighting effect.
What Makes It Visually Effective In Real Settings
DIY candle holders work well in low budget craft styling because they rely on something already visually strong, glass and candlelight.
The transparency of the jar allows light to spread softly, creating a warm atmosphere without needing heavy decoration. When kept simple and balanced, they naturally fit into event tables and home setups without looking overdone or artificial.
Styling Principle That Elevates The Design
The key is restraint and contrast. A clean jar paired with a warm candle already feels aesthetic, so the goal is to enhance, not cover, it.
Subtle additions like neutral wrapping or soft texture details are enough to give it a finished look. When the design stays minimal, the glow becomes the main visual focus, which is what makes it feel intentional.
Common Mistake That Weakens The Final Look
Over-decoration is the biggest issue. Adding too many materials, colors, or layers around the jar blocks the natural glow of the candle and makes the entire piece feel cluttered. In most cases, the more you simplify it, the more elevated it looks.
Learning step-by-step crafting becomes much easier with How to Make Scented Candles at Home That Look and Smell Professional – Step-by-Step Guide, a beginner-friendly guide that breaks down the full candle-making process clearly.
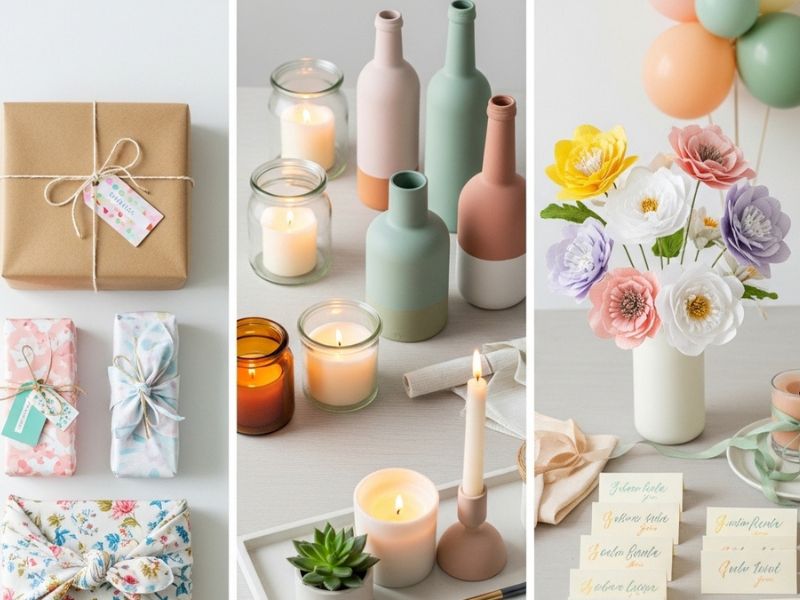
3. Handwritten Place Cards
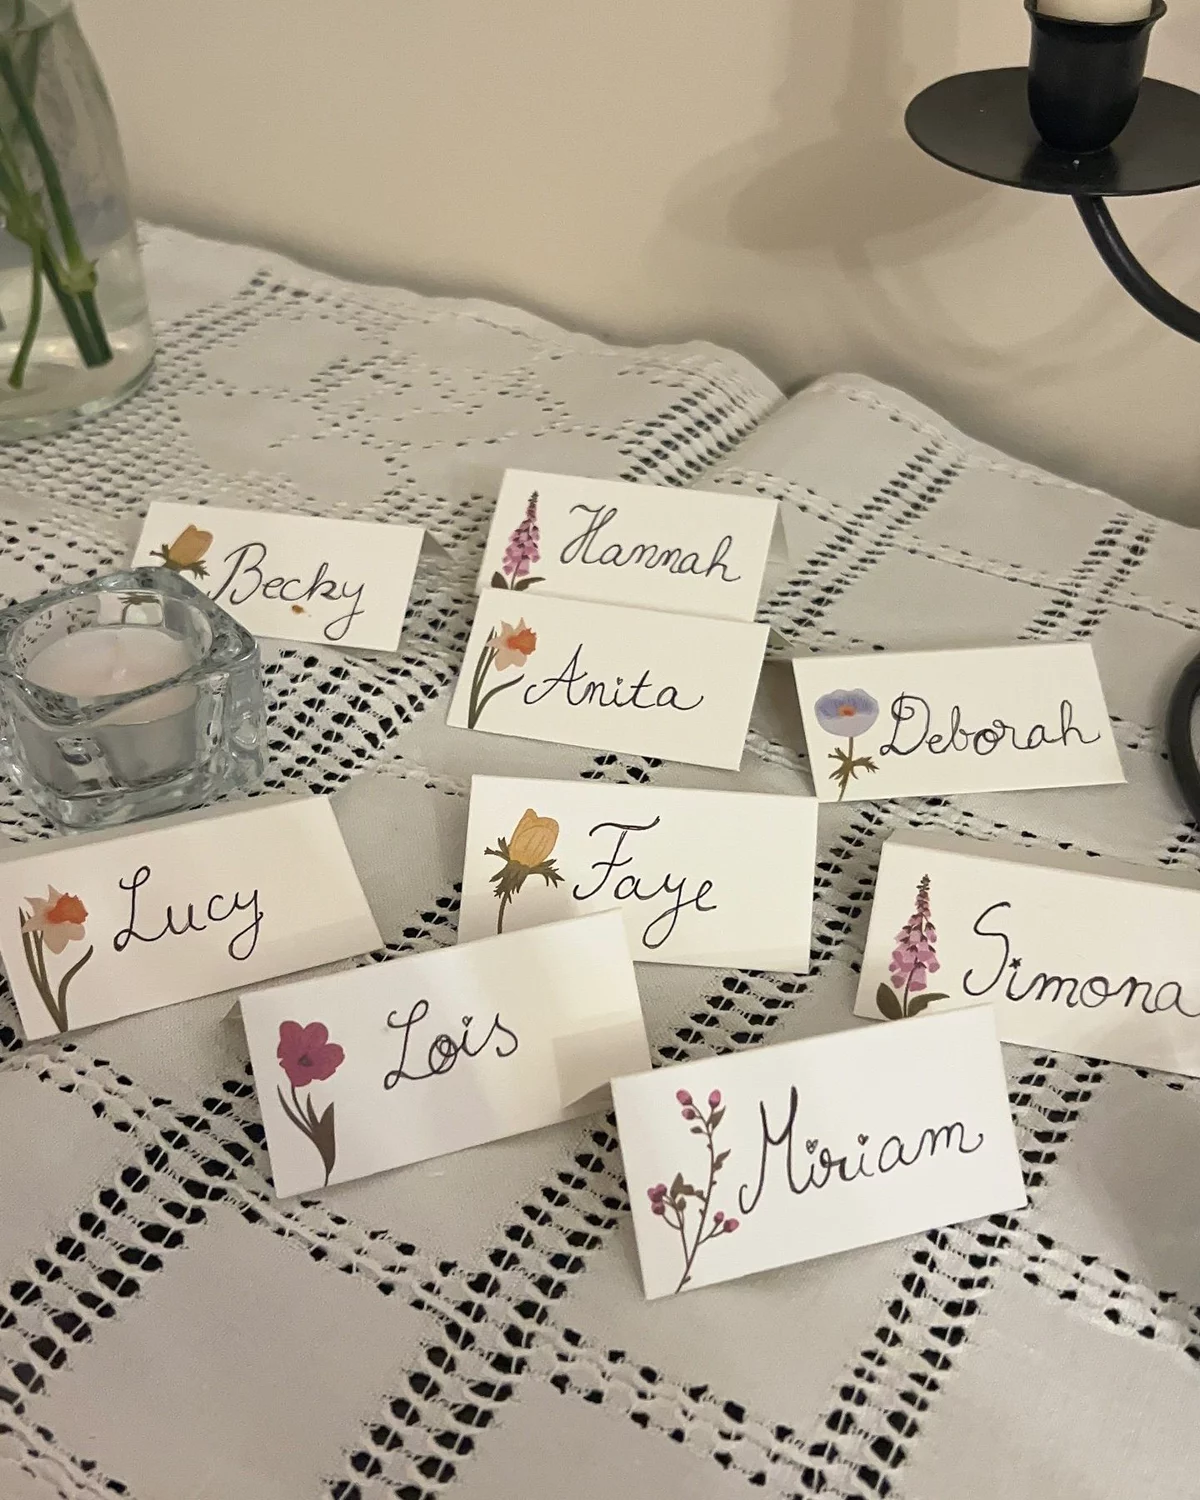
Handwritten place cards are small name tags made from cardstock or thick paper and placed at each seat during an event to guide guests.
They are often used for weddings, birthday dinners, bridal showers, or intimate gatherings. The focus is usually on simple design with clearly written names and minimal decoration to match the event theme.
What Makes It Visually Effective In Real Settings
They work because they add a personal and organized touch to the table without requiring complex design work. A neatly written name on quality paper instantly signals thoughtfulness and structure, helping the entire table setup feel more intentional and coordinated.
Styling Principle That Elevates The Design
The impact comes from consistency and clarity. Using uniform card sizes, neutral tones, and steady handwriting creates a calm, refined look. The goal is not decoration, but readability and visual balance across the table setting.
Common Mistake That Weakens The Final Look
Over-decorating the cards with stickers, glitter, or busy patterns can distract from the names and make the setup feel cluttered instead of elegant.
4. Balloon + Ribbon Styling
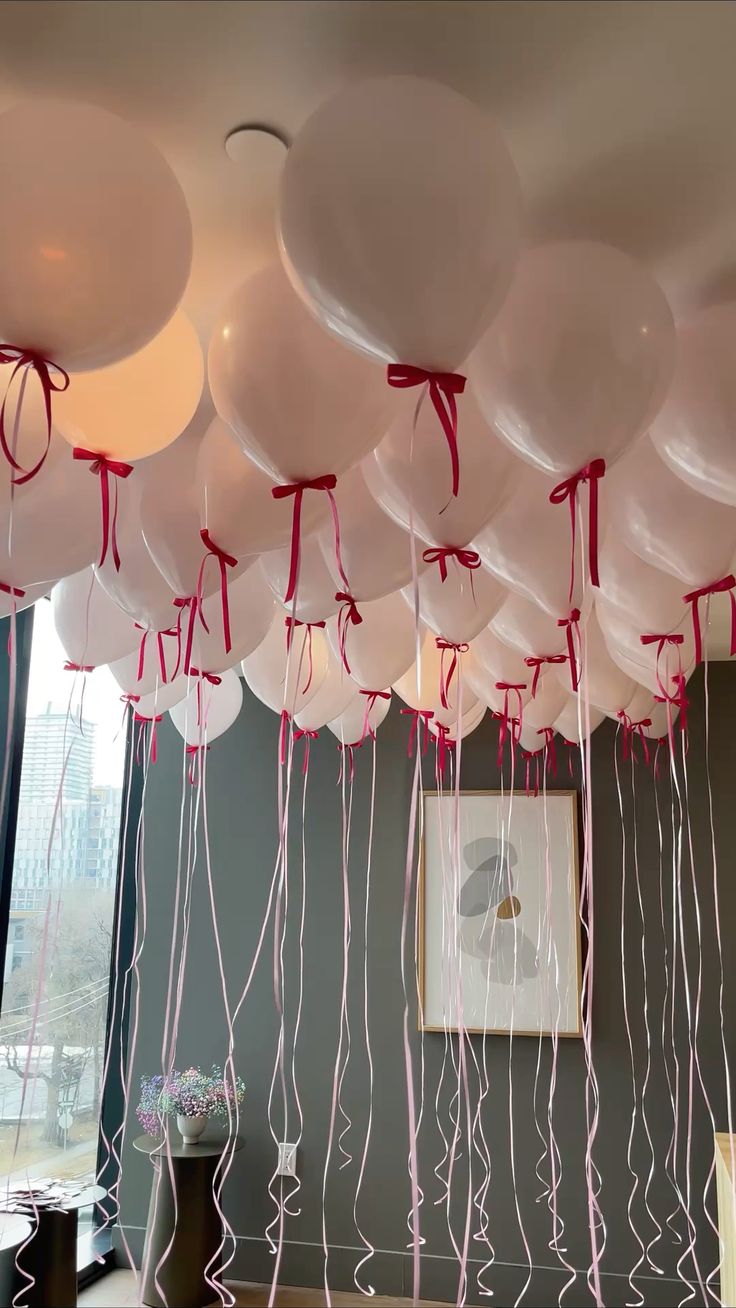
Photo credit: @ Tami Rotimi
Balloon and ribbon styling is a simple event decoration method where balloons are arranged in clusters or displays and paired with ribbons to enhance visual flow. It is commonly used for birthdays, small parties, and casual celebrations to create a festive atmosphere with minimal materials.
What Makes It Visually Effective In Real Settings
It works because balloons naturally add volume and celebration energy, while ribbons introduce movement and softness. When arranged with intention, even a small number of balloons can transform a space without needing expensive decor elements.
Styling Principle That Elevates The Design
The key is controlled repetition. Limiting colors to a coordinated palette and varying balloon heights creates visual rhythm. The ribbons should complement the color scheme rather than compete with it, helping the overall setup feel balanced and intentional.
Common Mistake That Weakens The Final Look
Using too many colors or overcrowding the space reduces visual clarity. When everything is placed too tightly or randomly, the arrangement loses structure and starts to feel chaotic instead of styled.
Earning from creativity becomes more structured with 10 Low-Cost DIY Crafts to Make and Sell From Home, which highlights simple, profitable crafts anyone can start from home.
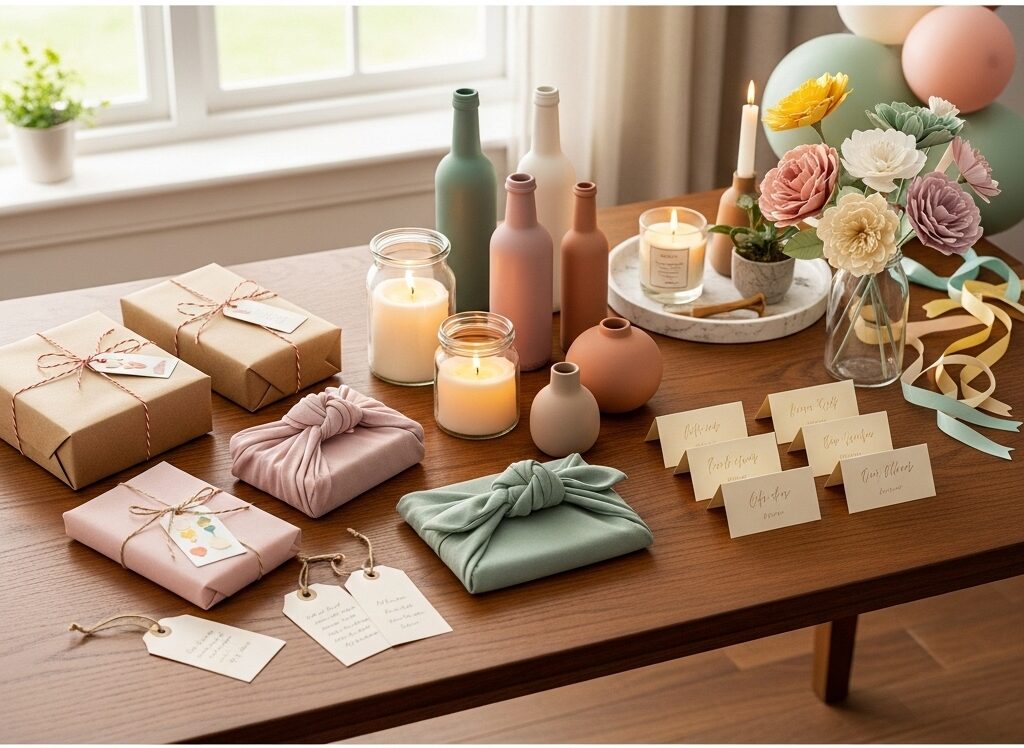
Low Budget Craft Ideas for Gift-Giving
Gift-giving is one of those moments where people expect something to feel thoughtful, not expensive. And that’s where most low-budget crafts either succeed beautifully, or fall flat. The difference is usually in how the gift is presented and emotionally framed, not how much it costs.
When you slow down and focus on presentation, even the simplest materials can carry real meaning.
Even when you have no budget, thoughtful gifting is still possible with DIY Gift Ideas for Friends When You Have No Money That Still Feel Special, which shows how creativity can replace spending.
1. Wrapped Gift Boxes With Kraft Paper + Twine
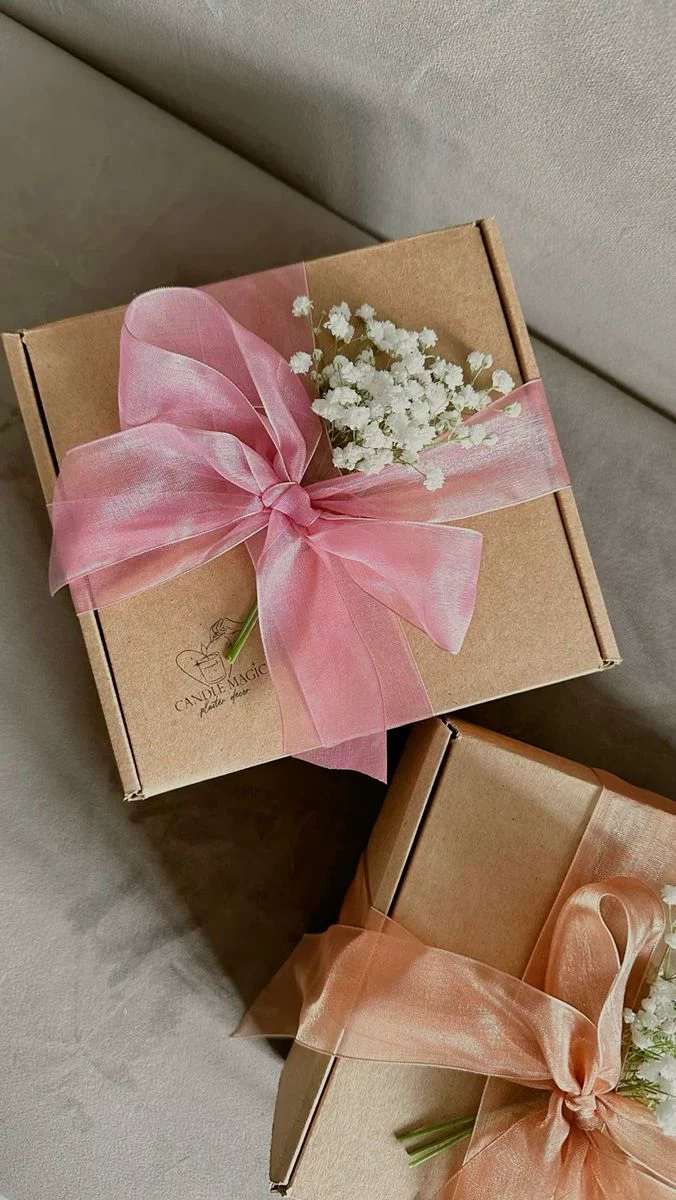
This is the practice of wrapping gifts using plain kraft paper instead of decorative wrapping paper, then finishing it with simple twine, string, or a minimal tag. It is often used for small boxes, books, or handmade items where the goal is a clean and natural presentation.
What Makes It Feel Thoughtful And Intentional
It works because kraft paper removes visual noise. Instead of loud patterns or shiny wrapping, the focus shifts to the shape of the gift itself. The simplicity creates a calm, “hand-prepared” feel that naturally communicates care and effort.
Presentation Principle That Elevates The Gift
The impact comes from restraint and neatness. Smooth wrapping, clean edges, and a single finishing detail like twine or a handwritten tag make the entire gift feel more intentional and personal.
Common Mistake That Weakens The Final Look
Using wrinkled paper, uneven folds, or over-accessorizing with too many decorative elements. When the simplicity is disrupted, the gift loses that clean, thoughtful finish.
2. Handmade Scented Candles
Handmade scented candles are small candles usually poured into jars or containers, infused with fragrance oils, and allowed to set into a finished decorative and functional gift item. They are commonly used for personal gifting or small handmade business items.
What Makes It Feel Premium And Gift-Worthy
It works because candles naturally combine function and atmosphere. When poured into clean, minimal jars, they feel calming and curated. The scent adds an emotional layer, making the gift feel personal even before it is used.
Presentation Principle That Elevates The Gift
Clean jars, balanced scent strength, and simple labeling make a big difference. The more minimal the design, the more “store-like” and premium it feels.
Common Mistake That Weakens The Final Look
Overloading the candle with heavy decoration or overly strong scents, which can make the final product feel less refined and less enjoyable to use.
Finding inspiration from global creativity becomes meaningful in Crafting Across Cultures: Meaningful Gift Ideas Inspired by Traditions Around the World, where traditional influences are turned into thoughtful handmade ideas.
3. Photo Memory Cards
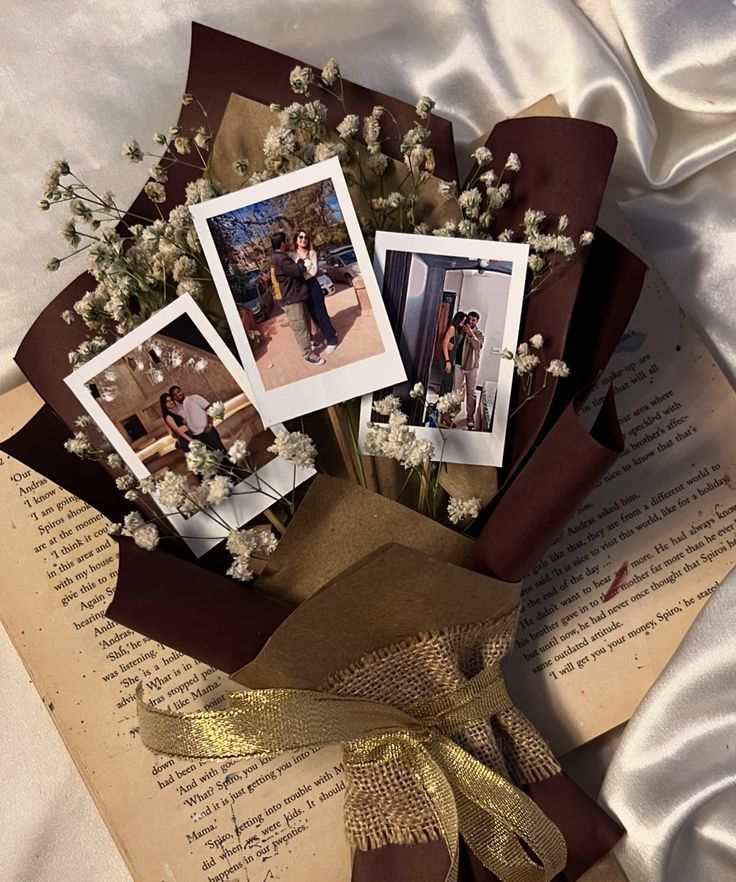
Photo memory cards are simple printed photographs arranged with minimal text or design elements, often used as personal keepsakes, greeting cards, or sentimental gifts.
What Makes It Emotionally Powerful
It works because it shifts focus from decoration to memory. A simple photo already carries meaning, so the design around it only needs to support, not compete with, the emotion behind it.
Presentation Principle That Elevates The Gift
Clean layouts, soft spacing, and limited text help keep attention on the memory itself. The simpler the design, the stronger the emotional impact.
Common Mistake That Weakens The Final Look
Adding too many fonts, stickers, or decorative elements that distract from the photo and reduce emotional clarity.
4. Fabric-Wrapped Gifts (Reusable Wraps)
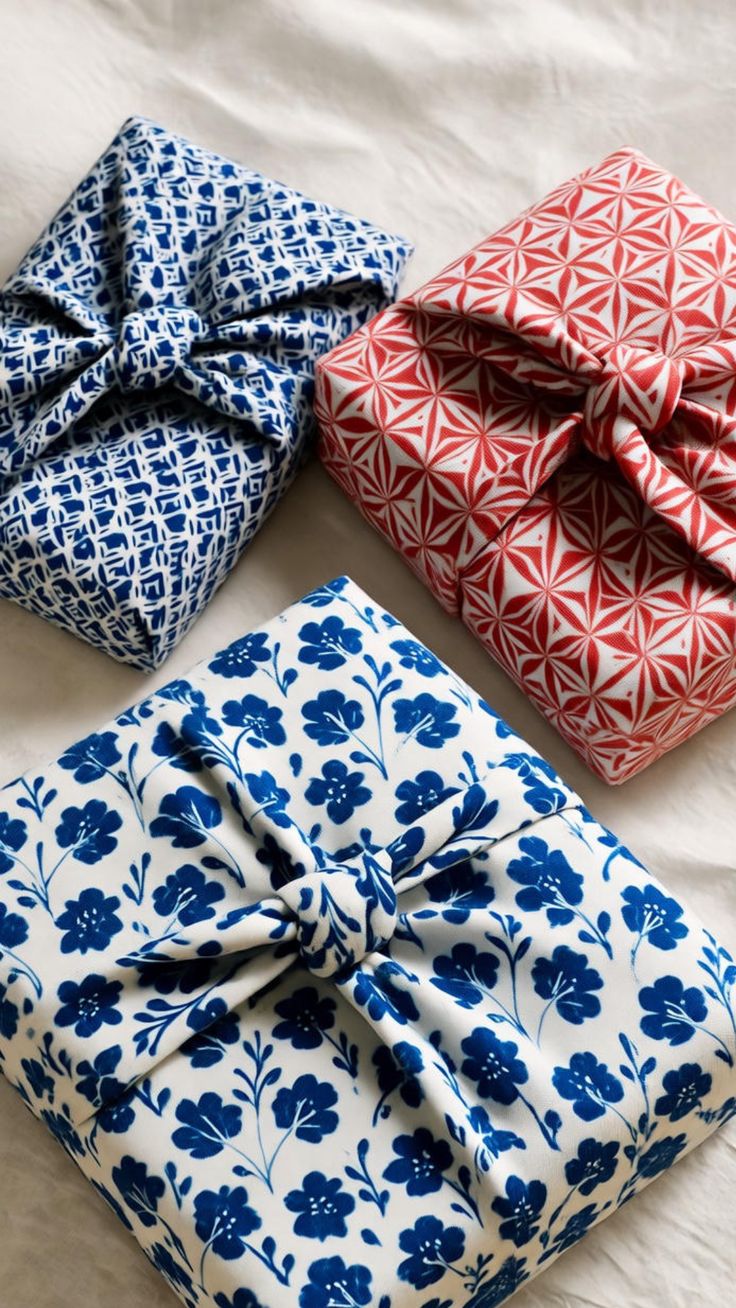
Fabric-wrapped gifts involve using cloth instead of paper to wrap items. The fabric is folded and tied using knots or ribbons, creating a reusable and eco-friendly presentation style.
What Makes It Feel Unique And Elevated
It works because fabric adds texture, softness, and dimension that paper cannot. It also introduces a reusable element, which makes the gift feel more thoughtful and sustainable.
Presentation Principle That Elevates The Gift
Choosing simple, clean fabric patterns and neat folding techniques creates a more refined look. The wrap itself becomes part of the gift experience, not just a cover.
Common Mistake That Weakens The Final Look
Using overly busy fabric patterns or messy wrapping techniques that make the gift look rushed instead of intentional.
Improving your crafting setup is easier when you read 15 Must-Have Crafting Tools Beginners Often Forget -That Make DIY Projects Easier, which highlights essential tools that make DIY work smoother and more efficient.
Low Budget Home Decor Crafts That Look High-End
Home decor is where most people quietly struggle. You want your space to feel calm, styled, and intentional, but you also don’t want to spend a lot trying to “fix” it.
The truth is, a beautiful home doesn’t come from expensive items. It comes from how things are arranged, colored, and simplified.
With the right approach, even low budget craft ideas can completely change how a space feels without making it look cluttered or cheap.
1. Minimal Wall Art (Print + Frame)
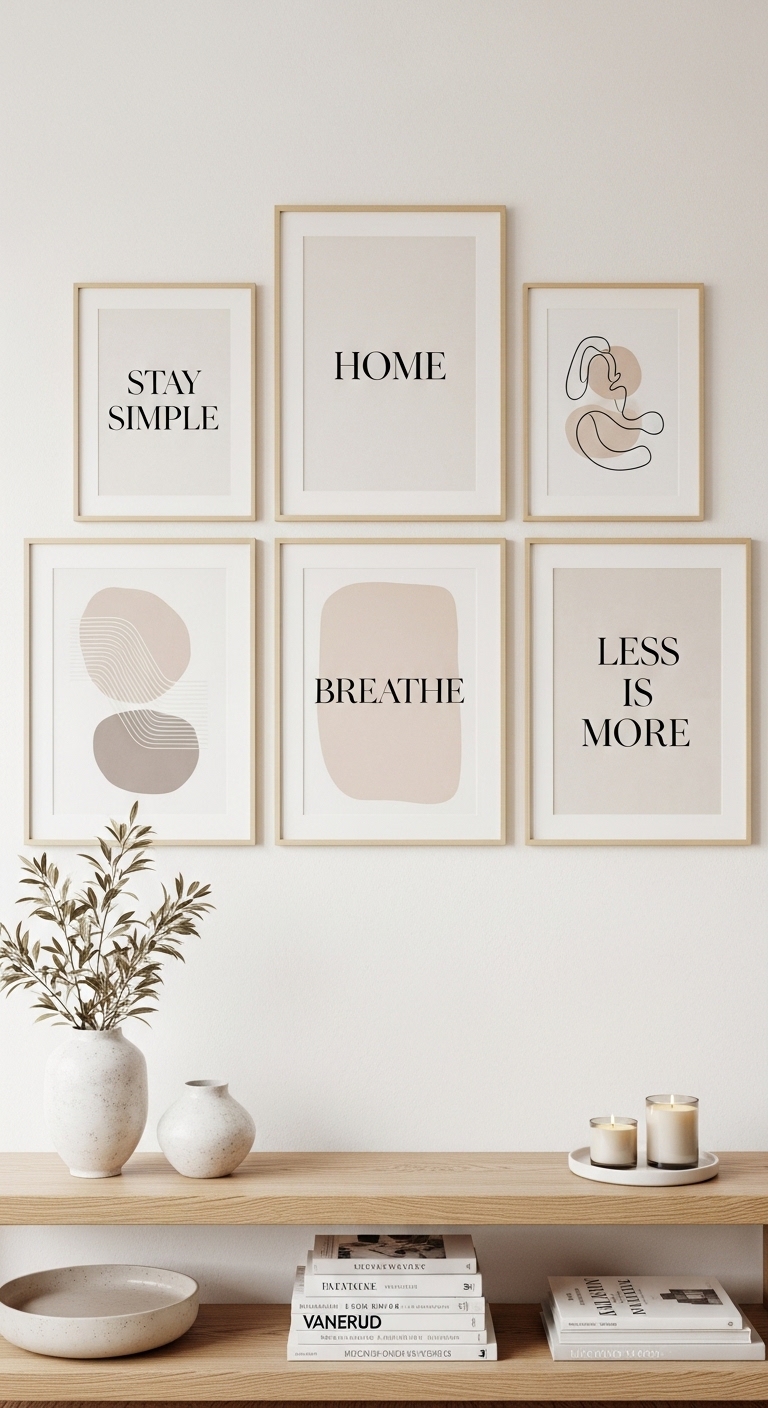
This involves using simple printed designs, like typography, line art, or soft abstract patterns, and placing them inside clean, basic frames to create wall decor.
What Makes It Feel High-End In Real Spaces
It works because simplicity creates visual calm. When artwork is minimal and framed neatly, it blends into the space instead of overwhelming it. This allows the room itself to feel more structured and intentional.
Styling Principle That Elevates The Look
Stick to neutral tones and consistent frame styles. Grouping similar designs together also creates a gallery feel, which instantly makes the space look more curated.
Common Mistake That Weakens The Look
Using mismatched frames or overly busy prints that compete for attention instead of complementing the room.
Creating a cozy living space on a budget becomes more achievable through DIY Room Decor Ideas on a Budget That Make Your Space Feel Warm and Lived-In, focused on simple changes that instantly improve home atmosphere.
2. DIY Vases (Bottles + Neutral Paint)
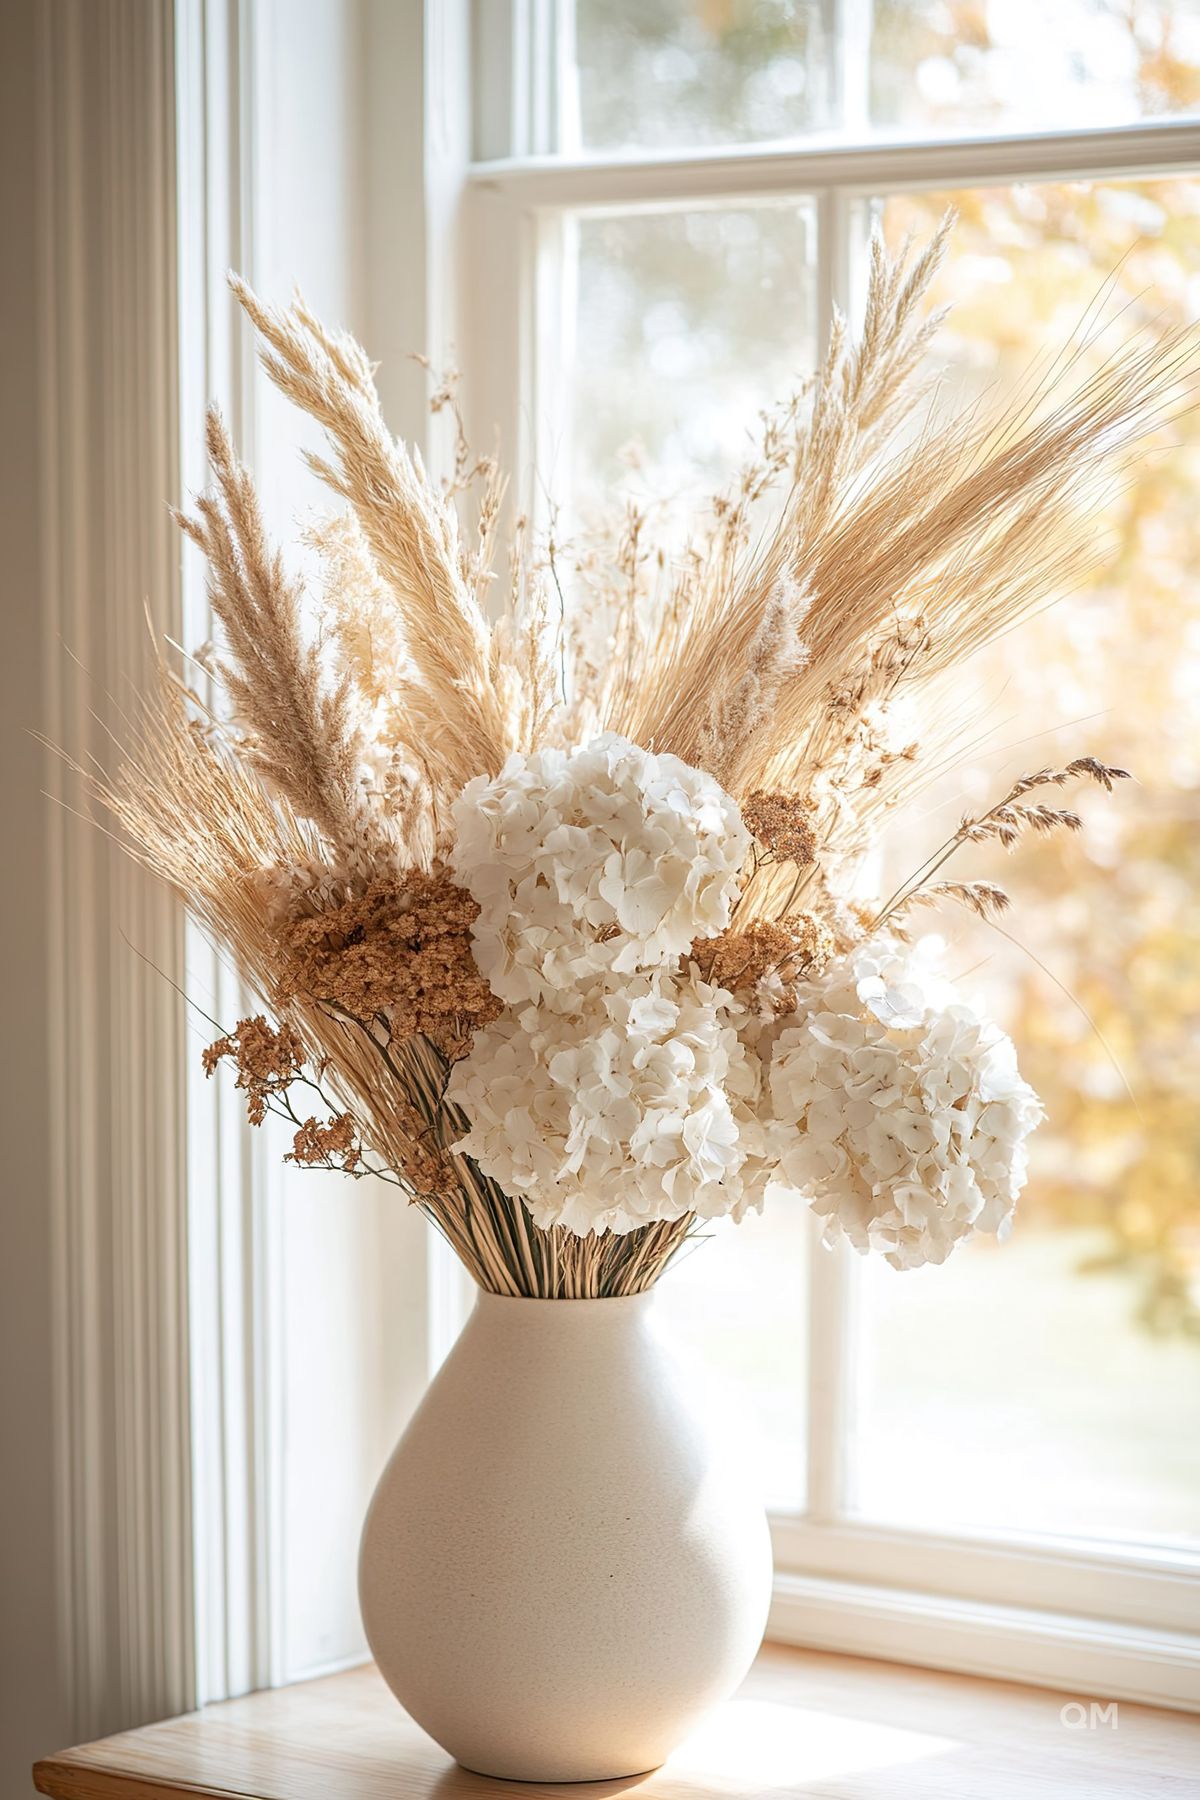
This is the process of repurposing old bottles or jars by painting them in neutral tones and using them as decorative vases for flowers or dried arrangements.
What Makes It Feel Modern And Clean
It works because uniform color creates visual order. When bottles are transformed into matching tones, they stop looking like recycled items and start looking like intentional decor pieces.
Styling Principle That Elevates The Look
Use soft, consistent colors like beige, white, or matte earth tones. Grouping vases of different heights together also adds subtle depth without visual clutter.
Common Mistake That Weakens The Look
Using too many bold or unrelated colors, which breaks visual harmony and makes the decor feel random.
3. Tray Styling (Grouped Items)

Tray styling is the arrangement of small decorative items, such as candles, books, and mini decor pieces—on a tray to create a single styled focal point within a room.
What Makes It Feel Intentional And Balanced
It works because grouping items creates order. Instead of having objects scattered around, everything is visually contained, which makes the space feel calmer and more structured.
Styling Principle That Elevates The Look
Mix different heights and textures while keeping colors aligned. A candle, a small plant, and a book together can create a simple but elevated composition.
Common Mistake That Weakens The Look
Overfilling the tray with too many items, which removes breathing space and makes the setup feel cluttered.
4. Mirror Or Frame Upgrades
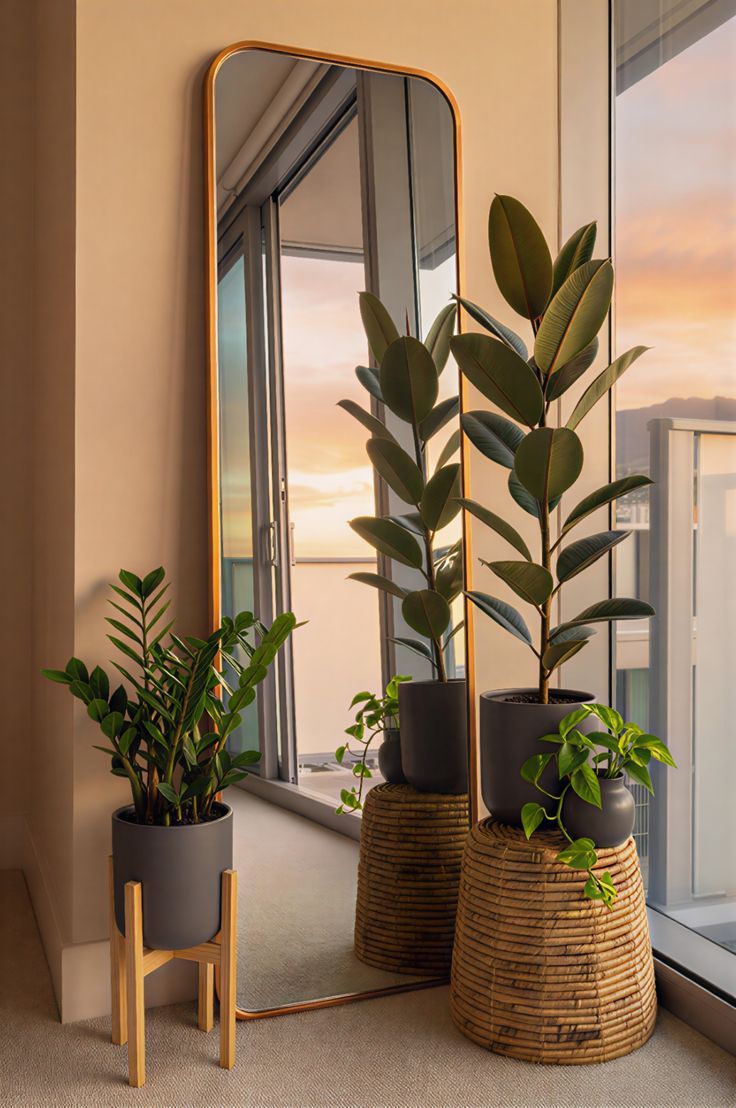
This involves refreshing existing mirrors or frames by adding simple borders, paint touches, or subtle design enhancements to improve their appearance without replacing them.
What Makes It Feel Refined And Updated
It works because small upgrades can completely shift how an object is perceived. A simple frame with a clean finish feels more intentional and styled than an untouched or worn one.
Styling Principle That Elevates The Look
Focus on clean lines and minimal enhancement. The goal is to improve—not completely redesign. Subtle changes often create the biggest visual difference.
Common Mistake That Weakens The Look
Adding excessive decoration or heavy patterns that overpower the original frame and make it look busy instead of refined.
Sustainable living becomes more practical with Eco-Friendly DIY Projects for Sustainable Living at Home That Save Money and Time, focused on reducing waste while still creating useful home projects.
Why Most Low Budget Crafts End Up Looking Cheap
Before anything else, it helps to understand something most people miss: it’s rarely the budget that ruins a craft. It’s the details.
You can use simple materials and still end up with something that looks clean and intentional, or you can spend more and still end up disappointed. The difference usually shows up in small finishing choices.
-
Poor Finishing (Visible Glue, Rough Edges)
This is one of the fastest ways a craft loses its polished look. When glue is visible, edges are uneven, or cuts look rushed, the whole piece instantly feels unfinished. Clean finishing is what separates something homemade from something that looks thoughtfully made.
-
Wrong Material Combinations (Cheap-Looking Plastics)
Not all materials work well together. When low-quality plastic or mismatched textures are combined, the result often looks inconsistent. Even simple crafts can look elevated when materials feel intentional and cohesive.
-
Over-Decorating (Too Many Elements Competing)
It’s easy to think “more details = better,” but the opposite is often true. When too many decorations are added, the eye doesn’t know where to focus, and the craft starts to feel cluttered instead of stylish.
-
No Color Control (Random Mixing)
Color is one of the biggest factors in how “expensive” something looks. Random or overly bright mixing without balance can make even a simple design feel chaotic. A controlled palette always feels more intentional.
-
Weak Structure (Things Not Holding Properly)
If something bends, shifts, or looks unstable, it immediately affects perception. Even a beautiful idea can look low quality if the structure isn’t solid and well put together.
Turning creativity into income becomes more realistic when you explore Low-Cost Craft Business Ideas for Beginners That Require No Expensive Tools or Skills, designed for starting a simple craft-based side hustle.
How to Choose the Right Craft
Before you start any craft, it helps to take a moment to get clear on what you’re actually trying to make and where it will be used. A good idea can still turn out wrong if it doesn’t match your space, your tools, or the level of detail it needs.
Asking the right questions at the beginning helps you avoid waste, stress, and messy results, and makes it easier to create something that actually looks finished and intentionalAnd, these small checks can save you time, materials, and frustration.
-
Where Will This Be Used? (Event, Gift, Home)
Every craft has a “home.” Something meant for a wedding table should feel different from something made for a gift box or wall decor. When you are clear on where it will be used, your choices around color, size, and style become much easier and more intentional.
-
Will It Be Seen Up Close? (Finishing Matters More)
Some crafts are viewed from a distance, but many are handled or seen closely. If it’s going to be touched or closely inspected, then finishing becomes the most important part—not decoration. Clean edges, smooth surfaces, and neat assembly matter more than adding extra details.
-
Do I Have The Tools To Do This Cleanly?
This question is often ignored, but it changes everything. Even a simple idea can look messy if you don’t have the right tools to cut, glue, or shape it properly. Being realistic about your tools helps you avoid crafts that you can’t finish neatly.
What To Avoid
-
Crafts That Require Too Many Materials
The more materials a craft needs, the higher the chance it becomes overwhelming or inconsistent. Simple setups are easier to control and usually look more refined.
-
Overly Complex Designs
Complicated designs can look impressive in theory, but they often fall apart in execution. If you’re still learning, simplicity gives you better results and a cleaner finish.
Getting started becomes less intimidating with DIY Projects for People Who Don’t Feel Crafty at All, which is designed for beginners who lack confidence but want simple, achievable ideas.
How To Make Any Craft Look More Professional
This is where small crafts stop looking “DIY” and start looking intentional. The difference is rarely about talent, it’s about how carefully you handle the final steps.
✔ Take Time To Finish Edges Properly
Clean edges are one of the first things the eye notices. Whether you’re cutting paper, fabric, or assembling materials, slow down and make sure every edge is neat and aligned. This small step instantly removes that “rushed” look.
✔ Let Materials Dry Or Set Fully Before Use
Rushing the drying or setting process is one of the fastest ways to ruin a craft. When materials are still soft or unstable, they shift and lose shape. Giving everything enough time to settle helps the final result stay firm and polished.
✔ Step Back And Edit Your Work
Don’t stay too close to your project the entire time. Step back and look at it as a whole. This helps you notice what feels unnecessary, uneven, or visually heavy. Removing one or two extra elements often improves the entire design.
✔ Stick To A Clear Color Direction
Color control is what separates messy-looking crafts from styled ones. Choose a small, intentional color palette and stay consistent throughout the piece. When colors feel connected, the whole craft feels more refined.
✔ Focus On Neatness Over Creativity Overload
It’s easy to want to add more details, but too many elements can weaken the final result. A simple, well-finished craft almost always looks better than a complicated one that feels crowded or inconsistent.
Conclusion
At the end of the day, it’s not about spending more, it’s about doing less, but doing it better. Most crafts don’t fall apart because the idea is bad; they lose impact because the small details weren’t handled with care.
When you slow down and focus on choice, control, and finishing, even the simplest materials can turn into something that feels intentional and well-made.
You don’t need to master everything at once. Start with just one idea from this post and give it your full attention, see what changes when you focus on doing it properly, not quickly.
That’s really what makes low budget craft ideas work: not complexity, but intention and clean execution.
What I Would Like You To Do Next
If this helped you, don’t just leave it here, turn it into action:
- Save this post so you can come back to it when you need ideas
- Try one simple craft idea today instead of overthinking
- Share it with someone planning an event, gift, or home decor project who needs easy inspiration
- And if you try one, let it be simple, you’ll be surprised how good “simple done right” can look
FAQs
1. How Do I Store Craft Materials So They Don’t Get Wasted Or Messed Up?
Keep materials in clear, separate containers based on type (paper, glue items, decorations, tools). This prevents damage, mixing, and unnecessary waste, especially when working on multiple small projects over time.
2. What Should I Do With Leftover Craft Materials After Finishing A Project?
Don’t throw them away immediately. Sort them by usability—small scraps can often be reused for accents, mini decorations, or future projects. This helps reduce cost and keeps your workspace organized.
3. How Can I Improve My Craft Skills Without Following Complicated Tutorials?
Start by recreating simple designs and focusing on one improvement at a time—like cleaner cutting, better spacing, or color control. Skill improves more from repetition and refinement than from complex tutorials.
4. How Do I Make My Craft Setup At Home More Organized For Better Results?
Create a small dedicated crafting space, even if it’s just a tray or corner. Keeping tools within reach and materials visible reduces distraction and helps you work more cleanly and efficiently.
5 How Long Should I Spend On A Simple Craft Before It Starts Looking “Overworked”?
Most simple crafts look best when they are completed in focused stages without over-editing. If you keep adjusting details for too long, the design can lose its natural balance. Knowing when to stop is part of the skill.