Turn Halloween into something your child actually wants to make with these cute Halloween crafts for kids—cheerful ideas with none of the creepy stuff.
Halloween can be a little confusing for a child.
The pumpkins are fun. The candy is exciting. Making a bat or a black cat sounds great, until a giant monster appears on the neighbor’s porch and suddenly Halloween doesn’t feel so friendly anymore.
Some children simply don’t enjoy the scary side of the holiday.
Masks, monsters, ghosts, and frightening decorations can feel very real to young children, even when adults know they’re only decorations.
So what happens when a child wants to make Halloween crafts but would rather leave the creepy stuff out?
You don’t have to remove Halloween from the table. You can change the mood.
A pumpkin can have freckles instead of jagged teeth. A bat can look goofy instead of sinister. A ghost can smile. A spider can become a funny little character instead of something crawling out of the dark.
That’s what these Halloween Crafts for Kids are about: keeping the recognizable parts of Halloween while giving children plenty of room to make them feel cheerful, silly, colorful, and completely their own.
Because sometimes the best Halloween craft isn’t the one that looks the spookiest, it’s the one a child is actually happy to make.
If you’re making Halloween crafts for yourself instead, Halloween Craft Ideas for Adults Who Don’t Want a Big Mess or Anything That Takes All Day has quick projects that don’t require a huge cleanup.
Not Scary Doesn’t Mean Every Craft Has to Look the Same

There is more than one way to make Halloween feel friendly. A child who dislikes a frightening ghost may still love a smiling one.
Another child might be perfectly happy with a black cat but not want a spider anywhere near the craft table.
So don’t treat “not scary” as one fixed style.
The easiest way to soften a Halloween craft is often to change the details that give it a frightening feel. A pumpkin can have round eyes and a grin instead of jagged teeth.
A monster can have bright colors and a ridiculous hairstyle. A bat can become a funny character rather than a dark shape flying out of nowhere.
Even the same Halloween subject can feel completely different depending on its expression, colors, shape, and details.
This fits with guidance from The Open University, which suggests using pumpkins, colorful decorations, happy ghosts and silly monsters when making Halloween more comfortable for children.
Think about the feeling you want the finished craft to give
Instead of asking, “Is this a Halloween thing?”, ask:
“Would my child enjoy looking at this when it’s finished?”
That small change gives you much more freedom. You don’t have to remove every ghost, bat, spider or monster. You simply give children the chance to make those characters silly, cheerful, colorful, or completely harmless-looking.
And if a child still doesn’t like one of them, leave it out. There is no prize for making a child craft something they find uncomfortable.
1. Smiling Paper Plate Pumpkin
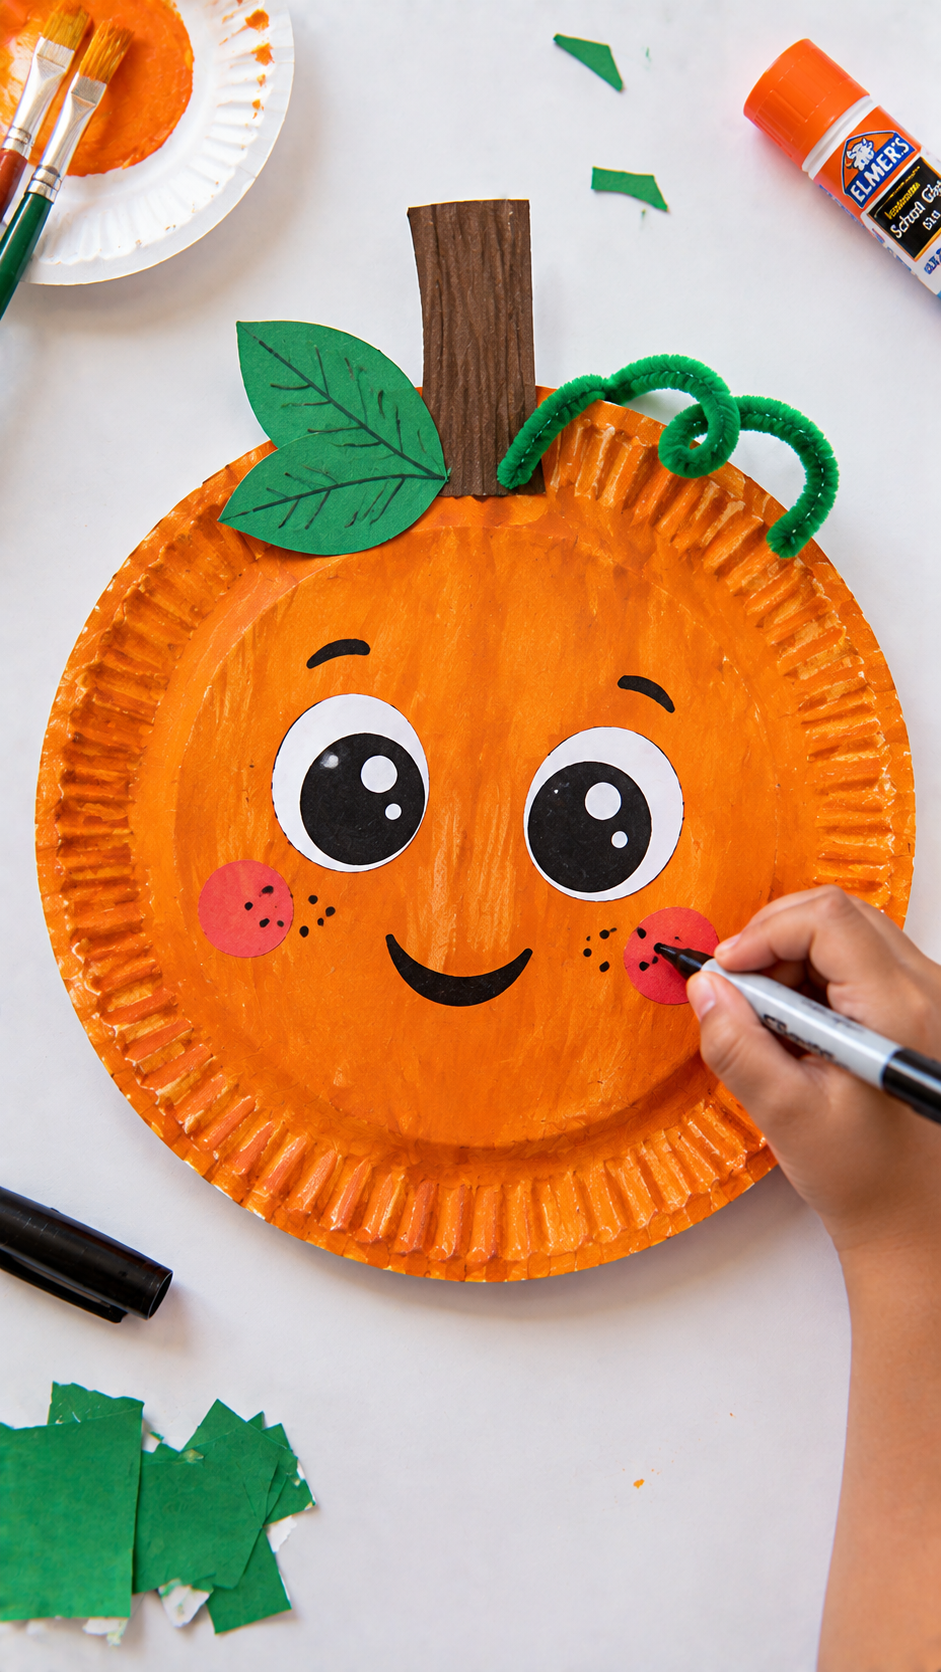
A pumpkin is an easy way to make Halloween feel festive without making it frightening.
Instead of the sharp eyes and scary teeth often used on jack-o’-lanterns, this paper plate pumpkin gets a friendly face. Give it round eyes, a big smile, rosy cheeks, freckles, or even a funny hairstyle.
The nice thing about this craft is that the child gets to decide what “cute” looks like. One child might make a sleepy pumpkin, while another might give theirs a huge grin and silly eyebrows. There is no need for every pumpkin to look the same.
You’ll need: a paper plate, orange paint or crayons, green paper for the stem, black paper or a marker for the face, and glue.
To make it: Color the plate orange, add a small paper stem, then create a friendly face with the black paper or marker. Add any extra details the child likes.
Make it personal: Give each pumpkin a different personality like sleepy, giggly, surprised, or even completely faceless.
2. Friendly Paper Ghost
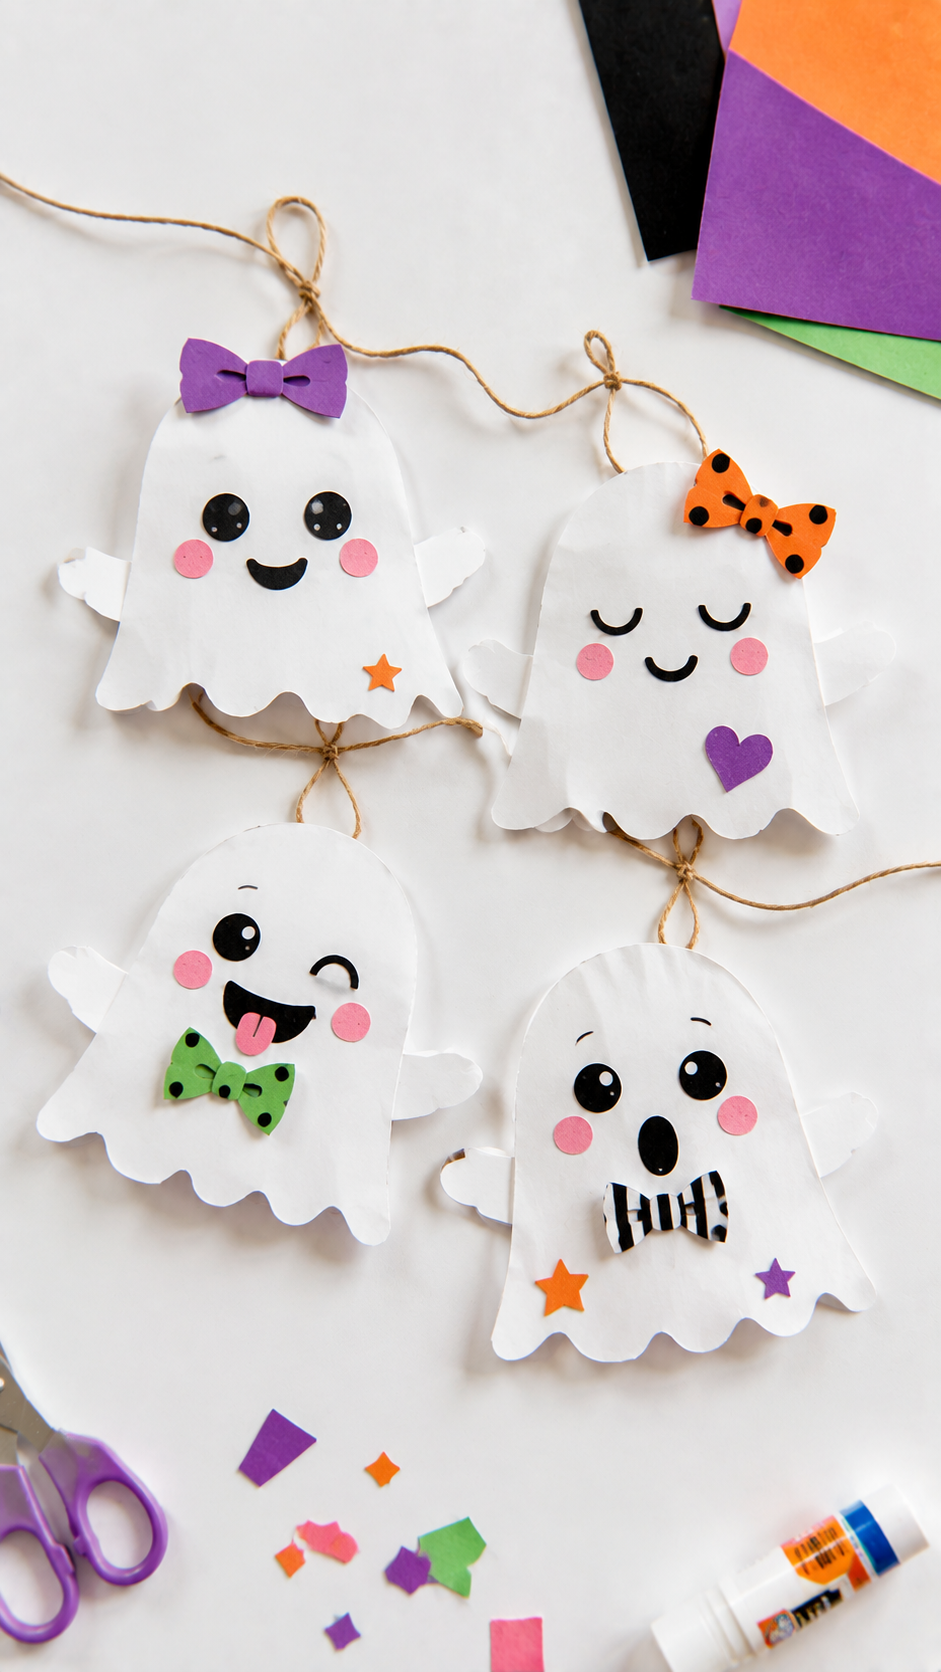
This craft turns a few sheets of white paper into a group of cheerful little ghosts.
Each ghost has a soft, rounded shape, simple eyes, and a smile, so the finished decorations look playful rather than frightening. Children can also change the faces and add small details such as bows, hats, cheeks, or colorful patterns.
You’ll need: white paper or cardstock, black paper or a marker, scissors, glue, and colored paper for optional decorations.
To make it: Draw and cut a simple ghost shape with a wavy bottom. Add two eyes and a smile, then decorate it however the child likes.
You can make several ghosts with different expressions and hang them together as a Halloween decoration.
Make it personal: Let the child name each ghost or give each one a different personality. A sleepy ghost, happy ghost, silly ghost, and surprised ghost can make a much more playful display than identical decorations.
3. Handprint Black Cat
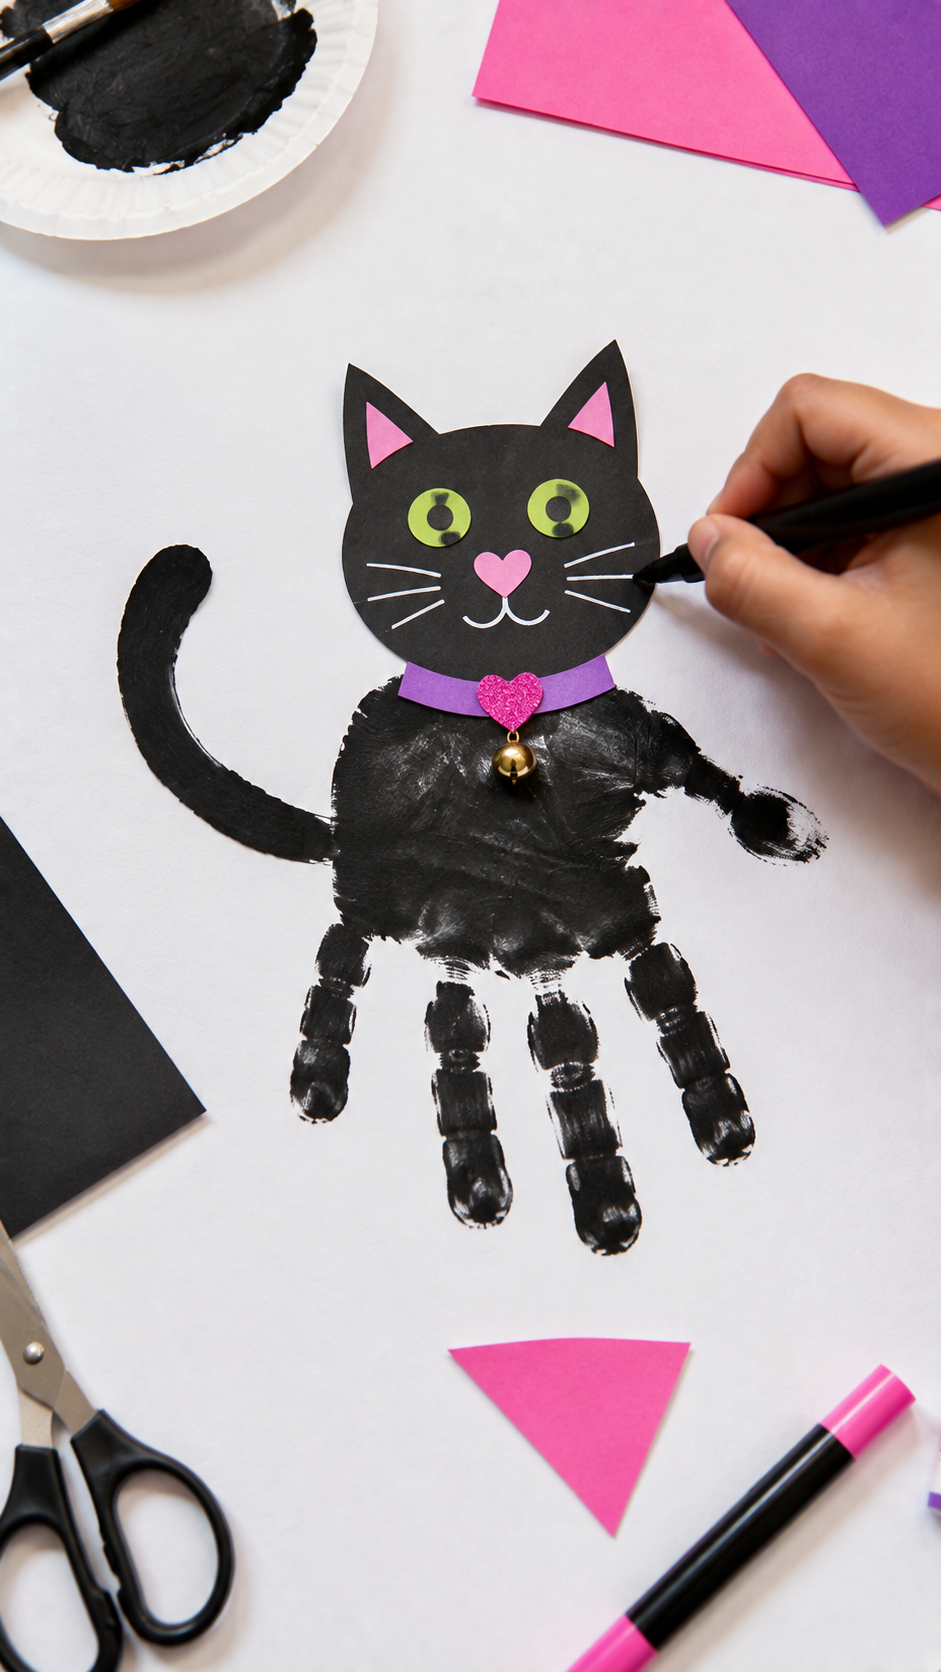
Here, a child’s hand becomes the starting point for a Halloween black cat. The fingers form the cat’s body and legs, while a paper head, ears, whiskers, and tail turn the hand shape into a recognizable character.
It is simple enough for young children and leaves plenty of room for them to add their own details.
You’ll need: black construction paper or washable black paint, colored paper, glue, scissors, and a marker.
To make it: Trace around the child’s hand on black paper and cut it out, or make a black handprint with washable paint. Add a head, pointed ears, eyes, whiskers, and a tail to finish the cat.
Make it personal: Give the cat a colorful collar, bow, patterned body, or funny name. If you’re making several, let each child create a different cat so the finished display has some personality.
4. Paper Plate Sunflower Pumpkin

This one brings Halloween together with the warmer side of autumn.
A paper plate becomes a round orange pumpkin, but instead of giving it a spooky face, the child can turn it into a cheerful fall decoration with leaves, petals, and a simple smile.
It works especially well when you want Halloween crafts to feel seasonal without filling the room with frightening characters.
You’ll need: a paper plate, orange paint or crayons, green and yellow construction paper, glue, scissors, and a black marker.
To make it: Color the plate orange, then add a green stem and a few leaves. Cut simple yellow or orange paper shapes and arrange them around the pumpkin if you want the sunflower effect. Finish with a friendly face or leave the pumpkin plain.
Make it personal: Add the child’s name, a few paper leaves, or small autumn shapes around the pumpkin to turn it into a fall wall decoration.
5. Candy Corn Paper Collage
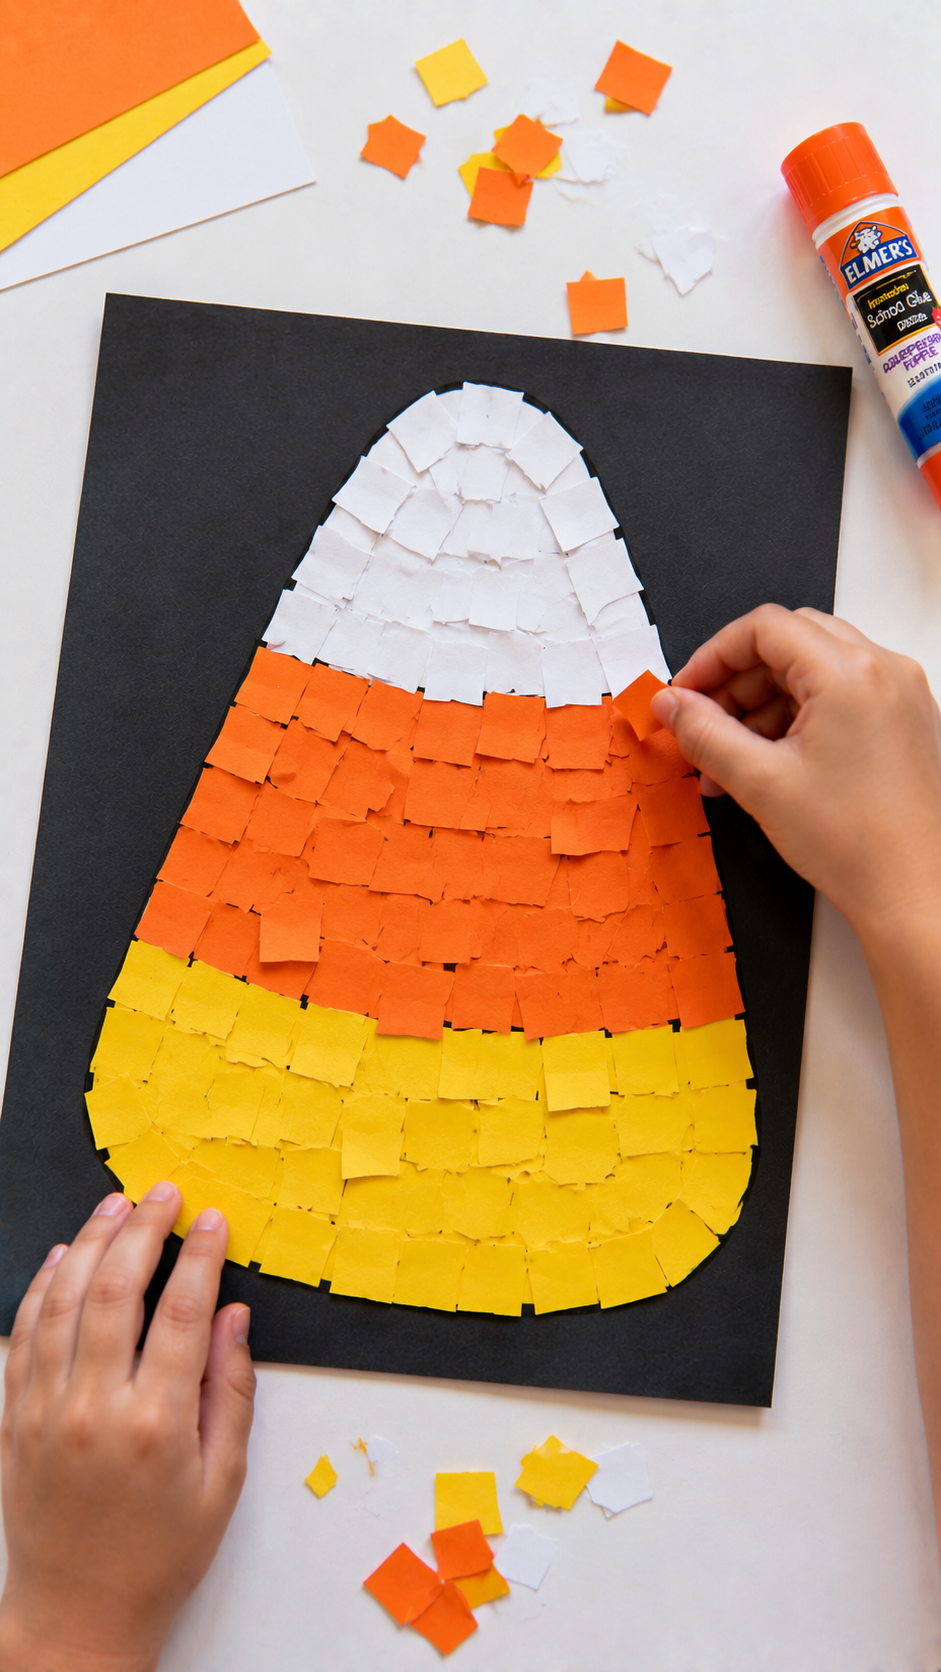
Candy corn gives you a very recognizable Halloween theme without needing a ghost, monster, or creepy character.
This Halloween craft for kids uses the familiar three-color candy shape as the main design, so children can focus on cutting, arranging, and decorating rather than making something spooky.
You’ll need: white, yellow, and orange paper, a sheet of cardstock, glue, scissors, and a pencil.
To make it: Draw a large candy-corn shape on cardstock and divide it into three sections. Fill the sections with white, orange, and yellow paper pieces. Older children can cut small squares or triangles and build the design piece by piece, while younger children can work with larger pieces.
Make it personal: Turn the finished candy corn into a greeting card, wall decoration, bookmark, or several small pieces for a Halloween garland.
6. Silly Paper Bat
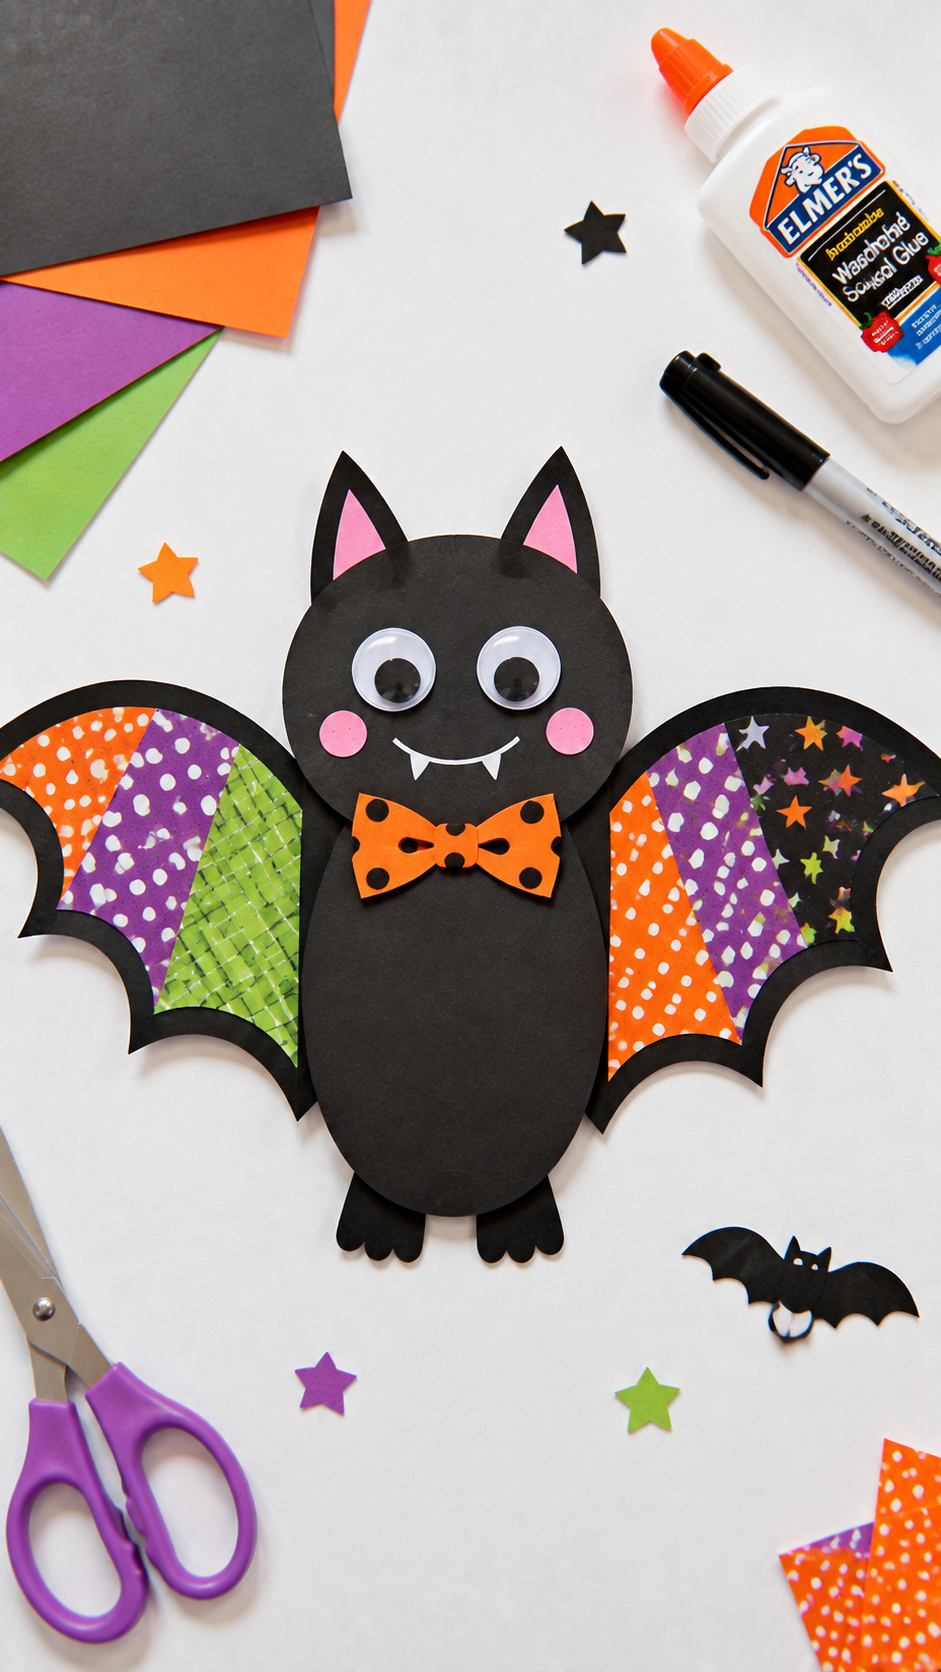
Bats can look quite different depending on how you draw them.
For this Halloween craft for kids, turn the familiar bat shape into a funny little character with oversized eyes, a wide smile, colorful wings, or even a tiny paper bow tie.
You’ll need: black or dark-colored cardstock, colored paper, glue, scissors, and markers or crayons.
To make it: Cut out a simple bat body with two wings. Add large eyes and a cheerful expression, then decorate the wings and body with whatever colors or patterns the child chooses.
Make it personal: Make a whole group of bats with different expressions and sizes. One can be sleepy, another excited, and another looking completely surprised. Hang them together so they look more like a playful Halloween group than a scary decoration.
Have pumpkins left after the holiday? What to Do With Leftover Pumpkins After Halloween: 9 Uses Before They Rot shares practical ways to use them before they go to waste.
7. Pumpkin Seed Mosaic
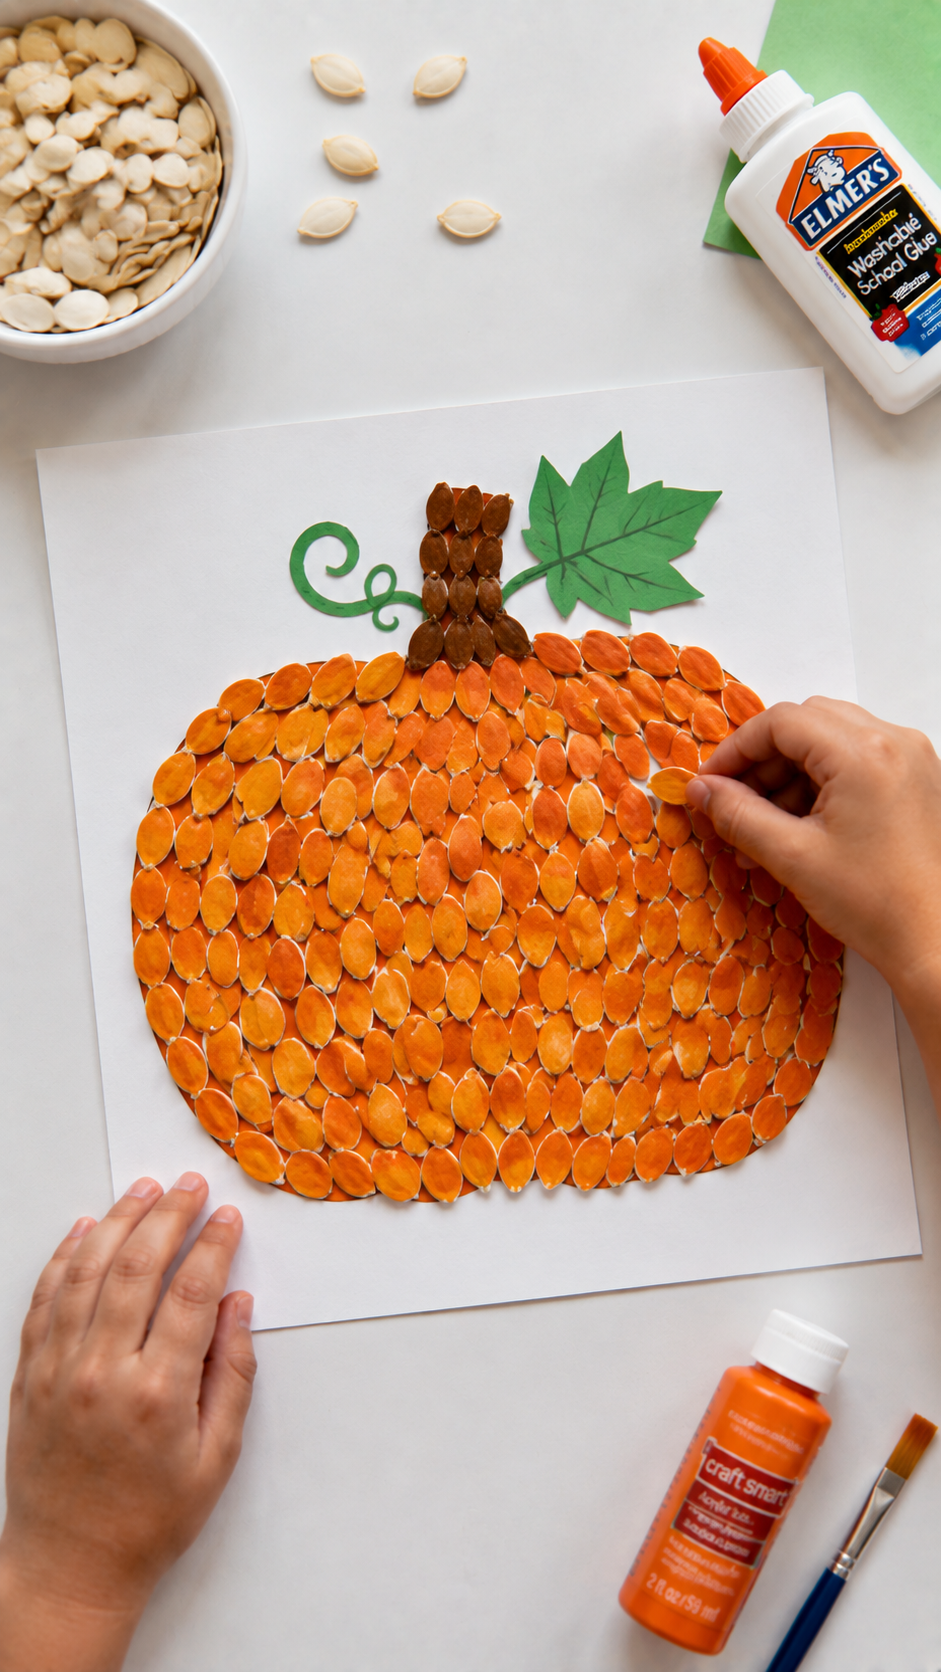
Instead of making another pumpkin from paper, this craft uses real pumpkin seeds to create the picture. It gives children something different to touch and arrange, while the finished piece still fits the Halloween theme without needing a scary character.
You’ll need: dried pumpkin seeds, cardstock, glue, orange and green crayons or paint, and a pencil.
To make it: Draw a simple pumpkin outline on cardstock. The child can color the pumpkin first, then glue pumpkin seeds along selected areas of the design. Leave some seeds plain or paint them different colors before using them.
A useful thing to know: Pumpkin seeds need to be clean and completely dry before using them for a craft. Fresh seeds straight from a pumpkin contain moisture and can spoil if sealed under glue. If you save seeds from a pumpkin, wash them and let them dry thoroughly first.
Make it personal: Rather than covering the whole pumpkin, let the child use the seeds to make stripes, a border, leaves, or a funny face.
8. Halloween Leaf Creature

Not every Halloween craft needs a pumpkin or a ghost.
Gather a few fallen leaves and turn them into funny little creatures with paper eyes, ears, feet, and other simple shapes. The natural shapes of the leaves do most of the work, so no two creatures will look exactly alike.
You’ll need: dry leaves, cardstock or paper, glue, scissors, and markers. Optional googly eyes or small pieces of colored paper can be used for details.
To make it: Place the leaves on the paper and turn them in different directions until you see a shape you like. Add paper eyes, ears, legs, wings, or a tail to turn the leaf into a character.
A detail worth knowing: Use dry, clean leaves rather than damp ones. Moist leaves can curl, stain the paper, and become difficult to glue. Flat leaves also work better than very brittle ones.
Make it personal: Don’t tell the child what the leaf has to become. One leaf might turn into a pumpkin character, another into a cat, and another into a completely imaginary creature.
9. Paper Pumpkin Garland
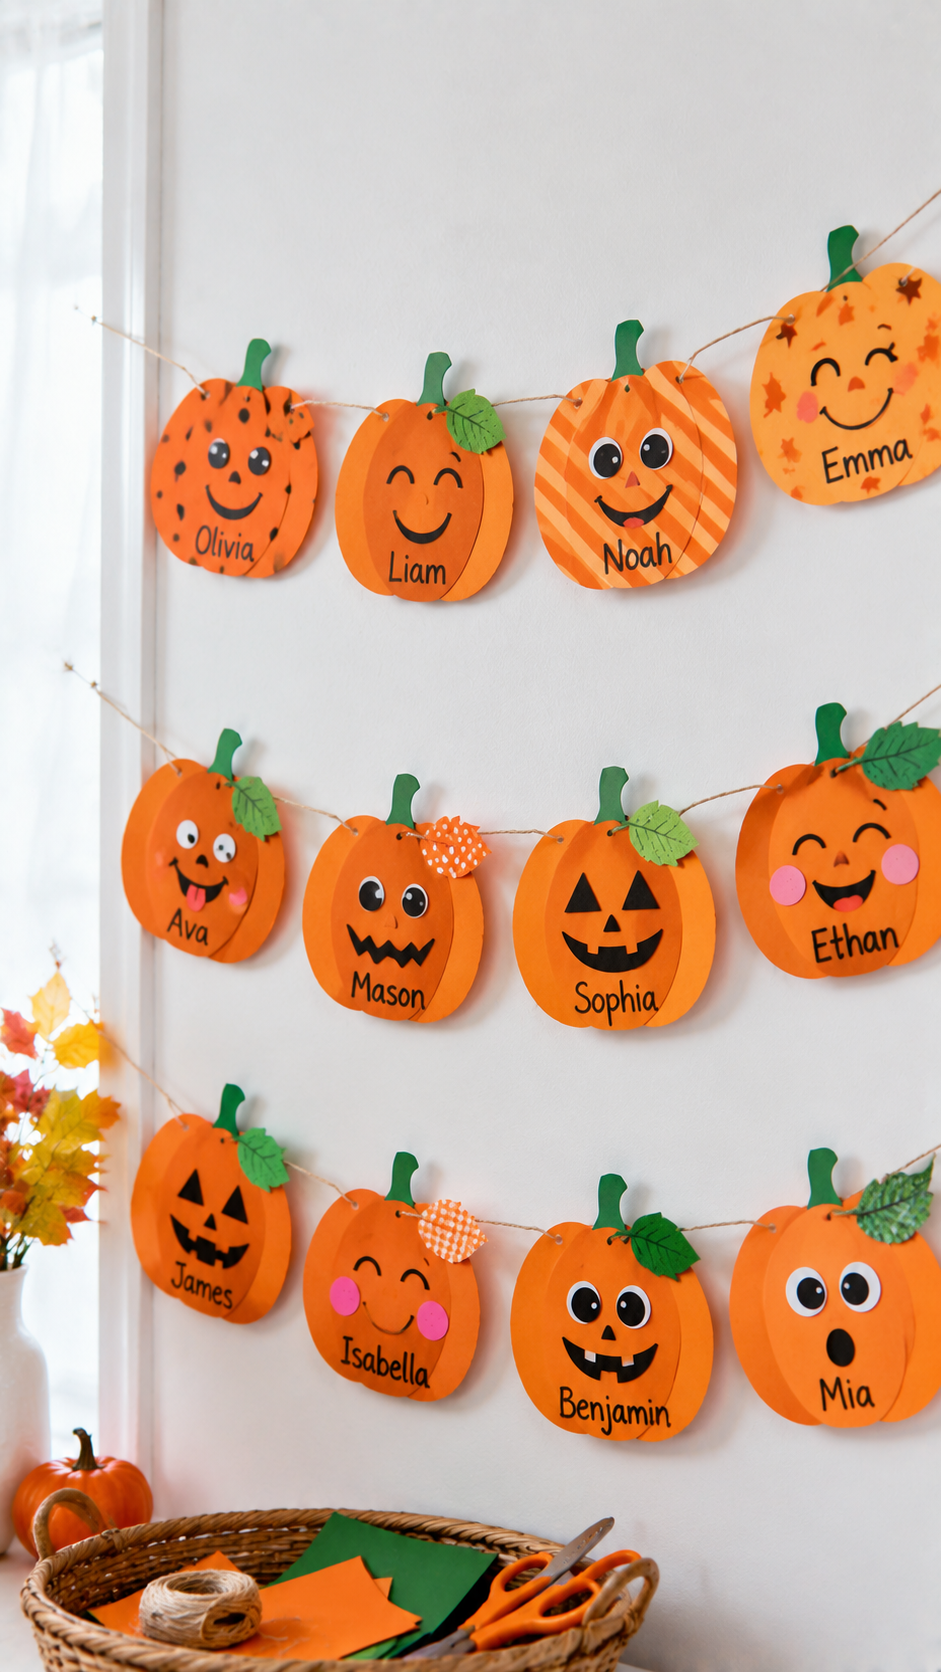
A row of small paper pumpkins can bring Halloween color to a room without filling it with frightening decorations. The pumpkins can all look different, which makes this more interesting than cutting out a set of identical shapes.
You’ll need: orange and green cardstock, scissors, glue, a hole punch, and string or yarn.
To make it: Cut several pumpkin shapes from orange paper and add small green stems. Decorate each one with a different face, pattern, or name. Punch two holes near the top of each pumpkin and thread them onto the string.
What makes this useful: A garland is easy to change to suit the child’s comfort level. If faces feel too much like jack-o’-lanterns, leave them off and use plain pumpkins, leaves, stars, or other autumn shapes instead.
Make it personal: Let the child choose the order of the pieces. They can alternate pumpkins with leaves, candy-corn shapes, stars, or friendly bats to create their own Halloween decoration.
If you enjoy making crafts that could also earn you some extra money, check out Halloween Crafts to Make and Sell: 21 Ideas to Cash In on the Spookiest Season.
10. Halloween Monster Made From Shapes
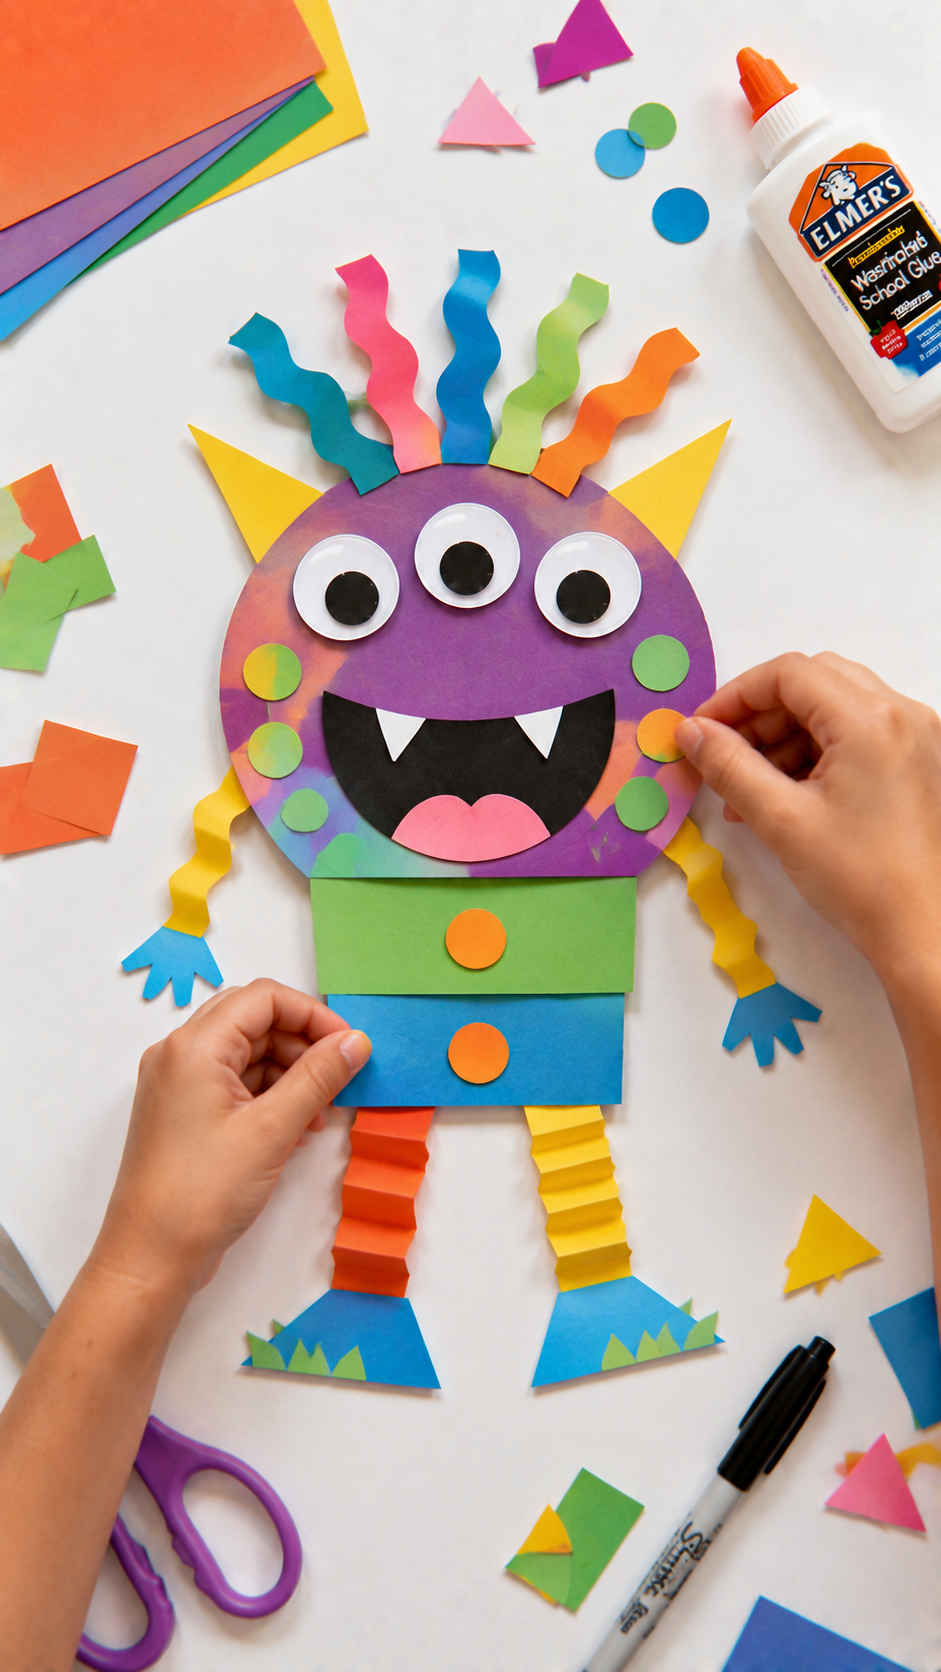
This craft lets children make a Halloween monster without having to make it frightening. Instead of starting with a picture of what the monster should look like, give them a collection of paper shapes and let them build a character from scratch.
Cut out circles, ovals, triangles, rectangles, and wavy strips in different colors.
A circle can become an eye, a triangle can become a horn, and a long strip can become hair or a tail. There is no “correct” monster, which makes this one especially fun for children who like making their own designs.
You’ll need: colored construction paper, cardstock, scissors, glue, and markers or crayons.
To make it: Place the shapes on a sheet of paper and move them around until the child likes the character. Glue the pieces down, then add details such as spots, eyebrows, shoes, ears, or funny hair.
A useful twist: Give the monster a name and one unusual feature. Maybe it has six ears, loves pumpkins, or is afraid of candy corn. The finished craft can then become the beginning of a short Halloween story.
11. Paper Plate Spider With a Friendly Face
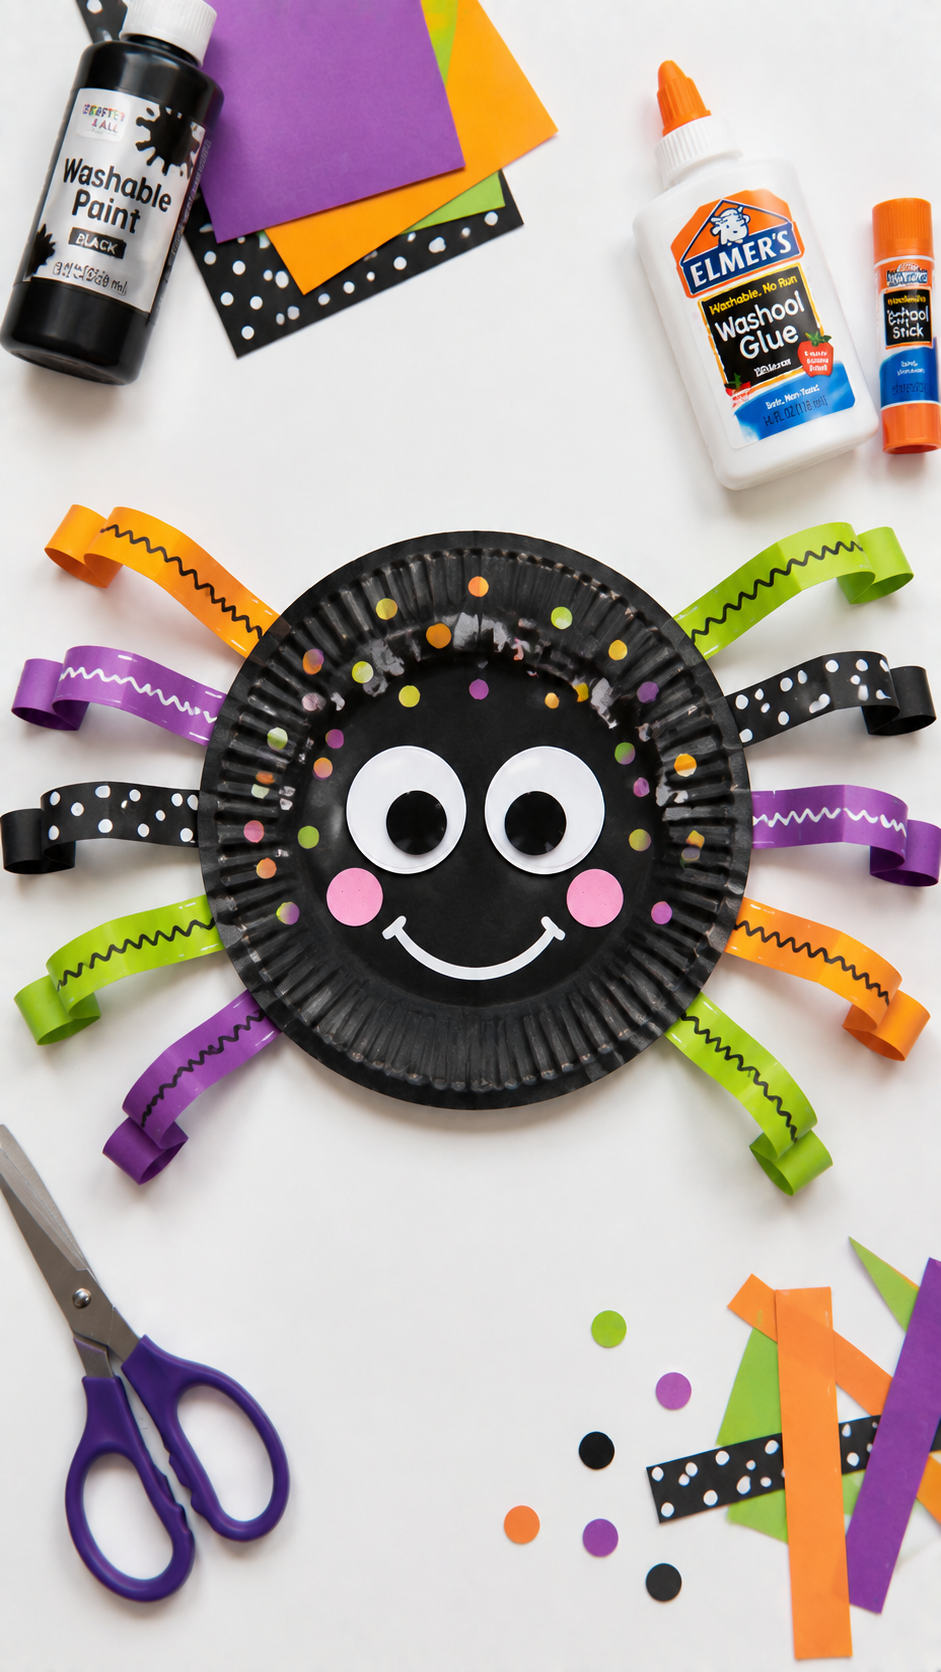
A spider may not be the first Halloween character a child who dislikes scary decorations would choose, but changing the design can make a big difference.
This version uses a paper plate for the body and turns the spider into a bright, cartoon-like character with large eyes and a smile.
You’ll need: a paper plate, black or colored paint, construction paper, glue, scissors, and a marker.
To make it: Color the plate and let it dry. Cut strips of paper for the legs and attach them around the sides. Add two large eyes and a smile, then decorate the body with spots, stripes, or other patterns.
A detail worth getting right: A spider has eight legs, so this is a simple opportunity to introduce that fact while the child is crafting. You don’t have to turn the activity into a science lesson; simply count the legs together as you attach them.
Make it personal: Give the spider a name and a personality. A bright bow tie or colorful legs can make it look more like a silly character than a creepy Halloween decoration.
12. Halloween Character Paper Puppets
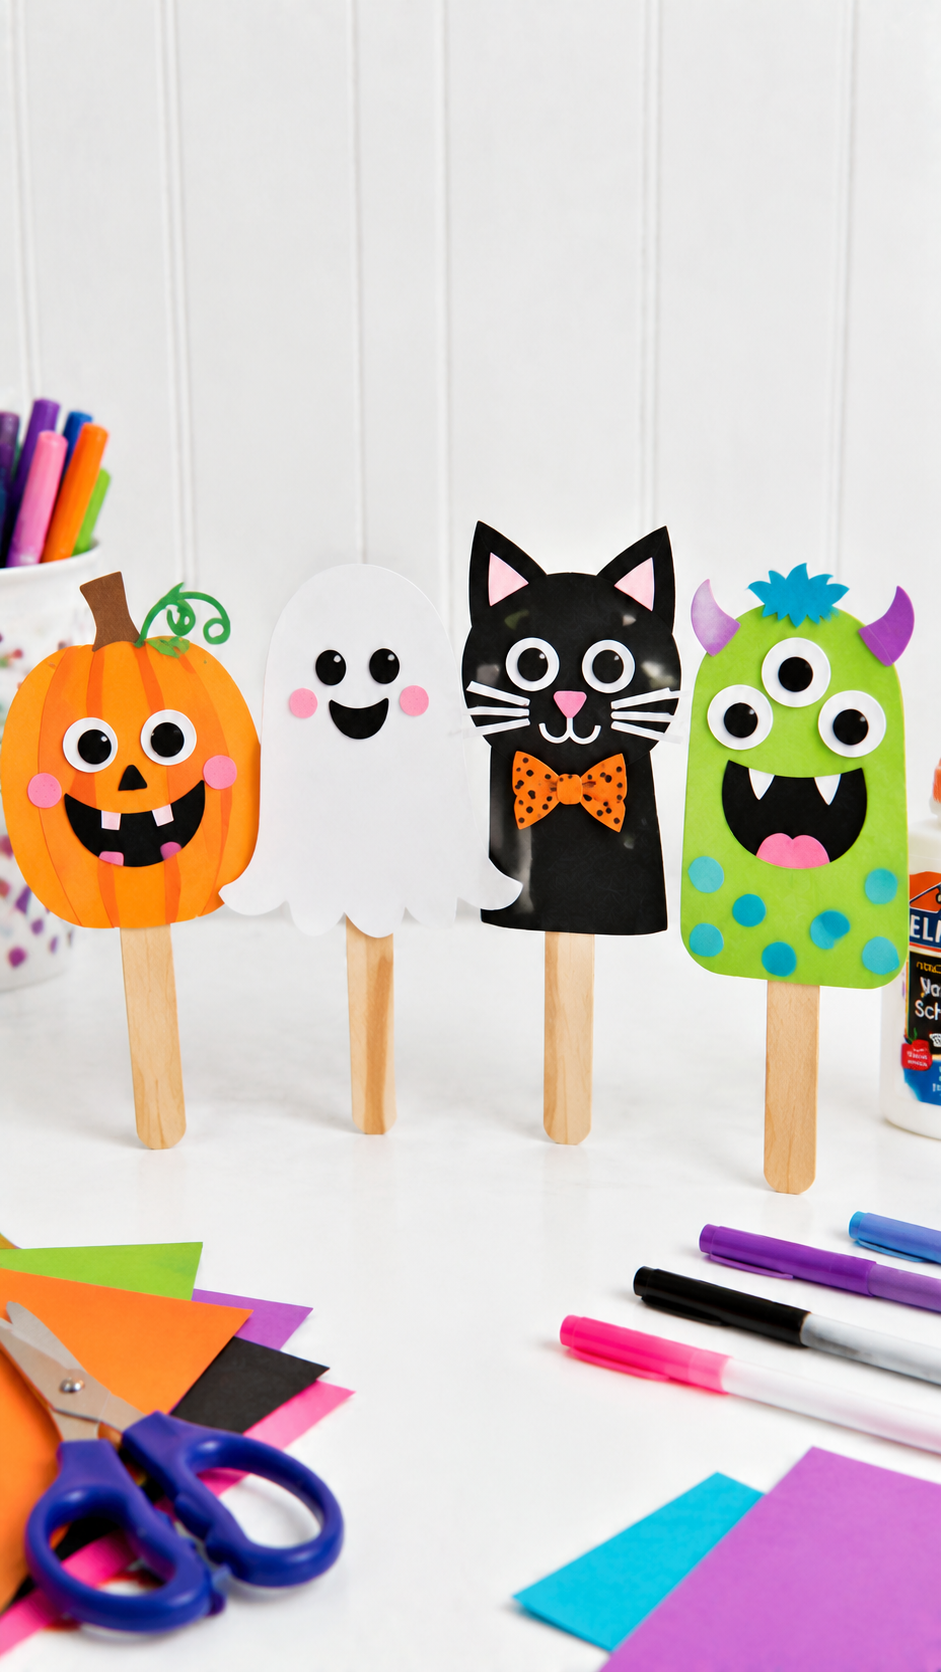
Turn the finished Halloween characters into something children can actually play with.
These simple paper puppets can be made as pumpkins, cats, bats, ghosts, or friendly monsters, giving children a chance to create a little Halloween cast of their own.
You’ll need: cardstock or construction paper, craft sticks or paper bags, scissors, glue, and markers or crayons.
To make it: Choose a character, cut out the main shapes, and assemble them onto a craft stick or paper bag. Add the face and other details last so the child can decide how friendly or silly the character should look.
The interesting part comes after the craft is finished. Ask the child to make the characters meet, go on an adventure, look for a pumpkin, or prepare for a Halloween party. There is no need for a scary storyline.
This also makes the activity more than a decoration. The craft becomes a simple prop for pretend play and storytelling, which can keep children engaged after the scissors and glue have been put away.
Make it personal: Let the child create one character that looks like themselves and another character they would invite to their Halloween party. That gives the craft a little story without making it complicated.
13. Halloween Sun Catcher
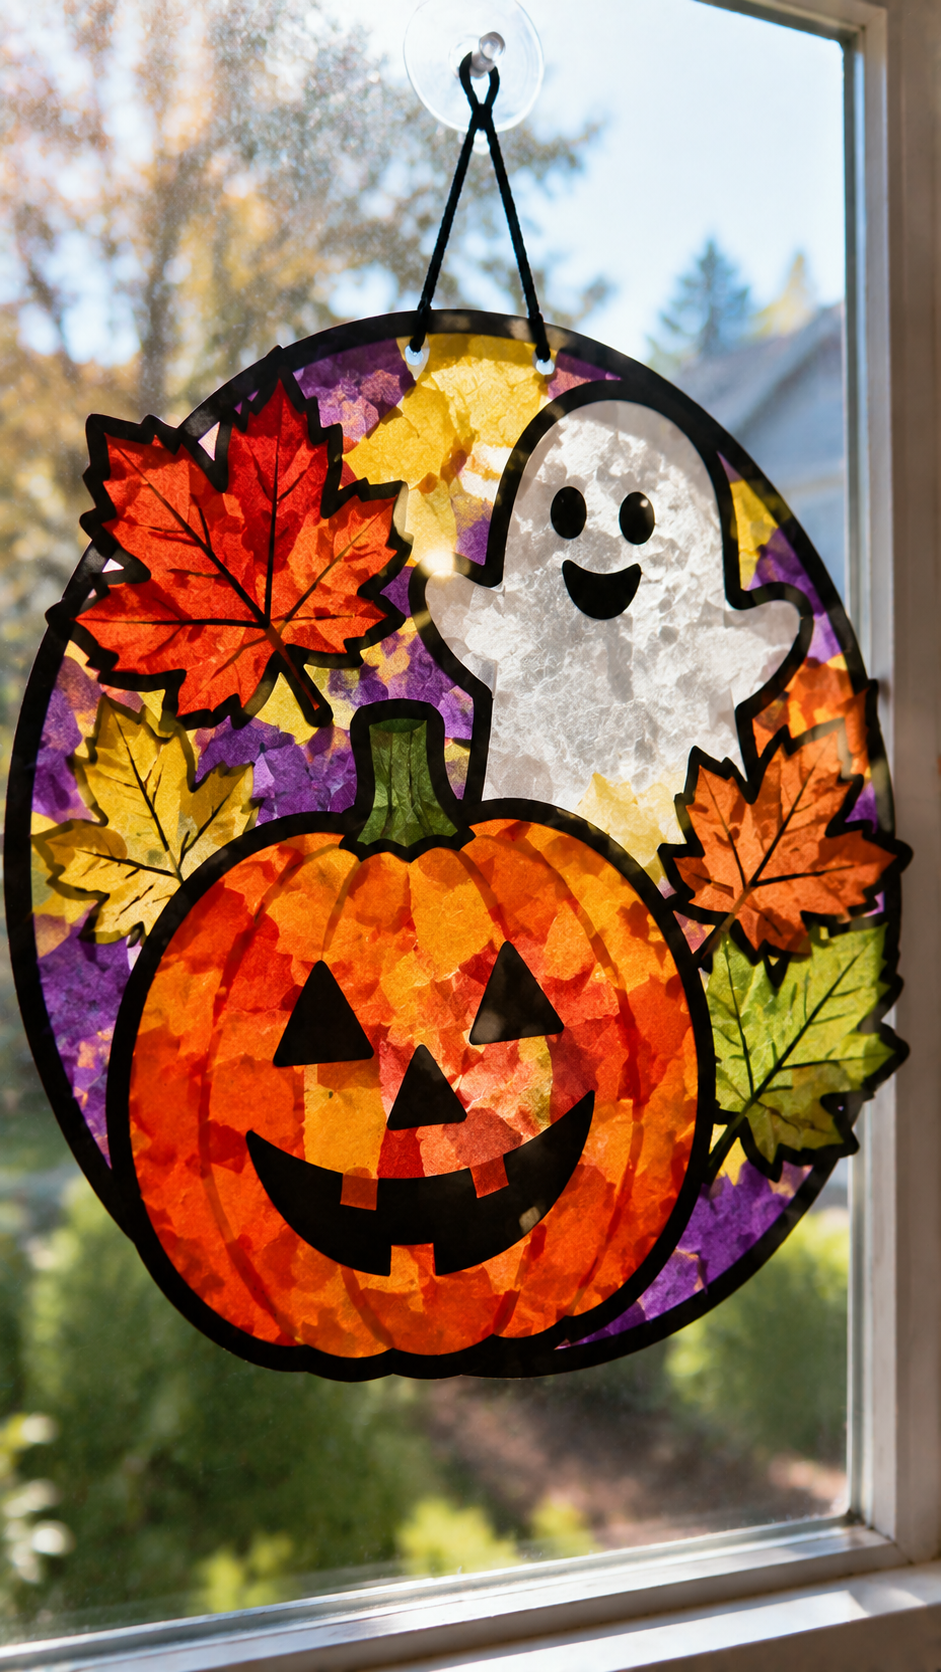
Turn a window into part of the Halloween decoration with a simple paper sun catcher.
Use clear contact paper or a transparent sheet as the base, then fill it with colorful pieces of tissue paper. Pumpkins, leaves, stars, cats, or friendly ghosts can become the shapes in the design.
You’ll need: clear contact paper or another suitable transparent craft sheet, colored tissue paper, black cardstock, scissors, and tape.
To make it: Cut the black cardstock into a simple outline, place it on the sticky side of the contact paper, and fill the open spaces with small pieces of tissue paper. Cover it with another layer of contact paper and place it on a window where daylight can shine through.
A useful detail: Tissue paper works especially well because light can pass through it. Avoid using ordinary construction paper for the colored sections if you want that stained-glass effect.
Make it personal: Use orange, yellow, and green for a warm autumn look, or let the child choose completely different colors. There is no reason a Halloween sun catcher has to be dark.
Planning a Halloween event with the kids? Trunk-or-Treat Decorating Ideas: 11 Themes You Can Set Up Fast for Every Skill Level can help you create a fun setup without spending hours decorating.
14. Halloween Paper Bag Treat Basket

Instead of making another decoration that sits on a shelf, turn a plain paper bag into a small Halloween treat basket. A friendly pumpkin, cat, bat, or ghost can go on the front, giving children something they can actually use during a Halloween party or treat collection.
You’ll need: a small paper bag, construction paper, glue, scissors, markers, and string or ribbon for the handle.
To make it: Cut out the pieces for the chosen character and glue them onto the front of the bag. Add a paper or ribbon handle if the bag doesn’t already have one, then decorate it with simple Halloween shapes.
Think beyond candy: The finished basket can hold stickers, crayons, small toys, pencils, or other party favors. That makes the craft useful even for families who don’t want Halloween to revolve around sweets.
Make it personal: Let the child design their own character rather than using a ready-made Halloween face. A purple cat, smiling pumpkin, or rainbow-colored monster can be just as festive.
15. My Happy Halloween Paper Scene

Finish with a craft that lets the child decide what their version of Halloween looks like. Give them a large sheet of paper and let them build a little Halloween scene using pumpkins, leaves, candy, friendly animals, stars, houses, or any other details they enjoy.
The important part is that nothing has to be scary. A child who doesn’t like ghosts can leave them out. Someone who loves bats can fill the sky with them. Another child might make the whole scene about pumpkins and candy.
You’ll need: cardstock or drawing paper, colored paper, crayons or markers, scissors, and glue.
To make it: Start with a simple background, then cut or draw the Halloween elements and arrange them into a scene. Children can make a pumpkin patch, Halloween party, decorated house, autumn garden, or an entirely imaginary setting.
Give it a little story: Ask, “What is happening in your Halloween picture?” The answer might lead to a short story about the characters and decorations they created.
This makes a fitting final craft because the child isn’t simply copying a Halloween design. They’re deciding what they want Halloween to look and feel like.
If the family is dressing up together, Plus-Size Group Halloween Costumes: 11 Costume Ideas That Fit the Group, Not Just the Theme has group costume ideas that put comfort and fit first.
Safety Notes You Shouldn’t Have to Hunt For When Making Halloween Crafts for Kids
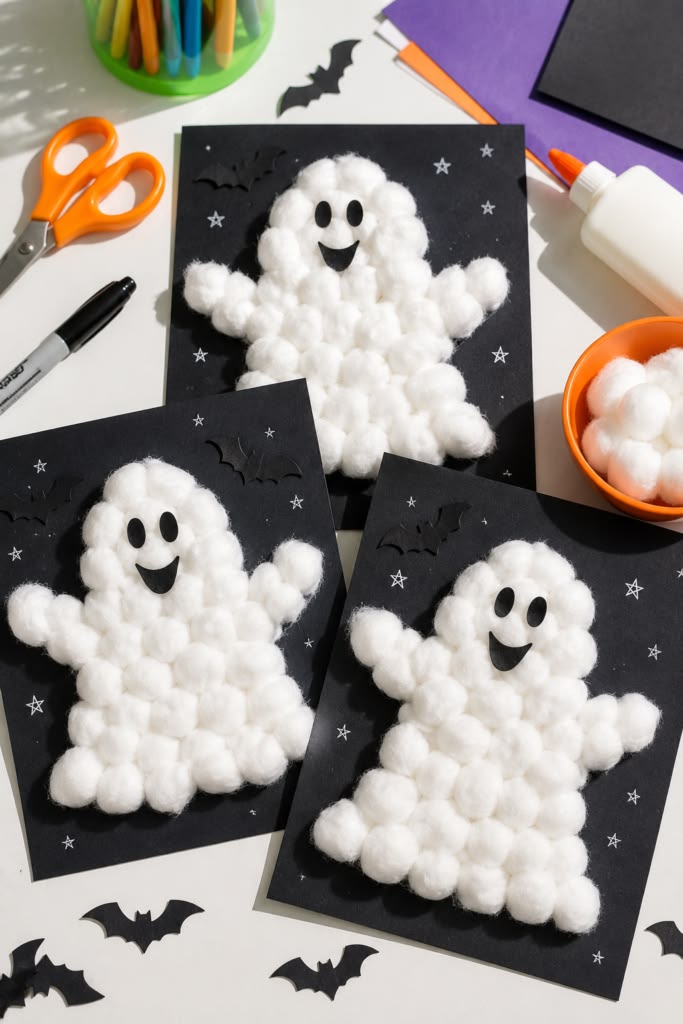
Most Halloween crafts for kids use ordinary materials, but a few simple precautions can prevent a fun afternoon from turning into an avoidable problem. The right level of supervision will depend on the child’s age and the materials being used.
- Scissors: Choose child-appropriate scissors and supervise children who are still learning to cut. Adults should handle sharp scissors when a craft requires them.
- Small pieces: Googly eyes, beads, sequins, buttons, and tiny pom-poms can be choking hazards for young children. Keep them away from children who still put objects in their mouths.
- Glue: Use washable, child-friendly craft glue for younger children. Hot glue guns should be handled by an adult.
- Paint and markers: Check the label and use products intended for children’s craft activities. Keep them away from mouths, eyes, and food.
- Natural materials: If you’re using leaves, seeds, twigs, or other outdoor materials, make sure they are clean, dry, and free from mold, sharp edges, or anything that could irritate the skin.
- Paper decorations: Keep paper crafts away from candles, fireplaces, heaters, and other sources of heat. If you’re making a Halloween lantern, use a battery-operated light rather than a real flame.
- Food-shaped crafts: A craft that looks like candy or treats should still be treated as a craft. Don’t let young children mistake decorative materials for something edible.
The goal isn’t to make Halloween crafts for kids feel complicated or overly supervised. It’s simply about matching the materials and amount of help to the child’s age, ability, and the particular craft you’re making.
And if your Halloween plans include sharing treats with people nearby, Halloween Treat Bags for Neighbors: What to Put Inside for a Thoughtful Halloween Surprise can help you put together something simple and thoughtful.
Let Halloween Feel Like Halloween
Halloween doesn’t have to look frightening to feel special. A paper pumpkin with a silly face, a cheerful ghost, a handprint cat, or a whole scene created from a child’s imagination can still bring the fun of the season without adding decorations they find uncomfortable.
The best part of these Halloween crafts for kids is that there isn’t one right way to make them.
Change the colors, leave out the characters your child dislikes, make the faces sillier, or let them invent something completely different. The finished craft doesn’t need to match a picture online, it just needs to feel right for the child making it.
So bring out the paper, glue, crayons, and scissors, and let the little Halloween artist take over.
Pick a craft that fits their personality, make it together, and see what they come up with. You may end up with decorations that are much more fun than anything you could have planned for them.
FAQs
1. What If Your Child Says a “Cute” Halloween Craft Is Still Scary?
Believe them. What looks cute to an adult may still feel frightening to a child. Remove the part that bothers them, change the face or colors, or choose a different craft altogether. They don’t need to finish something that makes them uncomfortable.
2. What Halloween Crafts Are Best for Toddlers Who Don’t Like Scary Things?
Start with simple, familiar shapes such as pumpkins, leaves, stars, candy corn, and friendly animals. Avoid crafts with tiny pieces or complicated cutting, and let the child decide which designs feel comfortable.
3. How Can I Make Halloween Fun Without Decorating the House With Scary Things?
Use seasonal decorations that don’t rely on horror, such as paper pumpkins, autumn leaves, colorful garlands, friendly cats, and cheerful Halloween characters. You can still create a festive atmosphere without using frightening imagery.
4. What Can I Do If My Child Wants Halloween Crafts but Is Afraid of Ghosts?
There’s no need to include ghosts just because they’re common Halloween symbols. Try pumpkins, cats, bats, candy corn, leaves, or other designs your child already enjoys. If they like the idea of ghosts but not scary ones, let them create their own friendly version.
5. How Do I Keep Halloween Crafts Interesting for Older Kids Who Don’t Like Scary Decorations?
Give them more control over the design. Older children can create their own Halloween characters, paper scenes, puppets, garlands, or decorations instead of simply following a template. A creative challenge can make the activity feel less babyish without making it scary.
6. Can Children Who Don’t Like Halloween Still Enjoy These Crafts?
Yes. The crafts can be treated as autumn or seasonal art rather than something that has to celebrate every part of Halloween. A child can make pumpkins, leaves, cats, or colorful decorations without having to participate in the parts of Halloween they dislike.