Most people see wood burning crafts and immediately think it’s out of their reach.
The designs look neat, detailed, and almost too professional. Then the mind jumps to it: “This must be hard… and I probably need a lot of money to even start.”
So the idea quietly gets dropped before it ever becomes something real.
That response is normal. Anything that looks creative or “artsy” can feel bigger than it actually is, especially from the outside.
The truth is much simpler.
Wood burning, also called pyrography, is just drawing on wood using heat Pyrography. Instead of ink or paint, a heated tool burns lines and shapes into wood. That’s it. No complicated process hiding behind it.
There’s no need for a workshop or expensive equipment. Most beginners start with one basic wood burning pen and a few smooth, cheap pieces of wood. That alone is enough to practice and create simple designs that actually look good.
What surprises many people is how forgiving it is. It doesn’t demand perfection. Small mistakes can be adjusted, and skills build slowly with practice. It feels less intimidating once you’re actually doing it.
This guide focuses on keeping things realistic and practical. Simple wood burning craft ideas that beginners can actually do, what tools are enough to start, and how everyday wood pieces can turn into something useful, creative, and even sellable without stress.
Beginner-friendly making and selling ideas expand further in 10 Beginner-Friendly Vinyl Crafts to Make and Sell Without a Cricut at Home, especially for simple start-up projects.
What Is Wood Burning (Pyrography)?
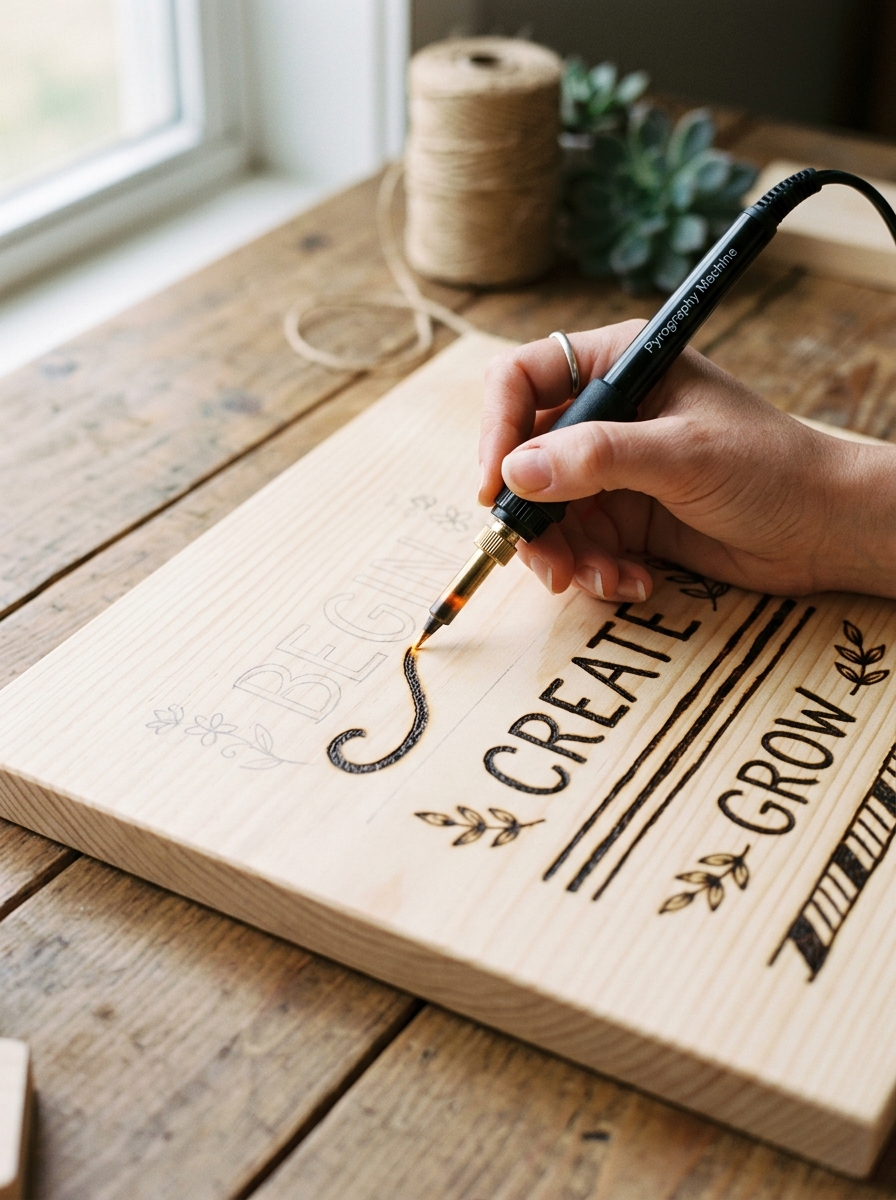
Wood burning, also called pyrography, is the process of creating designs on wood using heat. Instead of paint or ink, a heated tool is used to burn lines, patterns, names, and shading directly into the surface of wood.
That’s the core idea: you are not decorating wood with color, you are burning the design into it in a controlled way.
The tool used for this gets very hot and works almost like a pen, but instead of ink, it leaves burn marks on wood. These marks can be light for soft lines or darker for deeper shading, depending on pressure, speed, and temperature.
This craft is popular because it turns simple wood pieces into meaningful items like names, quotes, decor, and gifts using only heat and control—not expensive equipment or complex art skills.
Once this foundation is clear, everything else in wood burning crafts you can make starts to make more sense—from tools, to ideas, to safety, and even how people turn it into income.
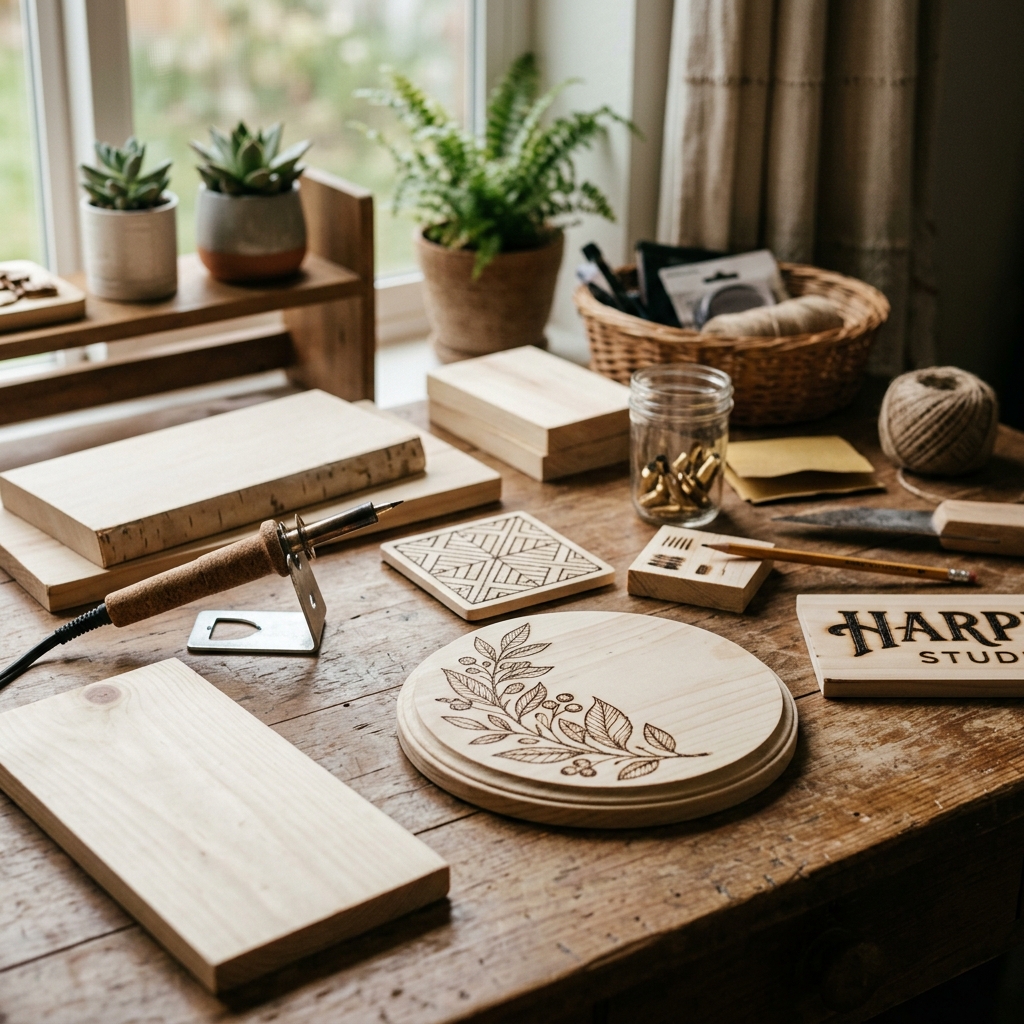
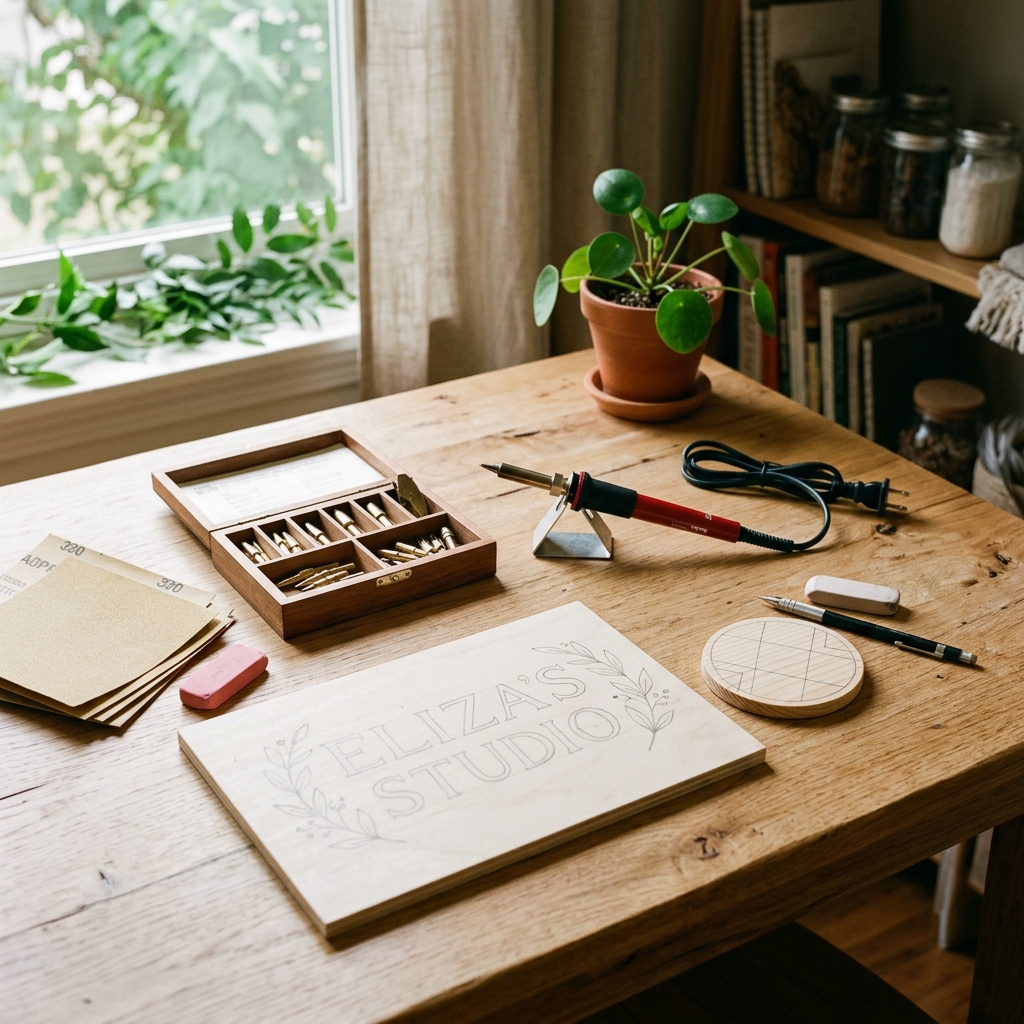
Basic Tools You Actually Need for Wood Burning Crafts You Can Make
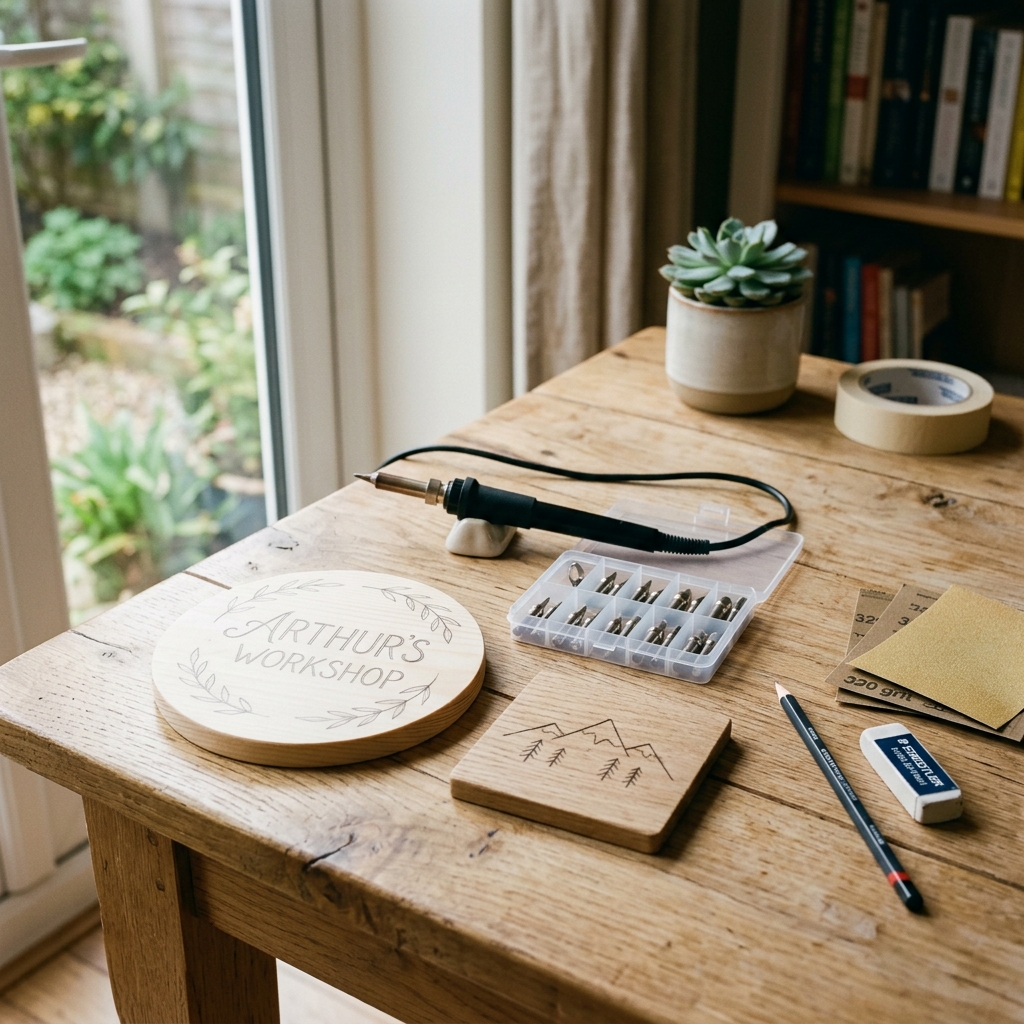
Starting wood burning doesn’t require a long shopping list or a professional setup. In fact, most beginners do better when things are kept simple. The goal is to understand the process first, not collect equipment.
Here’s what actually matters:
-
Wood Burning Pen (main tool)
This is the heart of all wood burning crafts you can make. It’s the heated pen that does the actual burning on the wood. Think of it as your “brush” in painting. It comes with different tips, but even a basic beginner pen is enough to create clean lines, shading, and simple designs.
-
Plain, Untreated Wood
Not all wood is safe or suitable. Treated or painted wood can release harmful fumes when heated. That’s why plain, natural wood is used. Soft woods are usually easier for beginners because they burn more evenly and respond better to the tool.
-
Pencil (For Sketching design first)
Before you burn anything, a pencil helps you plan your design. This step removes pressure because you’re not guessing directly on the wood. You simply sketch first, then trace over it with the burning tool.
-
Sandpaper ( For smooth finish)
This is often overlooked, but it makes a big difference. Rough wood can make burning uneven and harder to control. Light sanding gives you a smoother surface, which helps your lines look cleaner and more professional.
Small details often change the outcome of a project, which is why15 Must-Have Crafting Tools Beginners Often Forget -That Make DIY Projects Easier is helpful for avoiding common mistakes.
Wood Burning Crafts You Can Make at Home
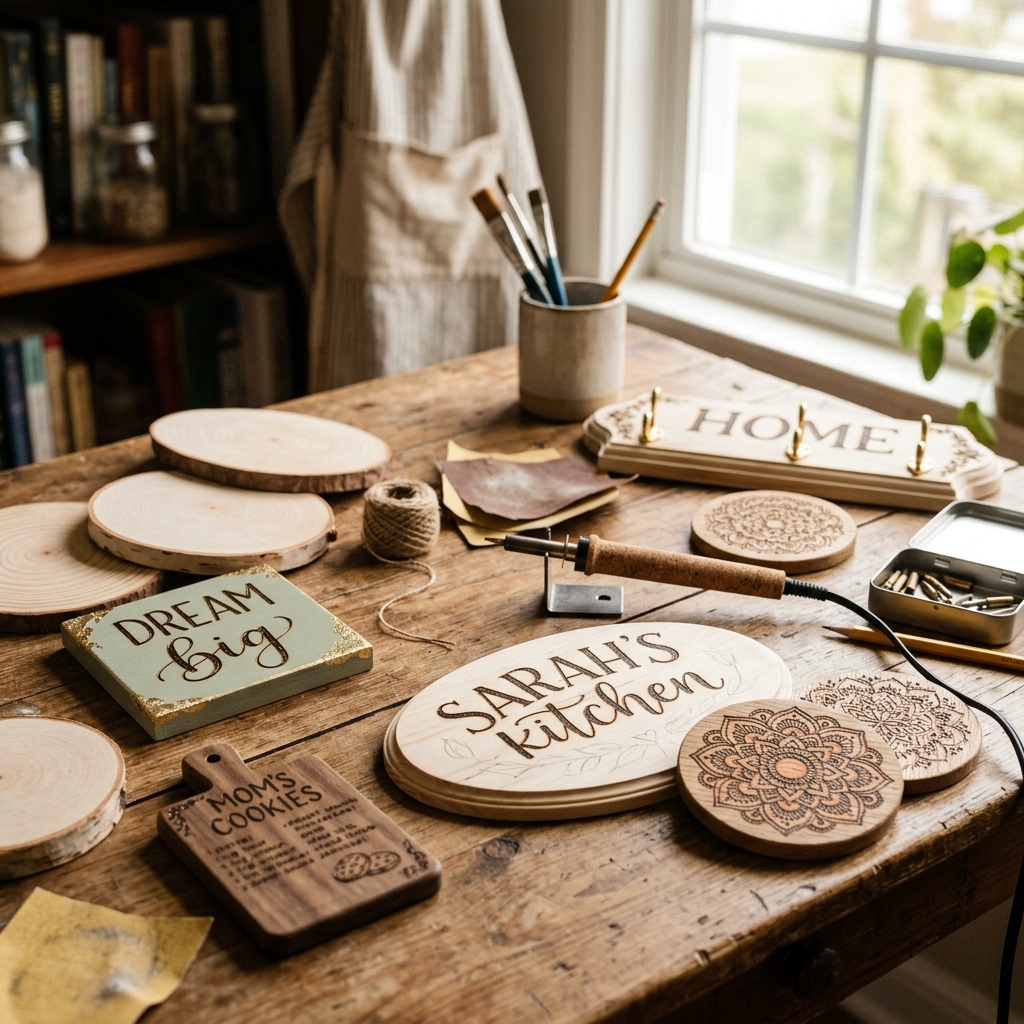
1. Wooden Name Signs

Photo credit: @ U
Wooden name signs are simple wooden pieces where names or words are permanently burned into the surface using a heated wood burning pen. It can be someone’s first name, a baby’s name, a family name, or even meaningful words like “Hope,” “Love,” or “Welcome.”
What makes this craft stand out is not complexity, but meaning. A plain piece of wood becomes something personal just by adding a name. It can sit on a bedroom wall, a nursery door, a study table, or even be used as a gift tag for special occasions.
The beauty of wooden name signs is that they don’t need perfect art skills. Even a simple, clean handwriting style looks intentional when burned properly. It’s one of those wood burning crafts you can make that feels personal without being difficult to execute.
Why It’s a Good Idea
People are naturally drawn to things that feel personal. A name is one of the most emotional details you can add to an object. That’s why wooden name signs are often kept longer than regular decor pieces.
It also fits many occasions, birthdays, baby showers, room decor, anniversaries, and even small business branding. That makes it a flexible craft, not limited to one audience.
Design Tip
Start simple. Use clear, bold lettering instead of thin or overly decorative fonts. Thick lines burn more evenly and reduce mistakes.
Before burning, always sketch the name lightly with a pencil. This helps you correct spacing and alignment before making anything permanent.
Step-by-Step: How to Make It
- Choose a smooth, untreated piece of wood (light sanding helps a lot)
- Lightly sketch the name or word using a pencil
- Check spacing and adjust before burning anything
- Heat your wood burning pen to a moderate level (not too high for beginners)
- Slowly trace over the pencil lines with steady hands
- Apply light pressure for thin lines and slightly slower movement for darker areas
- Let the wood cool completely before touching or cleaning it
- Optional: lightly sand edges again for a polished finish or add a light protective coat
What Makes It Sellable / Income Potential
Wooden name signs sell well because they are personalized. People don’t just buy them as decor—they buy them as identity pieces.
They are commonly ordered for:
- Baby nursery decorations
- Bedroom door signs
- Wedding or couple gifts
- Small business branding (shop names or studio signs)
Even simple designs can sell because the value is in the name itself, not the complexity of the artwork.
Budget-conscious creators can explore more value-focused inspiration in Low Budget Craft Ideas That Don’t Look Cheap for Events, Gift-Giving, and Home Decor, designed for practical and polished results.
2. Wooden Coasters
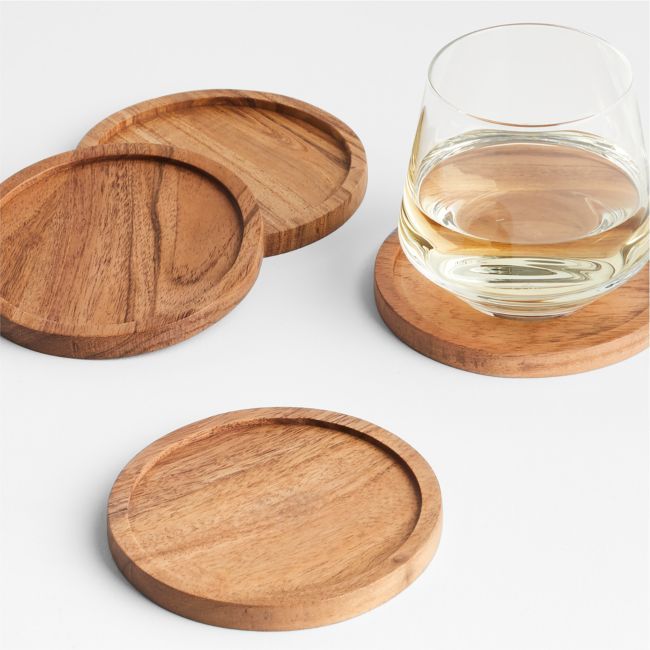
Photo credit: U
Wooden coasters are small, flat pieces of wood designed to sit under cups, mugs, or glasses to protect surfaces from heat, water rings, and stains.
In wood burning crafts you can make, this is one of the most practical beginner projects because it combines everyday usefulness with simple design work.
What you’re really creating here is not just a decorative piece, but something people use daily without thinking about it. A plain coaster becomes more interesting when you add burned patterns, initials, short quotes, or minimal designs. Even the simplest set can change how a table or small space feels.
The key is size and simplicity. Because the surface is small, the design has to be clean and intentional. This is where beginners learn control, how to keep lines steady and how not to overcrowd a small space.
Why It’s a Good Idea
Coasters are easy to relate to because everyone uses them. That makes them a safe and practical entry point into wood burning crafts you can make without pressure.
They also don’t feel like “art pieces” to most buyers—they feel like everyday home items. That lowers hesitation when people are buying them, especially as gifts or small home upgrades.
Another advantage is that they work well in sets. Instead of selling one piece, you can create a matching group, which naturally increases value.
Design Tip
Keep designs minimal and readable. Think small borders, simple mandalas, initials, or short words like “coffee,” “relax,” or “home.”
Avoid overloading the surface. On small wood pieces, less detail actually looks more professional and cleaner.
Step-by-Step: How to Make It
- Select small, smooth, untreated wooden circles or squares
- Lightly sand the surface to remove rough texture
- Sketch your design (simple patterns or initials work best) using a pencil
- Plan spacing so the design doesn’t feel cramped
- Heat your wood burning pen to a medium setting for control
- Carefully trace your pencil lines with steady, slow movement
- Add light shading if needed, but keep it minimal
- Let the coaster cool completely before handling
- Optional: seal with a light protective finish to improve durability
What Makes It Sellable / Income Potential
Wooden coasters sell well because they sit in the “useful gift” category. People don’t have to overthink buying them—they can use them at home, gift them, or buy them in sets for decoration.
They are especially attractive for:
- Coffee lovers and kitchen decor
- Housewarming gifts
- Small home business sales
- Gift bundles (sets of 4, 6, or 8)
In wood burning crafts you can make, coasters stand out because they are simple to produce, easy to repeat in batches, and still look thoughtful when done cleanly.
Handmade product inspiration continues in10 Handmade Boho-Inspired Gift Ideas You Can Make and Sell From Home, ideal for aesthetic and sellable craft styles.
3. Quote Wall Plaques
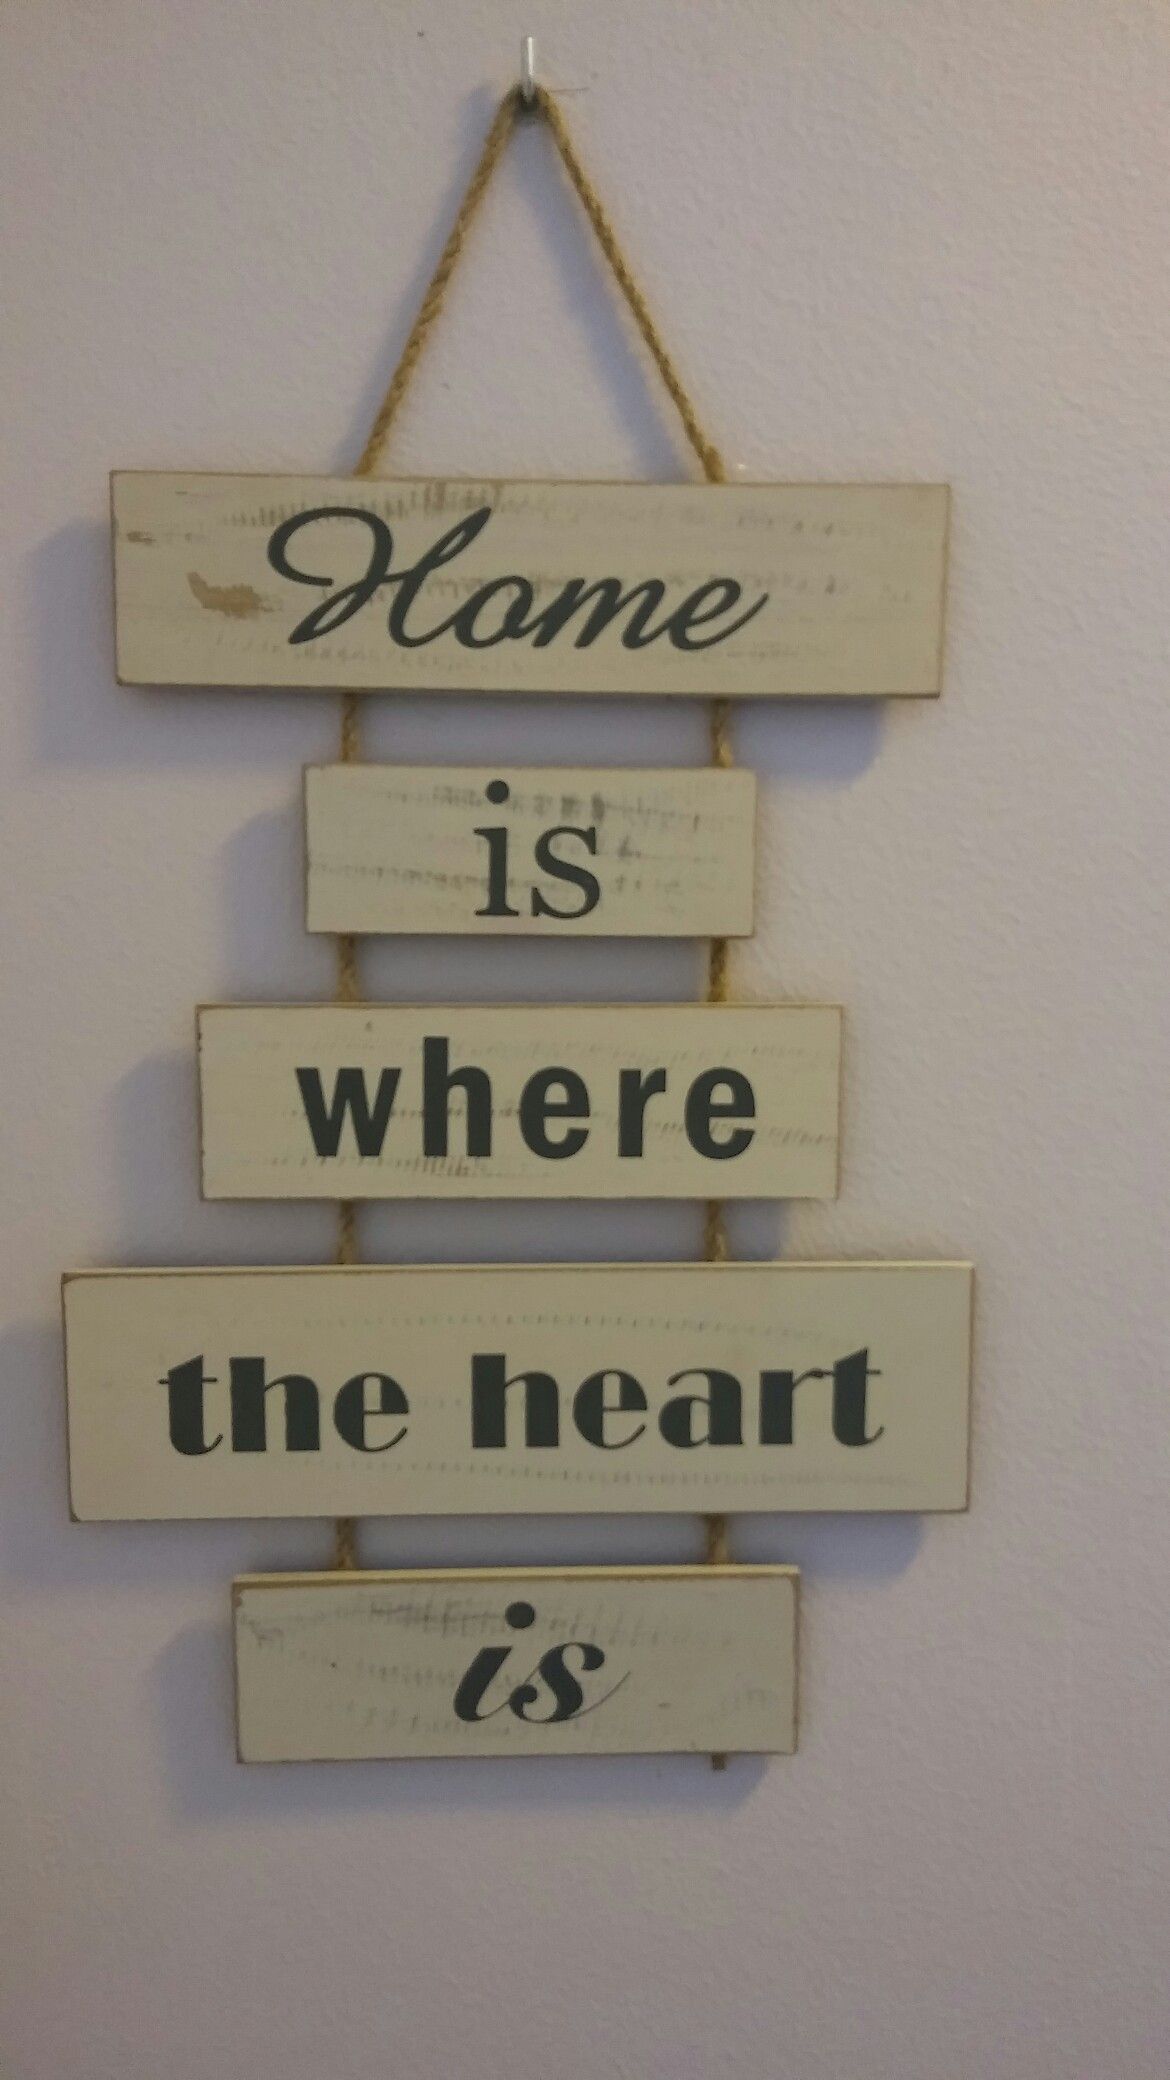
Photo credit: @ U
Quote wall plaques are flat wooden boards where short, meaningful quotes are burned into the surface using a wood burning tool. These are designed to be hung on walls, placed on shelves, or leaned against a desk as simple home or room decor.
In wood burning crafts you can make, this idea stands out because it focuses more on emotion than design complexity.
You’re not trying to draw something detailed, you’re transferring words that already carry meaning. A quote like “Stay strong,” “Breathe,” or “Home is peace” becomes permanent once burned into wood.
What makes it powerful is how simple it looks but how much feeling it carries. A plain wooden board suddenly becomes something people connect with on a personal level.
Why It’s a Good Idea
People don’t always buy decor because it looks complicated. Most of the time, they buy it because it speaks to them.
Quote plaques work because they carry emotion in a simple form. A short sentence can remind someone of hope, calm, motivation, or love. That emotional connection is what makes them appealing.
They also fit into almost any space, bedrooms, offices, living rooms, or even small personal corners, without needing a specific style or theme.
Design Tip
Stick to short quotes. The shorter the message, the stronger the impact on wood.
Use clean, readable fonts or neat handwriting styles. Overly decorative lettering can reduce clarity, especially when burned into wood.
Also, pay attention to spacing. Balanced alignment makes even simple words look intentional and professional.
Step-by-Step: How to Make It
- Choose a flat, smooth, untreated wooden board
- Sand the surface lightly to remove rough texture
- Pick a short quote that carries clear meaning
- Sketch the quote lightly using a pencil before burning
- Check spacing and alignment carefully before starting
- Heat the wood burning pen to a medium, controlled temperature
- Trace the pencil lines slowly and steadily
- Adjust pressure slightly for emphasis on certain words if needed
- Let the wood cool completely after finishing
- Optional: add a protective coat or frame for a finished look
What Makes It Sellable / Income Potential
Quote wall plaques sell because they are emotionally driven purchases. People buy them to feel something, motivation, comfort, or inspiration.
They are popular for:
- Home and office decor
- Gift items for friends and family
- Inspirational wall collections
- Small business decor shops or online craft stores
In wood burning crafts you can make, this idea is strong because it doesn’t depend on advanced drawing skills. It depends on choosing the right words and presenting them in a clean, thoughtful way that people can instantly connect with.
4. Quote Wall Art
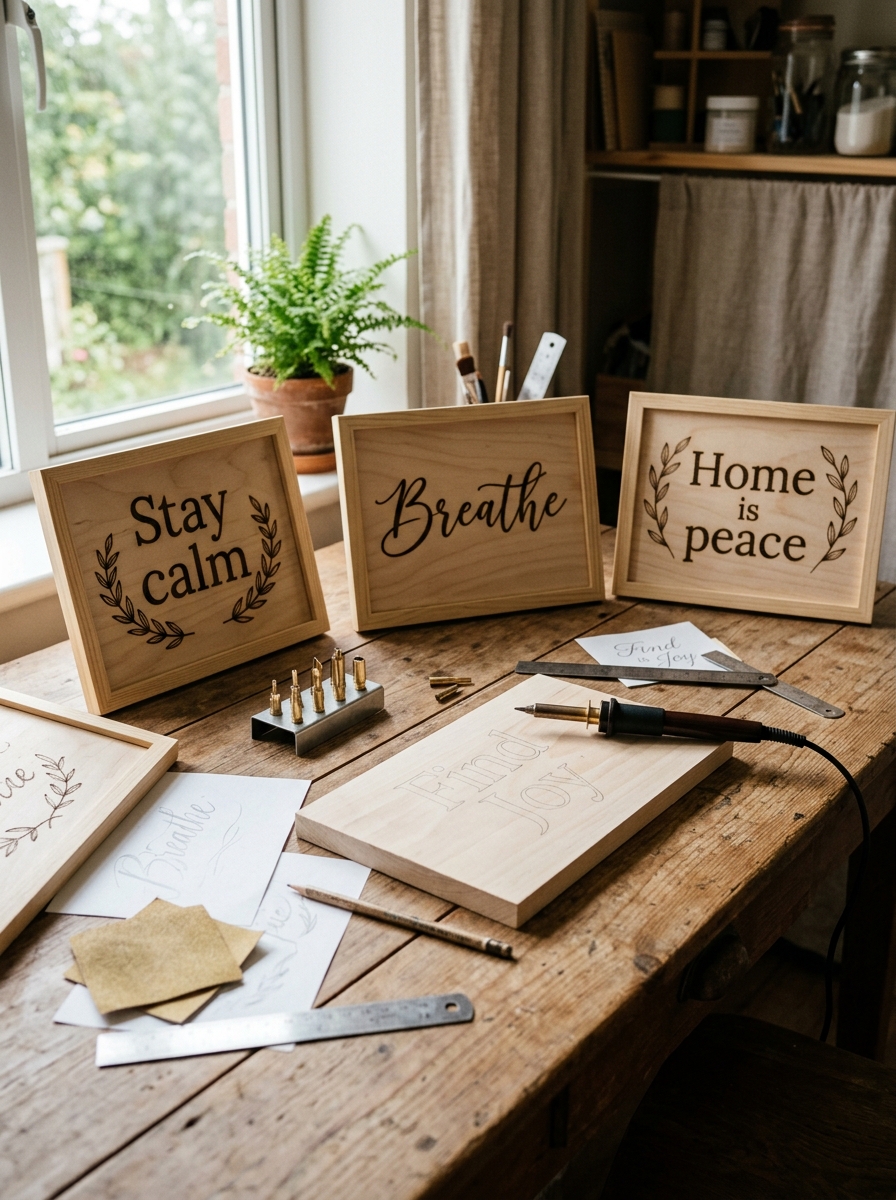
Quote wall art is a wooden piece designed to be displayed on a wall or shelf, where a short message or quote is burned directly into the surface. Unlike smaller items, this one is usually a bit larger and meant to be a visual focal point in a room.
The idea is simple but powerful. Instead of adding decoration through paint or prints, the wood itself carries the message.
Words like “Be kind,” “Stay grounded,” or “This is home” are burned into the surface, turning plain wood into something that feels personal and meaningful.
This type of piece works best when it feels calm and uncluttered. The wood is the background, and the words are the focus.
Why It’s a Good Idea
People use quote wall art to set a mood in a space. A single sentence can change how a room feels—more peaceful, more motivating, or more welcoming.
It also fits many environments without needing special styling. Homes, offices, studios, and even small shops use them because they add personality without being loud or distracting.
Design Tip
Keep the design balanced. Leave enough empty space around the quote so it doesn’t feel crowded.
Stick to short, clear phrases. The impact comes from meaning, not length or decoration.
Step-by-Step: How to Make It
- Choose a flat wooden board with a smooth surface
- Lightly sand it for a clean finish
- Select a short, meaningful quote
- Sketch the layout using a pencil before burning
- Adjust spacing so the text is centered and even
- Heat the wood burning tool to a medium setting
- Slowly trace each letter with steady movement
- Add light shading only if needed for emphasis
- Let the wood cool completely
- Optional: frame or seal for a polished display look
What Makes It Sellable / Income Potential
Quote wall art sells because it connects emotionally with buyers. People don’t just see it as decor, they see it as something that reflects how they feel or want to feel.
It works well for:
- Home decoration pieces
- Office inspiration boards
- Gift items for special occasions
- Small decor shops and online listings
Getting started on a budget becomes easier with ideas fromLow-Cost Craft Business Ideas for Beginners That Require No Expensive Tools or Skills, especially for simple entry points.
5. Cutting Boards with Designs
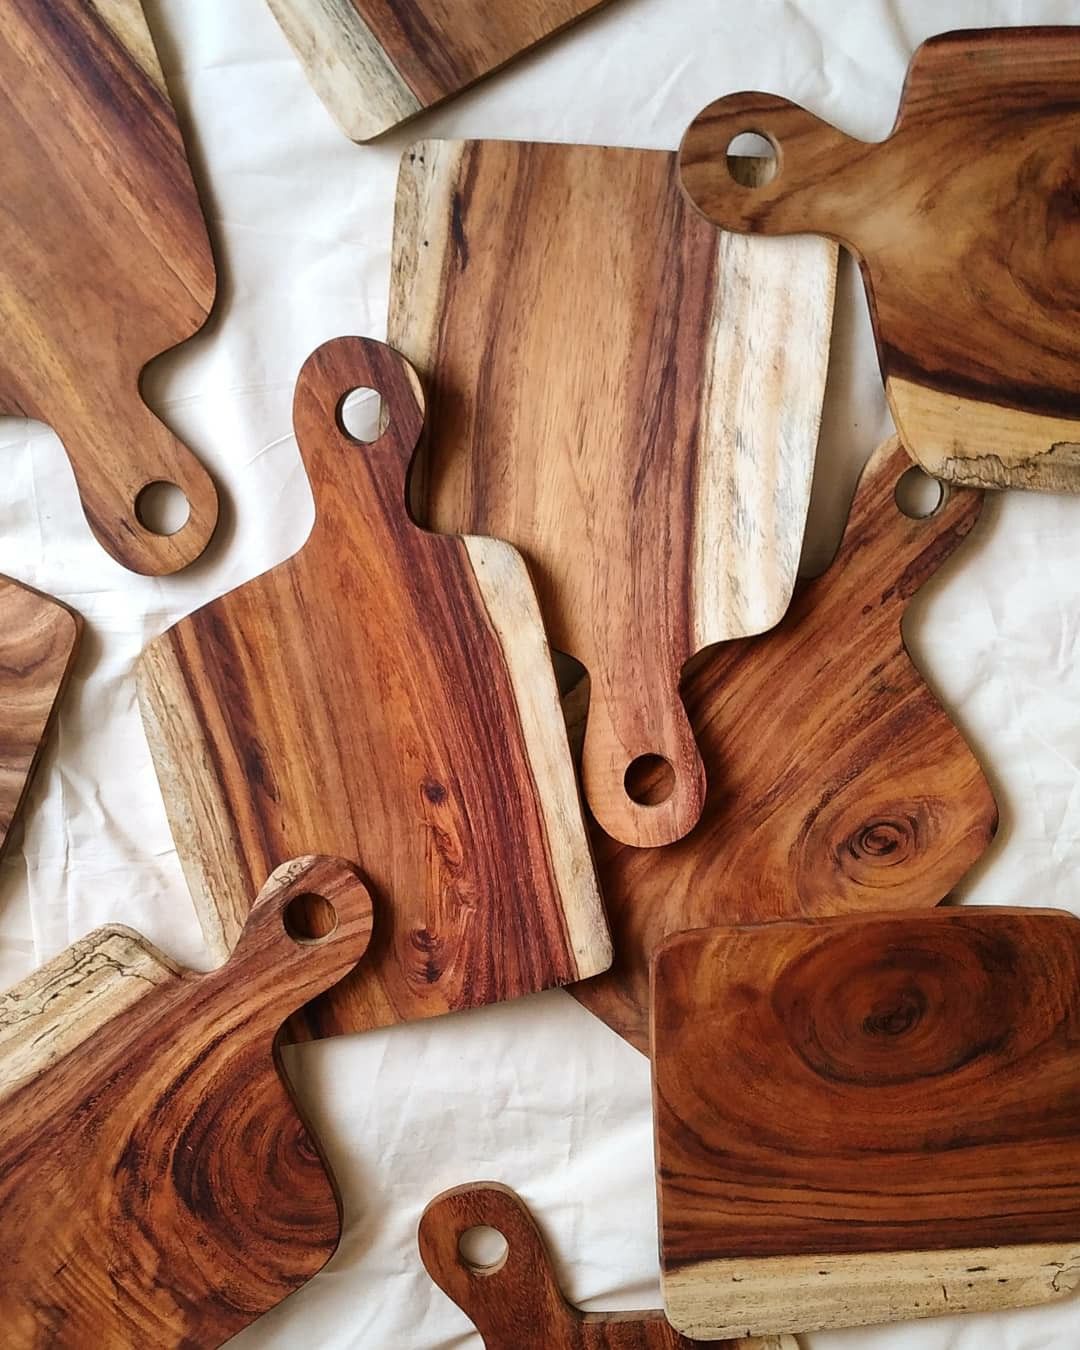
Cutting boards with designs are kitchen boards made for food preparation, but enhanced with simple burned patterns, names, or decorative accents. The key idea is that the design does not interfere with function, it enhances appearance without ruining usability.
This makes it one of the most practical wood burning projects. You are working on something that is both useful and decorative at the same time. A plain kitchen tool becomes something that feels custom and premium.
Designs are usually placed on the edges, corners, or handle area so the main cutting surface stays usable.
Why It Is a Good Idea
Kitchen items are always in demand, especially when they feel personalized. People like items that make everyday tasks feel a bit more special.
It also fits well into gifting culture. Housewarming gifts, wedding presents, and holiday sets often include kitchen items like this because they feel thoughtful and useful at the same time.
Design Tip
Keep designs minimal and intentional. Small icons, initials, or edge patterns work better than full-surface designs.
Avoid burning in the center where food is cut. This keeps the board functional and safe for long-term use.
Step-by-Step: How to Make It
- Choose a clean, untreated wooden cutting board
- Sand lightly if the surface feels rough
- Decide where the design will go (edges or corners preferred)
- Sketch the design lightly with a pencil
- Heat the wood burning tool to a controlled medium level
- Carefully trace the design with steady hands
- Add simple accents or borders if desired
- Avoid burning deep into areas used for cutting
- Let it cool completely before use or packaging
- Optional: apply food-safe oil for finish and durability
What Makes It Sellable / Income Potential
Cutting boards with designs sell well because they feel premium even when the design is simple. They combine usefulness with personalization, which increases perceived value.
They are popular for:
- Housewarming gifts
- Wedding and anniversary presents
- Kitchen decor sets
- Boutique homeware sales
This is one of those wood projects where even minimal effort can look high-value when done cleanly and thoughtfully.
For more detailed handmade projects, How to Make Resin Jewelry with Real Flowers That Looks Professional at Home offers a step-by-step creative direction for polished results.
6. Jewelry (Pendants & Earrings)
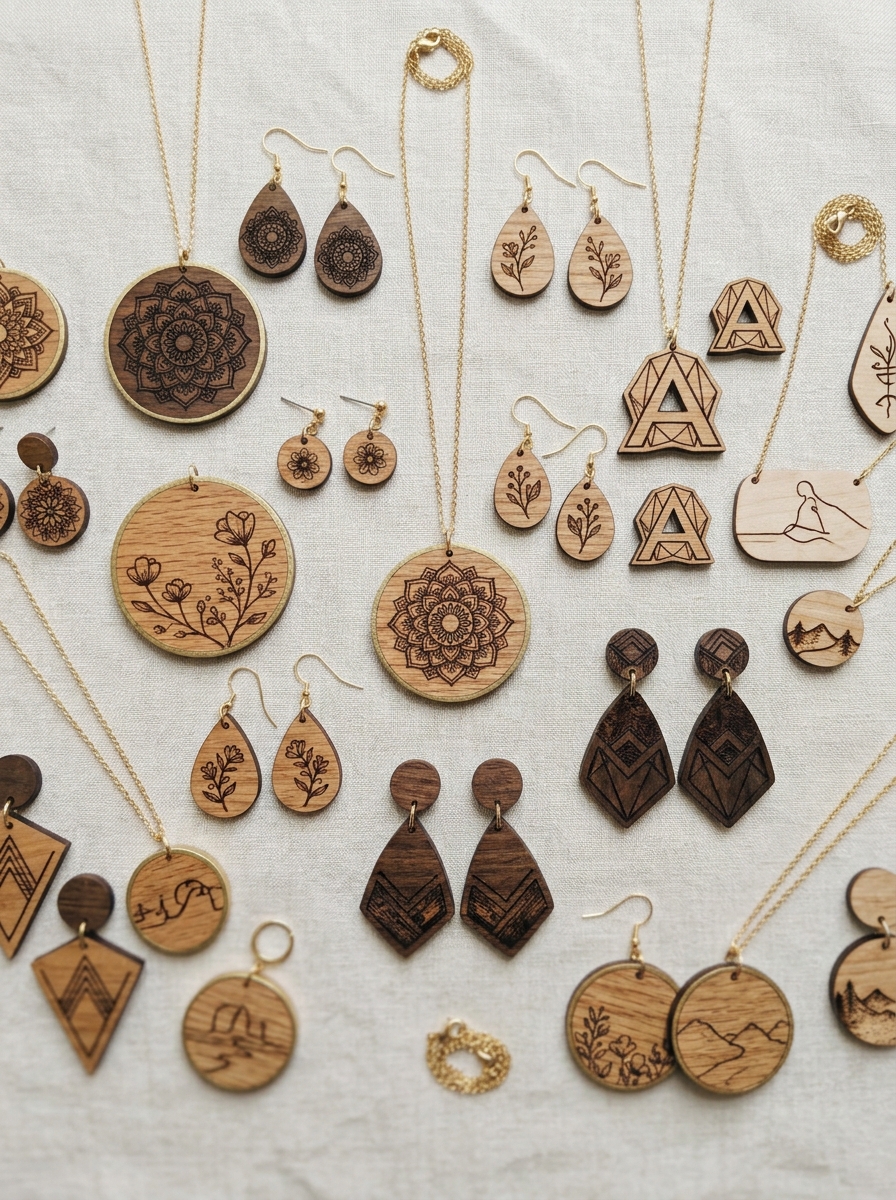
Wood burning jewelry involves creating small wearable pieces like pendants and earrings made from thin, lightweight wood. Designs are burned directly onto the surface, turning simple wooden shapes into handcrafted accessories.
In wood burning crafts you can make, this is one of the more detailed ideas because you’re working on a very small surface. That means designs must be simple, controlled, and intentional.
Common designs include tiny flowers, mandalas, initials, or minimal geometric patterns.
Why It Is a Good Idea
Jewelry is personal and expressive. People wear it not just for style, but for identity and meaning.
Because each piece is handmade, no two items look exactly the same. That uniqueness adds value and appeal, especially for people who prefer handmade or natural accessories.
Design Tip
Keep designs extremely simple. Small surfaces don’t handle heavy detail well.
Focus on clean lines, symmetry, and light shading instead of complex artwork.
Step-by-Step: How to Make It
- Choose thin, lightweight wood pieces suitable for jewelry
- Sand gently to smooth the surface
- Sketch a very simple design (small symbol or pattern)
- Heat the wood burning tool on a low to medium setting
- Carefully trace the design with steady hands
- Avoid deep burns to prevent weakening the wood
- Let it cool completely
- Add hooks or chains for earrings or pendants
- Optional: seal with a protective finish
What Makes It Sellable / Income Potential
Wood-burned jewelry sells well in handmade markets because it is unique, lightweight, and affordable.
It works well for:
- Handmade fashion stores
- Gift sets
- Craft fairs and online shops
- Personalized accessory collections
Inspiration for more meaningful creations can be found in Crafting Across Cultures: Meaningful Gift Ideas Inspired by Traditions Around the World, which focuses on deeper creative storytelling.
7. Decorative Wooden Spoons
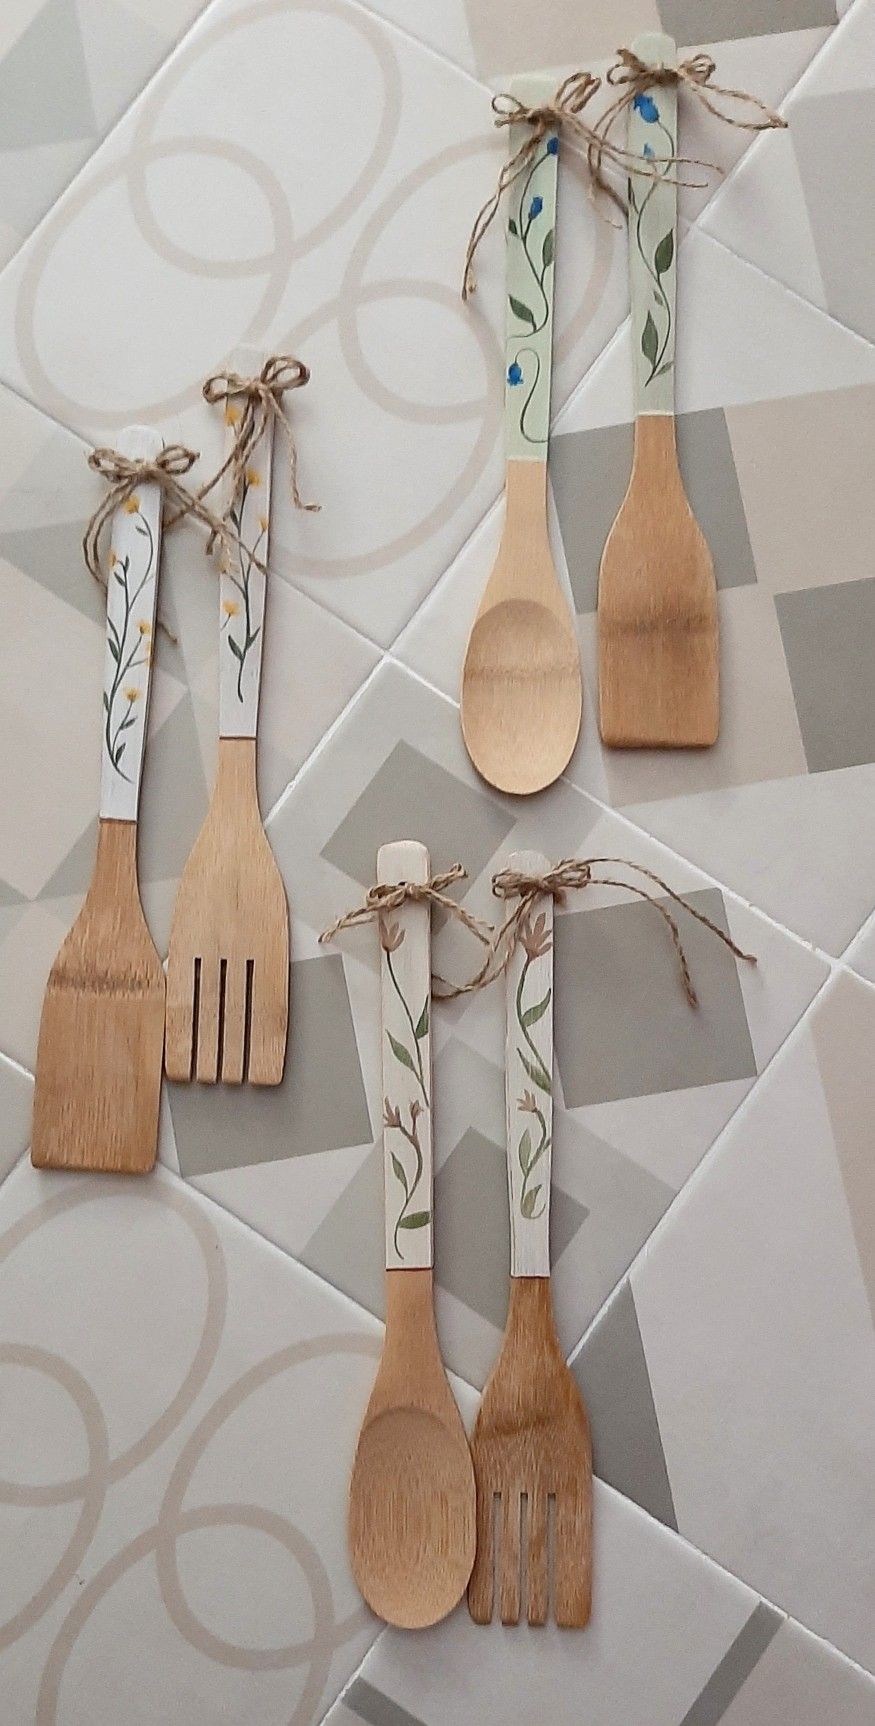
Decorative wooden spoons are regular kitchen spoons that are enhanced with burned designs, patterns, or words on the handle. They are not meant for heavy cooking use but for decoration or light kitchen styling.
This idea adds creativity to something very familiar. A simple spoon becomes a decorative piece through small burned details.
Common designs include floral patterns, names, or kitchen-related words like “stir,” “bake,” or “love.”
Why It Is a Good Idea
It transforms an everyday object into something decorative without changing its original form too much.
People like kitchen decor that feels warm and handmade, especially when it adds character to shelves or display jars.
Design Tip
Focus on the handle only. Avoid burning the part that touches food.
Use small repeating patterns instead of large, heavy designs.
Step-by-Step: How to Make It
- Choose plain wooden spoons (untreated)
- Lightly sand the handle for smoothness
- Sketch a simple design on the handle
- Heat the wood burning tool to a controlled medium level
- Carefully burn the design along the handle
- Keep pressure light to avoid deep marks
- Let it cool completely
- Optional: apply food-safe oil for finish
- Display or package as decor pieces
What Makes It Sellable / Income Potential
Decorative spoons sell well as kitchen decor and gift items.
They are popular for:
- Rustic kitchen styling
- Gift bundles with other kitchen items
- Home decor shops
- Handmade craft markets
They are low-cost to make but can be packaged in sets, which increases their value in the handmade market.
Turning creativity into income is easier when guided by 10 Low-Cost DIY Crafts to Make and Sell From Home, focused on simple, sellable ideas for beginners.
Beginners often hit common hurdles when working with machines, which is clearly broken down in 10 Cricut Crafts Beginners Always Struggle With- And How to Make and Sell Them, especially for improving skill and avoiding early mistakes.
8. Small Wooden Boxes
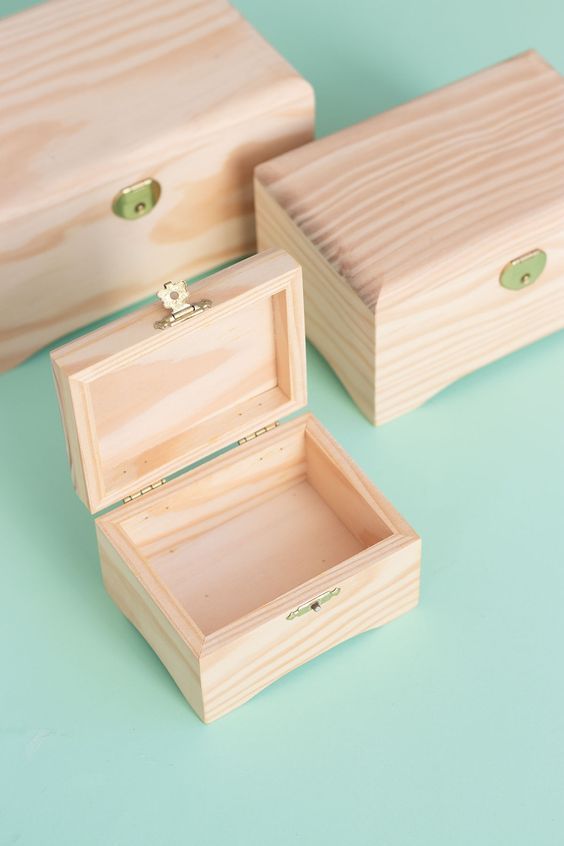
Small wooden boxes are compact storage pieces made from wood, often used to hold jewelry, keepsakes, letters, or small personal items. In wood burning crafts, the design is added on the lid or sides using simple burned patterns, names, or symbols.
What makes this idea special is that it combines storage with meaning.
It’s not just a box,it becomes a personal container for memories or important items. A plain wooden box can feel very ordinary, but once a name, date, or simple design is burned into it, it instantly feels more thoughtful and personal.
These boxes are often used for gifting, especially when someone wants to present something in a more emotional and memorable way.
Why It Is a Good Idea
People love items that feel personal and reusable. A wooden box doesn’t get thrown away easily because it has function. It stays in use for years, which increases its value in the eyes of buyers.
It also works well for gifting moments like birthdays, anniversaries, and keepsake storage.
Design Tip
Keep the design focused on the lid. That’s the first part people see.
Simple initials, short names, or small symbols like hearts or flowers work best.
Step-by-Step: How to Make It
- Choose a smooth, untreated wooden box
- Lightly sand the surface if needed
- Sketch your design on the lid with a pencil
- Keep the design centered and simple
- Heat the wood burning tool to a medium setting
- Slowly trace the design with steady hands
- Add light shading if desired
- Let it cool completely
- Optional: apply a protective finish or polish
What Makes It Sellable / Income Potential
Small wooden boxes sell well because they combine function and emotion.
They are commonly used for:
- Jewelry storage
- Gift packaging
- Memory boxes
- Personalized keepsakes.
Anyone starting from scratch can also benefit from DIY Projects for People Who Don’t Feel Crafty at All, which breaks down creativity into simple, stress-free steps.
9. Portrait Boards
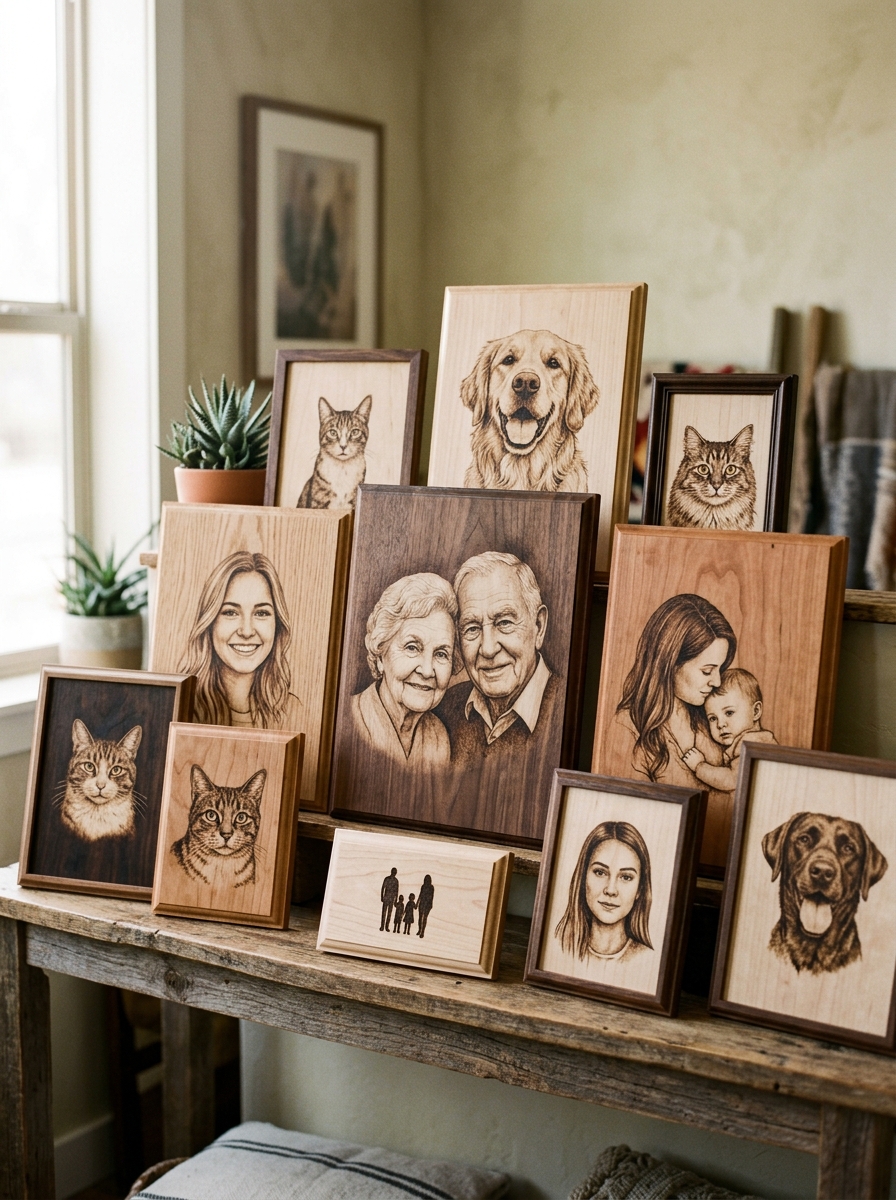
Portrait boards are wooden surfaces where faces, silhouettes, or simple portrait-style designs are burned into the wood. These can be outlines of people, pets, or stylized versions of photographs.
This is a more advanced idea in wood burning because it focuses on detail and shading. However, even simplified portraits, like outline sketches, can still look very striking on wood.
The final result is usually a framed or display-ready piece that feels personal and artistic.
Why It Is a Good Idea
Portraits carry strong emotional value. People are naturally drawn to images of loved ones, pets, or meaningful moments.
Even simple portrait-style designs feel special because they represent a real person or memory.
Design Tip
Start with outline portraits before attempting full shading.
Focus on proportions and spacing rather than detail in the beginning.
Step-by-Step: How to Make It
- Choose a smooth wooden board with a light surface
- Lightly sand to remove rough texture
- Sketch the portrait outline carefully using a pencil
- Keep lines simple and not overly detailed
- Heat the wood burning tool to a controlled medium setting
- Trace the main outlines first before adding detail
- Add shading slowly in small sections
- Step back often to check balance and proportions
- Let the wood cool completely
- Optional: frame the finished piece for display
What Makes It Sellable / Income Potential
Portrait boards are highly valued because of their emotional connection.
They are often used for:
- Personalized gifts
- Memorial keepsakes
- Pet portraits
- Home display artwork
Because of their emotional weight, even simple versions can sell at higher value compared to basic decor items.
Turning creativity into income is easier when guided by 10 Low-Cost DIY Crafts to Make and Sell From Home, focused on simple, sellable ideas for beginners.
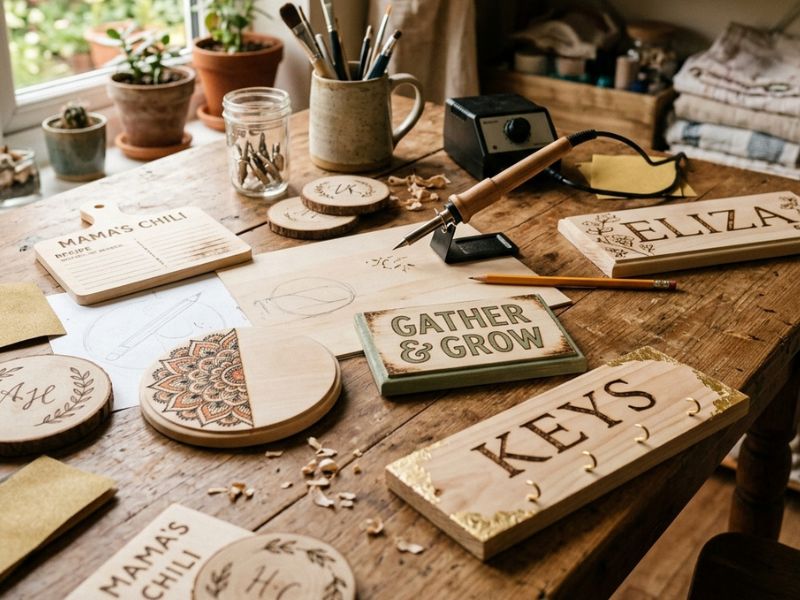
10. Recipe Boards
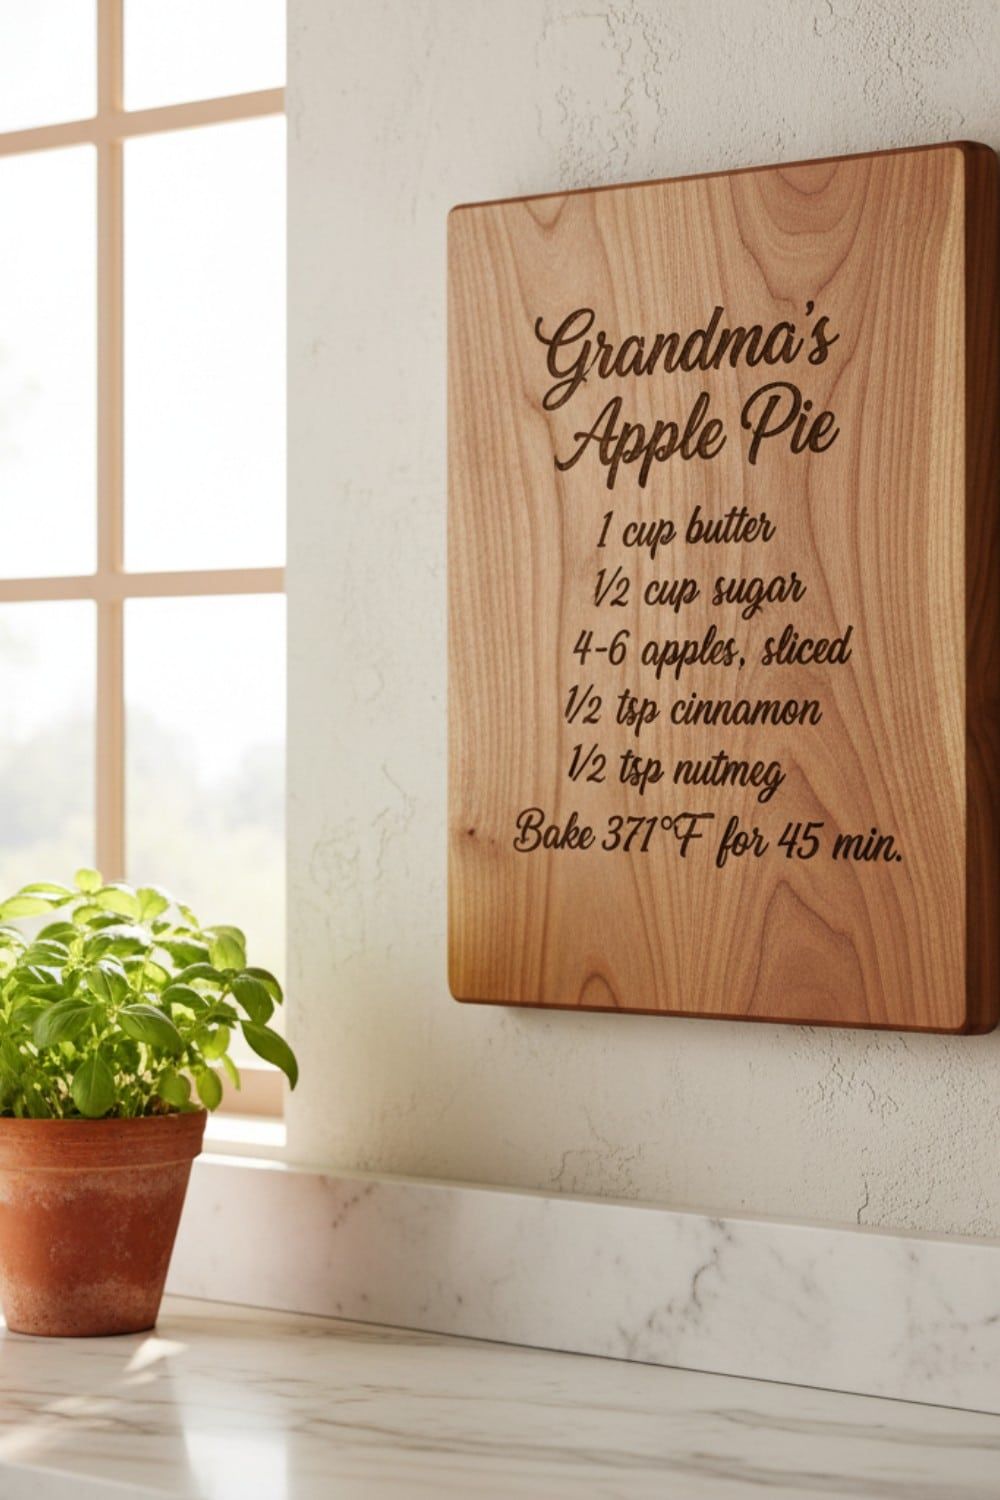
Recipe boards are wooden boards where favorite recipes are burned into the surface. This can be handwritten family recipes, short ingredient lists, or step-by-step cooking instructions.
This idea blends memory and function. A recipe that is usually written on paper or stored on a phone becomes something permanent and decorative on wood.
It often carries family or cultural meaning, especially when it preserves handwritten recipes from older generations.
Why It Is a Good Idea
Food connects people to memories. A recipe board is not just kitchen decor—it is a way of preserving tradition.
It also fits naturally into kitchen spaces, making it both useful and decorative at the same time.
Design Tip
Use clear spacing between ingredients and instructions.
Simple handwriting styles work best so the recipe remains readable.
Step-by-Step: How to Make It
- Choose a flat wooden board with enough writing space
- Sand lightly for a smooth surface
- Write or sketch the recipe layout with a pencil first
- Organize sections (title, ingredients, steps) clearly
- Heat the wood burning tool to a medium setting
- Burn the text slowly, focusing on readability
- Keep consistent spacing between lines
- Add small decorative borders if needed
- Let it cool completely
- Optional: seal for durability and kitchen display
What Makes It Sellable / Income Potential
Recipe boards are popular because they feel personal and nostalgic.
They sell well as:
- Family keepsakes
- Kitchen decor
- Housewarming gifts
- Custom recipe gifts for loved ones
They stand out because they turn everyday cooking information into something permanent and meaningful.
11. Garden Plant Labels
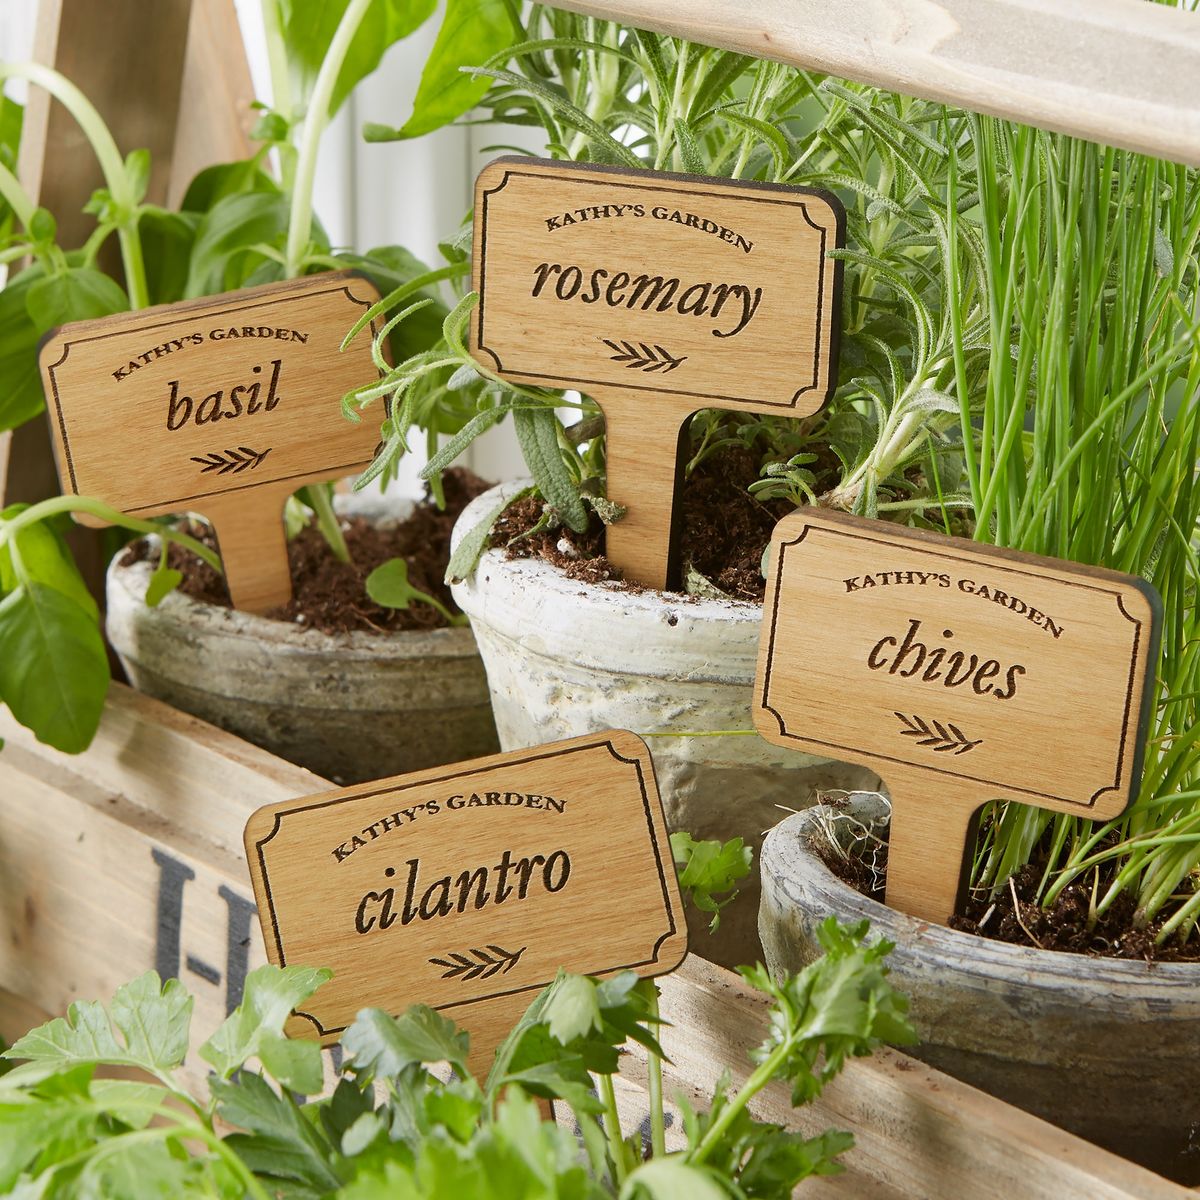
Garden plant labels are small wooden markers placed in soil to identify plants, herbs, or vegetables.
In wood burning crafts, names like “Tomatoes,” “Basil,” “Mint,” or “Rosemary” are burned directly into the wood so they stay visible even in outdoor conditions.
This turns a very simple gardening tool into something more organized and visually appealing. Instead of handwritten paper tags that fade or plastic labels that break easily, you get a natural, long-lasting marker that blends into the garden.
It also adds a personal touch to gardening spaces, especially for people who enjoy neat, labeled herb gardens or vegetable beds.
Why It Is a Good Idea
Gardening is all about care and structure. Labels help people stay organized, especially when growing multiple plants at once.
These wooden labels also appeal to people who like natural, eco-friendly garden setups. They feel more aesthetic than plastic alternatives and fit well into outdoor spaces.
Design Tip
Keep text short and bold so it remains readable outdoors.
Simple block lettering works best, and avoid overly detailed designs since weather exposure can fade fine lines over time.
Step-by-Step: How to Make It
- Cut small, flat pieces of wood into label shapes
- Sand edges and surfaces for a smooth finish
- Lightly sketch plant names with a pencil
- Keep lettering clear and centered
- Heat the wood burning tool to a medium setting
- Trace letters slowly and evenly for readability
- Add small icons if desired (like leaf symbols)
- Let the wood cool completely
- Optional: seal with outdoor-safe finish for durability
What Makes It Sellable / Income Potential
Garden plant labels sell well because they are both practical and decorative.
They are popular for:
- Home gardens
- Herb garden kits
- Gardening gift sets
- Eco-friendly lifestyle stores
They are low-cost to make and easy to produce in batches, making them ideal for small-scale craft sales.
What Wood Burning Crafts Actually Involve
Wood burning crafts are often misunderstood at first.
This is not painting. There is no ink, no brush, and no color being applied on the surface. Instead, designs are made by burning lines, shading, and patterns directly into wood using a heated tool.
That tool is not mild, it gets very hot, usually around 400–750°C. Because of that, control becomes very important. You are not just “drawing freely,” you are guiding heat carefully so it marks the wood in a controlled way.
The final result depends on a few simple but important factors:
- Pressure: How hard you press affects how deep and dark the burn will be. Too much pressure can damage the surface, while light pressure creates softer, cleaner lines.
- Speed: Moving the tool too fast makes faint lines. Moving too slow can create dark spots or burn too deeply.
- Finding a steady pace is key.
- Wood type: Some woods burn smoothly and evenly, making it easier for beginners. Others are rough, unpredictable, or harder to control.
When these three things are understood, the craft starts to make sense in a practical way.
The most important thing to know is this: wood burning is a skill-based craft, not a quick shortcut. It takes practice to get steady results.
But that doesn’t mean beginners can’t create beautiful work early on. Even simple shapes, names, and basic patterns can look clean and intentional when the basics are applied correctly.
Creative, hands-on activities for children are made simple with 13 Popsicle Stick Crafts for Kids That Actually Keep Them Busy and Boosts Creativity, which focuses on fun and engaging projects.
Safety Tips
Wood burning crafts you can make are simple to learn, but safety is one part you should never treat casually. The process uses heat, so a few basic habits make a big difference in both safety and the quality of your work.
-
Always Work in a Ventilated Space (fumes matter)
When wood is heated, it releases smoke. If the space is closed, that smoke builds up and becomes uncomfortable or unhealthy to breathe. A window, open door, or outdoor space is enough. Good airflow keeps the process safe and easier to stay focused on.
-
Never Burn Treated or Painted Wood
This is very important. Treated, stained, or painted wood can release harmful chemicals when heated. Even if the surface looks nice, it’s not safe for wood burning. Always use plain, untreated wood so your work stays safe and clean from the start.
-
Don’t Leave The Tool Unattended
The wood burning pen stays hot while it’s plugged in. Leaving it on a surface or walking away can cause accidents. Treat it like a hot iron—use it, then switch it off and set it safely down when you’re done.
-
Keep Your Hands Steady and Workspace Clear
A clean, uncluttered space helps you control your movements better. It also prevents accidental burns or knocking things over while you’re focused on your design.
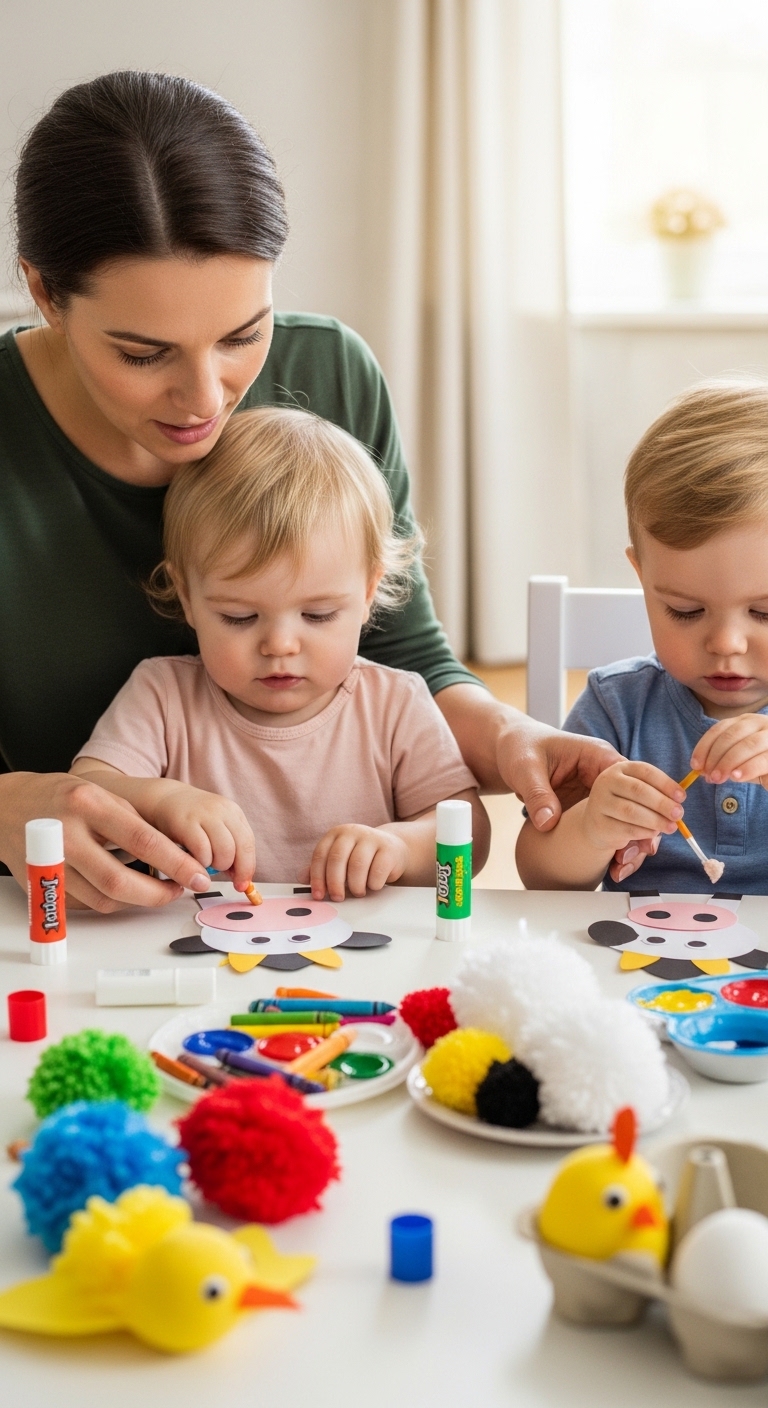
Early learning craft ideas are also supported by Farm Animal Crafts for Toddlers: Build Creativity and Fine Motor Skills Beyond Playtime, designed to encourage development through play.
Can You Really Turn This Into Income?

Yes—but not instantly.
Wood burning crafts you can make take time to build skill. The first few pieces are usually practice, not profit.
That’s normal. Your lines may not be perfect at the beginning, and that’s part of learning control, pressure, and speed.
What actually matters more than perfection is consistency. The people who turn this into income are not the ones who start perfect, they are the ones who keep improving piece by piece.
Once your hands get steady and your designs become cleaner, real opportunities start to open up.
Real Opportunities Include:
- Gifts
Personalized items like name signs, quote plaques, and small boxes are always in demand for birthdays, weddings, and special occasions. - Small online shops
Platforms like Instagram, Facebook Marketplace, or handmade stores allow you to sell simple wood pieces without needing a physical shop. - Local sales
Community markets, gift shops, and word-of-mouth orders often become the first real source of income for beginners.
The key truth is simple: wood burning crafts can become income, but it grows step by step. You start with learning, then improvement, and eventually, small but steady sales.
How to Choose the Right Craft to Start
Starting wood burning becomes much easier when you don’t pick randomly. The goal at the beginning is not to do everything, it’s to choose something you can actually finish well and repeat without stress.
A simple way to decide is to ask yourself a few honest questions before starting any project:
1. Is this simple enough to finish cleanly?
If a design looks too detailed or overwhelming, it will be hard to control at the beginning. Clean, simple designs always look better than unfinished complex ones.
2. Can I repeat this design easily?
If you can’t make it more than once with similar results, it’s probably too advanced for now. Repetition is important because that’s how skill improves and confidence builds.
3. Will someone actually use or gift this?
A good beginner project is not just about learning, it should also have real-life value. Items like coasters, name signs, or small boxes are useful, which makes them easier to sell or gift later.
What to Avoid at the Start
Try not to begin with overly detailed portraits or complex shading work. These require advanced control over pressure, speed, and heat, which can be frustrating early on.
Instead, start with simple, clear designs that focus on shapes, letters, or basic patterns. Once control improves, more detailed work becomes easier and less stressful.
Conclusion
You don’t need a workshop to start wood burning crafts you can make. You also don’t need perfect drawing skills or expensive equipment to begin.
What actually matters is simple:
- basic tools
- patience while learning
- attention to small details like pressure, speed, and control
That’s really the foundation of it.
Most beginners overthink it at first, but the process becomes easier once you start working with your hands. Small, simple designs often turn out better than complicated ones that never get finished.
Wood burning crafts work best when you keep things simple and focus on finishing each piece well. Clean lines, clear designs, and steady practice will always look better than rushing into advanced work too early.
If you’re thinking of starting, begin small. Pick one idea, try it, and improve as you go.
FAQs
1. Can I do wood burning without artistic skills?
Yes. You don’t need to be “good at drawing” to start. Most beginner projects in wood burning crafts you can make are based on simple shapes, letters, and patterns. The skill is more about control (steady hands, timing, and pressure) than artistic talent.
2. What type of wood gives the cleanest results?
Soft, light-colored woods like pine or basswood usually give the cleanest burns. They respond smoothly to heat and don’t resist the tool too much. Hard or rough wood can make lines uneven and harder to control.
3. Why do my burn lines look uneven?
This usually comes down to three things:
- Pressure is inconsistent (pressing harder in some areas than others)
- Speed is not steady (moving too fast or too slow in patches)
- The wood surface is rough or not sanded properly
Fixing even one of these usually improves results quickly.
4. How long does it take to get good at it?
There’s no fixed timeline. Most people start seeing improvement after a few practice pieces. The first few items are usually messy, but consistency matters more than speed. Regular practice builds control over time.
5. Can I do this safely at home?
Yes, it can be done safely at home if basic precautions are followed. Always work in a ventilated space, avoid treated or painted wood, and never leave the hot tool unattended. Treat the tool like a heat device, not a pen.