What will your child still remember by the end of the school year? Make a first-day-of-school time capsule to save today’s little details and look back later.
By the end of the school year, your child may not remember what they were so excited about in September. The book they carried everywhere may have been replaced by another favorite.
That thing they were sure they would never be able to do may suddenly be easy. Even their handwriting, drawings and little opinions can look different.
You can save a piece of that beginning before it changes.
A first-day-of-school time capsule gives you and your child a simple way to record who they are before the new school year gets underway.
It does not need expensive supplies or a complicated craft. A box, a few pages, a drawing, a photograph and some honest answers can be enough.
The interesting part comes later, when the capsule is opened and your child gets to meet the version of themselves who started the school year.
What Makes a First-Day-of-School Time Capsule Worth Keeping?

A box full of random school-day leftovers is easy to forget about. A good first-day-of-school time capsule gives your child something to compare with later.
The best things to include are details that belong to this particular version of your child: how they write their name, what they are interested in, what they think the new school year will be like, how tall they are, a picture of themselves, or something they have drawn.
Those details may seem ordinary now. That is exactly why they are worth saving.
Months later, your child can look at the same questions, drawing or photograph and see what changed, and what didn’t.
Current time-capsule activities commonly use this beginning-of-year/end-of-year comparison to help children notice changes in their interests, goals and physical growth.
So don’t try to fill the capsule with as much as possible. Choose things that will make your child say, “I was really like that?” when they open it.
If your child enjoys hands-on projects that also help them slow down and focus, DIY Sensory Bottles: How to Make a Calming Jar for Kids to Ease Big Emotions is another meaningful craft to try.
Choosing the Container Before Decorating
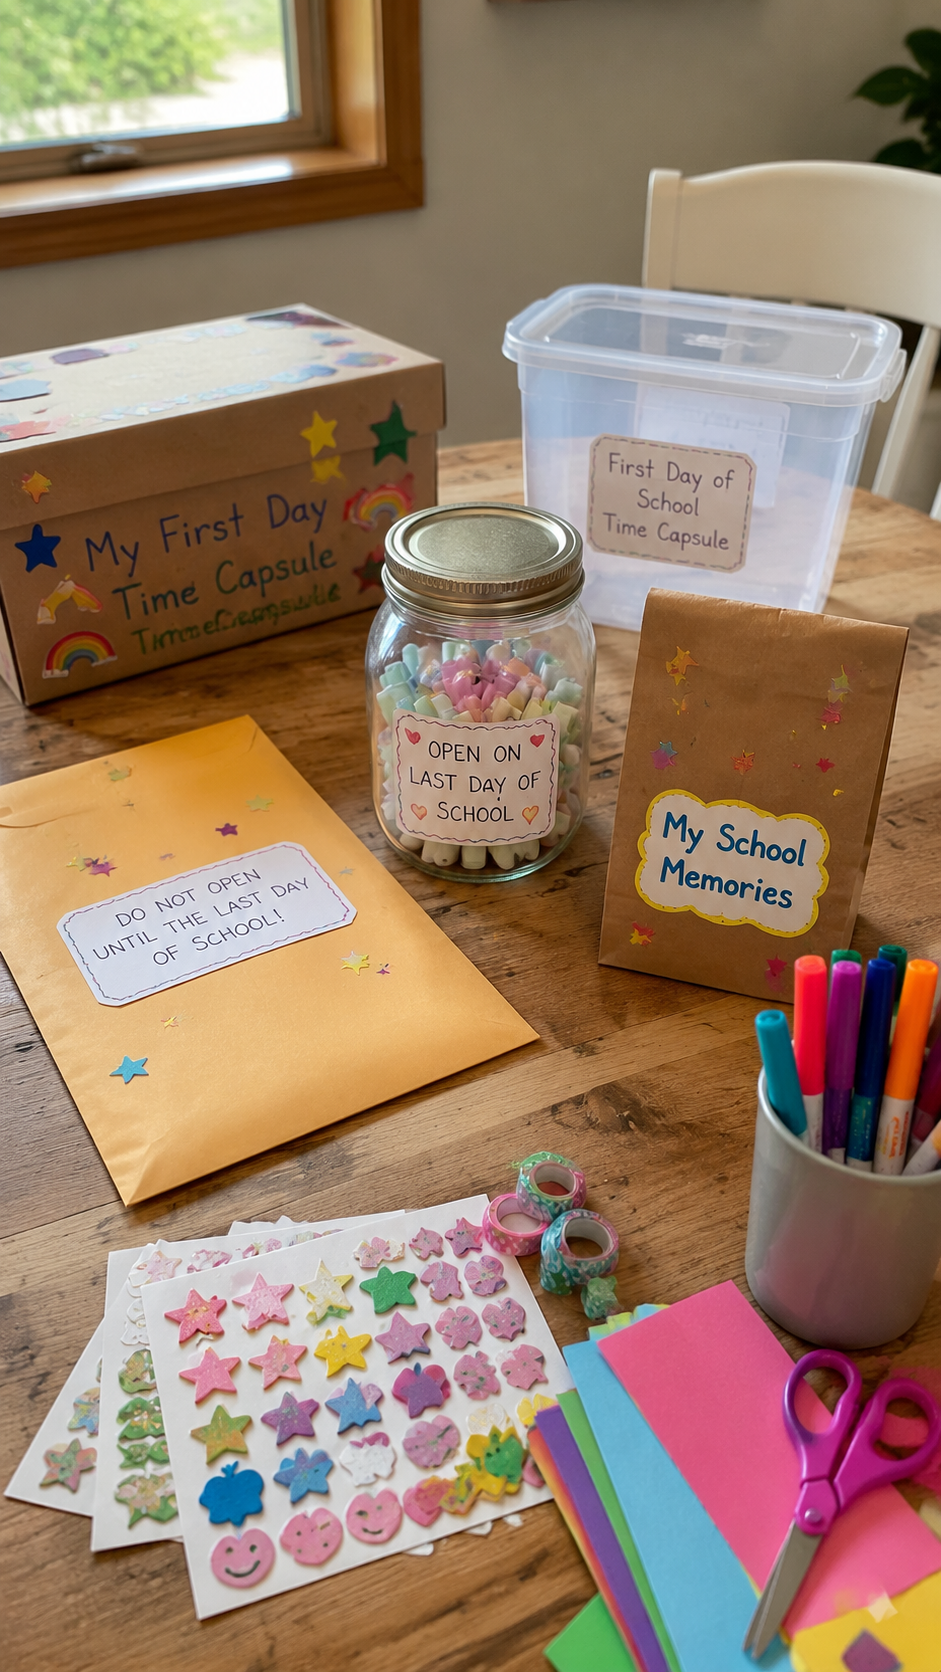
The container does not need to look like a traditional time capsule. What matters is that it can hold the contents safely, close securely and still be easy to open at the end of the school year.
Educators and family activity resources use everything from shoeboxes and sturdy boxes to jars, envelopes, plastic containers and even zip-top bags.
For a family project, choose based on what your child will actually put inside:
- Shoebox or sturdy lidded box: best when the capsule will hold drawings, photographs, cards and other flat keepsakes.
- Plastic container with a secure lid: useful when you want a more durable container that can be stored for longer.
- Jar or wide-mouth container: works well for rolled notes, small drawings and other compact pieces. Teach Starter uses jars or recycled plastic bottles for beginning-of-year capsules.
- Large envelope or paper bag: enough for a simple paper-based capsule if you are keeping the project small. PBS KIDS specifically suggests envelopes, shoeboxes and paper bags.
One thing to decide before decorating: how much you actually plan to put inside.
A small collection of papers and a photo does not need a large box, while a capsule containing drawings, artwork and several keepsakes will need more room.
Choose the container first, then decorate it around the child’s idea for the capsule.
That keeps the craft practical instead of ending up with a beautiful box that cannot comfortably hold what your child wants to save.
How to Make a First-Day-of-School Time Capsule With Your Child

Step 1: Give the Capsule a Date and a Future Opening Day
Before your child starts decorating, decide what this capsule is going to mark.
Write your child’s name, the school year, the date you are making it and the date you plan to open it on the outside of the container. If you are making it before school starts, use the date you actually make the capsule rather than pretending it was made on the first day.
For the opening date, the end of the school year makes the most sense because your child will have a clear beginning and ending point to compare.
School-based time-capsule activities commonly collect the information at the beginning of the year and return it to children at the end so they can see what changed.
You can write something as simple as:
Maya’s First-Day-of-School Time Capsule
School Year: 2026–2027
Made: August 31, 2026
Open: Last week of school
This little label matters. Without a date and an opening point, the capsule can easily become another box that gets pushed to the back of a cupboard.
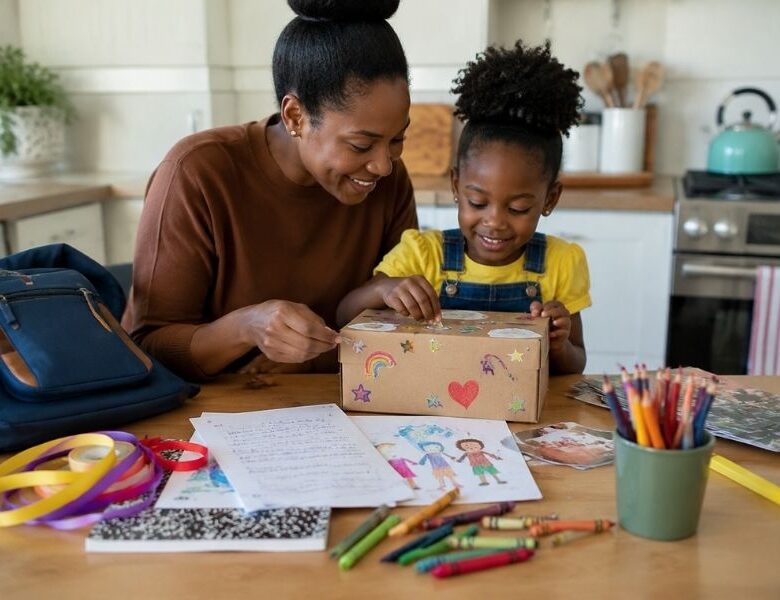
Step 2: Let Your Child Decorate the Container
Now let your child make the outside their own.
Use whatever you already have, markers, crayons, stickers, coloured paper, drawings, scraps of wrapping paper or washi tape. There is no need to buy special decorations for the project.
You can help with cutting or attaching materials, but let your child decide what the capsule should look like.
This is also a good time to leave one clear area for the label. If the entire lid is covered in decorations, you may have nowhere sensible to write the school year and opening date.
The decoration does not need to represent school perfectly. Your child might draw their favourite animal, a football, flowers, a cartoon character or simply cover the box in their favourite colours.
That is part of the record too.
Step 3: Make an “About Me Right Now” Page
This is the heart of the capsule.
Give your child a sheet of paper and let them answer questions about themselves as they are now, not what you think they should say.
Keep the questions simple enough that your child can answer them without turning the activity into homework.
You could include:
- My name:
- My age:
- My grade:
- My favourite food:
- My favourite book:
- My favourite game:
- My favourite thing to do:
- Something I am really good at:
- Something I want to learn:
- Something I am excited about:
- Something I think will happen this school year:
Older children can write their own answers. Younger children can dictate their answers while you write them down.
Don’t correct an answer because it sounds funny or because their favourite thing has changed since you last asked. The point is to capture their answer today.
Beginning-of-year time-capsule activities commonly use children’s current favourites, goals, predictions and personal details precisely because these are things they can compare later.
Step 4: Add a Handwriting Sample
Ask your child to write their name and, if they are able, one short sentence such as:
“I am excited to start school because…”
Let the child write it themselves.
Don’t rewrite crooked letters or fix spelling before putting it away. The handwriting is not being judged. It is there because it shows exactly where your child was at the beginning of the school year.
For a child who is not yet writing independently, you can write their dictated words and let them add a drawing, their name or a handprint instead.
A handwriting sample is a particularly useful addition because it gives you something concrete to compare later, rather than relying only on memories of how your child used to write. School time-capsule activities commonly include handwriting as part of the beginning-of-year record.
Step 5: Take One Current Photograph
Take a photograph of your child as they are now.
It doesn’t have to be a professional school portrait. A clear photograph taken at home is enough.
If your child is wearing their new school uniform or holding their backpack, you can include that, but don’t feel that the picture needs to be staged.
The important thing is that the photograph gives you a visual record to compare later.
You can print the photo and place it inside the capsule. If you don’t have a printer, write a note describing where the photograph is stored and keep the digital copy with the capsule’s other records.
Current first-day time-capsule projects commonly include a photograph specifically so children and parents can compare how they looked at the beginning and end of the school year.
Step 6: Record Something That Can Actually Be Compared Later
This is where the capsule becomes more interesting than a decorated memory box.
Have your child stand straight and record their height.
You can simply measure them and write the measurement on a card. Another option used in current family time-capsule activities is to cut a piece of string to the child’s height and place it inside the capsule.
If you use the string method, label it clearly:
My height on August 31, 2026
Don’t rely on the string alone. A written measurement gives you a useful record if the string is misplaced or stretched later.
For younger children, you can also trace a hand on paper and date it. A handprint is another simple physical marker that can be compared at the end of the school year.
Step 7: Ask Your Child to Make Three Predictions
Instead of filling the capsule with lots of questions, choose three things your child can look back on later.
Try:
This year I think I will…
I think my favourite thing at school will be…
By the end of the school year, I hope I can…
Let the answers be theirs.
A child might predict that they will make a new best friend, learn to swim, read a certain number of books, become better at maths or simply have fun at school.
Don’t turn these into performance targets. A prediction can be completely wrong and still make the capsule more interesting when it is opened.
The point is to preserve what your child expected before the year unfolded. Beginning-of-year classroom activities use predictions and goals for exactly this kind of end-of-year comparison.
Step 8: Let Your Child Choose One Thing to Represent Their Life Right Now
Give your child the final choice.
Ask:
“What small thing would you put in here to remind us of you right now?”
It could be a drawing, a short note, a friendship bracelet, a ticket, a small photograph, a paper creation or another safe, non-perishable object.
You don’t need to preserve something valuable.
In fact, a small ordinary object can be more revealing than an expensive keepsake because it shows what mattered to your child at that particular moment.
If the object is bulky, take a photograph of it and put the photograph inside instead.
Step 9: Put Everything Together in the Capsule
Before closing the container, spread everything out on the table.
You should now have a small collection that tells a story:
- who your child is
- what they like
- what they look like
- how they write
- how tall they are
- what they think will happen
- what they hope to learn
- something they chose themselves
Place the papers flat where possible. Put the photograph somewhere it will not be bent, and keep any small loose pieces together in an envelope or smaller bag inside the main container.
Don’t pack it until the container is overflowing.
A time capsule works because the contents are meaningful, not because there are many of them.
Step 10: Close It and Put It Somewhere You Will Actually Find It
Close the container securely and store it somewhere dry, indoors and away from things that could damage it.
A bedroom shelf, cupboard or storage box can work.
You do not need to bury a school-year time capsule in the ground. That adds preservation problems without adding much value to a capsule you intend to open within the same school year.
The important thing is to put it somewhere safe enough that nobody accidentally opens it before the agreed date.
If you are worried you will forget about it, put a reminder on your calendar for the end of the school year.
Then leave it alone.
Step 11: Open It Together at the End of the School Year
This is the part that gives the craft its meaning.
Bring the capsule out and let your child open it rather than simply handing them the contents.
Put the beginning-of-year photograph beside a current photograph. Compare the handwriting. Hold up the old height string or check the recorded measurement. Read the old answers and see which favourites stayed the same.
Then return to the predictions.
Which one came true?
Which one was completely wrong?
What changed that you didn’t expect?
What do you like now that you didn’t mention then?
There is no need to turn this into a formal assessment of how much your child has improved. The fun is in noticing the small differences.
That comparison is the reason to make the capsule in the first place.
Similar school-year activities are deliberately designed around looking at the beginning-of-year record again at the end of the year and noticing what changed and what stayed the same.
For a keepsake that can eventually become something living, How to Make Seed Paper with Kids: A Fun Nature Craft That Actually Grows turns a simple craft into a little nature project.
Choose Prompts That Fit Your Child
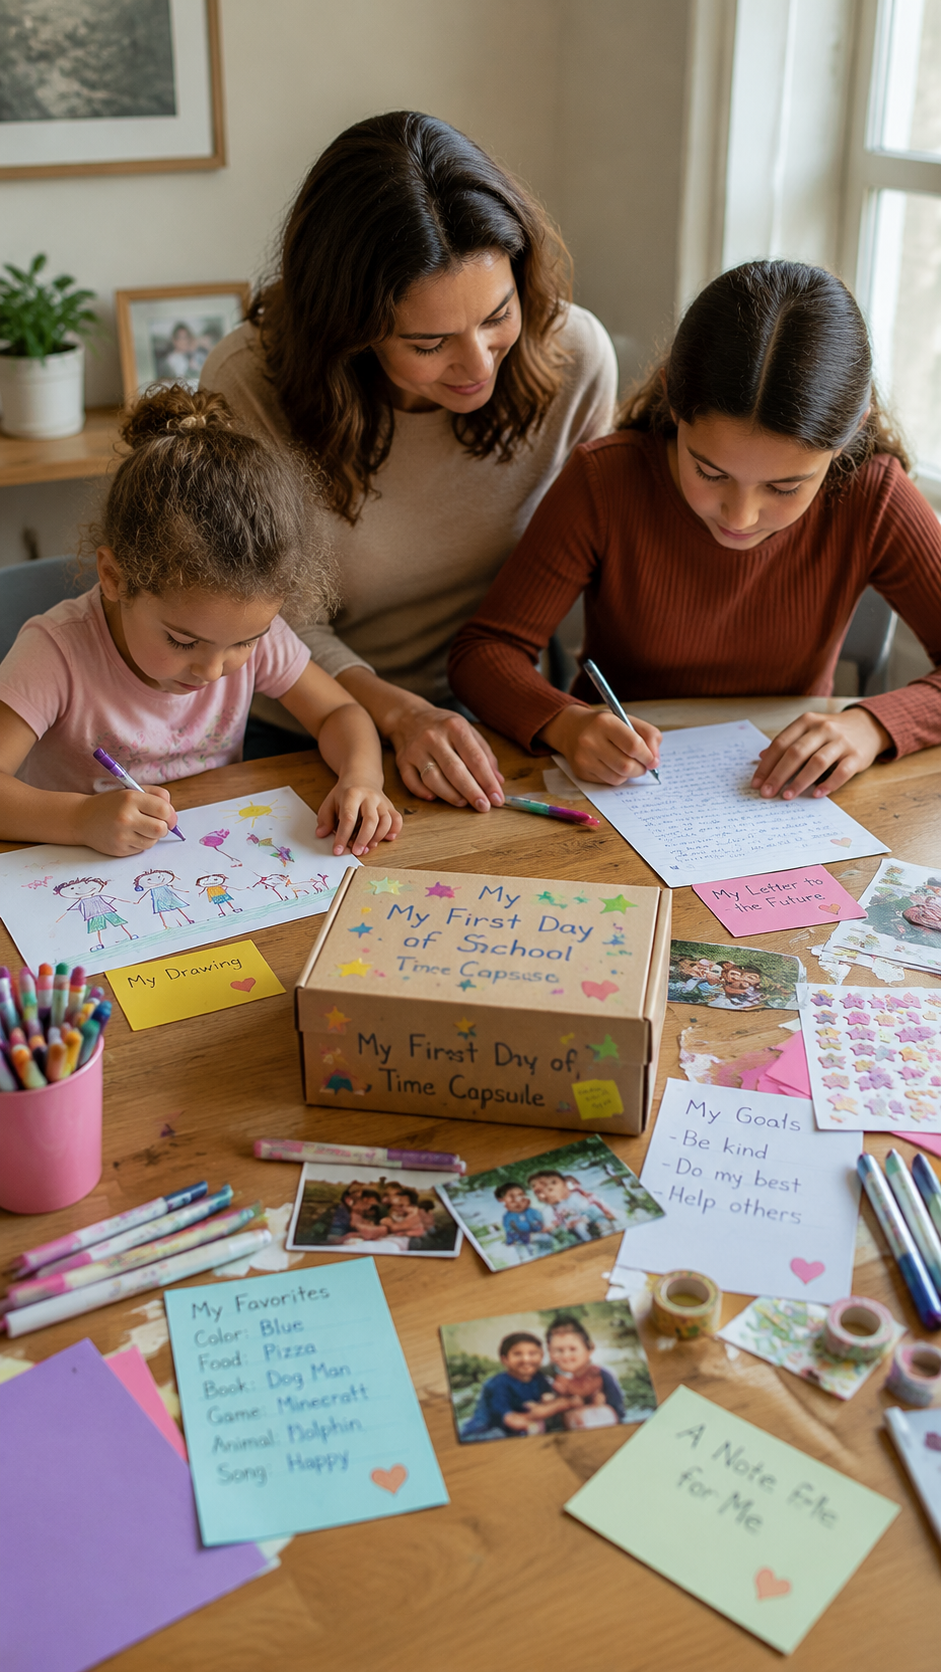
The prompts should give your child room to participate in a way that suits their age and abilities, rather than making the time capsule feel like another school assignment.
Younger children can contribute through drawings, photographs, handprints and answers they dictate while you write them down.
Children who are comfortable writing can complete a few questions themselves, add a handwriting sample and make predictions about the school year.
Older children may enjoy adding a short note to their future selves, recording a personal goal, describing their current interests or writing about something they are wondering about as the new school year begins.
The aim is to capture how your child thinks, expresses themselves and sees the world at this particular point in time.
The finished capsule does not need to look the same for every child. A five-year-old’s drawing can be just as revealing later as a ten-year-old’s written reflection.
Give the Capsule an Opening Date

Decide when the first-day-of-school time capsule will be opened before you put it away.
The end of the school year is a natural choice because your child will have had enough time to experience new routines, learn new things and develop new interests.
Write the opening date on the capsule itself so there is no guessing later. You can also add it to your calendar, especially if the capsule is going to be stored somewhere out of sight.
The date does not have to be the exact last day of school. Choose a day when you can sit with your child, open it together and take time to compare the answers, drawings, photograph and other keepsakes with who they are now.
That final comparison is what gives the first-day-of-school time capsule its purpose: your child gets to see the distance between who they were at the beginning of the year and who they became along the way.
What Not to Put in a First-Day-of-School Time Capsule
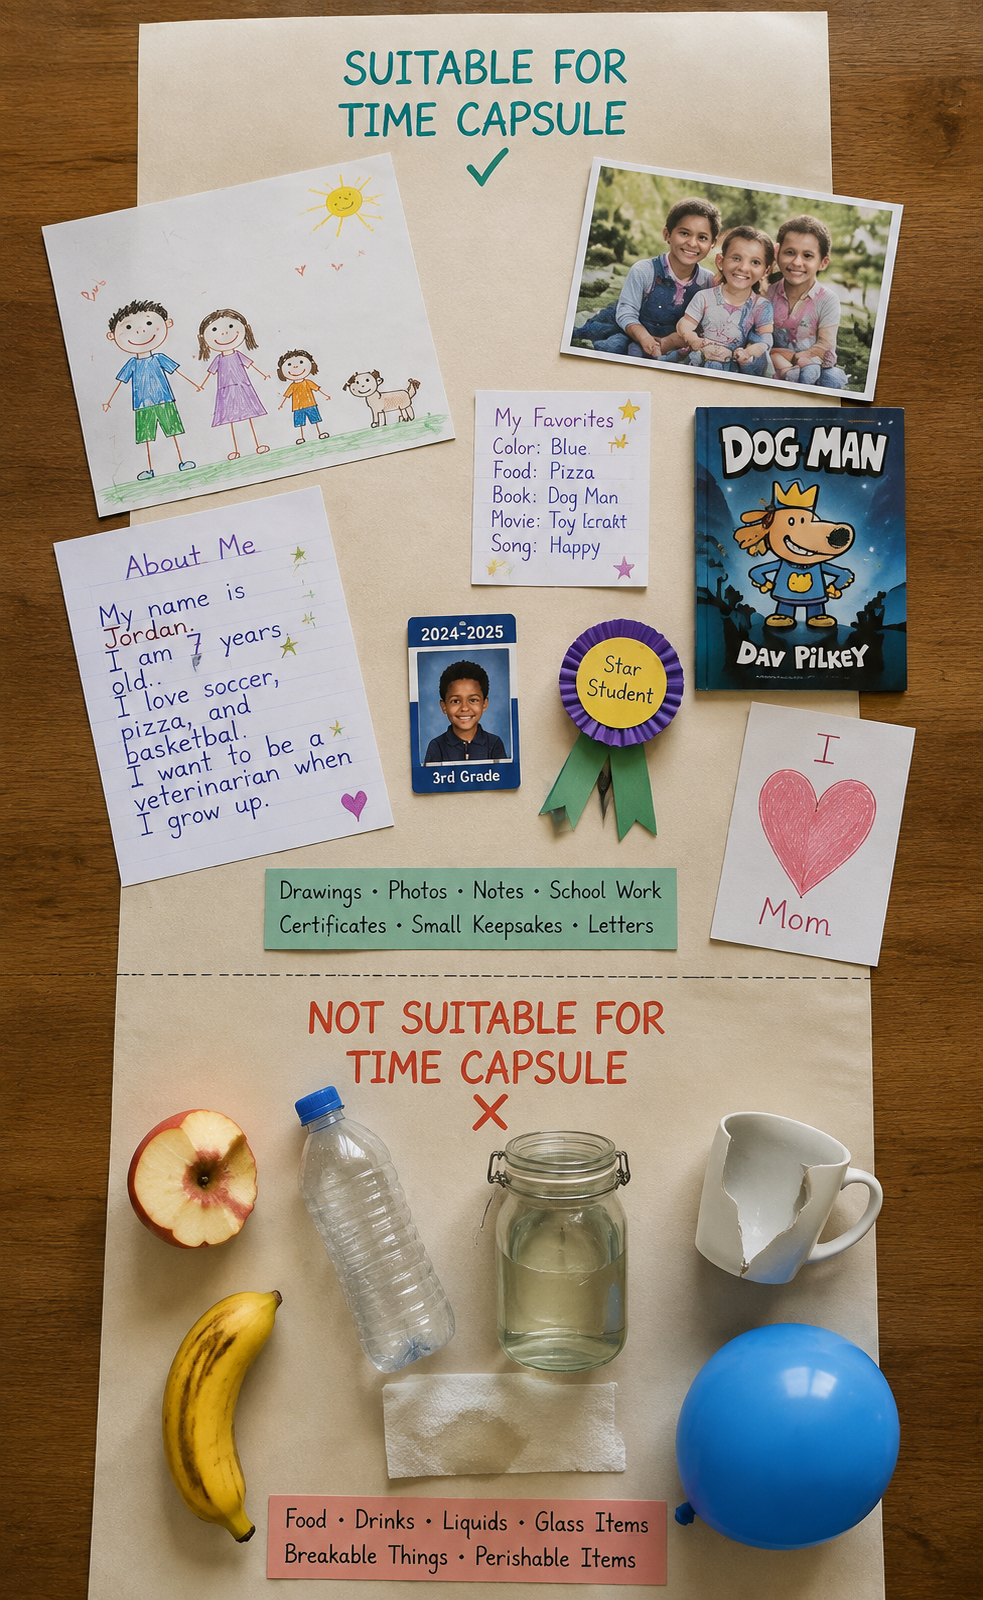
A first-day-of-school time capsule does not need to hold everything your child happens to love that day. Some things may seem like good memories now but will not store well for several months.
Food is an obvious example. A snack, piece of birthday cake or other perishable item can spoil and affect everything around it.
Liquids can leak, and damp paper or artwork can develop mould inside a closed container. Anything you put inside should be clean and completely dry before the capsule is sealed.
Be careful with small objects that can scratch, stain or damage photographs and paper. If your child wants to preserve something bulky or delicate, taking a photograph of it can be a better way to include the memory without trying to store the actual object.
This is also not the place for something genuinely valuable or irreplaceable. A favourite toy may have sentimental meaning, but if losing or damaging it would be upsetting, photograph it instead and let the photograph represent that part of the story.
Think of the capsule as a record of this moment, rather than a container for everything from it. The best contents are the things that will still make sense when your child opens the box months later.
And when you need more ideas to keep children occupied indoors, especially when school is out or the weather changes your plans, Indoor Activities for Kids on Rainy Days That Actually Keep Them Busy has plenty to choose from.
Conclusion
A school year can change a child in ways that are easy to miss while everything is happening. Interests shift, handwriting changes, new skills appear, and some of the things that mattered at the beginning quietly become part of the past.
Making a first-day-of-school time capsule gives you a simple way to save a small piece of that beginning. Keep it personal, let your child have a say in what goes inside, and choose an opening date you can look forward to together.
Gather a box and make yours before the school year begins. Months from now, opening it may be one of the nicest ways to see just how much has changed.