Forgotten supplies can slow down a sales day. Find out what to bring to a Christmas craft fair so your handmade stall is ready for customers.
Packing for a craft fair sounds easy. You gather your products, load the car and go.
But the things that cause the most trouble are often not the products. They are the tent that needs securing, the card reader left at home, or the permit the organiser asks to see.
When deciding what to bring to a Christmas craft fair, split your list into two groups: what you sell and what allows you to sell it.
Holiday fairs add another consideration: how much stock to bring without overcrowding your display or taking more than you can reasonably sell.
This checklist covers the supplies, equipment and documents to prepare, in the order you will need them, so you can focus on serving customers instead of fixing avoidable problems.
Put pinecones, twigs, and other winter finds to good use with these 12 Christmas Nature Crafts for the Kids Who Keep Bringing Pinecones and Winter Finds Home.
Check What the Christmas Craft Fair Provides Before Packing
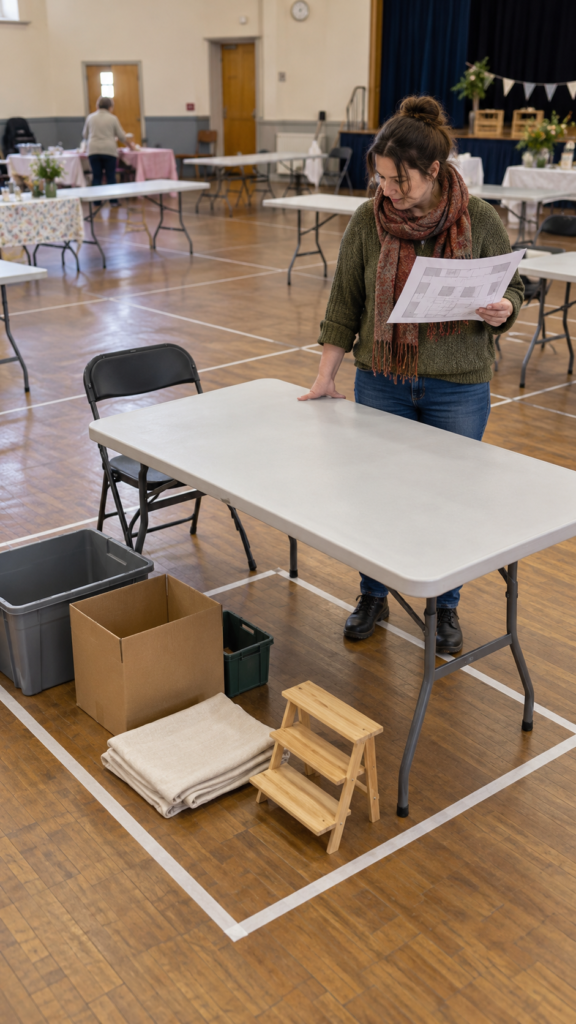
Before buying storage boxes, folding tables or display stands, read the vendor instructions or contact the organiser. Some fairs provide tables and chairs, while others give sellers only a marked space to set up.
Knowing the difference can save you money, reduce what you need to transport and prevent problems when you arrive.
Confirm Your Stall Size and Included Equipment
Check the details of your booking before deciding what to bring. A table that fits comfortably in your workspace at home may leave little room for customers once it is inside a smaller market stall.
Confirm these details with the organiser:
- Stall dimensions: Find out the width and depth of your allocated space, along with any height restrictions for shelves, signs or display stands.
- Furniture and shelter: Ask whether tables, chairs and canopies are included or whether you must supply your own.
- Electricity: Check whether power is available, whether you need to request it in advance and whether the venue permits your equipment.
- Arrival and setup: Confirm when vendors can unload, when the stall must be ready and where vehicles can stop during unloading.
- Storage and security: Ask whether you can leave stock or display equipment at the venue overnight. Do not assume your stall will be secure after closing.
- Documents and rules: Check whether the organiser requires proof of insurance, a trading permit or other paperwork. These requirements vary by location, event and product type.
Keep the confirmation email, site plan and any vendor instructions together in a folder on your phone. A printed copy in a document wallet is useful if your phone battery runs low or you need to show the organiser a particular detail quickly.
Separate Essential Equipment From Optional Purchases
The equipment you need depends on the space and facilities provided. An indoor fair with a supplied table may require little more than a table covering, product displays and price signs.
An outdoor market where vendors provide their own setup may require a suitable canopy, secure weights and weather-resistant storage.
Before purchasing anything, make three lists:
- Provided by the organiser: Items you have confirmed will be available, such as a table or chair.
- Required for your stall: Equipment you must supply to display and sell your products properly.
- Optional extras: Items that could improve the display but are not necessary for this event.
For an outdoor stall, check the organiser’s rules for securing canopies and displays. Use equipment suitable for the canopy and expected conditions; do not rely on lightweight table clips or improvised weights to secure a tent.
This check is particularly useful if you are attending your first Christmas craft fair. You can spend your budget on the supplies you genuinely need instead of buying bulky equipment that the venue already provides.
Pack Your Christmas Products for Display, Not Just Transport

Getting your handmade products to the venue is only half the job. They also need to arrive in a condition that allows you to display them neatly, explain their value and sell them without unnecessary handling or last-minute repairs.
Bring Sale-Ready Products and a Small Repair Kit
Inspect your stock before packing it. Check seams, fasteners, loose threads, labels and other details that matter to the quality of each item. Protect delicate decorations and keep products clean during transport.
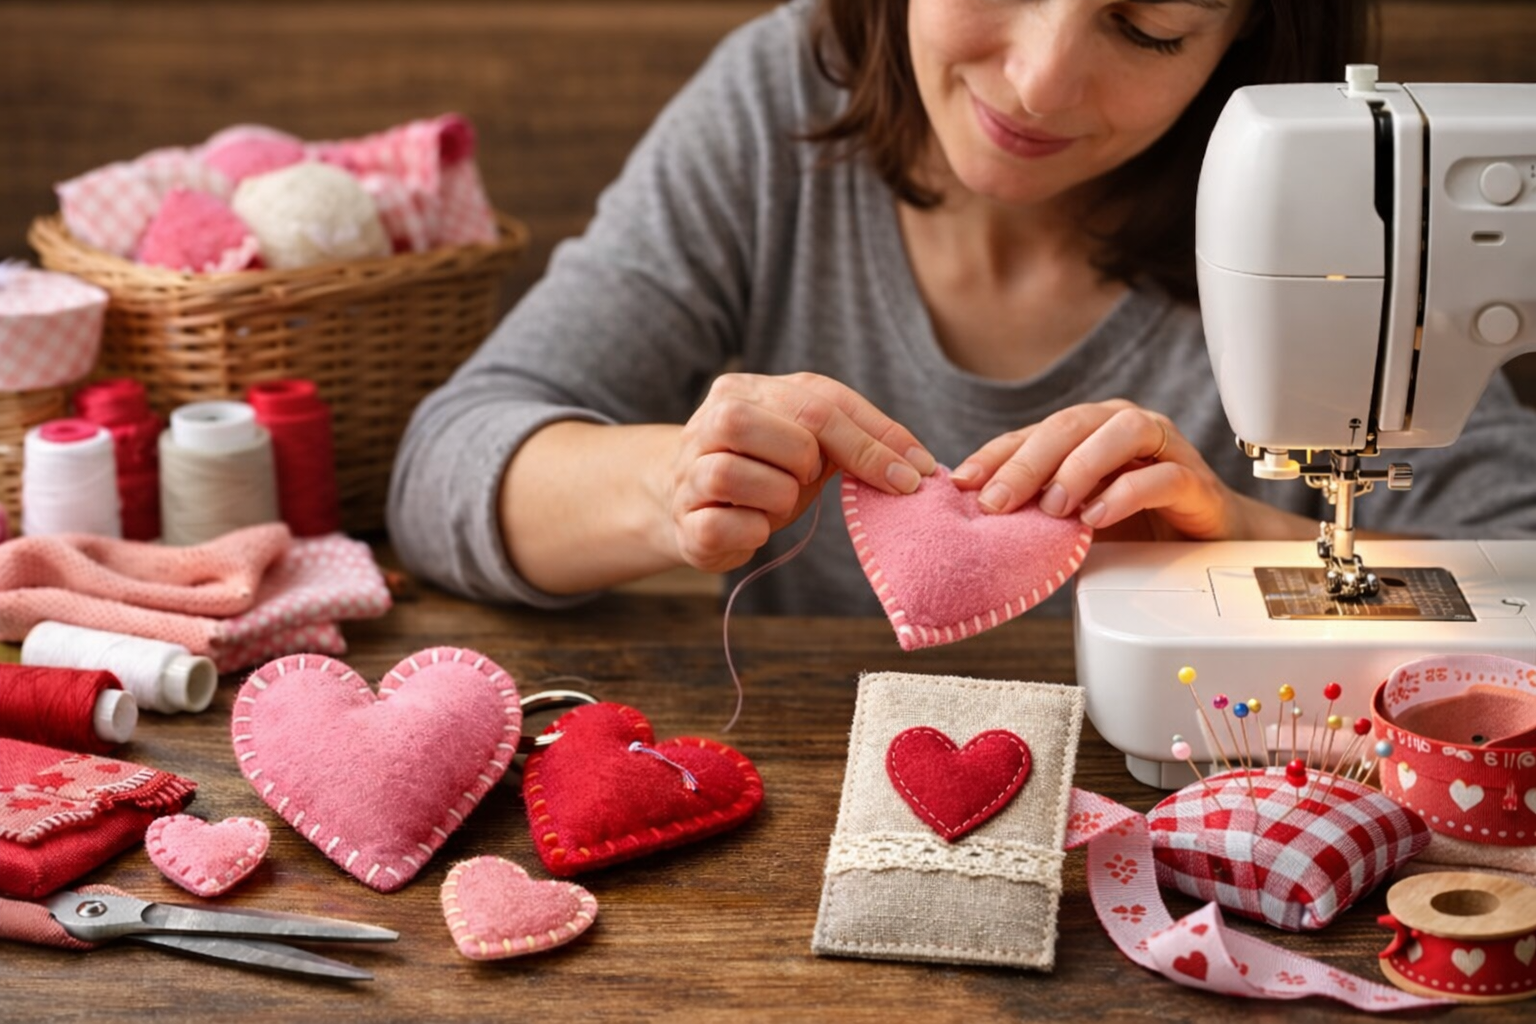
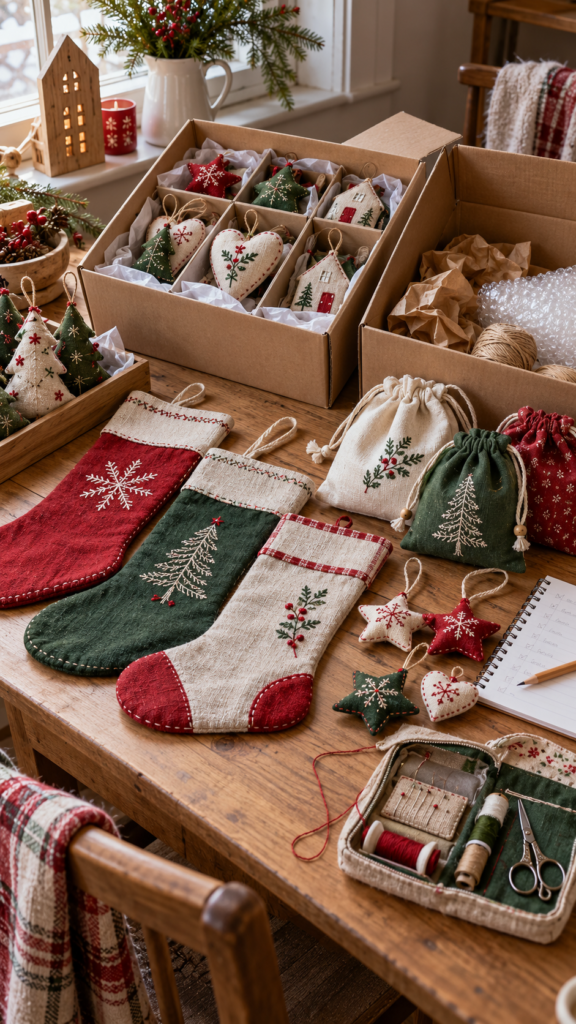
Your repair kit should match what you make rather than contain tools you are unlikely to use. For example, a seller bringing sewn Christmas stockings, fabric ornaments or reusable gift bags might pack:
- Matching thread and a few spare buttons or fasteners, where relevant.
- Small scissors for loose threads and packaging.
- A lint roller for removing loose fibres from suitable fabric products.
- A few basic repair supplies for minor problems that can be fixed safely at the stall.
Keep the repair kit separate from finished stock so tools do not scratch, stain or damage the products. Items that need substantial repairs should stay out of the sale-ready boxes until they have been properly fixed.
Prepare a Stock List That Matches the Products in Your Boxes
A stock list helps you check what you packed, identify what sells and account for what remains after the fair. It becomes especially useful when you bring several designs, colours or sizes that look similar.
Record each product name, design or size, quantity and selling price. Give storage boxes simple labels, such as fabric ornaments, Christmas stockings or gift bags, and make sure those labels match your inventory list.
Keep a copy on your phone or on paper, with space to record sales and remaining quantities. If you sell several variations of one product, record them separately where their prices or stock levels differ.
This does not need to be complicated. A basic spreadsheet or notebook is enough for a small stall. The important part is being able to tell which items sold, which came home and what you may want to make again for the next event.
Bring a Display Sample When a Product Needs Explaining
Some handmade products make more sense when customers can see how they are used. A small demonstration can answer questions without requiring you to explain every item individually.
For example, place a few lightweight gift items inside a fabric basket to show its capacity, or display a reusable fabric gift bag around a box so customers can understand its size.
If a product has several uses, a small sign can explain them without taking up valuable display space.
Choose examples that fit your stall and can be handled without damaging the sale stock. You do not need a separate sample of every item; prioritise products whose size, function or construction may not be obvious at first glance.
For delicate or easily damaged pieces, use a photograph or a clearly written sign instead of encouraging customers to handle the item. This allows you to explain the product while keeping the display tidy and the merchandise in good condition.
For a thoughtful present that will not take up valuable space, see these Christmas Gifts for Someone in a Nursing Home With No Room for Anything: 21 Gifts That Don’t Add Clutter.
Make Prices and Payment Ready Before the First Customer Arrives
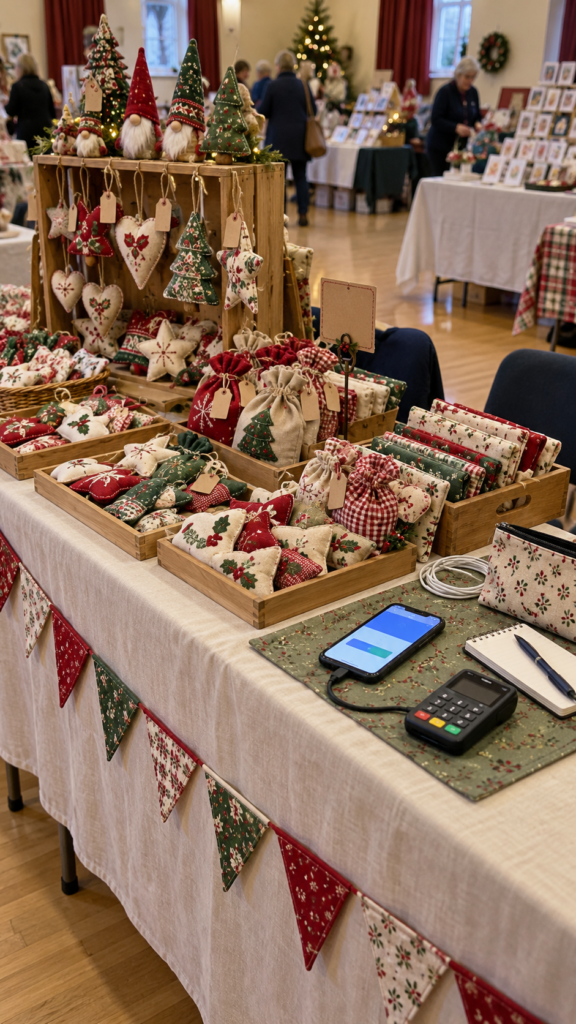
A customer may like your handmade item but hesitate when the price is missing or they cannot tell how to pay.
Preparing your prices and payment options before the fair helps customers make decisions and keeps you from searching for labels, checking prices or sorting out a payment while someone is waiting.
Pack Visible Price Labels and Signs
Price every item before packing your stock. When products come in different sizes, colours or designs, check that each price matches the correct item. This is particularly helpful when several similar products are displayed together.
Prepare these supplies:
- Price tags and spare labels: Use tags, stickers or small cards that suit your products. Bring a marker or pen in case a label needs replacing.
- A clear price sign: For groups of similar items, one sign can show the price for the whole group, provided the items are easy to identify.
- A bundle sign: If you plan to offer a set price, write the exact offer before the fair. For example, a seller might display “Three fabric ornaments for [price]” beside the relevant products. Make sure the offer is profitable and the individual prices are clear too.
- A stable display: Use a small sign holder, a suitable stand or another method that keeps signs upright. Check the view from the customer’s side of the stall, not just from behind the table.
Keep the wording brief enough to read while browsing. You do not need a sign for every detail, but customers should be able to find a product’s price without asking about every item. A consistent style also makes the display easier to follow.
Test Your Payment Setup and Bring a Backup
Decide how customers can pay before the event, based on the payment methods available to you and commonly used by shoppers in your area.
Cash, bank transfers, mobile payments and card payments are not equally convenient or available everywhere, so avoid choosing a service simply because another seller uses it.
If you use a phone, tablet or card reader to accept payments, check the following before leaving home:
- Charge each device and pack its compatible charging cable.
- Bring a power bank if your device can be charged from one. Check that its capacity and connections suit your equipment.
- Test the payment app or reader and confirm that your account is ready to receive payments.
- Check transaction fees and when the money will reach your account, particularly if this is your first time using the service.
- Find out whether the venue has reliable mobile signal, Wi-Fi or electrical outlets. Do not assume that power or internet access will be available at your stall.
Some payment systems support offline transactions, while others require a connection. Check the rules of your particular provider before relying on offline payments; a failed or delayed transaction can create problems if you assume the money has already been received.
If you accept cash, prepare change in denominations that make sense for your prices and local currency. Keep it secure and separate from your personal money.
There is no single amount that suits every seller: the right starting float depends on your prices, expected sales and whether customers are likely to pay with larger notes.
It is also worth displaying a small sign showing the payment methods you accept. Customers can then decide whether they can buy from you without having to interrupt you while you are helping someone else.
Keep Order and Sales Records Together
A busy stall can make it easy to forget which items sold, which customer requested a particular design or whether you promised to finish a custom order after the fair. A notebook, printed sales sheet or suitable sales app can help you keep these details organised.
Record the information you need for each transaction, such as the item sold, quantity, amount paid and payment method.
For a custom order, record the agreed design, size or other specifications, price, deposit if applicable, and expected completion or collection date.
Keep custom orders separate from ordinary sales in your notes. This makes it easier to see which products sold on the day and which work still needs to be completed afterwards.
If you take customer details for an order, collect only what you need to fulfil it. Store names, contact details and order information securely, and do not leave the notebook or device open where other shoppers can read it. Explain how you will contact the customer and avoid promising a completion date you cannot meet.
After the fair, use your records to count the money received, compare sales with the stock you brought and note which products need replenishing. You will have a more useful picture of how the event went than you would from remembering which table items seemed popular.
Pack the Small Tools That Prevent Setup Problems
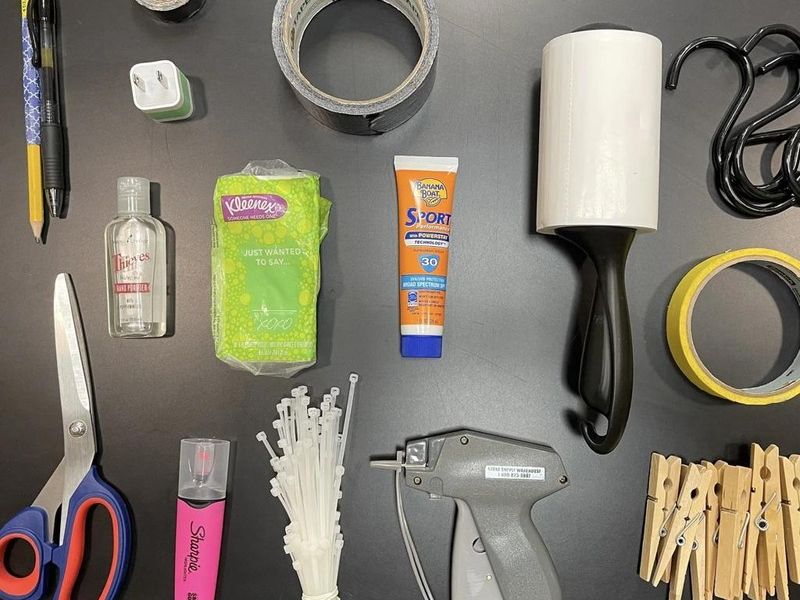
Photo credit: @ Valleymademarket.com
Small setup problems can take up time when customers are already arriving. A sign may keep falling over, a display stand may need tightening, or a loose thread may become noticeable just before opening.
Packing a few useful tools can help you fix these issues without disturbing your stock.
When deciding what to bring to a Christmas craft fair, choose tools that match your products and display. You do not need everything on this list.
| Item | Why You Need It |
| Scissors | Trim ribbon, packaging material or loose threads. |
| Removable tape | Hold lightweight signs or temporary labels in place where permitted. Test it first to avoid damaging surfaces. |
| Cable ties or reusable fasteners | Attach compatible display parts or secure suitable signs. |
| Tablecloth clips | Help keep your table covering in place. |
| Small screwdriver or hex key | Assemble or tighten display stands that use matching screws or fasteners. |
| Spare pens and labels | Replace missing price tags or correct product labels during the fair. |
| Small rubbish bags | Collect scraps of ribbon, label backing and other waste to keep your stall tidy. |
Choose Tools That Match Your Setup
Your packing kit depends on what you are selling and how your stall will be arranged. If the organiser provides a table and your products need little setup, scissors, spare labels and a pen may be enough.
If you bring shelves or display stands that require assembly, check which tools they need before leaving home.
Setting up your display at home first can help you identify loose fittings, awkward signs or parts that need tightening. Keep the tools you need together in a small pouch or labelled box so you can find them quickly during setup.
For an outdoor fair, check the organiser’s requirements for canopies, weights and weather protection. Use a suitable securing system for the expected conditions.
Tablecloth clips and a few cable ties are not substitutes for properly securing a canopy.
Complete the holiday menu with something sweet from these 10 Showstopping Christmas Desserts to Make This Holiday Season.
Protect Handmade Stock From Christmas Weather and Handling
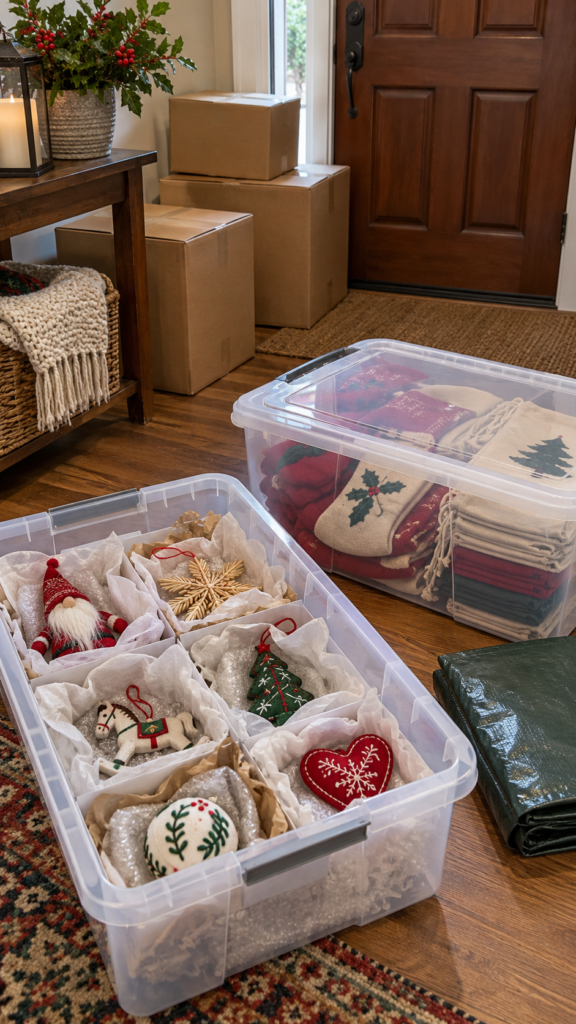
Handmade products can get damaged before the fair begins if they shift around in the car, get damp or are packed under heavier items. The packaging you choose should suit the product, not just the size of the box.
Choose Packaging According to the Products
Use containers and wrapping that protect your stock during transport and make it easy to unpack at the stall.
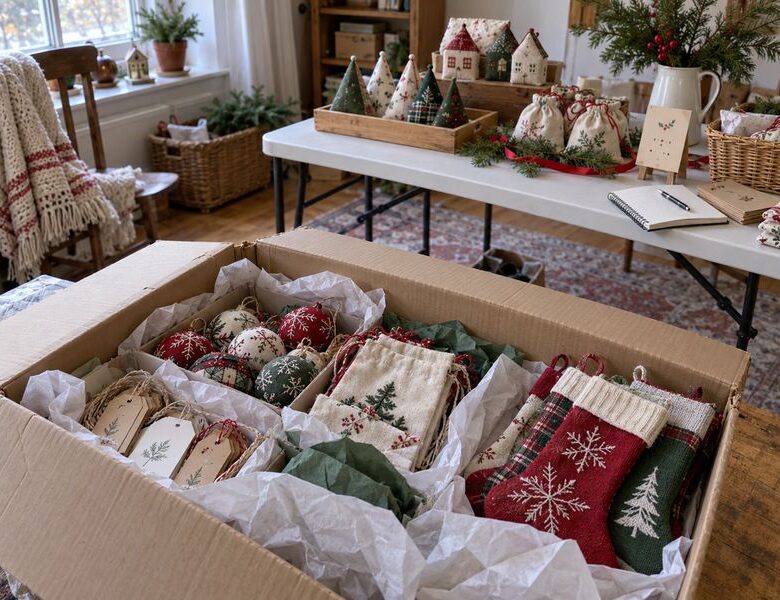
- Fragile ornaments: Place each ornament in a small compartment or wrap it individually in tissue paper or suitable protective material. Put the wrapped pieces in a rigid box and fill empty spaces with padding so they cannot knock against one another. Avoid stacking heavy boxes on top.
- Fabric stockings, reusable gift bags and sewn decorations: Fold them neatly and pack them in clean, dry storage bags or lidded containers. Keep pale fabrics separate from dark or unwashed materials that might transfer colour. A lint roller can help remove loose fibres before display.
- Paper crafts and flat decorations: Place them between rigid boards or inside a flat document box to prevent bending. Keep them away from drinks, damp surfaces and products that could stain them.
- Gift boxes, tags and paper bags: Stack boxes neatly and place paper bags and tags in a separate clean container. Do not put them at the bottom of a box beneath heavy products, where they may become crushed.
- Painted or glittered items: Allow finishes to dry fully before packing. Use separators between pieces so paint, glitter or other surface details do not rub onto neighbouring products.
Label each container with its contents and, where necessary, mark fragile boxes. Keep the items you will display first near the top so you do not have to unpack everything at the venue.
Prepare Differently for Indoor and Outdoor Fairs
For outdoor fairs, use lidded plastic storage containers to transport stock and keep spare products inside them until needed.
If rain is possible, carry a waterproof cover large enough to protect your stock boxes and a separate cover for the display when it is not in use. Secure covers so they cannot blow away, and never leave fabric or paper products exposed beneath a loose sheet that can collect water.
Keep boxes off wet ground by placing them on a suitable raised surface or dry platform. If you use a table, store spare stock underneath only when the space is dry and the containers are protected from splashes.
Check the organiser’s rules before bringing your own canopy, weights or other outdoor equipment, and use a suitable system to secure any permitted canopy.
Wind needs attention too. Use stable sign holders, secure lightweight display pieces appropriately and avoid placing delicate products near the edge of the table. If conditions become unsafe, follow the organiser’s instructions rather than trying to save the display in strong winds.
For indoor fairs, pack stock in clean containers and keep spare products covered until you need them. Store boxes where customers will not trip over them, and avoid placing handmade items close to drinks, food samples or other sources of spills.
Ask the organiser about storage space, electrical equipment and permitted lighting before the event.
If the fair is outdoors in cold or wet weather, bring clothing and footwear suited to the forecast. Keep a dry pair of socks or an extra layer in your personal bag if you expect to be outside for hours.
Christmas fairs are not all held in cold climates, so prepare for the actual location and venue rather than the season alone.
Pack the Customer-Ready Finishing Supplies
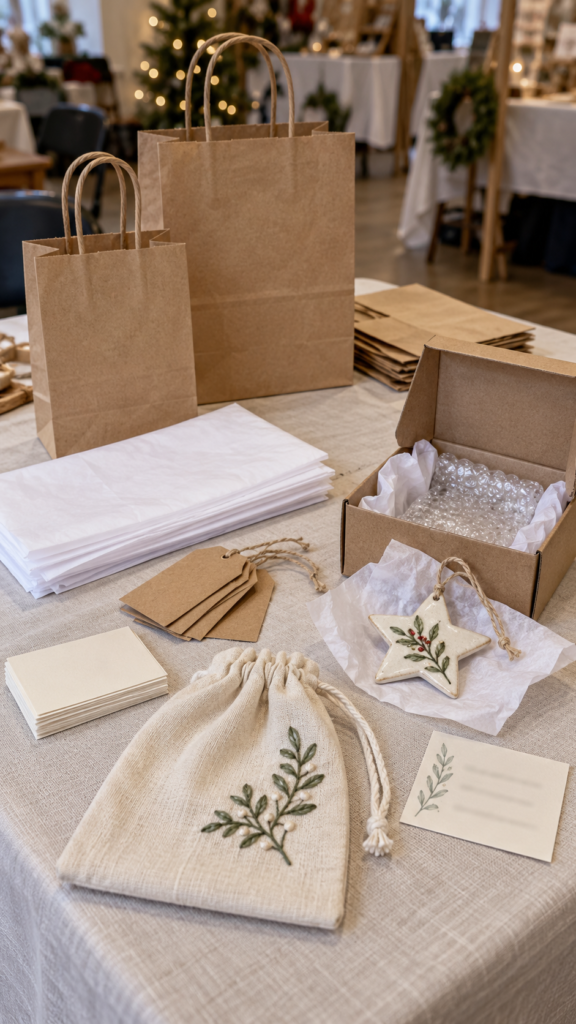
Once a customer has chosen an item and paid, you need a practical way to hand it over. A fabric gift bag may only need a paper bag, while a fragile decoration needs wrapping that prevents it from breaking on the journey home.
Preparing these supplies in advance helps you pack purchases without leaving customers waiting.
When deciding what to bring to a Christmas craft fair, focus on the finishing supplies that suit your products.
Prepare Packaging That Fits What You Sell
You do not need a separate gift box for every item. Choose packaging that protects the product, makes it easy to carry and does not take too much out of your profit.
- Gift bags and tissue paper: Bring a few sizes to accommodate the products you sell. A small ornament may fit in a paper gift bag, while a larger sewn item may need a wider bag. Test the fit before the event so handles do not strain and products are not squeezed inside.
- Protective wrapping: Keep suitable tissue, paper padding or bubble wrap available for fragile purchases. Wrap delicate items individually and use a sturdy box when a bag alone will not prevent damage. For items with painted or easily scratched surfaces, check that the wrapping will not mark the finish.
- Packaging for sewn products: Fold stockings, fabric ornaments, reusable gift bags and similar items neatly. A paper belly band, clean bag or simple product tag may be enough to keep the item tidy. Use a larger bag if the product needs to remain folded loosely rather than being compressed.
- Spare packaging: Bring a few extra bags, tags and sheets of wrapping material, based on your expected stock and likely sales. Keep them together in a clean box or under the table so they remain ready to use.
If your products are already packaged for display, check whether the packaging can also be used for the customer’s purchase. This can save space and avoid unnecessary double-wrapping.
Add Care Instructions Where They Are Useful
Care labels or small instruction cards can help customers look after handmade products correctly. They are particularly useful for sewn goods, knitted accessories and fabric decorations that may need specific washing or handling.
For example, a fabric item might need a cold wash, gentle handling or air-drying, depending on its materials and construction. Do not recommend machine washing simply because the item is made from fabric. Thread, interfacing, embellishments, dyes and attached decorations may respond differently to water or heat.
Before printing care cards, check the materials and, where appropriate, test the recommended cleaning method on a sample. Give instructions you can support, such as “Spot clean gently” or “Air-dry,” only when they are suitable for that particular item.
Attach a small tag to the product or place an instruction card inside its packaging. If you sell textile products, check the labelling rules that apply in your selling location and product category.
For example, US care-labelling rules cover certain apparel and textile products, while UK textile rules address fibre-content labelling. Requirements vary, so a handmade seller should not assume that a care card replaces any legally required label.
Keep Custom Orders and Customer Details Organised
A customer may ask for a different fabric, a particular colour, a personalised name or an item that is too large to take home that day. Bring a notebook, order pad or suitable digital record so you can capture the request accurately.
For each order, record:
- The customer’s name or agreed identifier and contact details needed to fulfil the order.
- The product, size, colour, personalisation or other agreed specifications.
- The total price, any deposit paid and the remaining balance.
- The agreed completion date and whether the item will be collected, delivered or posted.
Read the details back to the customer before confirming the order. This gives both of you a chance to correct a spelling mistake, confirm the colour or agree on the collection arrangement. Keep customer information secure and collect only the details you need.
Bring a Simple Way for Customers to Find You Again
Business cards, a small printed contact card or a QR code can help customers find your shop after the fair. You do not need all three. Choose one option that suits how you sell.
If you use a QR code, test it with a phone before printing and make sure it opens the correct shop page or business profile. Include a short written web address as a backup for customers who cannot scan it. Check the event’s rules before displaying promotional material or placing cards on shared tables.
Keep these items beside your packaging supplies so you can include one with a purchase when appropriate.
A contact card is particularly useful when a customer asks about a product you have sold out of or wants to order a different size later.
Bring the Personal Essentials for a Long Selling Day
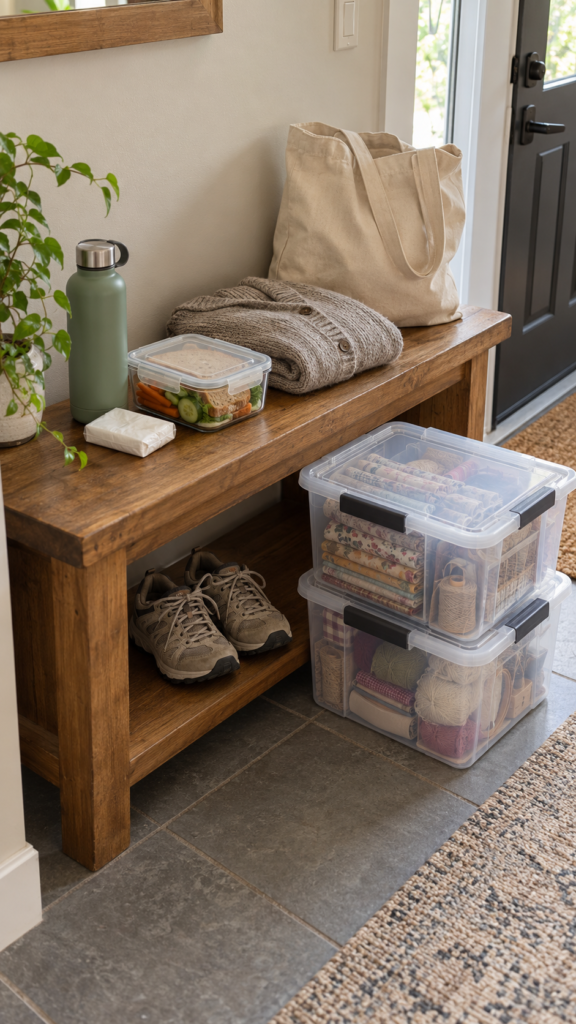
When deciding what to bring to a Christmas craft fair, remember the few personal items that will help you manage the day comfortably.
You may spend several hours standing, talking to customers and handling purchases, with limited time to leave your stall.
- Water and food: Bring drinking water and a meal or snacks suited to the length of the event. Check whether food is available nearby and whether the organiser allows sellers to eat at their stalls.
- Comfortable footwear and suitable clothing: Choose shoes you can stand in for several hours. For outdoor events, check the forecast and dress for the actual conditions.
- Personal medication: Pack any medication you may need during the event.
- Hand wipes and tissues: Keep a small supply handy for cleaning your hands or dealing with minor spills.
- A chair or cushion: Bring one if you expect to sit during quieter periods, but confirm that seating is permitted and will fit within your stall space.
Check the event hours and facilities before packing. A short indoor fair with seating provided will require less preparation than a full-day outdoor event.
What to Record After the Fair
Once the fair ends, it’s tempting to pack up, go home and rest. But a few notes taken now will tell you what to bring next time.
One craft fair source says the first ten minutes after a show are worth more than most sellers realize, because that’s when the details are still fresh. Write them down before you leave, or at least the same evening.
What to Write Down
Keep it simple. A notebook page or a phone note works. For each fair, record:
- What you brought and what you sold. Count each item, so you can see what moved and what came home. One guide lists best and worst sellers, revenue per item and profit per item as things to track.
- What the fair cost you. Add the booth fee, supplies and travel. Profit means your sales minus your expenses, and that is a different number from your total sales.
- Your hours. Count the time you spent preparing, selling and packing up, but leave out the time spent making products. This shows whether the fair was worth your day.
- Items per sale. Tracking what each customer bought shows whether shoppers buy one item or several. If most buy one, a small add-on near the till may help.
- Price points that worked. Note which prices sold quickly and which items people picked up and put back.
- Questions customers asked. If several people ask what an item is for, how big it is or whether it comes in another colour, put the answer on a sign next time.
Don’t Treat One Fair as the Rule
Each fair has a different crowd. What sold out at one craft show may not be as popular at the next. Compare notes across several fairs before you decide to drop an item or make more of it.
Check Your Leftover Stock
It’s rare to leave a fair with no stock left. Count what’s left, decide what goes to your next fair, and note any materials you need to reorder.
Follow Up With Shoppers
Many people who didn’t buy will look you up afterwards. Many shoppers who didn’t buy check the seller’s online store and social media in the days after a fair. Make sure your links are ready, and if you collected emails, send a short thank-you message.
Conclusion
A forgotten price tag or unsuitable box can cause more trouble than you expect on a busy selling day. Knowing what to bring to a Christmas craft fair starts with checking what the organiser provides, preparing your products for display and making sure customers can pay and take their purchases home safely.
Before packing the car, go through your checklist and tick off each item as it goes into its box. Leave a little room for the unexpected, too. Once the fair is over, note what you used, what you missed and what you brought home untouched. Those small observations will make your next craft fair easier to prepare for.
Have a Christmas craft fair coming up? Review your checklist before packing, then adjust it to suit your products, venue and selling arrangements.
FAQS
-
What should a first-time seller bring to a Christmas craft fair?
Start with the products, price labels, payment setup, packaging and any equipment the organiser does not provide. Then add the tools and personal supplies needed for your particular stall.
-
How should handmade items be packed for a craft fair?
Use packaging suited to each product. Protect fragile decorations from impact, keep textiles clean and dry, and separate products that could scratch, crush or stain one another.
-
Do I need to bring my own table to a Christmas craft fair?
Not always. Check your vendor agreement because some events supply tables and chairs, while others provide only the stall space.
-
How much stock should I bring to a Christmas craft fair?
There is no reliable quantity for every seller. Consider the length of the event, your production capacity, previous sales at comparable fairs, the available display space and the cost of bringing unsold stock home.
-
Should I bring a card reader to a craft fair?
A card reader can give customers another payment option, but the best setup depends on local payment habits and the services available to your business. Confirm your payment method works and bring a suitable backup.