If finding the right sparkly clutch feels impossible, this DIY Sequin Clutch tutorial walks you through making one yourself, step by step.
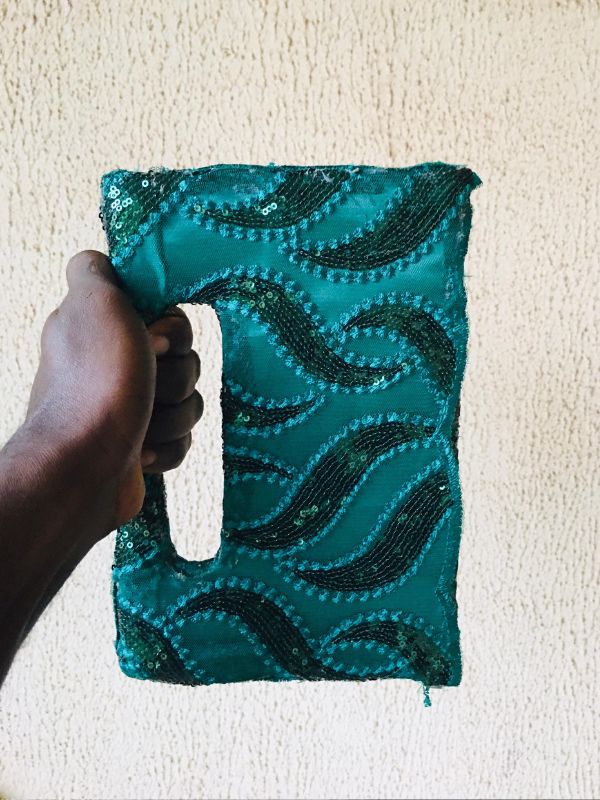
I made this clutch myself because I couldn’t find a party handbag that was affordable, sparkly, and matched the theme of the party in my closet.
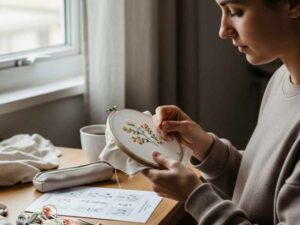
I wanted something I could finish in an afternoon, wear right away, and not feel guilty spending too much. After some trial-and-error with sequins, and a couple of small adjustments here and there, I figured out a method that’s simple, reliable, and looks polished, all without needing fancy tools or expensive materials.
This tutorial isn’t about perfection , it’s about giving you a step-by-step guide to create something you’ll actually love using with materials you can easily find.
By the time you’re done, you’ll have a clutch that’s fancy, sparkly, and totally usable, and you might even enjoy the process as much as I did.
Know that you don’t need to be a crafting expert , this DIY Sequin Clutch is beginner-friendly and something anyone can make and finish in just a few minutes.
This DIY Sequin Clutch Tutorial is beginner-friendly, and DIY Projects for People Who Don’t Feel Crafty at All shares even more simple ideas that build confidence without overwhelm.
What You’ll Learn in This DIY Sequin Clutch Tutorial
In this post, I’ll walk you through:
-
✔ The exact materials I used (and what each one does)
-
✔ How to build a strong clutch base that actually holds its shape
-
✔ The right way to attach lace so it looks neat and doesn’t fray
-
✔ How to line the inside for a clean, professional finish
-
✔ Simple stitching tips to make your clutch durable
-
✔ Common mistakes beginners make — and how to avoid them
-
✔ Easy ways to personalize your clutch to match any outfit or theme
By the end, you’ll know exactly how to create a sparkly, structured clutch that looks polished and is ready to use.
This clutch is easy to complete in short sessions, just like the projects featured in Spring DIY Projects You Can Start, Stop, and Pick Up Again Without Losing Progress.
Materials You’ll Actually Need
Here’s everything I used to make my DIY Sequin Clutch, along with why each item matters:
-
Lace (for exterior texture) – This gives the clutch a pretty, sparkly look and adds visual interest. You can choose lace with small patterns or sequins for extra sparkle.
-
Cane (for structure) – Thin cane strips help the clutch keep its shape and stay sturdy, so it doesn’t flop over when you hold it.
-
Carton (base for clutch) – Acts as the foundation of the bag. It’s lightweight but strong enough to hold the shape of the clutch and support the exterior materials.
-
Needle & Thread – Essential for stitching the lining and attaching fabric securely. It keeps everything neat and ensures durability.
-
Scissors – To cut fabric, lace, and carton to the right size. Sharp scissors make your edges clean and professional-looking.
-
Candle (for sealing lace edges) – A small flame gently melts or seals lace edges to prevent fraying and keeps your clutch looking polished.
-
Craft Gum/Glue – Used to attach lace, lining, and decorative pieces to the clutch. A strong, fast-drying glue ensures everything stays in place.
-
Dull-faced/lining fabric (for the interior) – This fabric lines the inside of the clutch, hides raw edges, and gives a clean, finished look. It also prevents sequins or lace from scratching your hands or belongings.
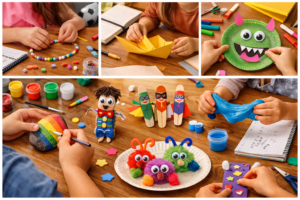
You might also love these 13 Popsicle Stick Crafts for Kids That Actually Keep Them Busy and Boosts Creativity, especially when you need quick, creative ideas that don’t require much setup.
Step-by-Step Tutorial: How to Make Your DIY Sequin Clutch
Step 1: Cut the Base (Carton)
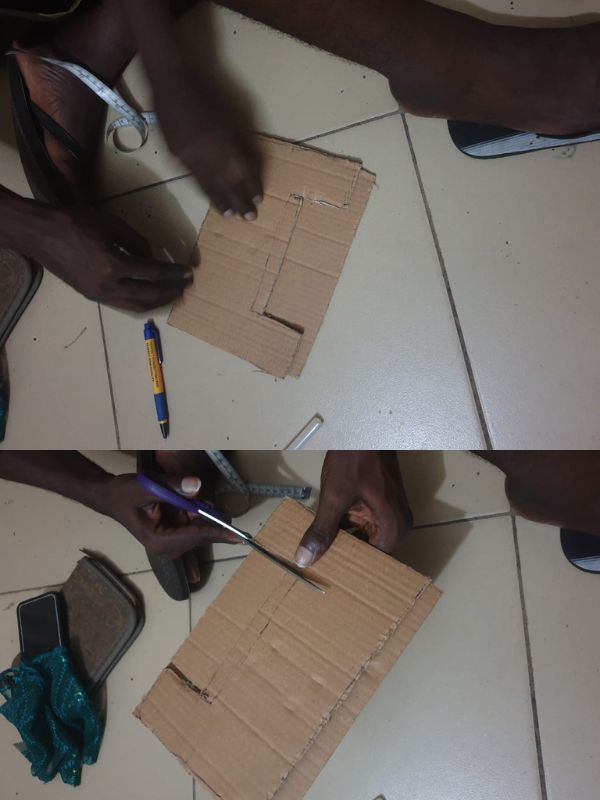
-
Decide the size you want. A simple size is about 10 x 6 inches.
-
Cut two equal rectangles from the carton (front and back).
-
Cut a thin strip for the side/bottom if you want the clutch to have depth.
This carton is what gives the clutch its shape.
Step 2: Add Structure with Cane
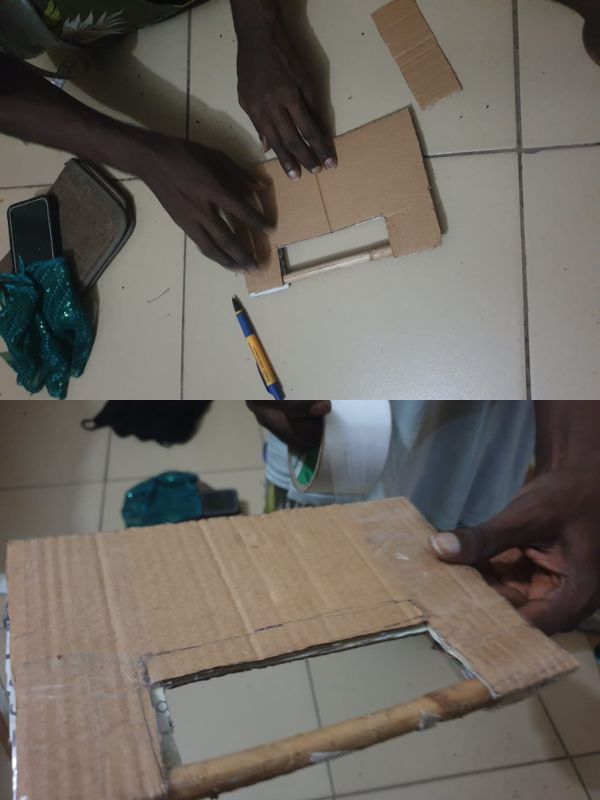
-
Cut cane pieces to fit along the edges of the carton.
-
Attach the cane around the border using gum.
-
Press it down and let it hold properly before moving on.
The cane helps the clutch stay firm instead of folding easily.
Step 3: Prepare the Clutch Cover (Dull Face)
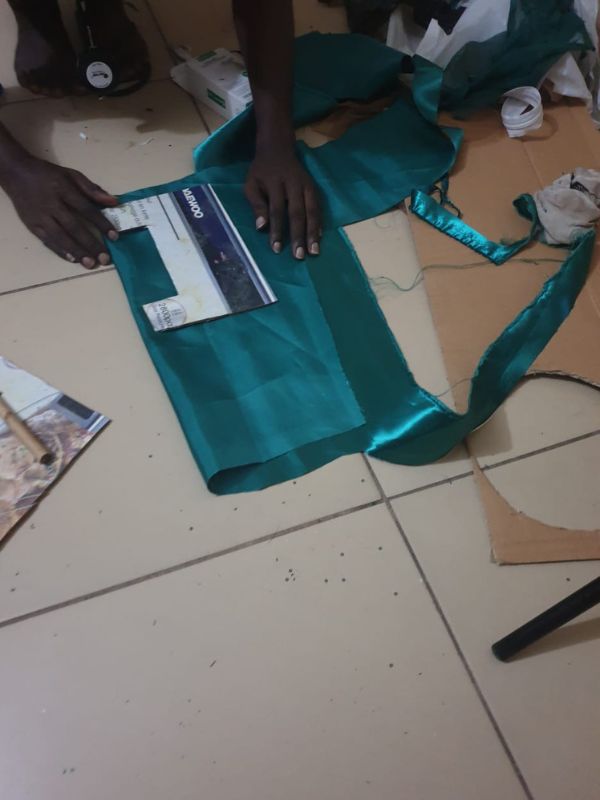
-
Place the carton base on the lace.
-
Cut the lace slightly bigger than the carton so you can fold it over the edges.
-
If the lace threads are coming apart, lightly pass the edge near a candle flame to seal it. Don’t hold it too close.
Take your time here so the pattern sits nicely.
Step 4: Attach the Cover to the Carton
-
Apply gum evenly on the carton surface.
-
Lay the lace on top and smooth it with your hands.
-
Fold the extra lace over the edges and glue it neatly inside.
-
Let it dry for a few minutes.
Make sure there are no bumps before it dries.
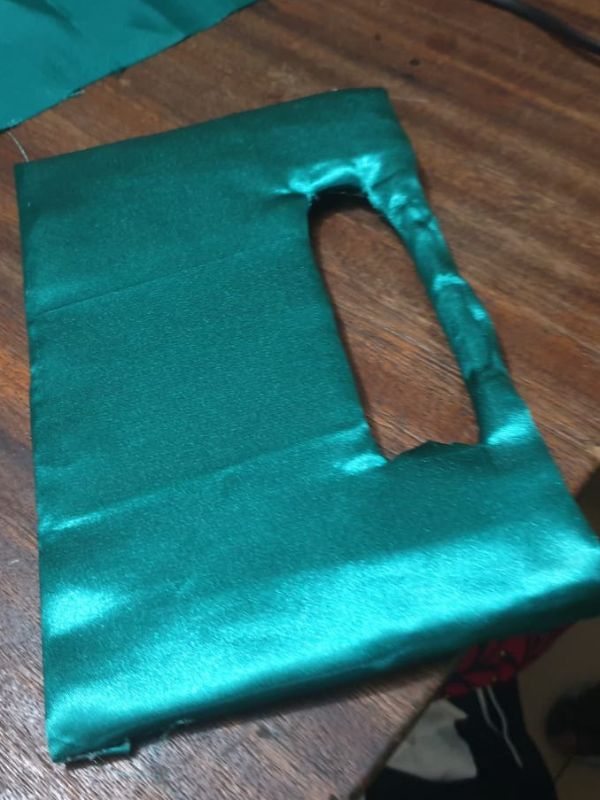
Step 5: Join Front and Back
-
Place the two covered carton pieces together.
-
If you created side strips, attach them now using gum.
-
Once aligned, stitch around the edges with needle and thread for extra strength.
Don’t rush the stitching. Small, even stitches look cleaner.
Step 6: Add the Lace Fabric
-
Cut the lining fabric to match the inside size.
-
Fold the edges inward so it looks neat.
-
Fix it inside using a little gum.
-
You can add a few stitches to secure it properly.
The lining makes the inside look finished and covers the folded lace.
Step 7: Final Check
-
Trim loose threads.
-
Press gently along the edges to make sure everything is secure.
-
Leave it for a few hours so the gum sets completely.
This method might seem like a lot at first, but once you work step by step, it flows naturally. The small adjustments and careful handling make all the difference.
Leftover lining or lace pieces don’t have to go to waste: What to Do With Fabric Scraps: Sewing Hacks That Turn Leftovers Into Keep-Worthy Gifts shows creative ways to use every bit.
Styling and Using Your DIY Sequin Clutch

Once your clutch is finished, the fun part begins, putting it to use. Here’s how you can style it and keep it looking fabulous:
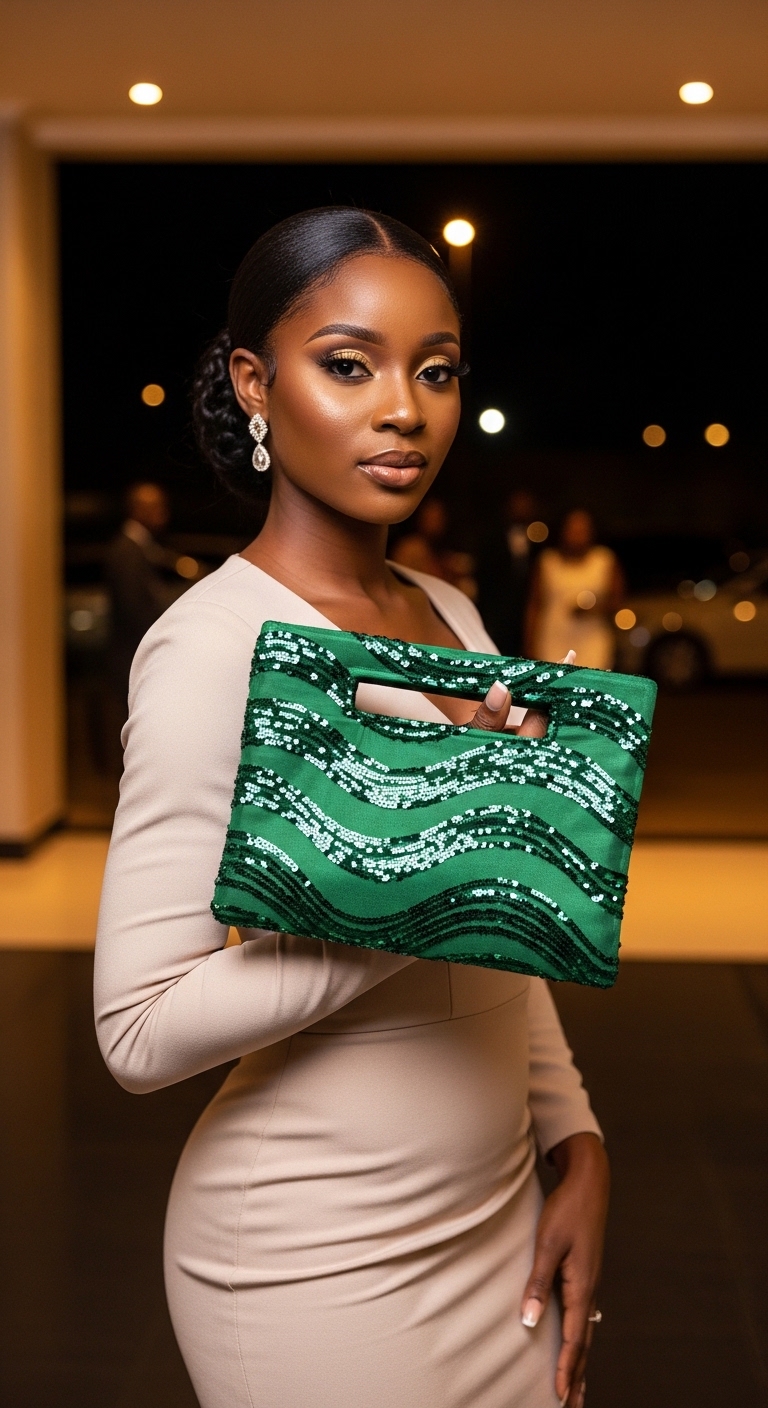
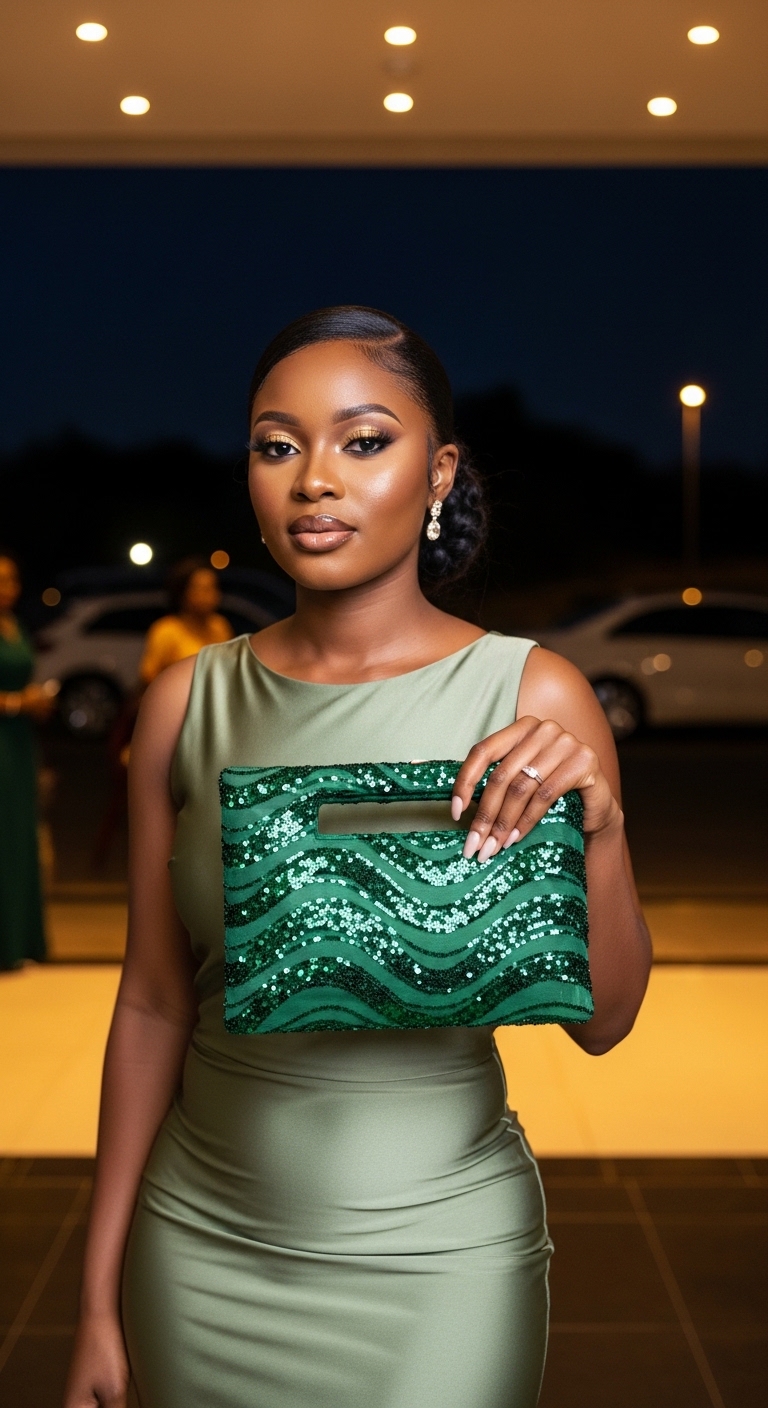
1. Party-Ready Looks
This clutch was made for sparkle, so it shines at parties. Pair it with a simple dress or jumpsuit to let the bag stand out. A little black dress with this clutch instantly feels more festive, or a pastel outfit gets a playful, fun touch from the sequins.
Smart Trick: Keep your other accessories minimal, the clutch is the statement piece.
2. Casual Outings
Don’t save it just for parties! This clutch works for casual events too. Throw it with jeans and a cute top for brunch, or with a casual sundress for daytime outings. The key is pairing it with outfits where a bit of sparkle adds charm without feeling overdone.
3. Gifting Your Clutch
Because it’s handmade and unique, this DIY clutch makes a thoughtful gift. Package it in a small box with tissue paper, or pair it with a matching card for a birthday or special occasion. People will love that it’s personal and one-of-a-kind.
4. Keeping It Sparkling and Clean
-
Avoid overstuffing it, the sequins need room to stay in place.
-
Keep it away from sharp objects that might snag the lace or sequins.
-
If dust accumulates, gently wipe with a soft, dry cloth, no harsh cleaners.
-
Store it in a dust bag or small box when not in use to prevent crushing or snagging.
5. Optional: Show it Off in Photos
Take photos of your clutch styled with different outfits, on a table with your other accessories, or even with party decor. Not only is this fun for social media, but it also helps you remember all the ways you can use it.
Choosing the right lining makes a big difference, and Understanding Fabrics for Sewing: Choosing the Right Material for Every Project explains how to select materials that work best.
Variations and Personalization for Your DIY Sequin Clutch
One of the best things about this DIY Sequin Clutch Tutorial is how flexible it is, you can make it truly your own by adding small personal touches or experimenting with different materials.
Here are some ideas:
1. Change Colors, Shapes, or Sizes
Don’t feel limited to the standard shape or color. Try a round, rectangular, or envelope-style clutch. Replace the lace for sequins in your favorite color or a patterned fabric to match your outfit or theme. A slightly larger clutch can double as a small handbag, while a smaller one is perfect for essentials only.
2. Add Charms, Embroidery, or Extra Bling
Make your clutch even more unique by adding tiny charms, beaded embroidery, or extra sequins. You can create initials, a small design, or even a motif that reflects your personality. This simple step elevates the clutch from cute to wow-worthy, and it’s an easy way to customize it for gifts.
3. Kid-Friendly or Beginner-Friendly Versions
This tutorial works for all skill levels. For a beginner-friendly version, skip the complex trims and focus on a simple lined base with glue-secured lace. For a kid-friendly craft, use larger, colorful sequins and pre-cut fabrics so the little ones can safely make their own sparkling clutch.
By trying these variations, your clutch becomes an extension of your style and creativity. Following this DIY Sequin Clutch Tutorial gives you a solid, beginner-friendly framework while leaving plenty of room for personal touches.
Basic stitching skills used in this clutch are similar to the techniques shared in 5 Clothing Alterations I Stopped Paying a Tailor For (DIY Made Easy).
Issues You May Encounter (And How to Avoid Them)

Even though this project is beginner-friendly, there are a few small problems that can come up. I ran into some of them myself, so here’s what to watch for, and how to fix or avoid them.
1. Crooked Seams or Uneven Edges
This usually happens when you rush while wrapping the lace or attaching the lining. If the base isn’t aligned properly from the start, everything else shifts slightly.
How I solved it:
Before gluing anything permanently, I did a dry fit first. I wrapped the lace around the base without glue just to check alignment. Once I was sure everything lined up straight, I glued it in sections instead of all at once.
How you can avoid it:
-
Work slowly and check alignment often.
-
Use a ruler when cutting the carton base.
-
Glue small areas at a time instead of covering the whole surface in glue.
Small adjustments early prevent bigger problems later.
2. Sequins Falling Off
If the sequins aren’t properly secured, they can loosen over time, specially near edges or folds.
What I learned:
Not all glue works the same. I first tried a very light craft glue, and it didn’t hold as strongly as I expected.
How to avoid this:
-
Use a strong craft gum or fabric-friendly adhesive.
-
Press the lace firmly after applying glue and allow it to fully dry.
-
Reinforce high-stress areas (like corners and edges) with a few small stitches.
Let the glue cure completely before using the clutch, that patience makes a big difference.
3. Using the Wrong Type of Glue
Some glue dries stiff, leaves white marks, or soaks through delicate lace.
What worked for me:
I tested the glue on a small scrap piece of lace first. That helped me see how it dried before applying it to the actual clutch.
How you can avoid issues:
-
Always test glue on scrap fabric first.
-
Apply thin, even layers, too much glue causes mess and stiffness.
-
Wipe away excess glue immediately with a clean cloth.
4. Loose Lace Edges
If you skip sealing the lace edges, they can start fraying after handling.
What helped:
Lightly sealing the edges with a candle flame made a huge difference. It stopped fraying and made the finish look cleaner.
Important tip:
Move the lace quickly past the flame, don’t hold it directly in the fire. You just want to seal, not burn.
Wrapping Up
This DIY Sequin Clutch Tutorial is proof that you don’t need expensive materials or perfect skills to create something beautiful. If your stitches aren’t flawless or a corner isn’t perfectly sharp, that’s okay, handmade charm is what makes it special.
If you will be making this, make it in your favorite color, add your own touch, and rock it like you would with a well known brand. And if you do create one, feel free to share it or tag me, I’d love to see how you made it your own.
Simple, sparkly, and made by you, that’s what this is all about.