
Thanksgiving crafts for teens that won’t make them roll their eyes. Try creative projects with real uses, better design and none of the usual kiddie crafts.
Search for Thanksgiving crafts and you’ll find plenty of paper turkeys, handprint art and decorations made with googly eyes. Those can be fun for younger children, but they’re not exactly the projects most teenagers are excited to spend an afternoon making.
The problem isn’t that teens have suddenly outgrown making things.
They’re more likely to want a project that feels like something they would actually choose to make, a piece of decor they could keep, something useful at Thanksgiving, or a craft where the finished result depends on their own design choices.
That’s the approach here. These Thanksgiving crafts for teens aren’t about making a harder version of a kindergarten project. They use simple materials and techniques, but the finished pieces are designed to look more intentional and grown-up.
And you don’t need a craft room full of expensive supplies to make them.
What Makes a Thanksgiving Craft Feel Too Young?
A craft doesn’t have to be difficult to feel appropriate for a teenager. In fact, making a project complicated just to make it seem “older” can make it less enjoyable.
What usually makes a Thanksgiving craft feel young is the way it is designed, not how easy it is to make.
Large cartoon faces, lots of googly eyes and other novelty pieces can give a project a preschool feel. The same can happen with a template that tells the maker exactly what to cut, where to glue it and what the finished piece should look like. There is very little room to make a decision of their own.
That is an important difference. An easy craft gives you simple steps. A good teen craft also gives you choices.
For example, making a Thanksgiving place card is easy.
But there is a big difference between giving a teen a printed turkey to color and asking them to create their own place card using cardstock, lettering and a small seasonal detail.
The second project still doesn’t require advanced skills, but the teen gets to decide how it looks.
Purpose matters too. A craft is more likely to feel worthwhile when there is something to do with the finished piece. Printed napkins can be used at Thanksgiving. A framed leaf arrangement can become room decor. A recipe card can hold a family recipe worth keeping.
So when you’re choosing Thanksgiving crafts for teens, don’t ask only, “Is this easy enough?” Ask three better questions:
Can they make their own choices?
Will the finished piece be useful, decorative or meaningful?
Would a teenager actually want to keep it when they’re finished?
If the answer is yes, the craft can be simple without looking or feeling like a kindergarten project.
1. Embroidered Thanksgiving Napkins With a Tiny Motif

A Thanksgiving napkin doesn’t need a giant pumpkin or turkey stitched across it to look festive. A small embroidered detail in one corner can be enough.
This makes a good teen craft because the interesting part is learning how a few stitches can create a finished design.
They can embroider a tiny leaf, acorn, pumpkin, wheat stalk or simple branch on a plain fabric napkin, then use the napkins at Thanksgiving dinner.
Materials
- Plain cotton or linen napkins
- Embroidery needle
- Embroidery floss
- Embroidery hoop
- Small scissors
- Pencil or washable fabric marker
- Simple embroidery pattern or a design drawn by hand
How to Make Them
Start by choosing one small motif and sketching it lightly onto the corner of the napkin. Keep the design small enough that it doesn’t take over the fabric.
Place the fabric in an embroidery hoop so it stays reasonably taut while stitching. A beginner can use simple stitches such as backstitch for outlines, satin stitch for small filled areas and French knots for tiny details.
There’s no need to embroider the whole napkin. One little motif can actually look more intentional than covering the fabric with Thanksgiving designs.
Once the embroidery is finished, remove any visible marking according to the marker’s instructions and care for the napkin according to the fabric and thread manufacturer’s guidance.
The nice part about this project is that the Thanksgiving connection can be subtle. A tiny leaf or branch can work for the holiday without making the napkin look like seasonal children’s tableware. And after Thanksgiving, the napkins can still be used.
A useful design tip: Have the teen make one sample motif first. It is much easier to adjust the size, thread color or stitch choice on a scrap of fabric than after several hours of embroidery.
2. Thanksgiving Table Place Card They Can Actually Design
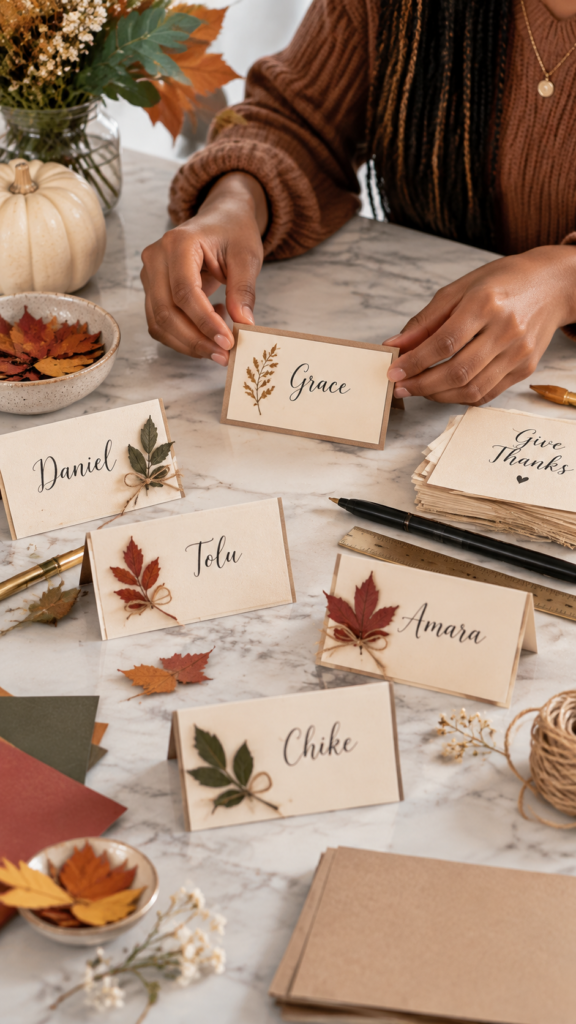
A place card is small, but that is part of what makes it a good project for teens. They don’t need to spend hours making one, and they can experiment with the design without needing advanced crafting skills.
Instead of giving them a turkey template to color, let them create the card from scratch. They can choose the paper, decide how the name is written, add a simple autumn detail and work out how the card will stand on the table.
The easiest way to keep it from looking like a children’s craft is to keep the design simple. One or two colors can be enough.
A pressed leaf, a small drawn branch, a stamped pattern or a narrow strip of patterned paper can add a seasonal detail without taking over the card.
Materials
- Cardstock or other firm paper
- Scissors or a paper trimmer
- Pencil and eraser
- Black or dark-colored fine-tip pen
- Ruler
- Colored pencils, markers or watercolor, if desired
- Leaves, stamps, patterned paper or other small decorative details
- Glue, if adding paper or natural elements
How to Make It
Cut the cardstock into rectangles large enough for the guest’s name and fold each piece in half to make a tent card.
Before decorating, have the teen lightly mark where the name will go. This helps with spacing, especially if they want to use hand lettering.
Then choose one main design detail. A small leaf in one corner, a simple border, a stamped pattern or a little illustration is enough. They can repeat the same design across all the cards or change each one slightly.
Write the names last.
This is also a good opportunity to teach a simple design principle: repetition makes separate pieces look like a set. Using the same paper, lettering style or small motif on every card can make the table look coordinated without making every card identical.
For a more personal version, each teen can design the cards around the people sitting at the table, while keeping the overall style consistent.
The finished cards have a real job at Thanksgiving: they tell guests where to sit and become part of the table setting. That gives the project a purpose beyond making something to glue together and put away.
3. Pumpkin-Pie Recipe Card Set

Family recipes often live in a phone, a stained notebook or a piece of paper that has been passed around for years. Turning one of those recipes into a proper card gives a teen a craft with a useful result at the end.
For this project, create a small set of recipe cards around pumpkin pie.
One card can hold the ingredient list, another can include the method, and a third can leave space for notes such as who usually makes it, when your family serves it or any changes made to the recipe over time.
Materials
- Blank cardstock or heavy paper
- Ruler
- Pencil and eraser
- Fine-tip pen
- Colored pencils, markers or watercolor
- Hole punch and ribbon, optional
- Small envelope or recipe-card box for storage
How to Make Them
Cut the cardstock into equal-sized cards and decide on a simple layout before adding the recipe. Keep the writing large enough to read easily and leave enough space between sections for the card to stay useful in the kitchen.
The decoration can stay small. A hand-drawn pumpkin, a pie slice, a few leaves or a simple border is enough. Teens can also create a matching design across the whole set so the cards look like they belong together.
For the recipe itself, use a real family recipe or a trusted published recipe rather than inventing measurements. If the recipe comes from a family member, this can also be a chance to record details that usually get lost, such as substitutions or the person who taught them how to make it.
Store the finished cards together in a small box, envelope or ring-bound stack. Unlike a one-season decoration, the set can be brought out whenever the recipe is made.
Why it works for teens: the craft combines illustration, handwriting and simple layout with something that has a real purpose. They aren’t just decorating a card, they’re creating a small piece of the family’s recipe history.
4. Corn-Husk Mini Woven Mat
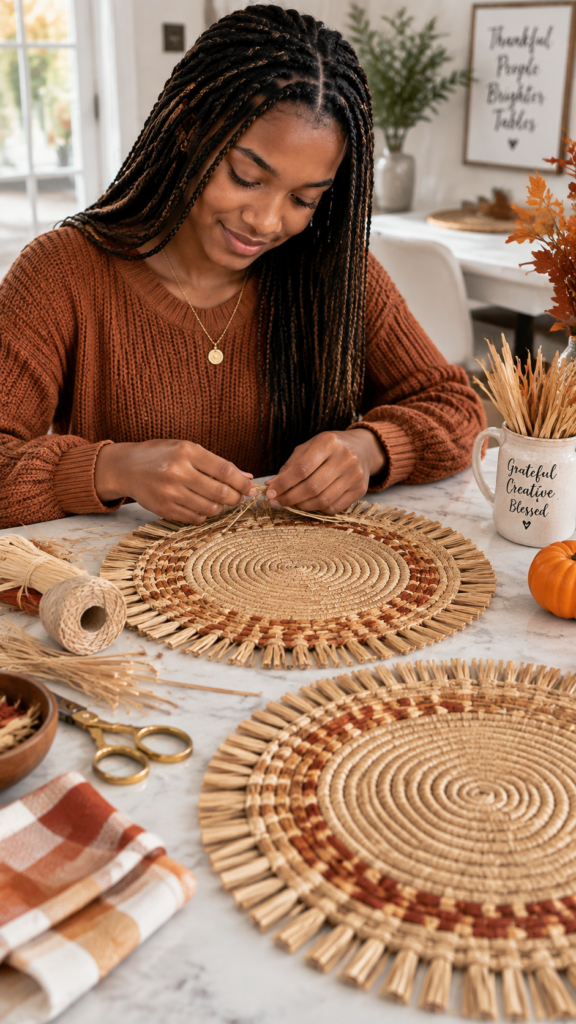
Dried corn husks or other suitable natural fibers can become a small woven mat or coaster, giving teens a chance to learn a basic weaving structure while making something they can actually use.
For Thanksgiving crafts for teens, this is more interesting than simply gluing fall shapes onto paper because the finished piece depends on how the material is handled.
Materials
- Clean, dried corn husks or another suitable weaving fiber
- Scissors
- Flat work surface
- Ruler
- Cotton cord or strong thread for securing the edges, if needed
How to Make It
Prepare the husks by cutting them into strips of roughly similar width. Arrange some strips in one direction, then weave the others across them using a simple over-under pattern.
Keep the strips close together without pulling them so tightly that the mat starts to buckle. Once the woven section reaches the size you want, secure the loose ends and trim them neatly.
A small mat can work as a coaster, under a small serving dish or as part of a Thanksgiving table setting.
The useful skill here is tension control. Pull too loosely and the weaving can shift; pull too tightly and the finished piece can lose its shape.
That makes this a genuine introduction to how woven structures are built, rather than simply an autumn decoration.
5. Wax-Resist Thanksgiving Table Art

Wax-resist painting gives teens a way to make Thanksgiving table art without relying on the usual turkey template.
They can draw leaves, squash, wheat or other harvest-inspired shapes with a suitable wax-resist medium, then brush watercolor over the surface. The waxed areas resist the paint, allowing the design to appear through the contrast.
Materials
- Watercolor paper
- Watercolor paints
- Paintbrush
- White candle wax crayon or another wax-resist material intended for art
- Pencil
- Water and a mixing palette
How to Make It
Sketch a simple harvest design lightly onto the paper, then trace the parts you want to remain resistant with the wax crayon. Apply watercolor over the entire surface and allow it to dry.
The wax prevents the watercolor from soaking into those areas, so the original design becomes visible as the painted surface develops around it.
For a more polished Thanksgiving table decoration, keep the design fairly simple and leave some unpainted space around the main motif. The finished artwork can be displayed as a small table sign, framed afterward or used as part of the Thanksgiving decor.
This technique also gives teens something to experiment with. They can see how changing the pressure of the wax, the amount of water in the paint and the colors used affects the final result.
Safety note: Use a wax crayon or commercially made art resist rather than asking teens to melt candle wax themselves. If a different resist product is used, follow its specific instructions.
5. Make a Thanksgiving Candle Holder From an Empty Glass Jar
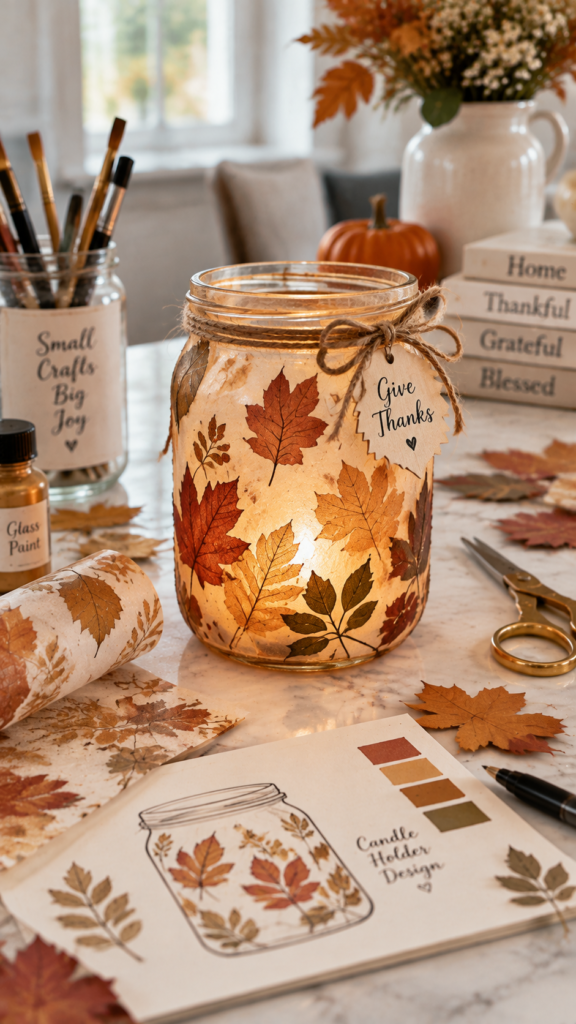
An empty glass jar can become simple Thanksgiving table decor when the design lets the light show through instead of covering the entire surface.
Teens can experiment with tissue paper, vellum, glass paint or another material suitable for the jar to create leaves, geometric shapes or a simple harvest pattern.
The translucent areas will look different once the candle is lit, which gives them something to consider when planning the design.
Materials
- Clean empty glass jar
- Tissue paper, vellum or glass-suitable paint
- Glue suitable for the chosen material, if needed
- Scissors
- Paintbrushes, if using paint
- LED tealight
How to Make It
Clean and dry the jar thoroughly before decorating. Sketch the design first so the teen knows where the translucent and more covered areas will sit.
If using tissue paper or vellum, cut small pieces and attach them to the outside of the jar according to the adhesive manufacturer’s instructions. Glass paint can also be used if the product is intended for that surface.
Place an LED tealight inside once the decoration is dry. The light will reveal parts of the design that may not have been as noticeable when the jar was unlit.
Safety note: An LED candle is the better choice for this type of craft, particularly around children or anywhere an open flame could be knocked over.
If using a real candle, only use a container and materials specifically suitable for candle use and follow the manufacturer’s safety instructions.
6. A Thanksgiving “Menu” They Design Like a Restaurant
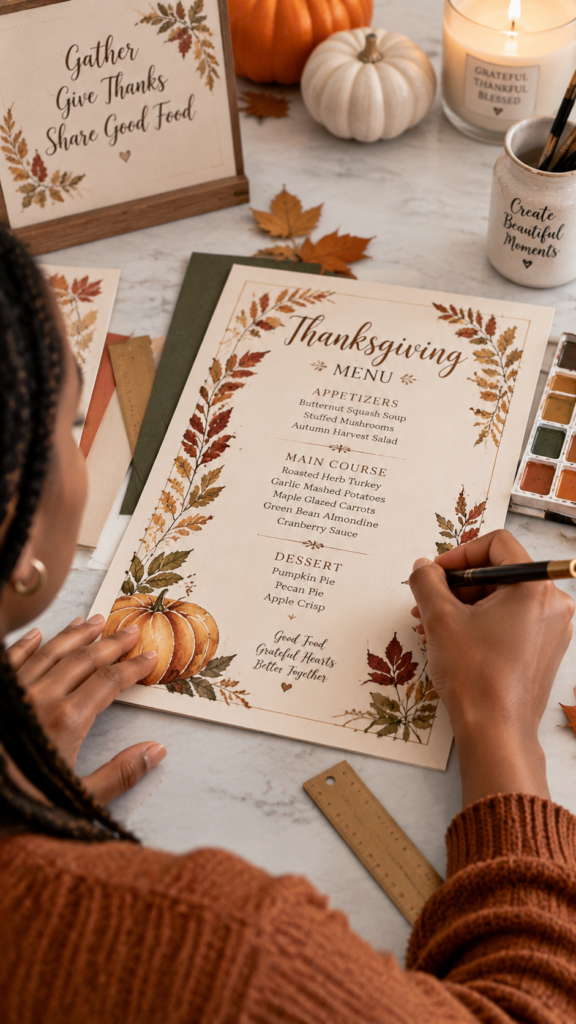
Take the actual Thanksgiving menu and turn it into a small design project.
Instead of simply writing “Turkey, mashed potatoes and pie” on a piece of cardstock, teens can decide how the information should be arranged and presented. They can give the meal a name, separate dishes into sections and add small illustrations or decorative details.
Materials
- Cardstock or thick paper
- Pencil and eraser
- Ruler
- Fine-tip pens or markers
- Colored pencils or watercolor, optional
How to Make It
Start by writing down the actual dishes that will be served. Then decide which information needs to stand out most. The main dish might have the largest lettering, while sides, desserts and drinks can use smaller headings.
This introduces three basic graphic design ideas without turning the craft into a formal lesson: hierarchy, spacing and alignment.
Have the teen make a rough version first. They may discover that fitting everything onto the page requires shorter descriptions, different spacing or a different layout.
The finished menu can sit at each place setting or in a frame on the Thanksgiving table. It can also be printed or photographed afterward as a record of that year’s meal.
7. Stitched Leaf Garland Using Real Leaves as the Inspiration
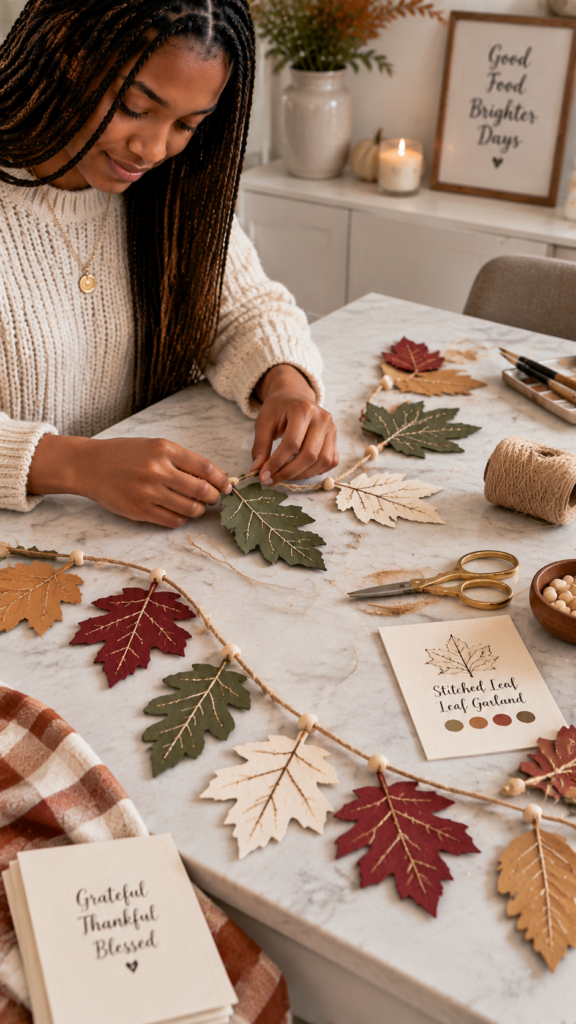
Real leaves provide the starting point for this garland, but the finished decoration is made from paper so it can be kept and reused.
Teens can draw or paint different leaf shapes on cardstock, cut them out and add simple stitched details before joining them into a garland.
Materials
- Cardstock
- Pencil and eraser
- Colored pencils, markers or watercolor
- Scissors
- Hole punch
- Embroidery needle
- Embroidery floss or strong thread
How to Make It
Use real leaves as references for the shapes, veins and differences in color. Draw several leaf types rather than making every piece identical.
Once the paint or coloring is completely dry, cut out the leaves and punch two small holes near the top of each one. Thread the pieces together, leaving a little space between them.
The teen can decide whether to arrange the leaves randomly, alternate colors or create a repeating sequence.
The stitching isn’t just decoration. It gives the project a simple introduction to spacing, repetition and pattern, while the finished garland can be hung across a wall, shelf or table area for Thanksgiving.
8. A Handmade Pie Box or Dessert Sleeve

Leftover pie is much easier to give away when it has something better than a sheet of foil wrapped around the plate.
This project lets teens turn a simple piece of cardstock into packaging for a slice of pie, cookies or another dry Thanksgiving treat.
The interesting part is that they have to design around the food. The package needs to be large enough to hold the item without crushing it, but not so loose that the food moves around.
Materials
- Food-safe cardstock or suitable paperboard
- Ruler
- Pencil
- Scissors or craft knife
- Scoring tool or the blunt edge of a ruler
- Double-sided tape or suitable paper adhesive
- Pens or markers for decoration
- Small label or sticker
How to Make It
Start with the size of the dessert. Measure the length, width and height needed, then plan the box or sleeve around those measurements. Mark the folds before cutting so the finished package has clean edges.
For a simple sleeve, the cardstock can wrap around a slice of pie or a small container, with a flap that overlaps at the back. A small box takes more measuring and folding but gives the teen more opportunity to experiment with structure.
Keep decoration away from any surface that will directly touch food unless the material is specifically suitable for food contact.
Adding the recipient’s name, the dessert name or a short Thanksgiving message can make the package feel intentional without covering it in decorations.
This is one of those Thanksgiving crafts for teens where the finished project solves an actual problem. It teaches measuring, planning, folding and basic packaging design—and someone can take the dessert home afterward.
9. Thanksgiving Photo Transfer on Wood
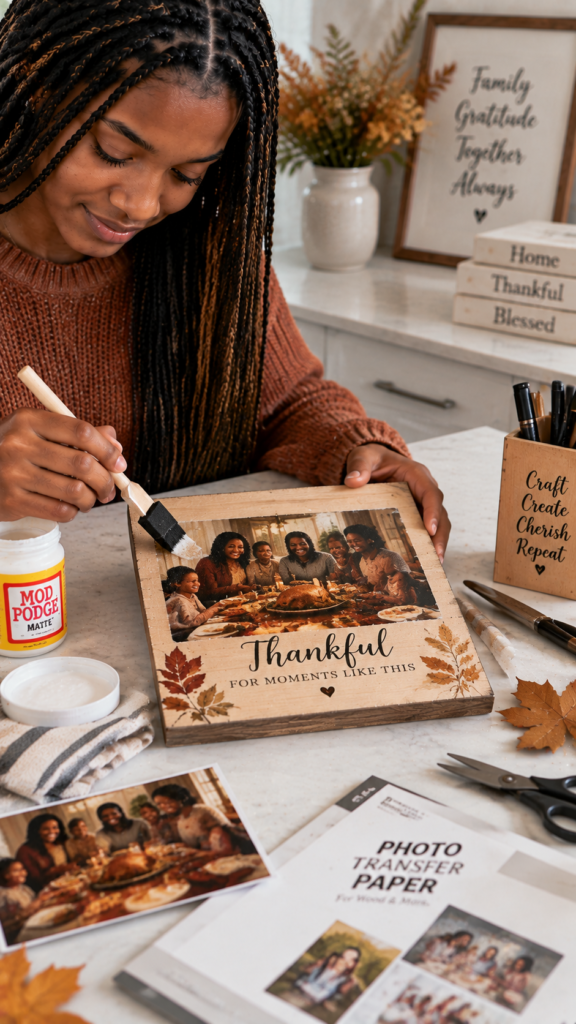
A family Thanksgiving photograph can become a small piece of keepsake decor through a photo-transfer process.
Unlike painting or collage, this technique involves transferring an image onto another surface, so the result depends heavily on the transfer product and the preparation of the image.
Materials
- Small unfinished wood plaque or smooth wood surface
- Laser-printed photograph or image, if required by the chosen transfer medium
- Photo-transfer medium designed for wood
- Foam brush
- Squeegee or old gift card
- Water
- Soft cloth or sponge
- Sandpaper, if the wood needs smoothing
- Clear protective finish, if recommended for the transfer product
How to Make It
Start with a smooth, clean piece of unfinished wood. Check the instructions for the particular transfer medium before printing the photograph because not every transfer product works with every type of printer or image.
Trim the image to fit the wood, then apply the transfer medium according to the manufacturer’s directions. Press the image onto the wood with the printed side positioned as instructed and leave it for the full recommended drying time.
Once the medium has dried, dampen the paper and gently rub it away in stages. The transferred image should remain on the wood. Avoid rubbing aggressively, since that can remove parts of the image as well.
A small Thanksgiving photograph works particularly well because the finished piece becomes a keepsake rather than a decoration that has to be packed away immediately after the holiday.
The technique also teaches an important crafting lesson: following the material’s instructions matters.
Transfer products differ in drying time, image requirements and finishing methods, so teens should use the directions supplied with the product rather than assuming every photo-transfer method works the same way.
Which Crafts Work Best for Different Skill Levels?

Some of these projects are easier to pick up than others. Age gives you a rough starting point, but crafting experience matters just as much. A 13-year-old who already sews may be more comfortable with embroidery than a 17-year-old trying it for the first time.
Here’s a practical way to match the projects to different teens:
| Craft | Good starting age | Skill level |
| Pumpkin-pie recipe card set | 12+ | Beginner |
| Wax-resist table art | 12+ | Beginner |
| Stitched leaf garland | 12–14+ | Beginner to intermediate |
| Embroidered Thanksgiving napkins | 13+ | Beginner to intermediate |
| Corn-husk woven mat | 13+ | Intermediate |
| Handmade pie box or dessert sleeve | 14+ | Intermediate |
| Thanksgiving menu design | 12+ | Beginner |
| Photo transfer on wood | 14+ | Intermediate |
These ages aren’t strict rules. They’re there to help you judge the amount of patience, precision and tool handling a project requires.
A younger teen who enjoys drawing might take naturally to the wax-resist artwork or menu design.
Someone who already works with fabric may be ready for embroidered napkins even at 13. Older teens who enjoy hands-on projects may appreciate the measuring and construction involved in the pie box or woven mat.
Pay attention to the tools, too. Scissors, paper and basic art supplies are relatively straightforward, while craft knives, heated materials, adhesives or photo-transfer products may require closer supervision depending on the teen’s experience.
The best choice isn’t necessarily the one marked with the lowest age. Pick something that is just challenging enough to teach a skill without making the teen feel like they’re struggling through it.
Let Teens Make Thanksgiving Their Own
Thanksgiving crafts for teens don’t have to compete with the crafts they made as little kids. The better approach is to give them something they can interpret, personalize and actually feel proud of finishing.
That might mean changing the colors, redesigning the project, using a different material or turning a simple idea into something more personal. The finished craft doesn’t need to look perfect either. It just needs to feel like something they chose to make.
So when you’re planning a Thanksgiving activity for a teenager, give them a starting point rather than a strict template. You may be surprised by what they come up with when they’re given room to make it their own.
FAQs
- What can teens do with Thanksgiving crafts after they make them?
Don’t let the finished project become clutter. Teens can use their crafts to decorate a bedroom, set the Thanksgiving table, package leftovers, preserve a family recipe or create a keepsake box for future holidays. - How can you make Thanksgiving crafts more interesting for a group of teenagers?
Give everyone the same basic materials but let them choose their own design. A shared theme with different results works better than asking a group of teens to copy the same finished example. - What Thanksgiving crafts can teens do while waiting for Thanksgiving dinner?
Choose projects that can be completed in 20–30 minutes and don’t require paint or materials that need a long drying time. Personalized menus, recipe cards and simple paper decorations are easier to set up around a busy holiday. - How do you keep Thanksgiving crafts from making a big mess?
Set up one contained crafting area and limit the materials available at one time. Paper, thread and drawing supplies are easier to manage than glitter, loose beads or wet paint when the kitchen is already busy. - What are good Thanksgiving crafts for teens who don’t like traditional fall colors?
Skip the usual orange, brown and yellow palette. A teen can use black and cream, deep green, burgundy, navy, metallic accents or neutral colors while keeping the design connected to Thanksgiving through leaves, food, typography or table details. - Can Thanksgiving crafts be used as a school or youth-group activity?
Yes. Projects such as menu design, recipe cards, paper weaving and table decorations work well because several people can work at different skill levels without everyone needing to finish an identical project. - What can a teen make for Thanksgiving when they don’t have many craft supplies?
Start with materials already around the house. Cardboard from food packaging, paper bags, old fabric, leftover wrapping paper, magazines and plain paper can become useful decorations or packaging with a little cutting, drawing, folding or stitching.
