Bring sustainability into your home with functionable eco-friendly DIY projects that are fun, budget-friendly, and kind to the planet.
I know trying to live more sustainably can feel overwhelming. Maybe you’ve tried using fewer plastic bags, or thought about making your own cleaning products, but it quickly feels like too much too time-consuming, or maybecomplicated.
Life is busy, and you don’t need extra stress on top of everything else.
That’s why I’ve put together these DIY projects. These are simple, functionable projects you can really complete at home. They make your home nicer, save you money, and help the planet in small but real ways.
Also, these DIY projects are avalaiable so you can do them comfortably at home, without expensive tools, complicated materials, or professional help.
You’ll save money, save time, and help the planet, all from your own living room or kitchen.
By the end of this post, you’ll have easy, useful ideas that feel doable, useful, and worth your time.
Read up how ordinary thrift store finds can look high-end with 10 Thrift Store Furniture Flips That Look Expensive on a Budget.
How to Approach Eco-Friendly DIY Projects Without Wasting Money or Time
Starting a DIY project can feel exciting at first, but it’s easy to get stuck, spend too much, or waste time.
So, here’s a simple way to make it work for you:
-
Start with what you already have at home
Look around your kitchen, closet, or garage. Old jars, scrap wood, worn-out clothes, or even leftover fabric can become the base for something new. Using what you already have saves money and makes the project feel doable.
2. Focus on projects that do more than one thing
If you can make something that’s both useful and beautiful, you’ll get more value from your time. For example, a storage box that also looks nice on a shelf, or a small plant holder that doubles as a decoration.
3. Keep it simple with low-tech methods
You don’t need expensive machines or fancy tools. Hand sewing, simple glue, or basic cutting tools are often all you need. The goal is to get results without frustration.
4. Set up a small DIY supply station
Keep all your materials in labeled containers in one place. It makes it easier to start projects quickly and avoids wasted trips to the store. You’ll save both time and stress.
Reimagine your wardrobe and give old clothes a fresh, stylish life in Thrift flip Sewing Projects Ideas For People Who want Expensive Style on A Budget.
Low-Key Eco-Friendly DIY Projects
1. Upcycled T-Shirt Produce Bags
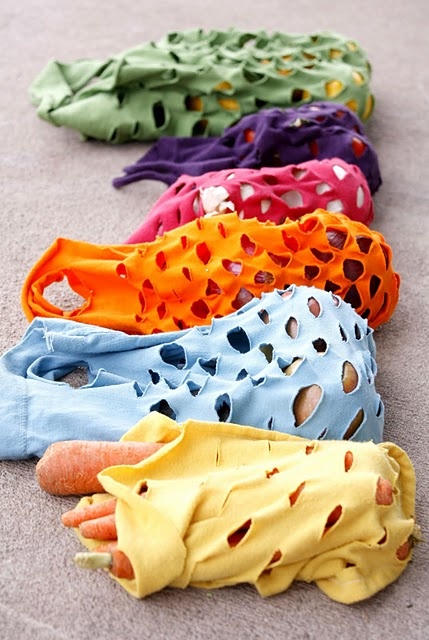
Photo credit: @ Hannah Smash
Video credit: @ Darby Smart
Turn old T-shirts into reusable grocery or produce bags that you can take to the store instead of using plastic ones. It’s a simple, practical project that gives your old clothes a second life.
The benefit:
Using these bags helps reduce single-use plastics, which is better for the environment, and it keeps your old t-shirts from being thrown away. Plus, making your own bags at home costs almost nothing and can be done in under an hour.
Materials you’ll need:
- Old T-shirts (cotton works best)
- Scissors
- Needle and thread or a sewing machine
- Optional: fabric scraps for small compartments
How to do it step by step:
- Pick your T-shirt: Choose one that’s clean and doesn’t have holes (or use one with holes in a creative way). A medium-sized adult T-shirt works best for a standard produce bag.
- Cut the shirt:
- Lay the shirt flat.
- Cut straight across the bottom to remove the hem if you want a smoother edge.
- Cut off the sleeves if you want a simple tote shape, or leave them as part of the handles for a unique look.
- Sew the bottom:
- Turn the shirt inside out.
- Fold the bottom edge up about half an inch and sew a straight seam across to close the bottom.
- If you don’t have a machine, you can hand-stitch a simple running stitch—it just takes a bit longer.
- Optional compartments for delicate produce:
- Take leftover fabric scraps and cut small mesh or fabric squares.
- Sew them into the inside of the bag to create little pockets for berries or cherry tomatoes. This keeps delicate fruits from getting squished.
- Turn it right-side out:
- Flip the shirt so the seams are inside.
- Your bag is ready to use!
Saves time & money:
- Time: You can make a bag in 30–45 minutes.
- Money: You’re reusing materials you already have, so it costs nothing compared to buying reusable bags.
Extra touch:
- Add a small tag inside with care instructions: wash in cold water, air dry. This keeps your bag lasting longer.
- Use fabric scraps to personalize with initials or patterns, it makes the bag yours and adds a fun creative element.
Bring the family together while making real, useful items in 12 Easy Sewing Projects Adults and Kids Will Actually Complete Together.
2. DIY Beeswax Food Wraps
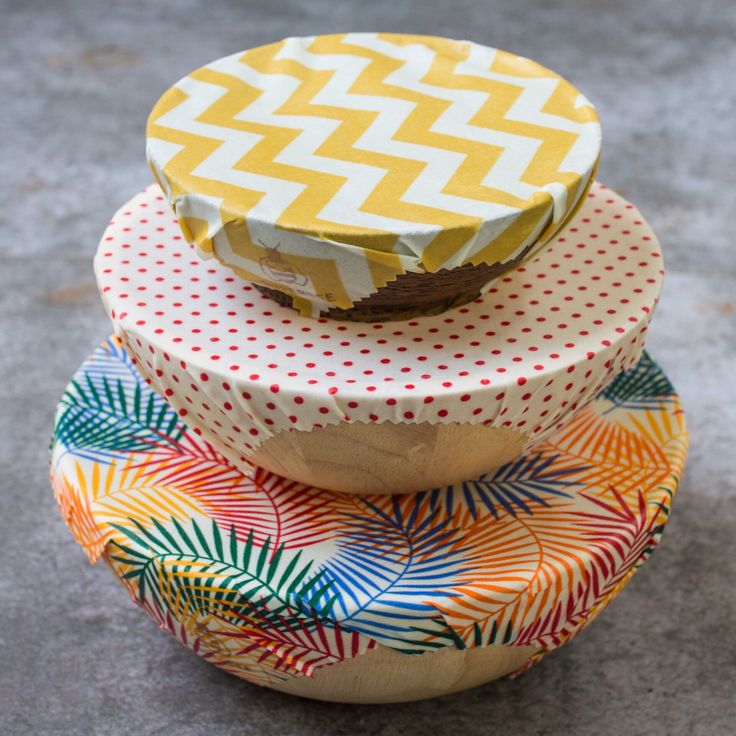
Beeswax wraps are reusable alternatives to plastic wrap. You can use them to cover bowls, wrap sandwiches, or store fruits and vegetables. Making your own at home is simple, eco-friendly, and much cheaper than buying pre-made wraps.
The benefit:
These wraps cut down on single-use plastic, last for months if cared for properly, and can be customized to fit your kitchen style. Plus, creating them yourself means you control the ingredients, no unnecessary chemicals.
Materials you’ll need:
- Cotton fabric scraps (old t-shirts, pillowcases, or clean cotton prints work well)
- Beeswax pellets or blocks
- Pine resin (optional, for extra stickiness)
- Jojoba oil (optional, adds flexibility)
- Parchment paper
- Baking tray
- Iron or oven
How to do it step by step:
- Prepare the fabric:
- Cut your fabric into the sizes you want (e.g., 8×8 inches for snacks, 12×12 for bowls).
- Make sure the fabric is clean and dry. Cotton works best.
- Set up your workspace:
- Preheat your oven to 150°C (300°F) if using the oven method, or prepare your iron with parchment paper.
- Line a baking tray with parchment paper to catch drips.
- Add the wax mixture:
- Sprinkle beeswax evenly over the fabric.
- Optional: Add a small pinch of pine resin for extra stickiness and 5–10 drops of jojoba oil for flexibility.
- Melt the wax:
- Oven method: Place the fabric on the parchment-lined tray and bake for 3–5 minutes until the wax melts completely.
- Iron method: Place another piece of parchment paper on top and gently iron over the fabric until the wax melts.
- Spread the wax evenly:
- Quickly use a brush or the back of a spoon to spread the wax if needed.
- Lift the fabric carefully to avoid dripping wax.
- Cool and set:
- Hang or lay flat to cool completely.
- Once cooled, your wraps are ready to use.
Saves time & money:
- Time: Each wrap takes about 10–15 minutes from start to finish.
- Money: Using old fabrics and simple natural ingredients costs far less than store-bought wraps, especially if you make a set of 5–10 wraps at once.
Extra touch:
- Add citrus peels into the wax while melting to add a subtle natural scent and extra antibacterial properties.
- Personalize your wraps with fabric scraps in fun patterns or small stenciled designs for a unique look.
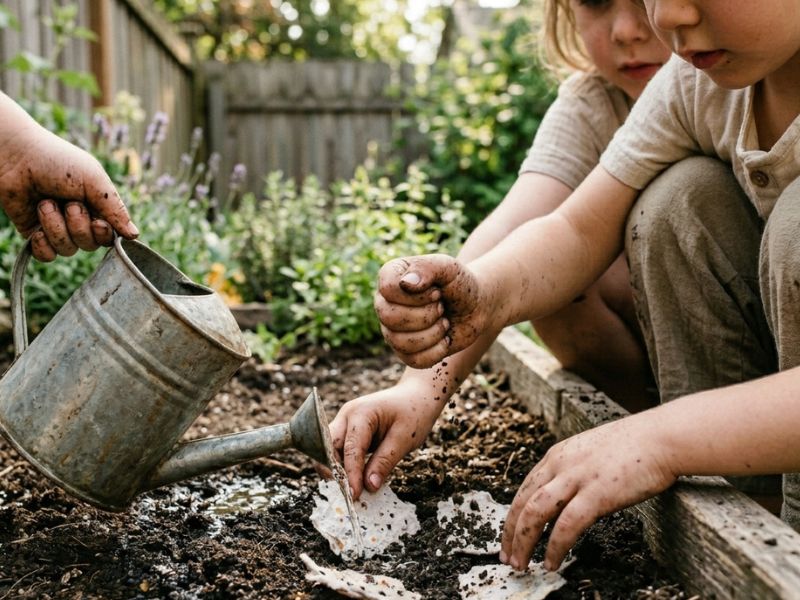
3. Water-Saving Indoor Herb Garden from Kitchen Scraps
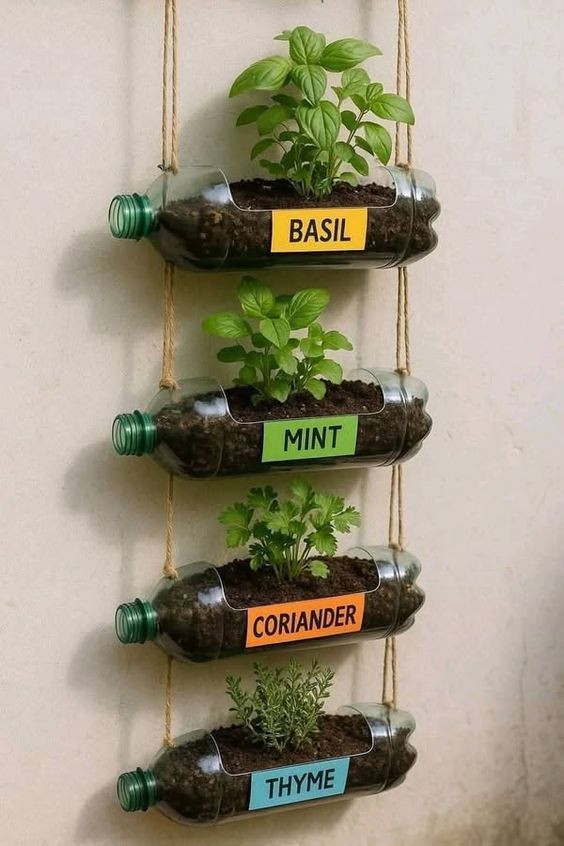
A simple indoor herb garden using scraps from your kitchen, like eggshells, coffee grounds, or vegetable stems, that grows fresh herbs on your windowsill. This is a perfect way to combine gardening with sustainability, all from the comfort of your home.
The benefit:
You save water, reduce kitchen waste, and get fresh herbs for cooking without buying expensive pots or fertilizers. This project is a small but powerful way to practice sustainable living while making your home greener.
It’s one of those eco-friendly DIY projects that feels productive and rewarding every day.
Materials you’ll need:
- Eggshells or small jars/containers
- Leftover coffee grounds (optional, adds nutrients)
- Vegetable scraps (like celery bases, green onion ends) or herb cuttings
- Soil (recycled from old plant pots is fine)
- A small tray to catch water
- soldering iron or cutter
How to do it step by step:
- Prepare your containers:
- If using eggshells, carefully crack the tops and remove the egg. Rinse and dry the shells.
- For jars or small containers, make sure they’re clean and have drainage holes or a layer of small pebbles at the bottom.
- Add soil and scraps:
- Fill your containers about two-thirds with soil.
- Sprinkle a little used coffee grounds if you want extra nutrients.
- Plant your vegetable scraps or herb cuttings so the roots are covered by soil.
- Position and water:
- Place your garden in a sunny windowsill. Herbs and veggies need sunlight to grow strong.
- Water lightly but consistently. Because this is a small, controlled garden, you’ll use less water than traditional pots, making it a water-saving solution.
- Care and grow:
- Check every day for growth and remove any leaves that start to rot.
- Harvest small amounts as needed; your plants will keep producing for weeks if cared for properly.
Saves time & money:
- Time: This project takes about 10–15 minutes to set up, and maintenance is just a few minutes each day.
- Money: You’re using scraps and containers you already have, so there’s little to no cost. Plus, you’ll save money on store-bought herbs.
Extra touch:
- Arrange your containers in a small tiered tray to maximize sunlight and space.
- Label each plant with fun tags or small sticks, this adds a cute, organized look.
- Pair herbs that grow well together (like basil and parsley) for better growth and minimal waste.
Solve the crafts that stump beginners, and even earn a little, through 10 Cricut Crafts Beginners Always Struggle With- And How to Make and Sell Them.
4. Eco-Friendly Laundry Detergent Pods
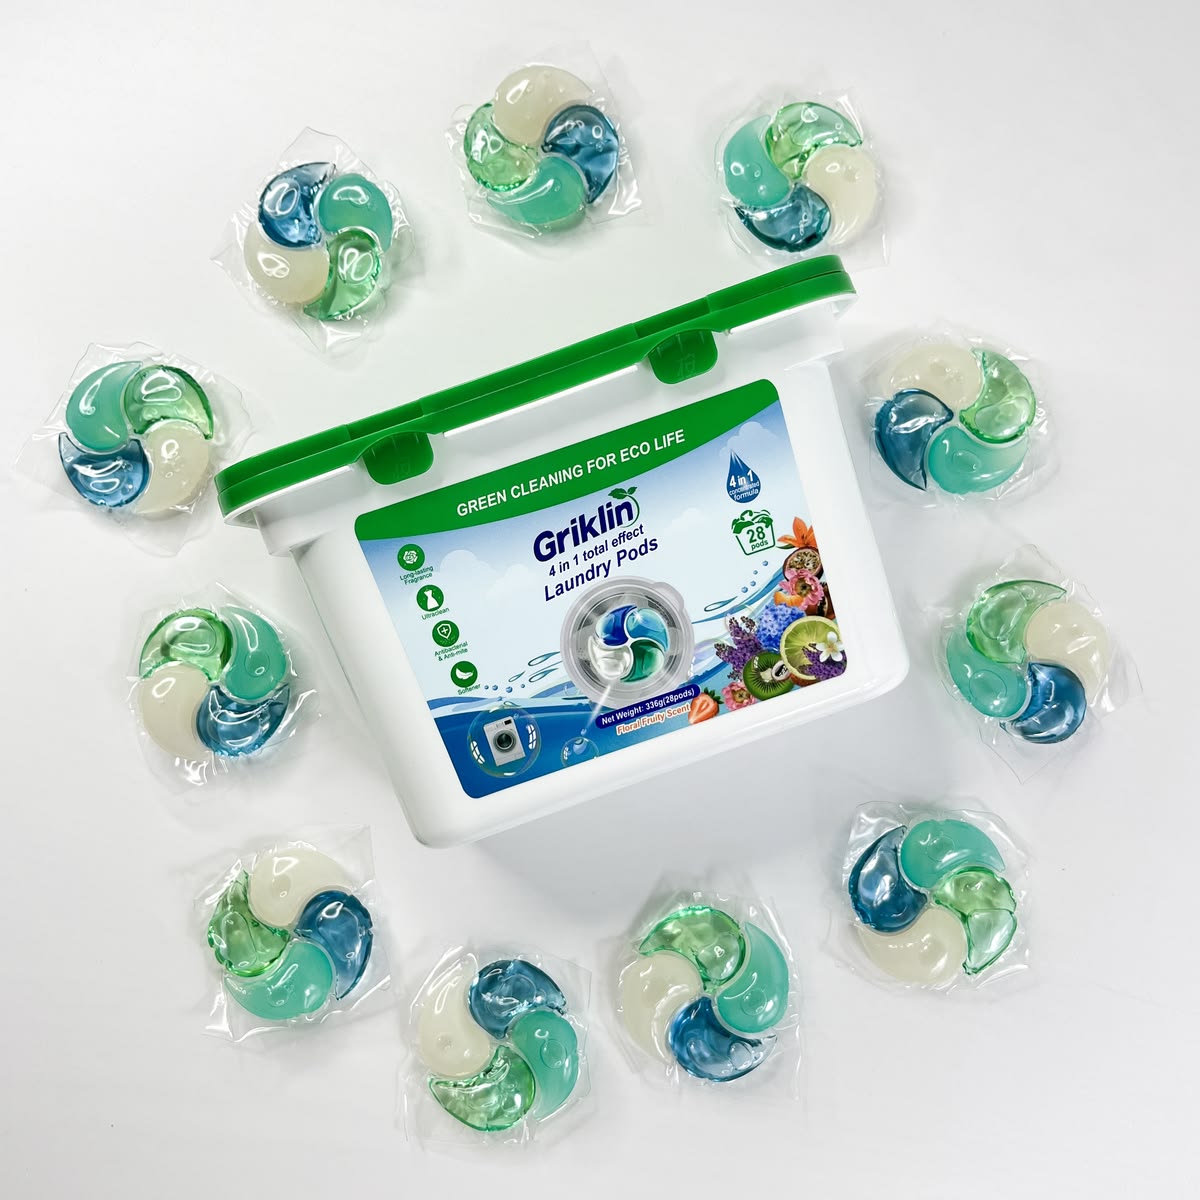
Homemade laundry detergent pods are small, concentrated packs you can toss directly into the washing machine. They clean your clothes effectively, reduce plastic waste, and avoid harsh chemicals found in many store-bought detergents.
This is one of the easiest eco-friendly DIY projects that saves money and helps your household stay more sustainable.
The benefit:
These pods reduce plastic packaging, cut chemical exposure, and let you control the ingredients. They’re safe for most washing machines and gentle on sensitive skin. Making them at home is much cheaper than buying pre-made pods, and you can customize scents naturally with essential oils.
Materials you’ll need:
- Baking soda (cleans and deodorizes)
- Washing soda (boosts cleaning power)
- Castile soap or grated natural soap
- Essential oils (optional, for scent)
- Water
- Ice cube tray or silicone mold
- Spoon or small funnel
How to do it step by step:
- Mix the ingredients:
- In a bowl, combine 1 cup baking soda, 1 cup washing soda, and 1/2 cup grated soap.
- Stir gently to mix evenly.
- Add liquid and scent:
- Slowly add 1/2 cup water while stirring to form a slightly damp mixture.
- Add 10–15 drops of essential oils (like lavender, lemon, or tea tree) for a natural scent.
- Form the pods:
- Press the mixture firmly into each compartment of an ice cube tray or silicone mold.
- Make sure the mixture is compact so the pods hold together once dry.
- Dry completely:
- Leave the pods to dry for 24–48 hours in a cool, dry area.
- Once dry, pop them out of the mold and store in an airtight container.
- Use the pods:
- Drop 1 pod into your washing machine for a regular load.
- Adjust the number of pods for larger loads.
Saves time & money:
- Time: Making a batch takes about 20–30 minutes, and each batch lasts for several weeks.
- Money: Ingredients are inexpensive and can make dozens of pods, much cheaper than buying pre-made eco-friendly detergent pods.
Extra touch:
- Use a combination of essential oils to create your signature scent.
- Color code pods with natural powders (like turmeric for yellow or beetroot powder for pink) for fun, easy-to-identify loads.
- Keep a small pouch of pods in a convenient spot to make laundry day easier and more organized.
Turn seasonal celebrations into lasting memories with Eco-Friendly Easter Crafts You Can Make and Reuse Year After Year.
5. Upcycled Coffee Grounds Fertilizer
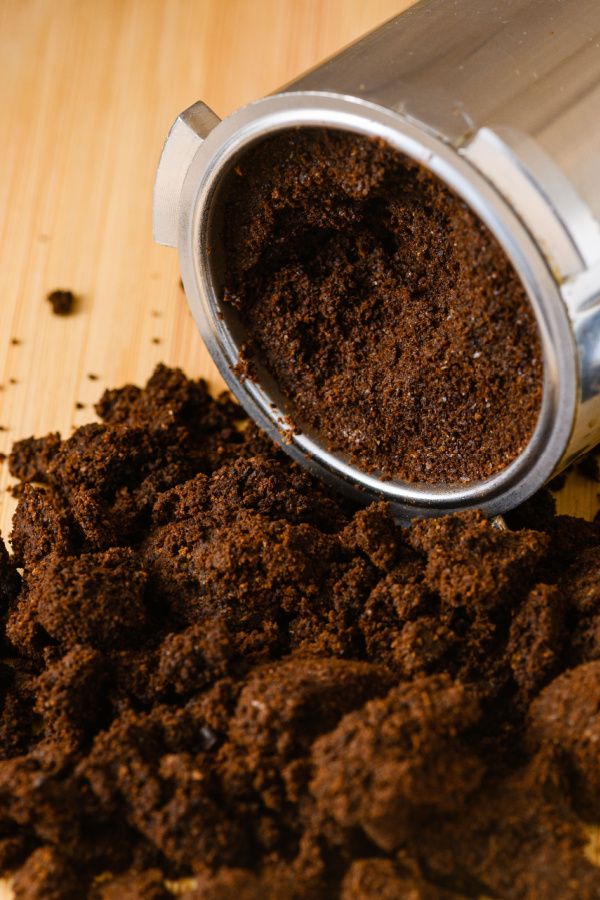
Turn leftover coffee grounds into a nutrient-rich fertilizer for your indoor or outdoor plants. This is an easy way to recycle kitchen waste and give your plants a healthy boost without buying commercial fertilizers.
The benefit:
Coffee grounds add nitrogen, improve soil structure, and help retain moisture for your plants. Using them reduces food waste, keeps your garden chemical-free, and supports sustainable plant care.
Materials you’ll need:
- Used coffee grounds
- Small containers or jars for storage
- Optional: eggshells (crushed) for extra calcium
- Plants in pots or garden soil
How to do it step by step:
- Collect your coffee grounds:
- After brewing coffee, let the grounds cool.
- Dry them slightly on a plate or in a low oven to prevent mold if you won’t use them immediately.
- Prepare the fertilizer mix:
- Mix coffee grounds with a small amount of crushed eggshells if you want extra calcium for your plants.
- For indoor plants, use 1–2 teaspoons per pot. For garden beds, sprinkle evenly across the soil.
- Apply to your plants:
- Gently work the coffee grounds into the top layer of soil without disturbing roots.
- Water the plants lightly afterward to help nutrients soak in.
- Storage:
- Store extra coffee grounds in an airtight container in a cool, dry place.
- Avoid leaving damp coffee grounds in an open container to prevent mold.
Saves time & money:
- Time: Applying coffee grounds is quick, just a few minutes per plant or pot.
- Money: You’re reusing a byproduct of your daily coffee, so it’s essentially free fertilizer.
Extra touch:
- Combine with other kitchen scraps like banana peels or veggie leftovers to create a richer compost mix for your plants.
- Use coffee grounds as a natural pest deterrent for ants or slugs in your garden, sprinkle a ring around plants to help protect them.
- Label pots with the date you applied coffee grounds so you can track plant growth and nutrient cycles.
Tackle projects even if you think you aren’t crafty with DIY Projects for People Who Don’t Feel Crafty at All.
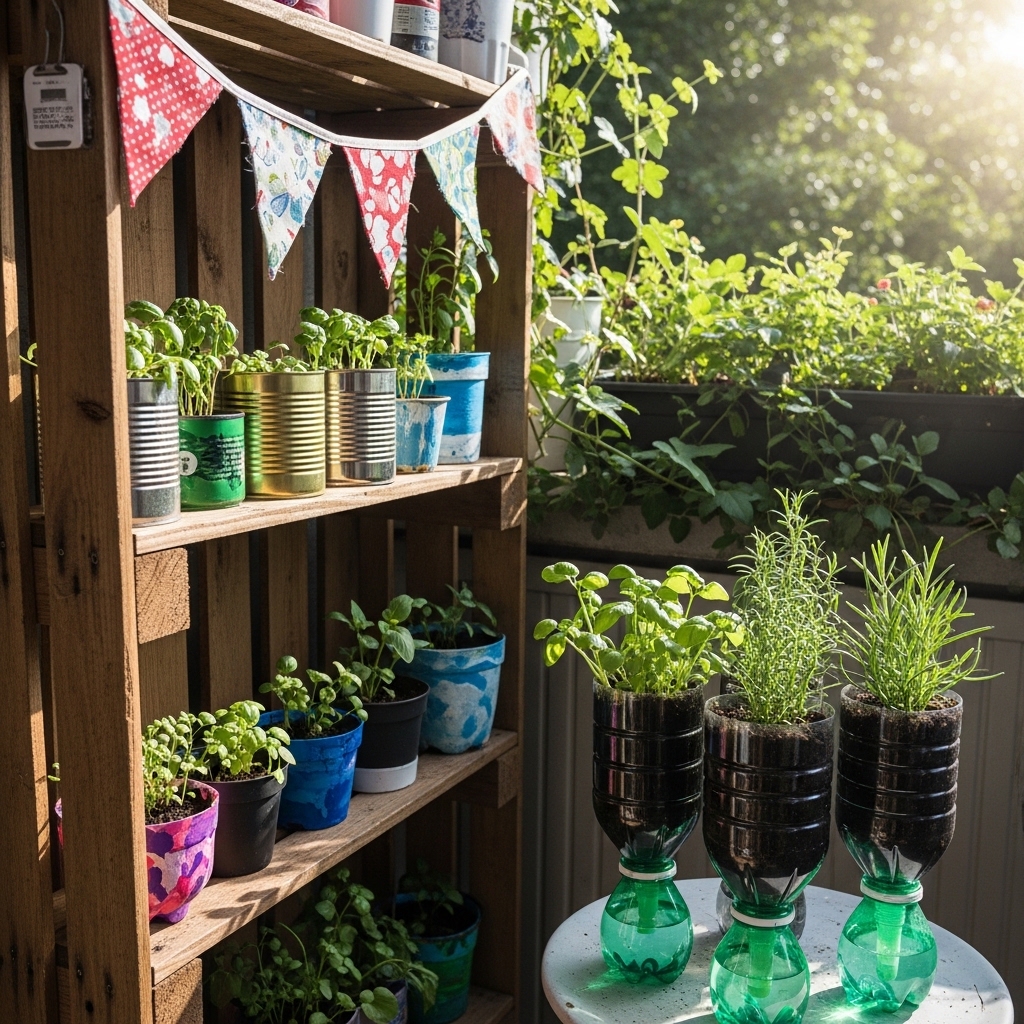
6. Homemade Compost Bin
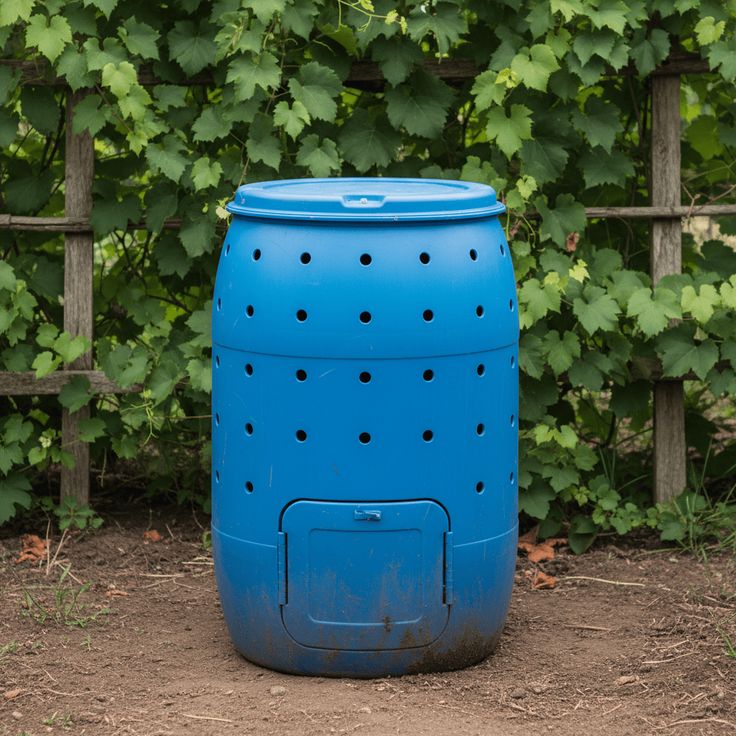
Photo credit: @ Small Space Farming
A small-scale compost bin that you can keep in your kitchen, balcony, or any small indoor/outdoor space. It turns your food scraps into rich, natural compost that feeds your plants, reduces waste, and keeps your home eco-friendly.
The benefit:
Composting helps divert organic waste from the trash, reduces methane emissions from landfills, and creates nutrient-rich soil for plants.
Even in a small space, you can recycle scraps like vegetable peels, coffee grounds, eggshells, and paper towels into something useful for your garden or potted plants.
Materials you’ll need:
- A small plastic or glass container with a lid (5–10 liters works well)
- A drill or sharp tool to make ventilation holes
- Scraps from your kitchen (vegetable peels, fruit skins, coffee grounds, eggshells)
- Dry materials (like shredded paper, cardboard, or leaves)
- Optional: small garden trowel or spoon for mixing
How to do it step by step:
- Prepare your bin:
- Drill or poke small holes in the lid and sides for ventilation. Proper airflow helps decomposition and reduces odors.
- If you’re using a container without a lid, just ensure it’s placed somewhere discreet but not completely sealed.
- Start layering:
- Add a layer of dry materials first (shredded paper, cardboard, or dried leaves). This helps balance moisture and keeps the compost from getting too wet.
- Add a layer of fresh kitchen scraps (vegetable peels, fruit skins, coffee grounds).
- Alternate layers until your bin is about two-thirds full.
- Maintain your compost:
- Mix or stir the contents every few days using a small spoon or trowel to speed up decomposition.
- If it’s too wet, add more dry material. If it’s too dry, sprinkle a little water.
- Keep the bin covered to minimize smells but ensure airflow through the holes.
- Harvest the compost:
- After 3–6 weeks (depending on temperature and materials), your compost should look dark and crumbly with an earthy smell.
- Use it for potted plants, your small balcony garden, or mix it into soil for herbs and vegetables.
Saves time & money:
- Time: Setting up the bin takes about 15–20 minutes. Daily maintenance is just a few minutes to mix and monitor moisture.
- Money: Using kitchen scraps and a small container you already own makes this a cost-free way to create nutrient-rich compost instead of buying commercial fertilizers.
Extra touch:
- Keep a small tray under the bin to catch any leaks and make cleaning easier.
- Sprinkle a little garden soil or finished compost in the bin each week to introduce helpful microbes and speed up decomposition.
- Label your bin “Kitchen Compost” to remind everyone in your home to add scraps, making it a family-friendly eco habit.
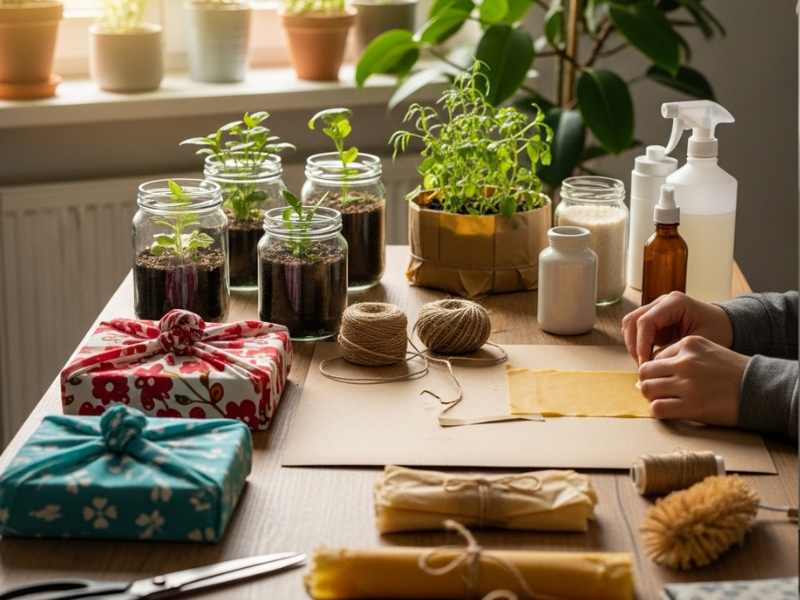
7. Reusable Gift Wrap From Fabric Scraps
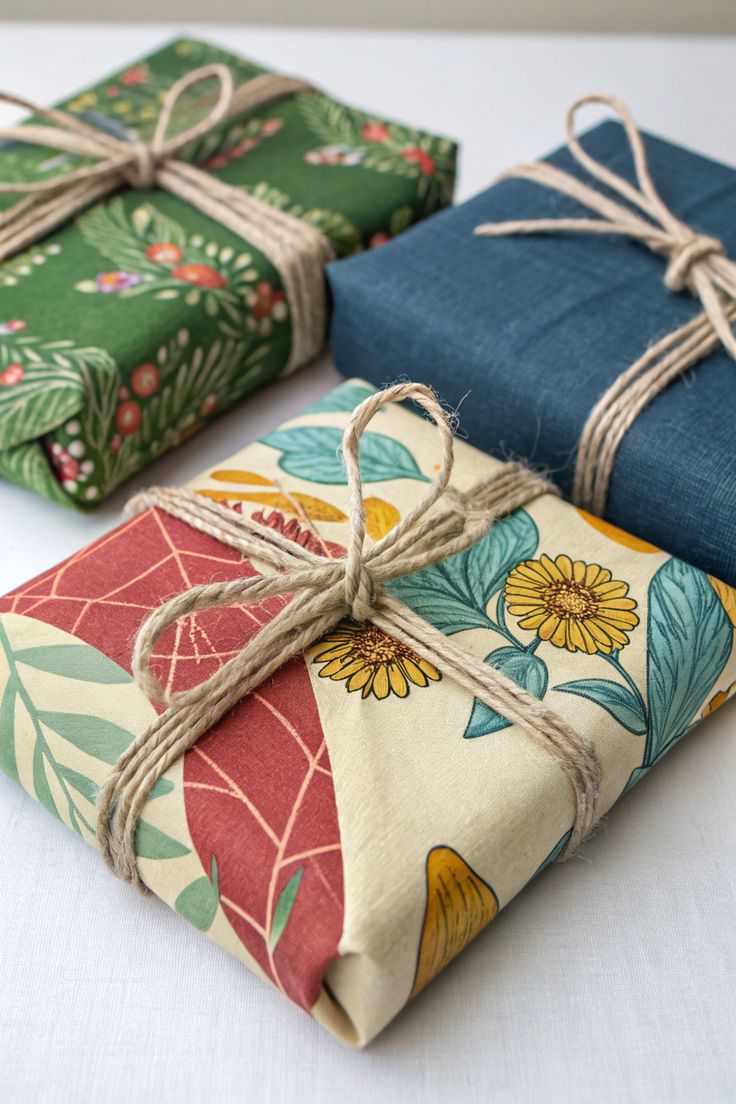
Instead of using disposable paper, create beautiful gift wraps from leftover fabric scraps. These wraps can be used over and over, making your gifts eco-friendly and unique. This is one of the easiest eco-friendly DIY projects that transforms small scraps into something practical and stylish.
Take time to read my guide on: What to Do With Fabric Scraps: Sewing Hacks That Turn Leftovers Into Keep-Worthy Gifts.
The benefit:
By reusing fabric, you reduce paper waste, save money, and add a personal touch to your gifts. The wraps are durable, washable, and suitable for all kinds of presents, from small boxes to bottles and baskets.
Materials you’ll need:
- Fabric scraps (cotton, linen, or old scarves work well)
- Scissors
- Needle and thread or fabric glue (optional)
- Ribbon, twine, or yarn for tying
- Optional: stencils or fabric markers for decorating
How to do it step by step:
- Choose and prepare your fabric:
- Pick fabric scraps large enough to cover your gift.
- Cut them into squares or rectangles depending on the size of your presents.
- If the fabric frays easily, fold the edges in slightly and sew a simple hem or use fabric glue.
- Wrap your gift:
- Lay the fabric flat with the gift in the center.
- Bring the corners of the fabric together at the top and tie with ribbon, twine, or yarn.
- Adjust folds so it looks neat and secure.
- Add creative touches:
- Use fabric markers, stamps, or stencils to add patterns or designs.
- Attach a small recycled tag or dried flower for decoration.
- Reusing the wrap:
- After the gift is opened, gently untie and fold the fabric for the next use.
- Wash if necessary, and store in a small box or drawer ready for future gifts.
Saves time & money:
- Time: Wrapping with fabric is quick once you get the hang of folding and tying—it takes about 5–10 minutes per gift.
- Money: You’re reusing scraps or old textiles, so it costs nothing compared to buying gift wrap or reusable alternatives.
Extra touch:
- Mix and match different fabric patterns for a colorful, layered look.
- Use small scraps to create matching gift tags, bows, or mini pouches to complete the set.
- Keep a small basket of fabric wraps in your home so wrapping gifts becomes fast, organized, and sustainable.
Master delicate, elegant DIY touches that make events unforgettable in Handcrafted Petal Floral Hand Fan for Easter Weddings: A DIY Guide.
8. DIY Eco-Friendly Cleaning Products
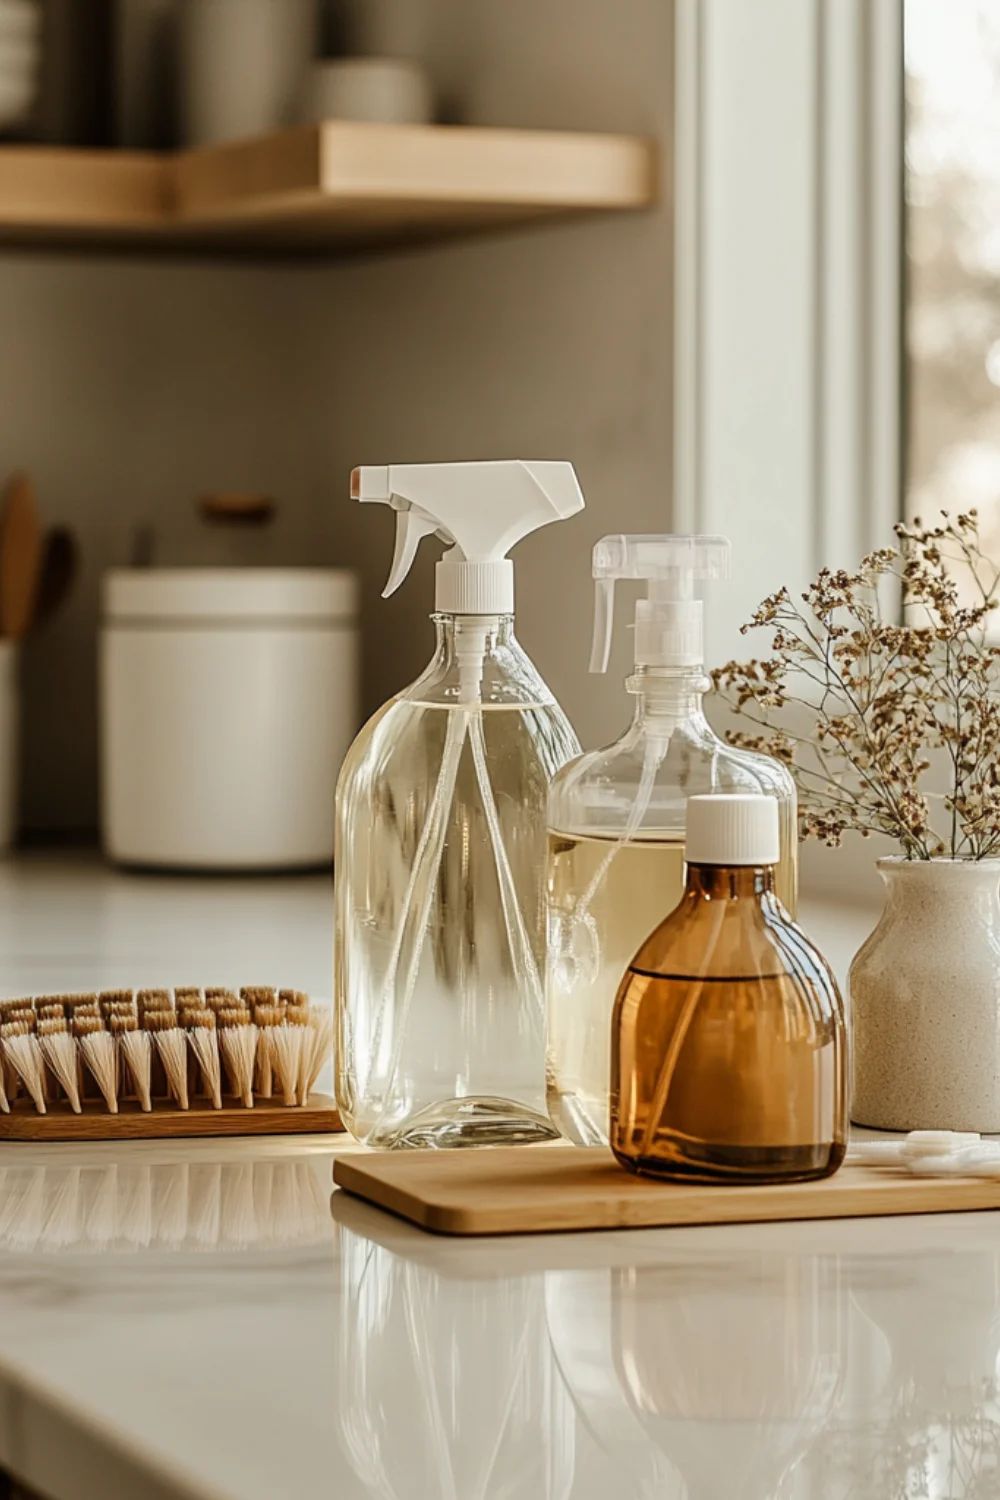
Simple, natural cleaning products you can make at home using ingredients from your kitchen. These cleaners work just as well as commercial ones but are safer for your family, pets, and the environment. This is one of the most practical eco-friendly DIY projects for a sustainable home.
The benefit:
Making your own cleaners reduces chemical exposure, cuts down on single-use plastic bottles, and saves money. Plus, you control exactly what goes into your home, no harsh perfumes or unnecessary additives.
Materials you’ll need:
- White vinegar
- Baking soda
- Lemon juice
- Castile soap or liquid soap
- Spray bottles or small containers (reusable)
- Optional: essential oils for scent (tea tree, lavender, or lemon)
How to do it step by step:
- All-purpose spray:
- Mix 1 cup water, 1 cup white vinegar, and 10 drops of essential oil in a spray bottle.
- Use for countertops, windows, and sinks.
- Shake before each use.
-
Scrubbing paste:
- Combine 1/2 cup baking soda with enough water to make a thick paste.
- Apply to sinks, stovetops, or tiles and scrub with a sponge.
-
Glass cleaner:
- Mix 2 cups water, 1/2 cup white vinegar, and 1 teaspoon lemon juice in a spray bottle.
- Spray on mirrors or glass surfaces and wipe with a lint-free cloth.
-
Degreasing solution:
- Mix 1 cup warm water, 1/4 cup baking soda, and a few drops of castile soap.
- Use on greasy stovetops, ovens, or kitchen cabinets.
Saves time & money:
- Time: Each solution takes less than 5 minutes to mix. Once bottles are ready, cleaning becomes easier and faster.
- Money: All ingredients are inexpensive and often already in your kitchen, saving money compared to store-bought eco cleaners.
Extra touch:
- Label each bottle clearly with its purpose and date made.
- Reuse old spray bottles or jars to reduce waste.
- Customize scents by mixing different essential oils, lavender for bathrooms, lemon for kitchens, to make cleaning more enjoyable.
Add instant party glamour you actually made yourself in DIY Sequin Clutch Tutorial: Easy & Sparkly Party Handbag You Can Make Yourself.
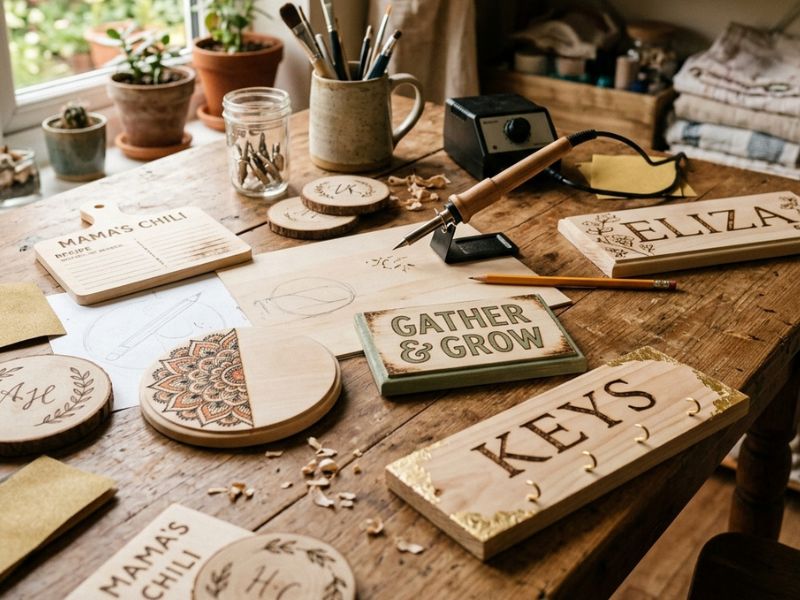
9. Reclaimed Wood Wall Organizer
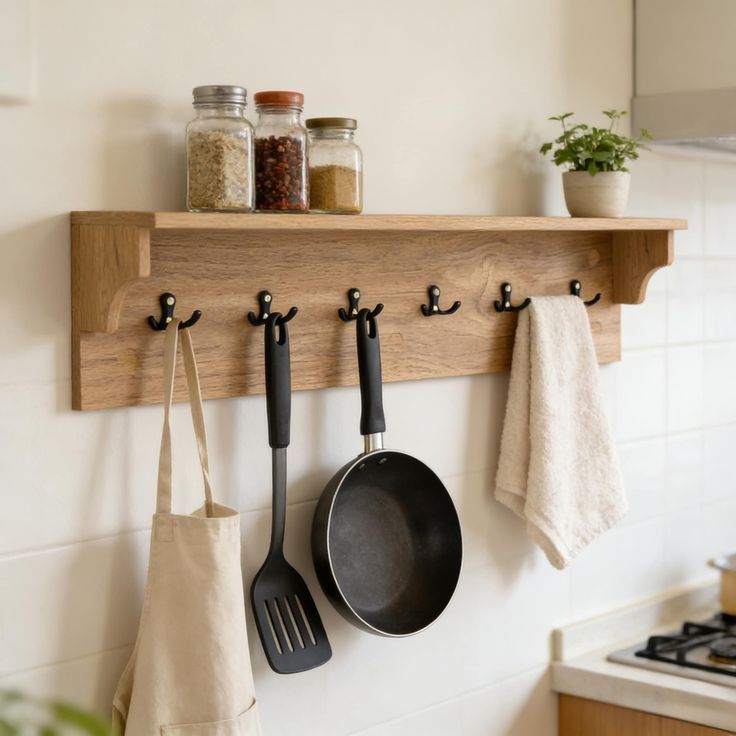
A wall-mounted organizer made from old or leftover wood, perfect for storing mail, keys, small plants, or craft supplies. It’s a stylish way to organize your space while giving new life to wood that would otherwise go to waste.
The benefit:
Using reclaimed wood is environmentally friendly and cost-effective. It adds a rustic charm to your home and helps you stay organized, especially in small spaces or apartments. This project also teaches you basic woodworking skills you can use in other DIY projects.
Materials you’ll need:
- Reclaimed wood planks (old pallets, drawer fronts, or leftover trim)
- Screws or nails
- Drill or hammer
- Sandpaper
- Optional: wood stain or paint for finishing
- Wall anchors (if mounting on drywall)
How to do it step by step:
-
Select and prep your wood:
- Choose planks that are solid and not rotting.
- Sand each piece thoroughly to remove rough edges, splinters, and old finishes.
-
Plan your design:
- Decide how many compartments or shelves you want.
- Lay the planks on a flat surface to visualize the organizer’s shape and size.
- You can create pockets for letters, hooks for keys, or a small shelf for plants.
-
Assemble the organizer:
- Use screws or nails to attach pieces together.
- For small shelves, secure each plank horizontally with at least two screws on each end for stability.
- Make sure everything is level as you go.
-
Optional finishing:
- Apply a natural wood stain, paint, or clear varnish to protect the wood and enhance its appearance.
- Let it dry completely before hanging.
-
Mount on the wall:
- Mark the spots for screws or wall anchors on the wall.
- Drill or hammer in wall anchors if needed.
- Secure the organizer to the wall, ensuring it’s level and stable.
Saves time & money:
- Time: Prep and assembly can take 1–2 hours depending on complexity.
- Money: Using reclaimed wood means no need to buy new planks, and leftover screws or nails from other projects can be reused.
Extra touch:
- Add small hooks underneath for keys or jewelry.
- Attach a corkboard or chalkboard section for notes or reminders.
- Arrange multiple organizers side by side for a larger wall storage system.
10. Solar-Powered Mason Jar Lamps
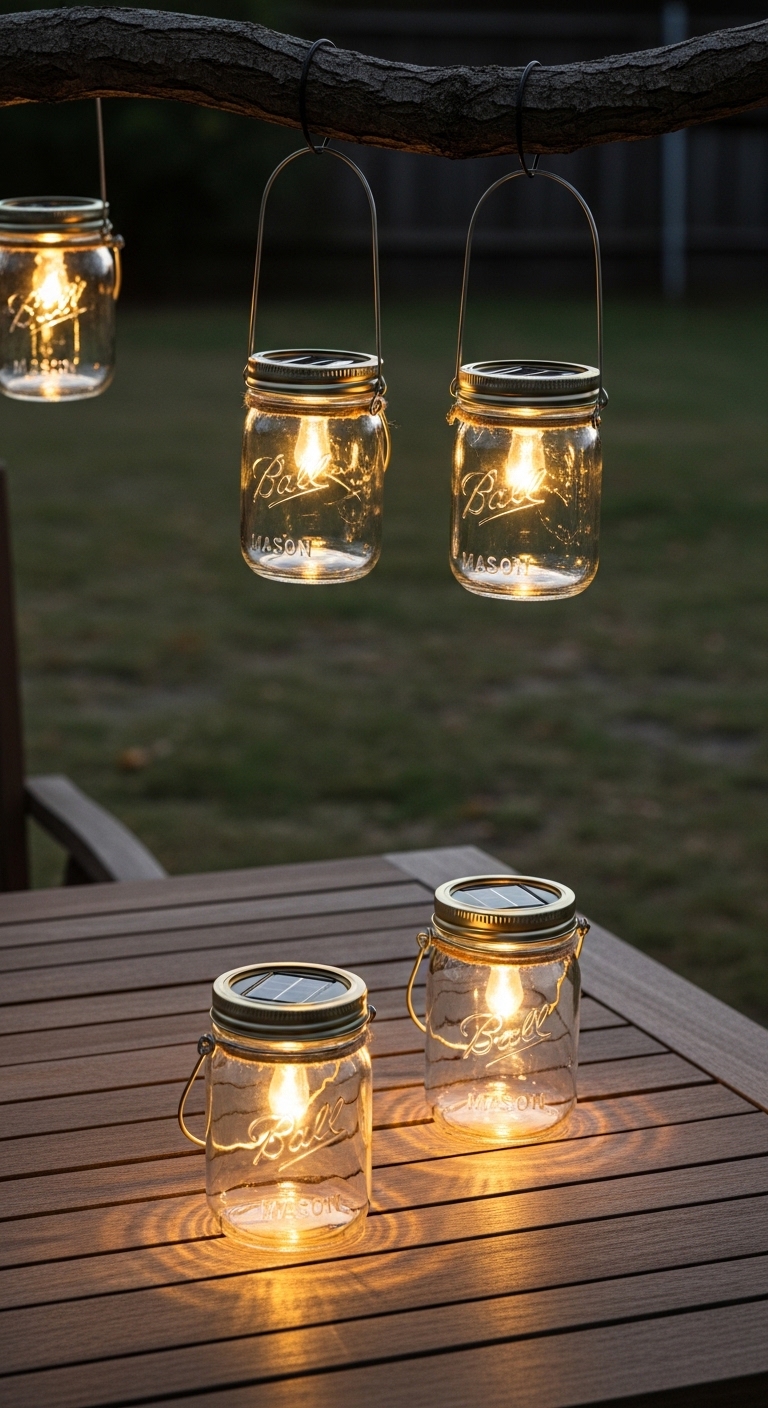
A charming lamp made from a recycled mason jar with a small solar-powered LED light inside. This project brings a cozy, sustainable glow to your home or outdoor space. It’s one of the easiest eco-friendly DIY projects that combines creativity, sustainability, and practicality.
The benefit:
These lamps reduce electricity use, repurpose glass jars, and provide a soft, ambient light for indoor or outdoor areas. By using solar energy, you’re creating a sustainable lighting option that’s both decorative and functional.
Materials you’ll need:
- Mason jars (any size)
- Small solar-powered LED lights
- Decorative elements (optional: pebbles, sand, faux flowers)
- Glue or adhesive (optional for decorations)
How to do it step by step:
Prepare the jar:
- Clean your mason jar thoroughly.
- Ensure the solar LED light fits inside the jar.
Add decorative elements:
- Fill the bottom with pebbles, sand, or other decorative touches.
- Place the solar light inside, making sure the solar panel remains accessible.
Assemble the lamp:
- Close the jar lid or leave it slightly open depending on your design.
- If desired, add glue for extra decorative touches like small flowers or beads.
Place and use:
- Put the jar in sunlight during the day to charge the solar light.
- At night, it will automatically illuminate, giving a soft, warm glow.
Saves time & money:
- Time: Setup takes 20–30 minutes. Once charged, no daily maintenance is needed.
- Money: Uses jars and small solar lights you may already have, reducing electricity costs.
Extra touch:
- Hang multiple jars with twine for a rustic, magical chandelier effect.
- Group several jars together for a cozy outdoor patio display.
- Paint or decorate the jars to match your home décor or seasonal themes.
Turn small, low-cost ideas into creative income with 10 Low-Cost DIY Crafts to Make and Sell From Home.
You Can Do This
Sustainable living doesn’t have to be perfect. Just pick one of these eco-friendly DIY projects to try at home, make a little planter, wrap a gift in fabric, or turn scraps into something useful. It doesn’t have to be fancy.
The point is, you tried. You made something. And that small step already matters.
Share it with us: Drop a photo or a note in the comments about what you made. Seeing what others create can give everyone new ideas and a little motivation to try their own eco-friendly DIY projects.
I’m rooting for you.
This guide talked on: Eco-Friendly DIY Projects for Sustainable Living.