This guide on 10 thrift store furniture flips that look expensive on a budget shows you how to transform secondhand furniture into polished, modern pieces with ease.
You know how you can walk into a thrift store, see a piece of furniture, and feel like it has potential… but you’re not fully sure what to do with it?
I’ve been there more times than I can count.
Sometimes it’s a dresser that feels a bit too bulky. Or a table that isn’t exactly ugly, just… off. And you stand there thinking, if I take this home, will I actually make it look better—or just waste my time and money?
That hesitation is real.
Not because you don’t have ideas, but because it’s not always obvious what makes one piece look clean and expensive, while another still feels like a DIY project—even when both were done with effort.
And it’s not about spending more.
It usually comes down to a few small choices, how you simplify a shape, the kind of finish you use, or even what you decide to leave alone.
That’s what this post is about.
I’m going to walk you through 10 thrift store furniture flips that look expensive on a budget, but more importantly, I’ll point out the little details that make the difference, so you’re not just trying things blindly.
Once you start noticing those things, it gets a lot easier to walk into a thrift store and actually know what’s worth picking up, and what you can turn into something you’ll be proud to keep in your space.
You’ll notice the same idea applies beyond furniture, and Thrift flip Sewing Projects Ideas For People Who want Expensive Style on A Budget shows how to get that polished look with simple fabric upgrades.
What Makes a Thrift Flip Look Expensive (Or Not)
You can grab two very similar pieces at a thrift store, spend about the same on both, and yet one ends up looking clean, intentional, like it belongs in a well-put-together home… and the other still feels like a project in progress.
It’s rarely about money. It’s about a few subtle things that most people overlook at first, proportion, finish, and knowing when to stop.
Here’s what I mean:
- Putting on too many knobs or handles, or details that don’t really work together
- Not thinking about the size or weight of the piece, sometimes it ends up looking clunky or awkward.
- Choosing a paint finish that doesn’t fit, too flat, too shiny, or unevenly applied
None of these are huge mistakes alone. But together, they quietly make a piece feel cheap.
What really makes furniture feel high-end is the opposite: restraint, balance, and letting the strongest parts shine.
Think of it like editing a photo. You don’t need every filter, sticker, or frame to make it look good, you just remove distractions and let the best parts stand out.
Furniture works the same way. Expensive-looking pieces aren’t about what you add, they’re about what you edit and simplify.
The way small details change everything here is similar to what’s shared in How to Make Resin Jewelry with Real Flowers That Looks Professional at Home, especially when it comes to finishing touches.
Thrift Store Furniture Flips That Look High-End on a Budget
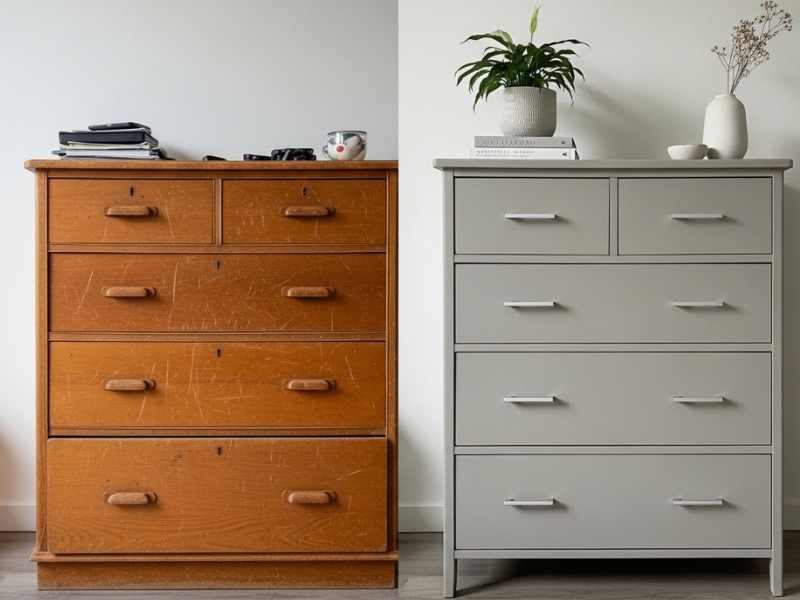
1. Boxy Dresser Transformation
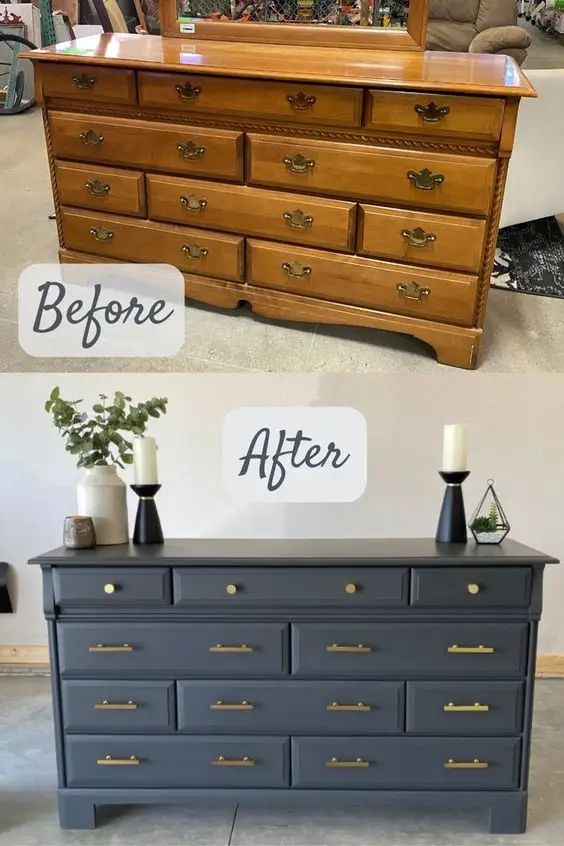
This is a classic piece you see all the time in thrift stores, a chunky dresser with extra trim and details that make it feel outdated. The goal here is to simplify it so it reads clean and intentional.
Materials You’ll Need:
- Sandpaper (medium and fine grit)
- Paintbrushes or foam rollers
- Neutral paint (soft gray, warm beige, or charcoal)
- Slim, minimalist knobs or handles
- Screwdriver (for removing old hardware)
- Drop cloth or old newspapers
- Optional: wood filler (for filling holes or dents)
Steps to Transform:
- Remove Extra Trim: Take off bulky or decorative trim that makes the dresser feel heavy. Keep only the essential structure.
- Sand Edges: Smooth rough spots and soften corners with medium, then fine-grit sandpaper.
- Paint: Apply 1–2 coats of neutral paint. Stick to a soft gray, warm beige, or charcoal for a modern, high-end feel.
- Swap Hardware: Replace old knobs or handles with slim, minimalist options. Even small hardware updates change how polished the piece looks.
2. Coffee Table Leg Lift
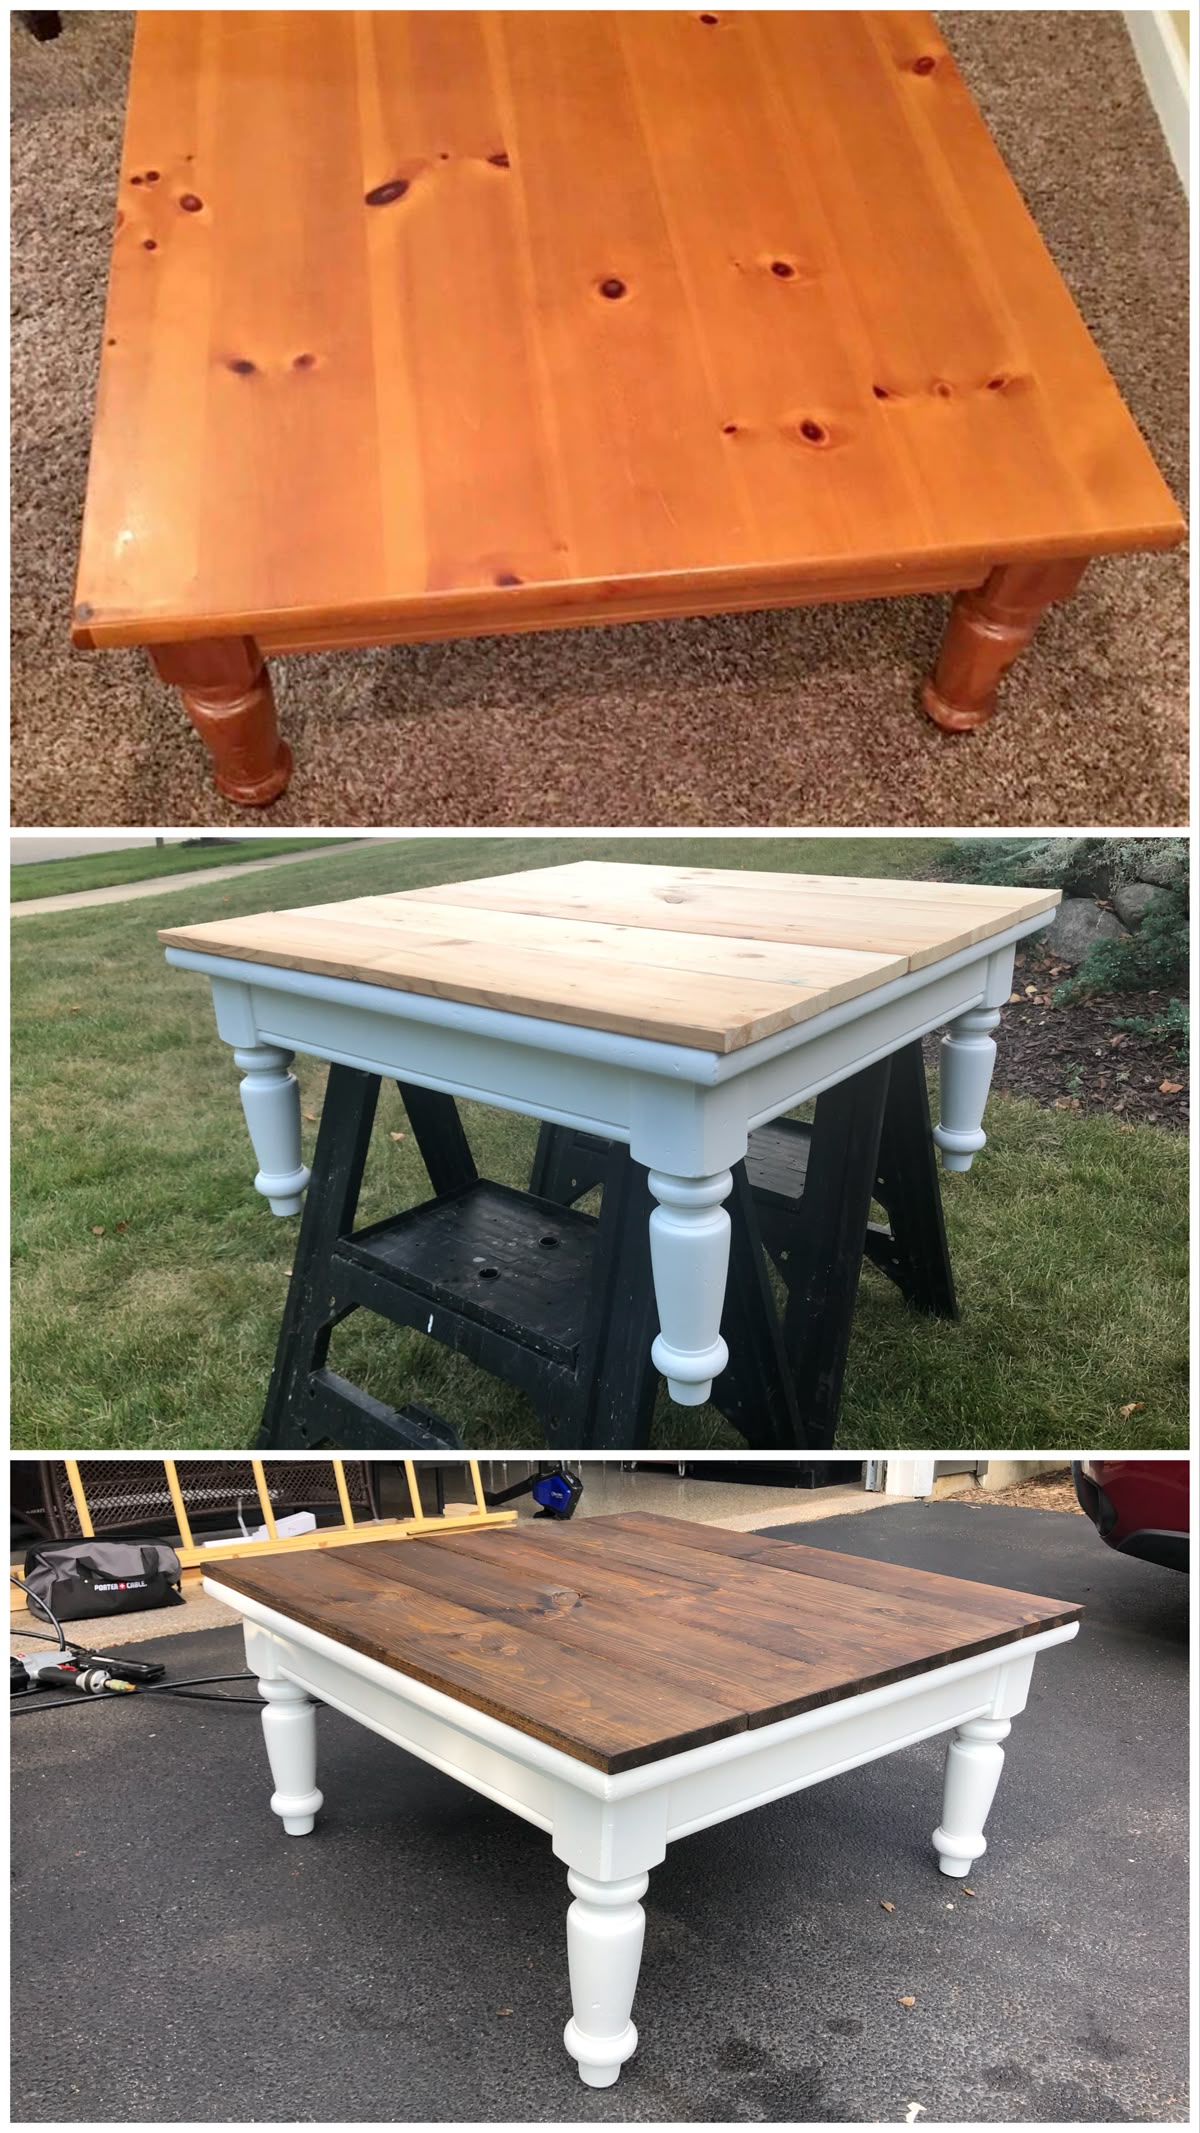
Coffee tables in thrift stores are often low or stubby, which can make them feel outdated or awkward in a living space. The goal here is to adjust the height and proportions so the table looks intentional and well-designed.
Materials You’ll Need:
- Furniture legs or leg extensions (wood or metal)
- Screws and screwdriver/drill
- Sandpaper (optional, for smoothing legs before painting or finishing)
- Paint or stain (optional, to match table top or existing décor)
- Measuring tape
- Level
Steps to Transform:
- Measure and Plan: Check the current height of your table and decide on the new height that works for your space.
- Remove Existing Legs (if necessary): Some tables may need old legs removed before adding new ones.
- Attach New Legs: Secure your chosen legs or extensions with screws, making sure everything is level.
- Finishing Touches: Sand or paint legs if needed to match the tabletop or desired style.
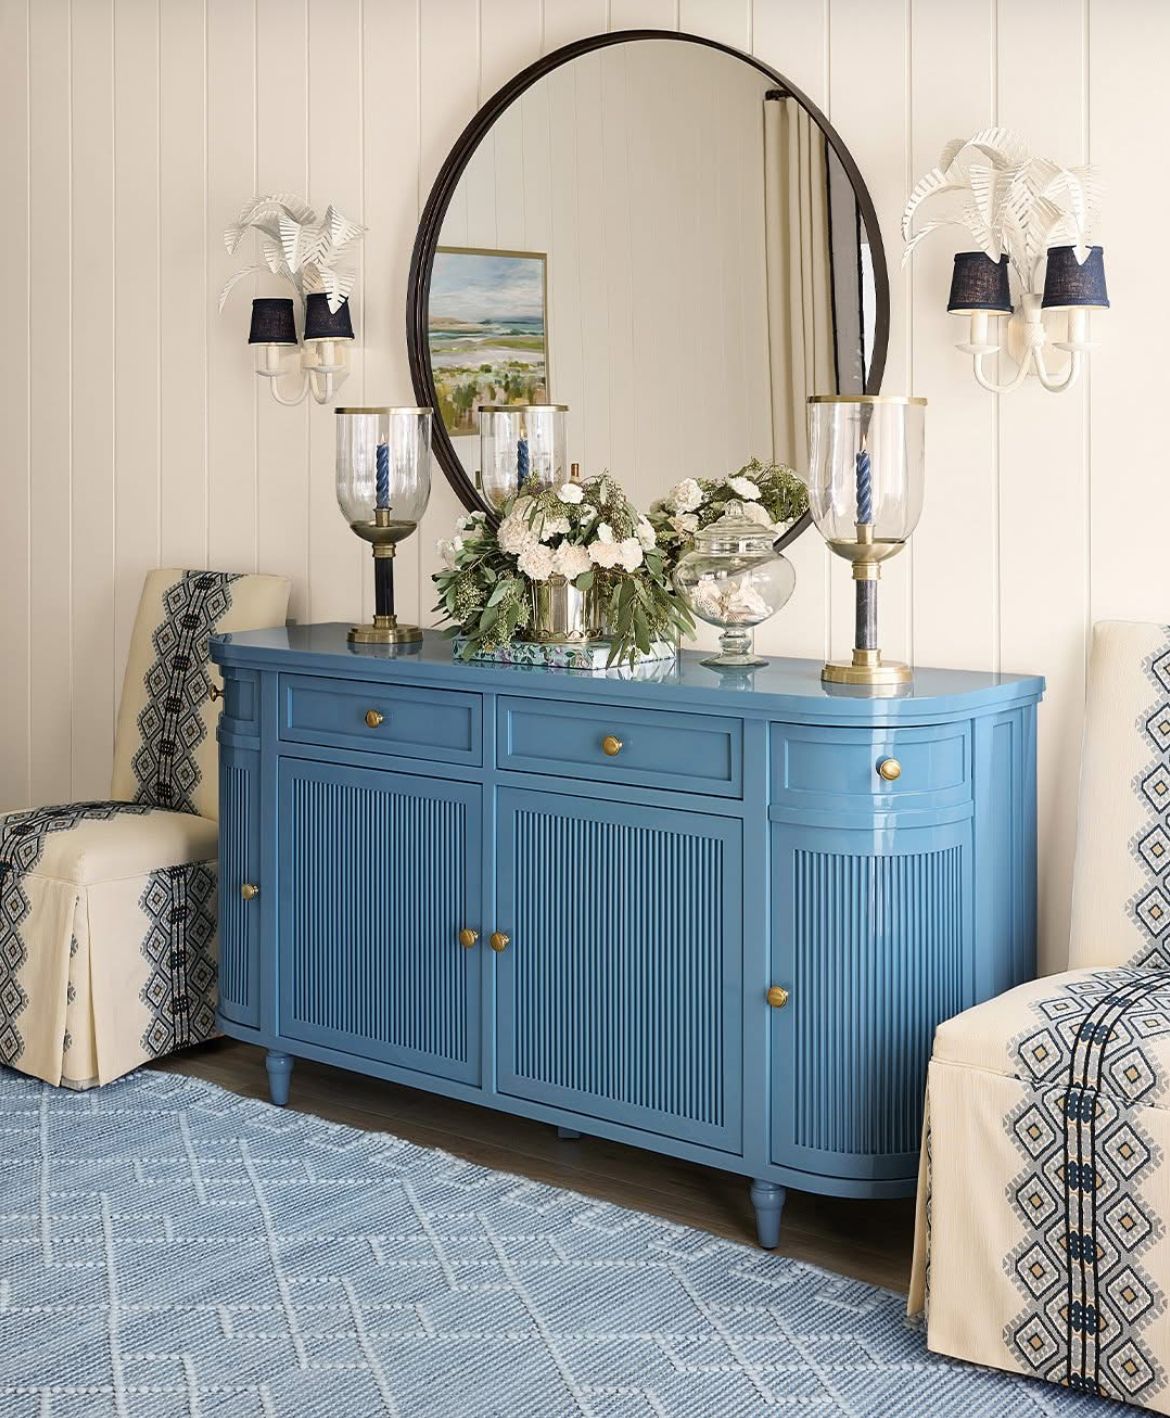
3. Plain Cabinet → Paneled Statement
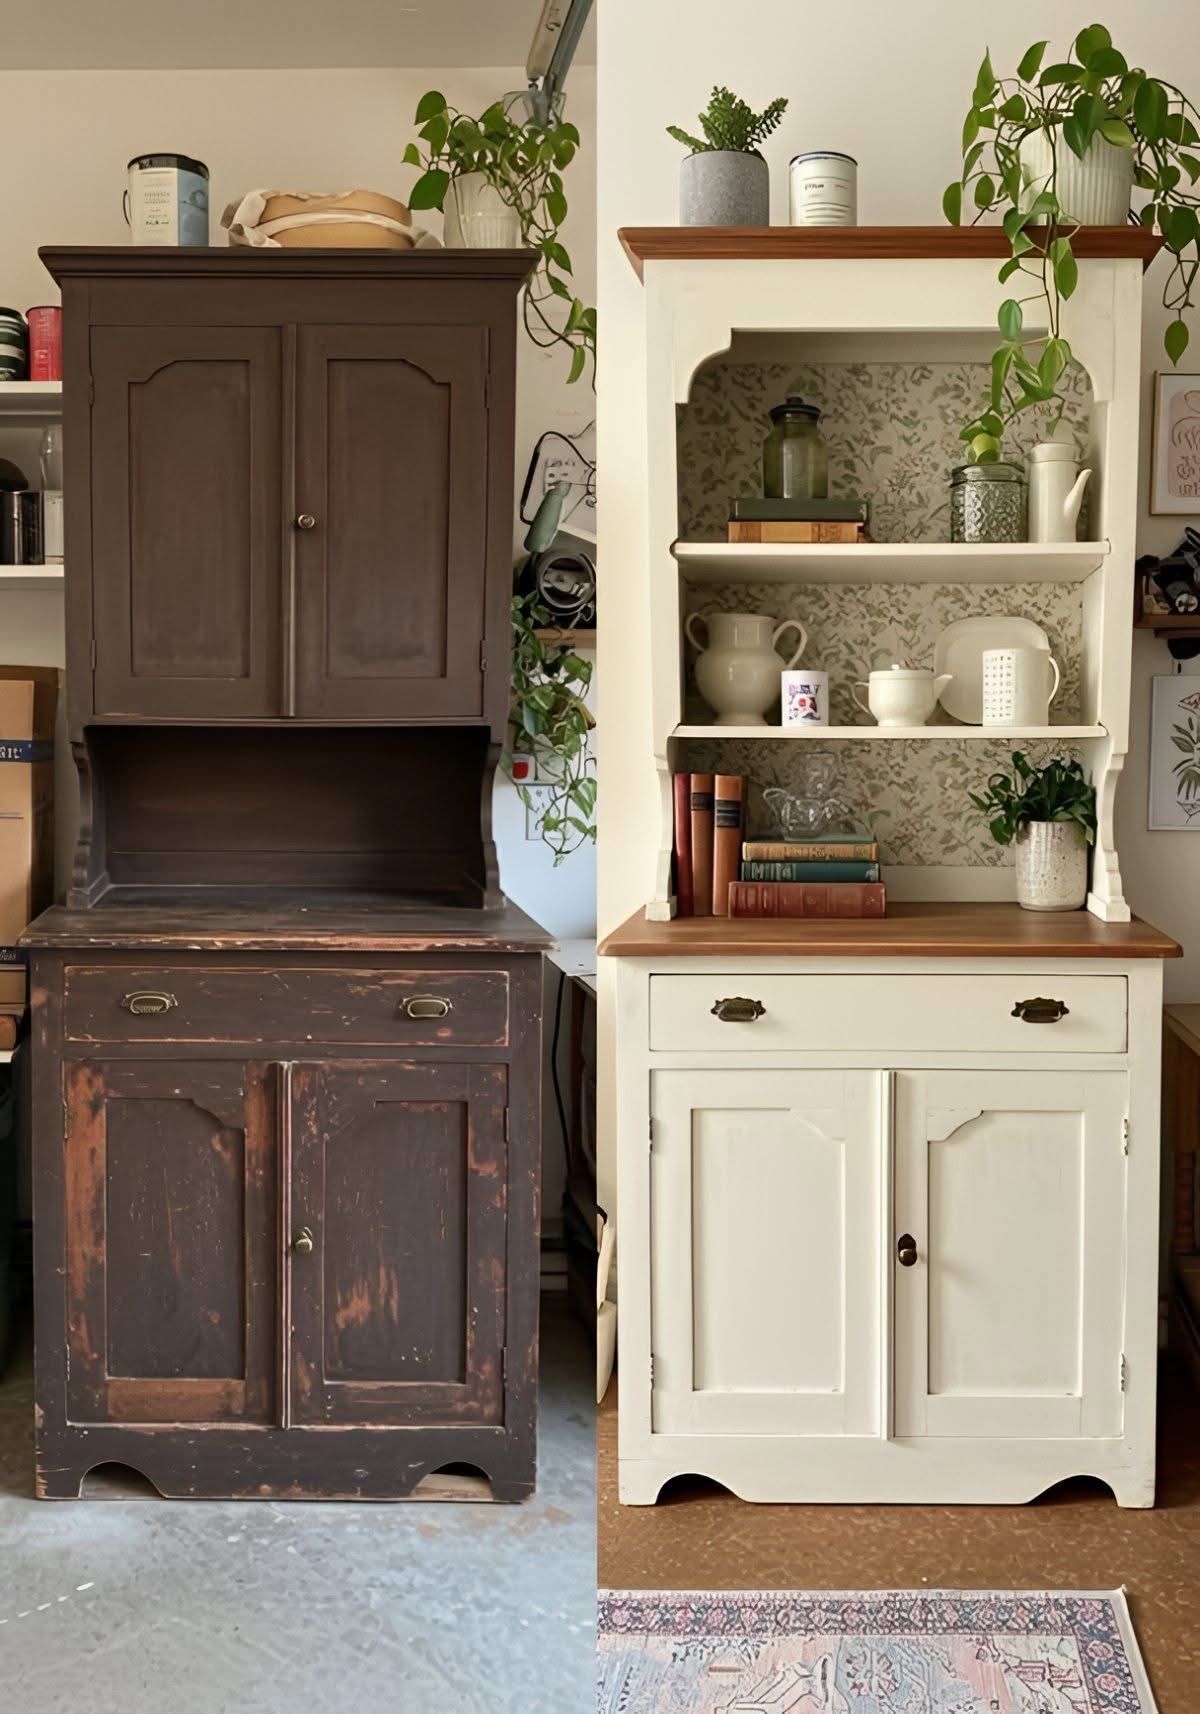
Many thrifted cabinets are simple and flat, which can make them feel cheap or unfinished. The goal here is to add subtle dimension so the piece reads custom and high-end.
Materials You’ll Need:
- Thin molding or trim strips (wood or MDF)
- Wood glue or small finishing nails
- Sandpaper (medium grit)
- Paint in a soft satin finish (neutral tones like white, gray, or beige)
- Small brushed metal pulls (optional)
- Paintbrush or foam roller
- Measuring tape and pencil
Steps to Transform:
- Plan Your Panels: Use a pencil to mark where the molding will go. Keep the design simple and balanced—subtle lines are enough.
- Attach Molding: Use wood glue or finishing nails to secure the strips. Make sure everything is aligned and straight.
- Sand and Smooth: Lightly sand any rough edges or nail holes so the surface is even.
- Paint: Apply a soft satin paint coat to the cabinet, including the molding. This gives gentle light reflection, making the piece feel refined.
- Swap Hardware (Optional): Replace old knobs or handles with small, brushed metal pulls for a subtle, modern upgrade.
A lot of beginners struggle with getting that clean, finished look, which is exactly what 10 Cricut Crafts Beginners Always Struggle With- And How to Make and Sell Them breaks down in a practical way.
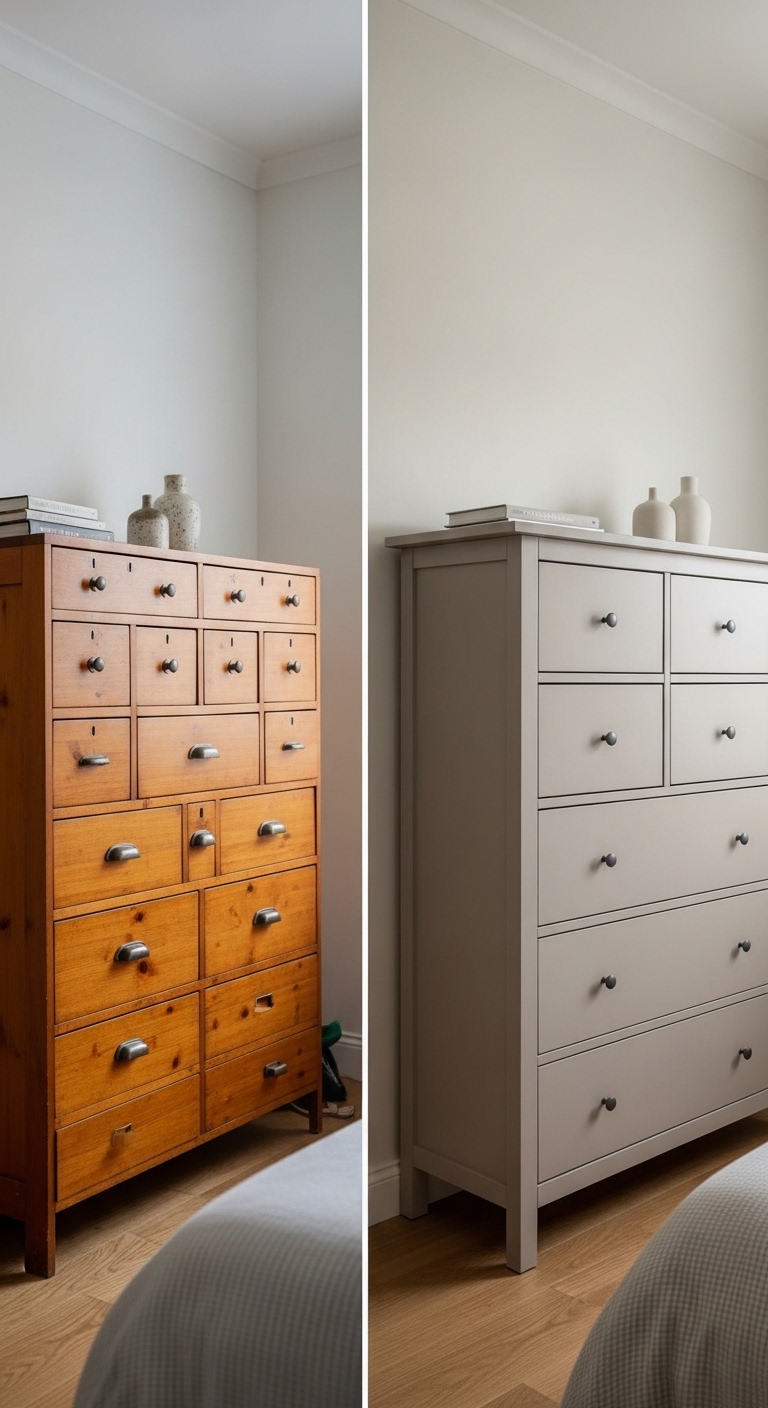
4. Fixing Mismatched Furniture Tones
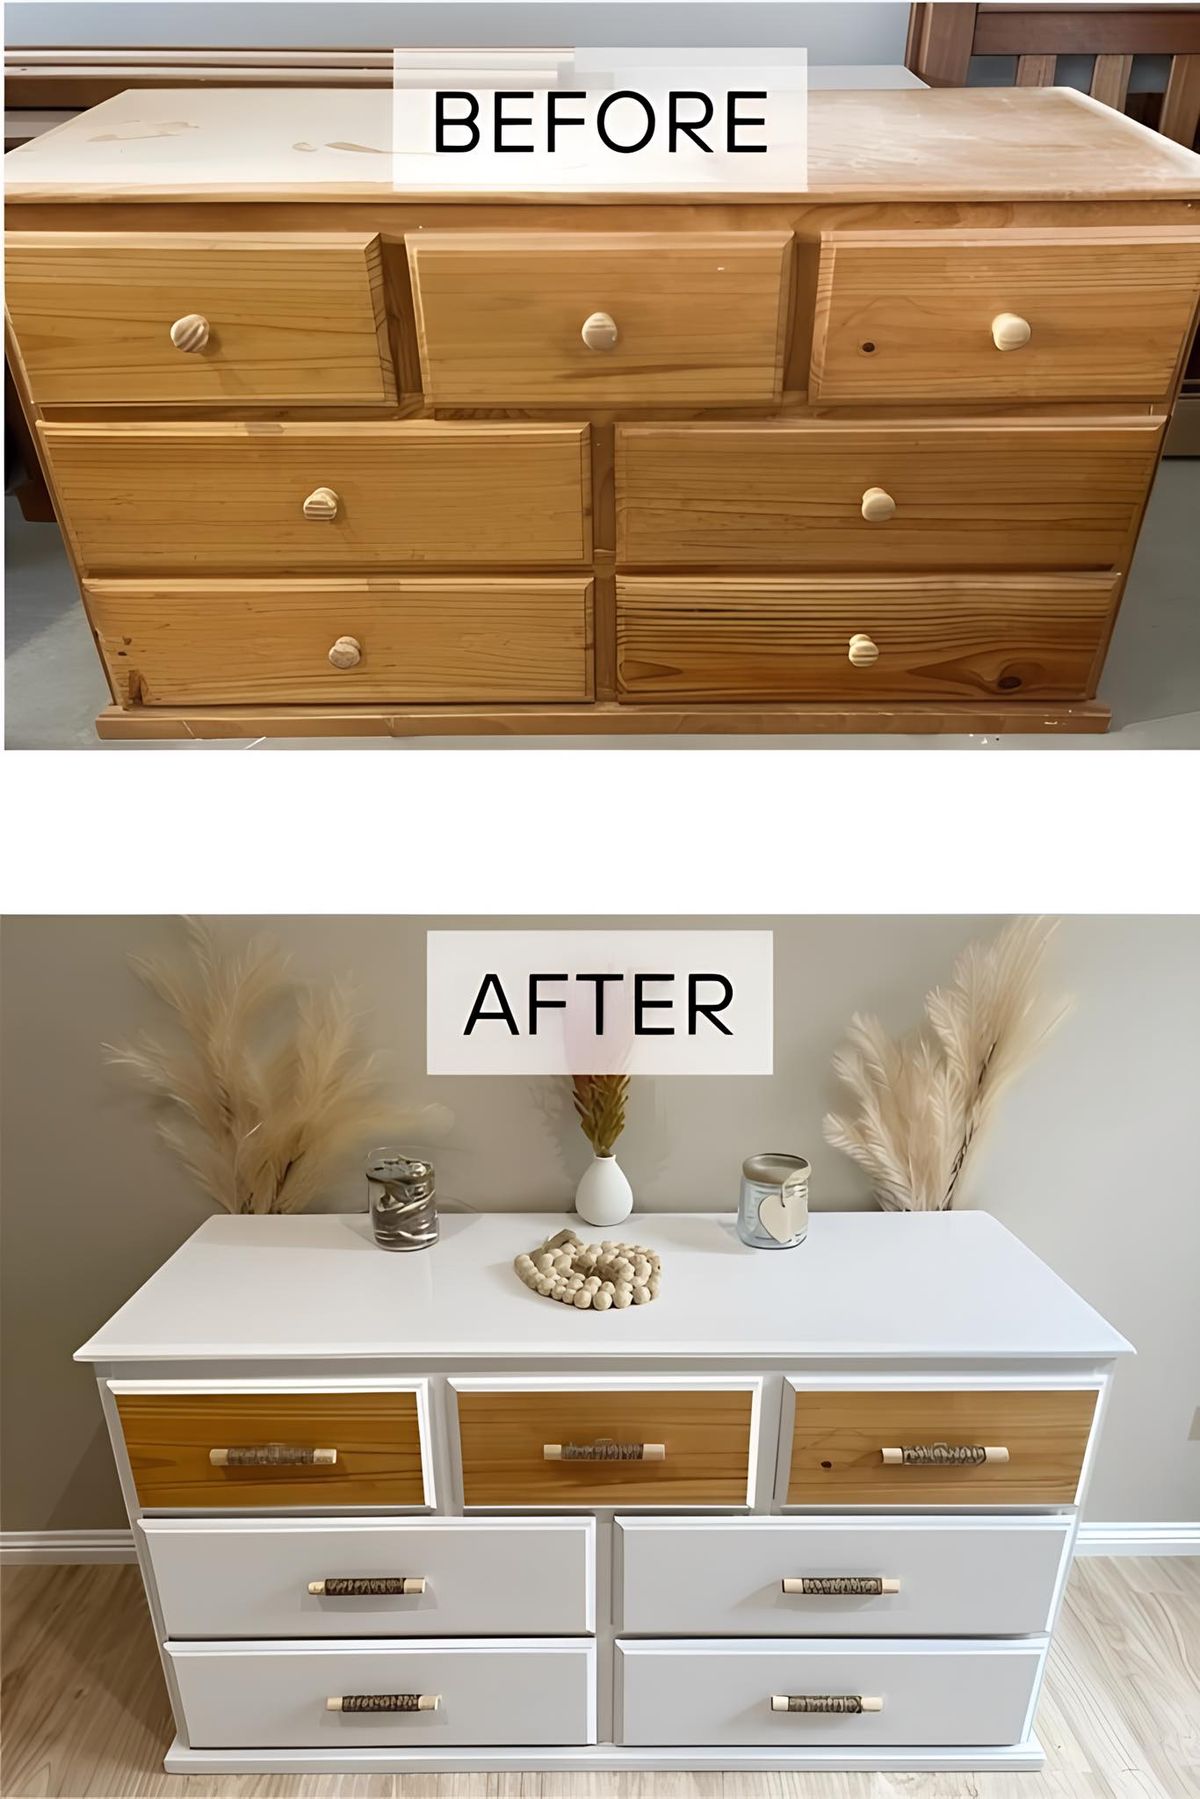
Photo credit: @ Kim Neary
One of the most common issues in thrifted furniture is uneven wood tones, some parts look orange, red, or just mismatched. If left as-is, even a well-made piece can feel cheap. Fixing this is a simple way to make your thrift store furniture flips read polished and intentional.
Materials You’ll Need:
- Wood stain (muted or neutral tone) or paint
- Paintbrush or clean cloth (for stain application)
- Sandpaper (medium and fine grit)
- Drop cloth or old newspapers
- Optional: clear topcoat or wax
Steps to Transform:
- Prep the Surface: Sand lightly to remove rough spots or existing finish inconsistencies.
- Neutralize Tones: Apply a stain wash or muted paint over orange/red undertones. Work gradually and blend carefully for an even look.
- Avoid Extreme Contrasts: Make sure no section is drastically darker or lighter than the rest, it’s about harmony.
- Seal (Optional): Once dry, add a clear topcoat or wax to protect the finish and give gentle sheen.
5. Simplifying a Drawer-Heavy Piece
Drawer-heavy furniture can quickly feel cluttered or overwhelming, even if it’s in good condition. Simplifying it is a subtle but powerful way to make your thrift store furniture flips feel clean, intentional, and high-end.
Materials You’ll Need:
- Screwdriver (to remove or adjust hardware)
- Matching drawer handles or knobs (if unifying hardware)
- Sandpaper (optional, for smoothing areas around removed handles)
- Neutral paint or stain (optional, for a cohesive finish)
Steps to Transform:
- Remove Extra Handles: Take off some drawer handles if there are too many, or replace all of them with matching hardware for a unified look.
- Keep Lines Consistent: Make sure the placement of remaining handles aligns perfectly with drawer edges and neighboring drawers.
- Avoid Over-Accessorizing: Resist adding extra decorative elements, simplicity gives the piece a calm, deliberate feel.
With this, you have a drawer-heavy dresser or cabinet now reads as calm, balanced, and purposeful. This simple adjustment is one of the easiest ways to make thrift store furniture flips look polished without spending extra money.
6. Targeted Gloss Upgrade
Sometimes a neutral thrifted piece can feel flat or unfinished, even after sanding and painting. Adding a subtle gloss in the right places can make it feel polished and high-end, but it’s all about restraint.
Materials You’ll Need:
- Soft gloss or satin furniture paint, or a clear topcoat
- Small paintbrush or foam brush
- Sandpaper (optional, for smoothing surfaces before application)
- Drop cloth or old newspapers
Steps to Transform:
- Identify Key Areas: Focus on spots where light naturally hits, tops, edges, or raised details. Highlighting these areas adds depth and draws the eye.
- Apply Gloss Carefully: Use a light hand. Avoid covering the entire piece if it’s already painted in a neutral tone. Too much shine can feel artificial or cheap.
- Blend Smoothly: Make sure the glossy areas transition naturally into the matte parts so it looks intentional.
With this, you have a subtle shine in the right places makes the furniture feel sophisticated and carefully finished, giving your piece that high-end, polished look without spending a fortune.
Simple, thoughtful changes can go a long way, just like the ideas in Eco-Friendly Easter Crafts You Can Make and Reuse Year After Year, where reuse and intention matter more than cost.
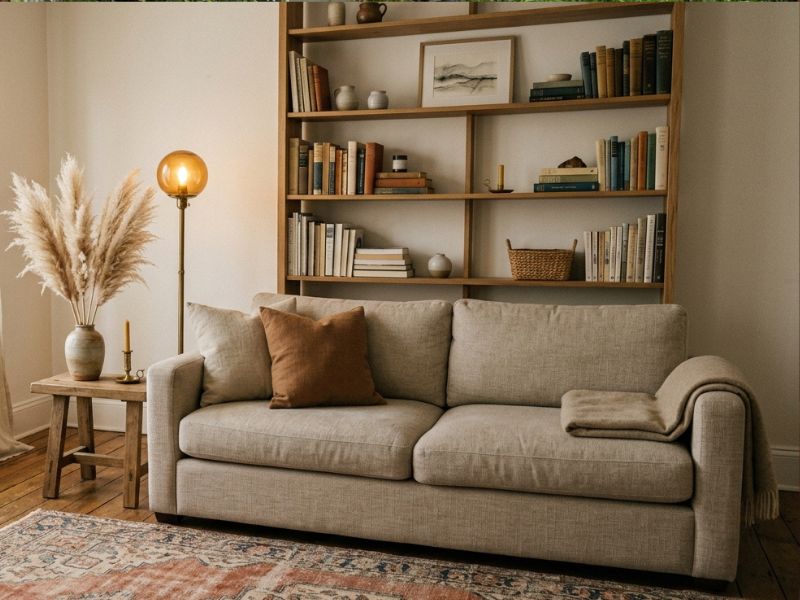
7. Open Shelf Styling
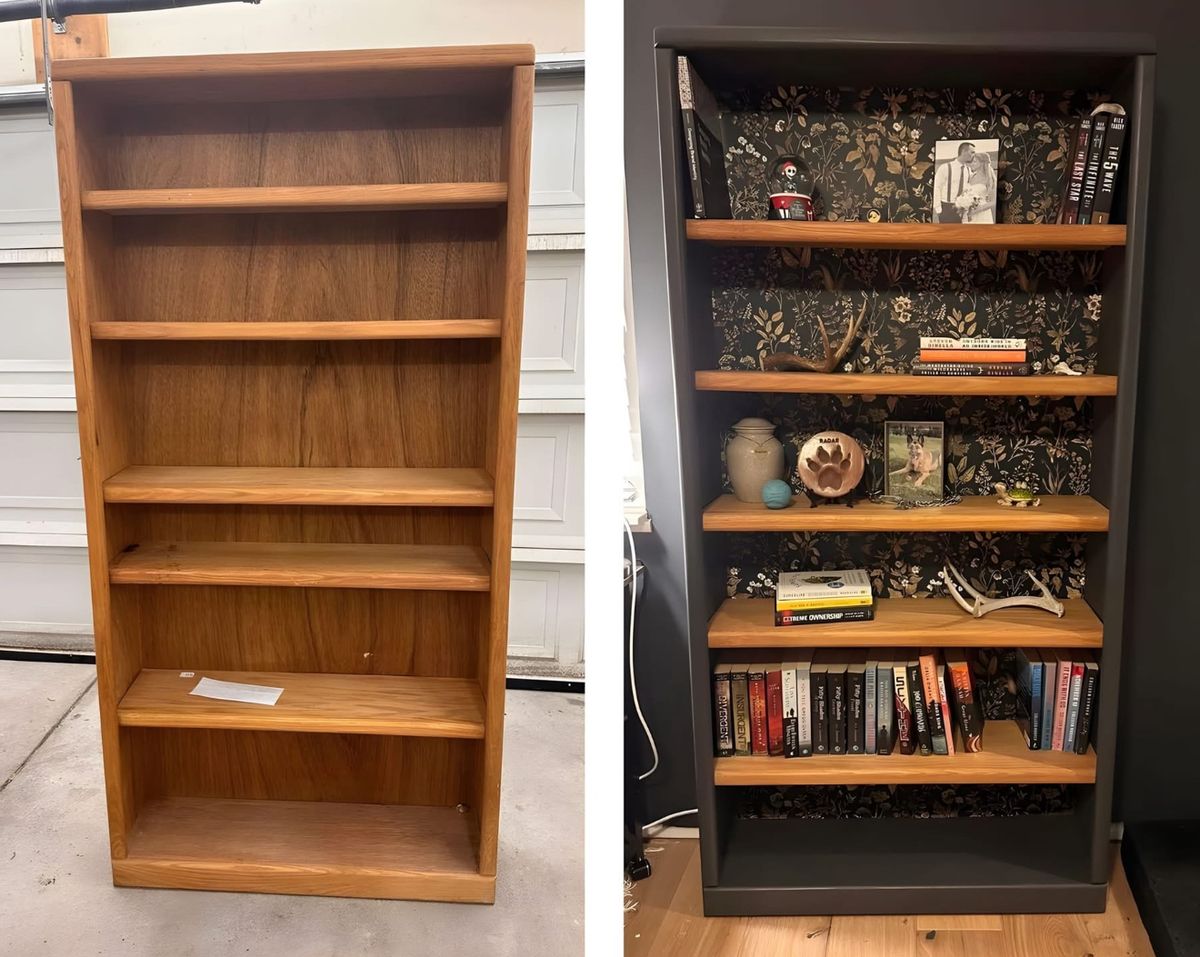
Open shelving can quickly feel cluttered or cheap if every space is filled with random items. Styling it carefully creates a sense of depth and intentional design that makes even thrifted furniture feel high-end.
Materials You’ll Need:
- Paint or removable wallpaper (neutral or subtle pattern)
- Small paintbrush or roller
- Decorative items (books, plants, small baskets, or ceramics)
- Optional: trays or organizers to group items
Steps to Transform:
- Prep the Back Panel: Paint or apply wallpaper to the back of the shelving unit. A contrasting yet subtle background immediately adds depth.
- Curate Items: Instead of filling every shelf, layer 3–5 carefully chosen pieces. Vary heights and textures to create visual interest.
- Group Thoughtfully: Use small trays or baskets to keep items organized and prevent visual clutter.
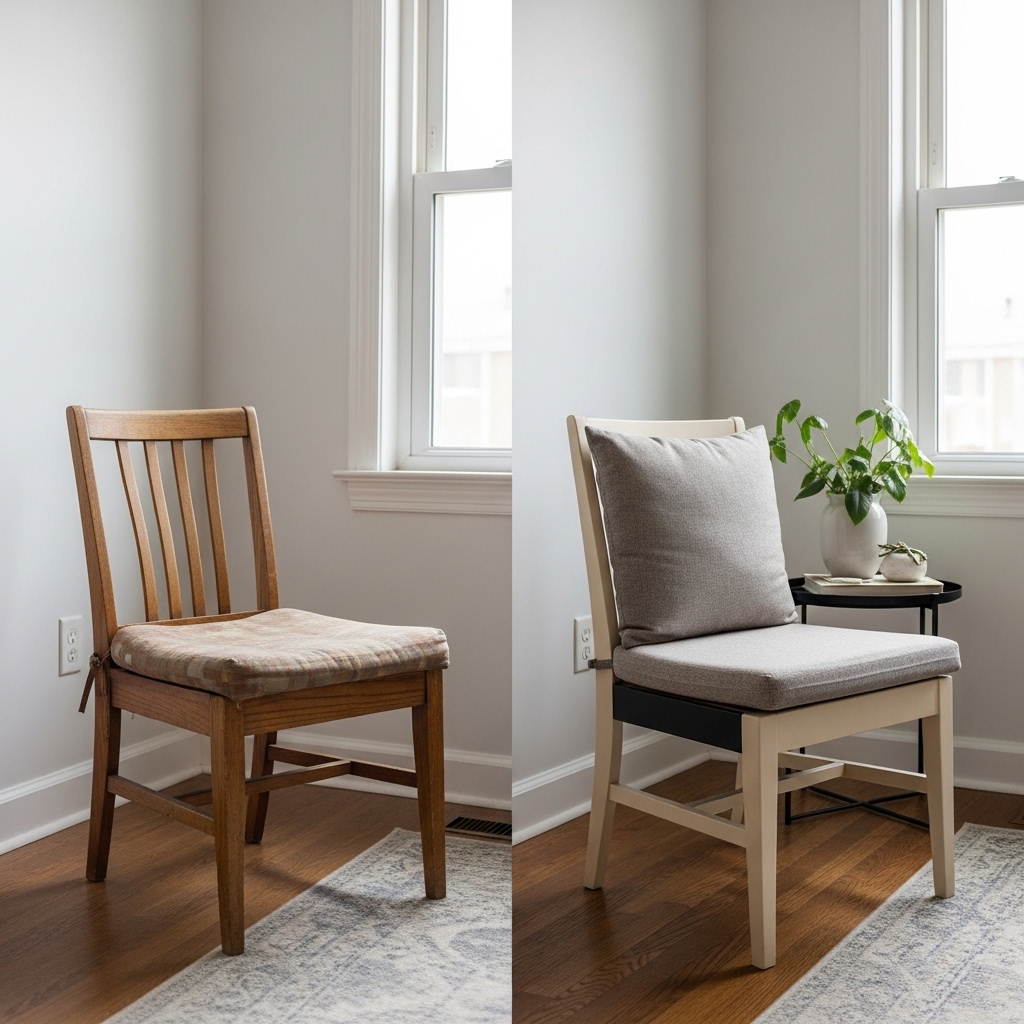
8. Chair Cushion Slimming
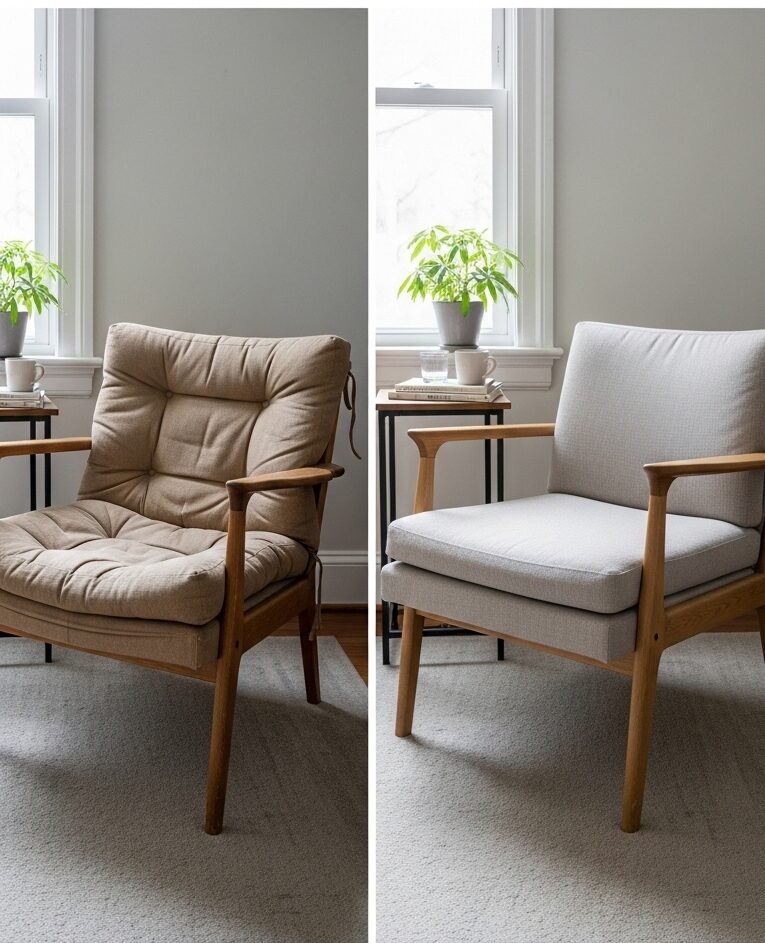
Chairs from thrift stores often come with bulky, worn cushions that make them feel outdated or sloppy. Slimming down the cushions is one of the easiest ways to make your thrift store furniture flips feel modern, clean, and high-end.
Materials You’ll Need:
- Thin, structured foam padding or replacement cushion
- Upholstery fabric (durable, neutral tones work best)
- Staple gun or upholstery tacks
- Scissors
- Screwdriver or pliers (for removing screws or tacks)
Steps to Transform:
- Remove Existing Cushion Properly: Flip the chair over and check how the cushion is attached. Most cushions are either screwed in, stapled, or held by Velcro. Use a screwdriver or pliers to carefully remove screws, nails, or tacks. Keep them aside if you plan to reuse hardware.
- Cut and Fit New Padding: Trim thin, firm foam to match the cushion base. The padding should be structured but not bulky, giving a sleek silhouette.
- Reupholster: Lay your fabric over the foam, fold neatly around the edges, and secure it to the cushion base using a staple gun or tacks. Keep corners smooth for a professional finish.
- Reattach Cushion: Place the new cushion back on the chair and fasten it using the original screws or attachments. Ensure it sits evenly and is secure.
This approach works even if you don’t feel naturally creative, and DIY Projects for People Who Don’t Feel Crafty at All is a good place to build confidence with easy wins.
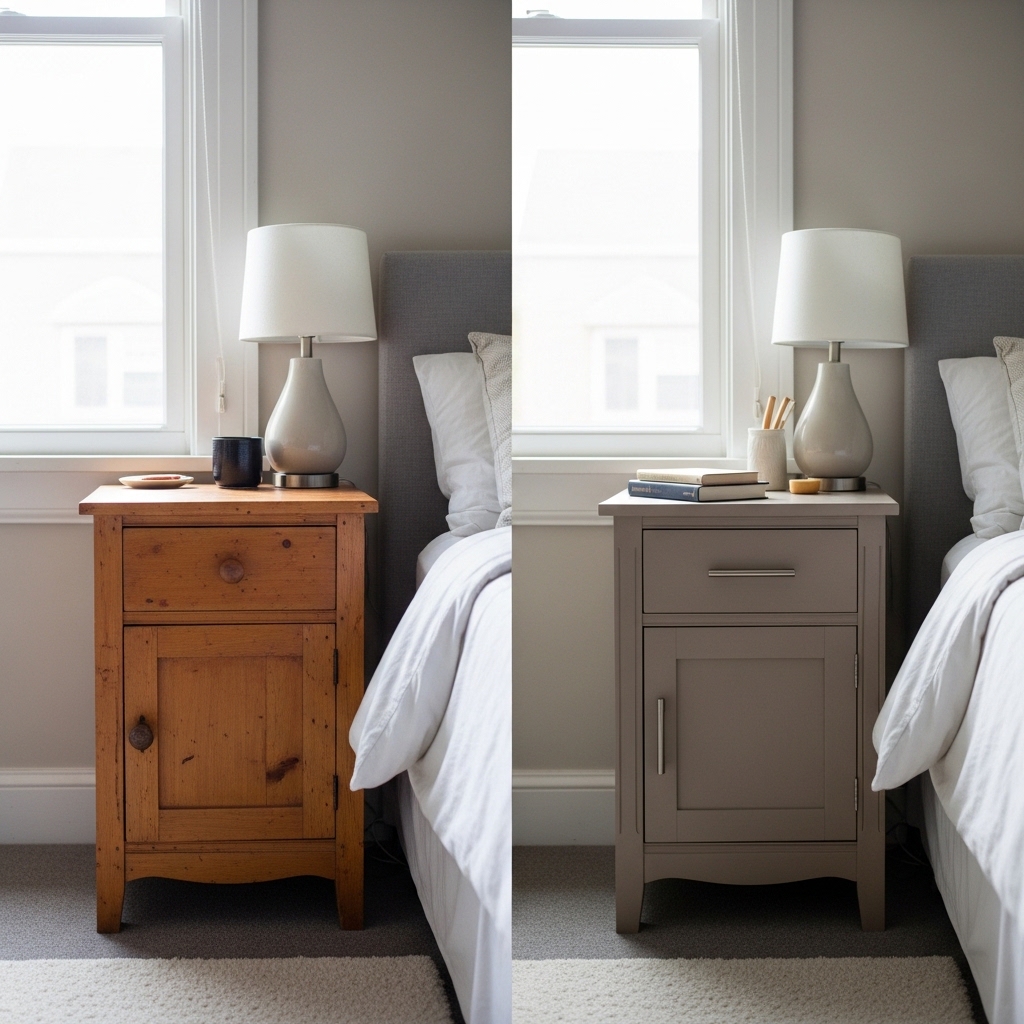
9. Nightstand Minimal Flip
Nightstands are small pieces, but even a tiny misstep can make them feel cheap. A minimalist approach, focusing on just one change, can make your thrift store furniture flips feel intentional and high-end.
Materials You’ll Need:
- Paint or stain (if changing color)
- Slim, modern hardware (if updating knobs or handles)
- Screwdriver (for removing old hardware)
- Optional: replacement legs or leg caps
- Sandpaper (optional, for smoothing surfaces before painting)
Steps to Transform:
- Pick One Focus: Choose a single update, either new hardware, a fresh color, or updated legs. Avoid trying to change everything at once; simplicity reads as quality.
- Prepare the Piece: Sand lightly if you’re painting or changing hardware, ensuring the surface is smooth and clean.
- Apply Your Change:
- Hardware: Remove old knobs with a screwdriver and install slim, modern replacements.
- Color: Apply 1–2 coats of paint or stain, keeping it neutral or soft for a polished look.
- Legs: Replace or update legs to improve proportion and stability.
- Keep Surfaces Clear: Don’t overcrowd the top with decor, the piece should feel calm and deliberate.
10. Side Table Material Mix
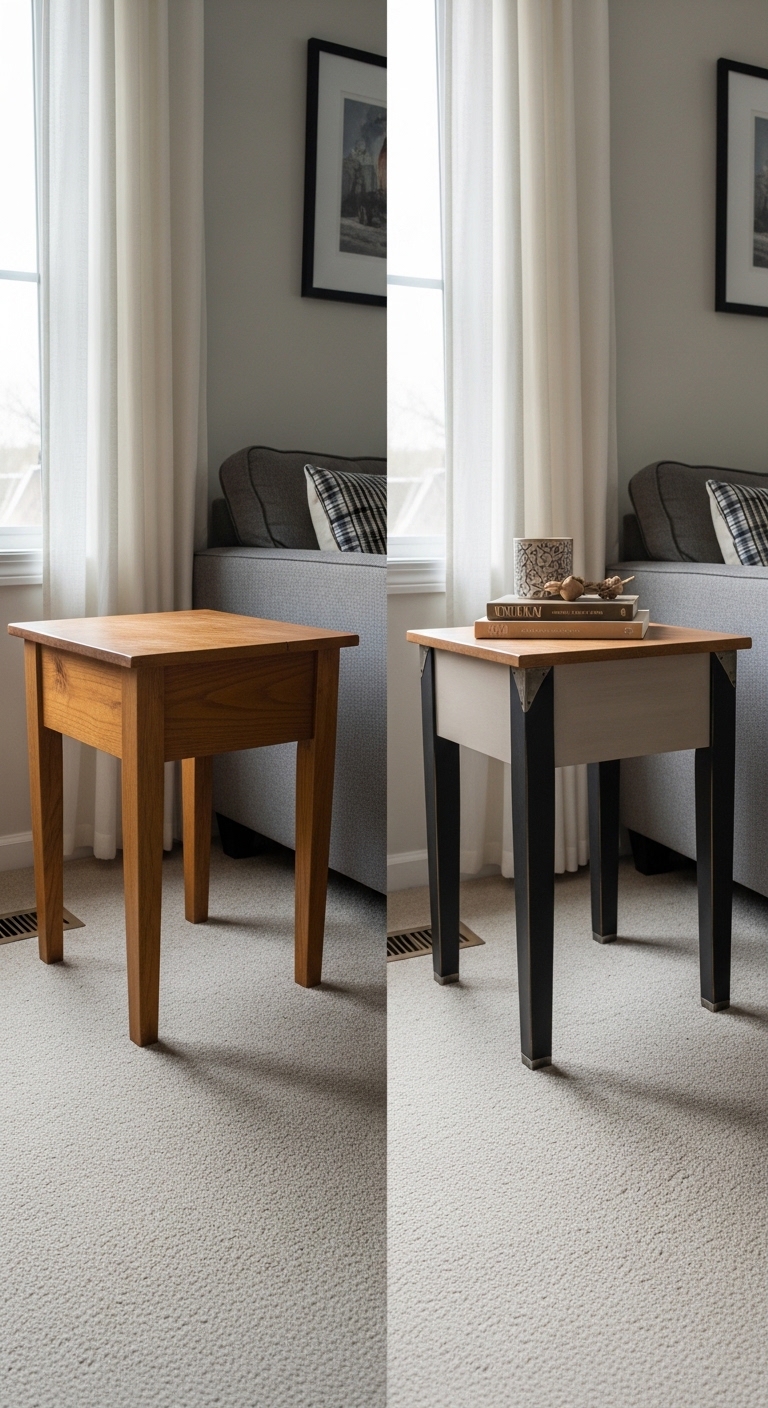
Even a small side table can feel high-end when you play with materials carefully. Combining different textures or finishes adds depth and sophistication, making your thrift store furniture flips feel intentional and designer-level.
Materials You’ll Need:
- Side table (wood, metal, or mixed materials)
- Paint for the base (neutral or muted tones)
- Wood stain for the top (optional, for contrast)
- Small paintbrushes or foam rollers
- Sandpaper (medium and fine grit)
- Optional: metal accents like corner brackets or small hardware
Steps to Transform:
- Prep the Surface: Sand both the tabletop and base lightly to remove rough spots and prepare for paint or stain.
- Separate Materials: Decide which part will be painted and which will retain or enhance its natural finish. A painted base with a stained wood top works beautifully.
- Apply Finishes: Paint the base in a muted, neutral tone. Stain the top to enhance the wood grain or add warmth. Keep edges clean and crisp.
- Add Subtle Accents: Optional metal details like corner brackets or small hardware can elevate the look, but avoid busy patterns that compete with the materials.
Turning small ideas into something useful or even profitable is possible, and 10 Low-Cost DIY Crafts to Make and Sell From Home shares practical ways to get started.
Mistakes That Instantly Ruin a Thrift Flip
Sometimes a piece doesn’t turn out the way you hoped, even when you’ve put in the work. And most of the time, it’s not one big mistake—it’s a few small ones that affect how the final piece looks and feels.
Here are a few things to watch out for:
-
Mixing too many finishes
Using matte paint, glossy topcoat, shiny hardware, and maybe a different wood stain, all on one piece, can feel disconnected. Try to keep your finishes consistent so the piece feels calm and cohesive.
-
Ignoring hardware scale
Handles and knobs that are too big or too small for the drawers or doors can throw everything off. Hardware should match the size and weight of the furniture, it’s a small detail, but it affects the overall balance.
-
Choosing trendy over timeless
It’s easy to go for bold colors or styles you’re seeing everywhere, but they don’t always age well. Simple, neutral tones and clean lines tend to hold up better and make the piece easier to style in different spaces.
-
Rushing the drying or finishing process
This is a big one. Paint that isn’t fully dry can lead to streaks, dents, or a rough surface. Giving each coat enough time to dry properly makes a noticeable difference in how smooth and finished the piece looks.
-
Copying ideas without understanding what works
It’s fine to get inspiration, but if you don’t pay attention to things like proportion, color balance, and finish, the result can feel off. Try to notice why something looks good before trying to recreate it.
Conclusion: You Don’t Need Expensive Furniture—You Need a Better Eye
At this point, you’ve probably noticed something, it’s not really about finding the perfect piece. It’s about how you see it and what you choose to do with it.
A lot of good thrift store furniture flips start with simple changes. Not everything needs a full makeover. Sometimes it can be just adjusting the shape, changing the finish, or taking off something.
And, you don’t need a big budget to make a piece feel high-end. You just need to pay attention to details like proportion, finish, and balance, and make a few intentional choices.
If you’re not sure where to start, keep it simple:
👉 Pick one piece this week and try just one of these flips.
That’s enough to help you build confidence and start seeing things differently when you walk into a thrift store.
And if you do try one, I’d really love to see how it turns out. You can share your before and after, or even just what you changed—it helps you track your progress and might inspire someone else too.