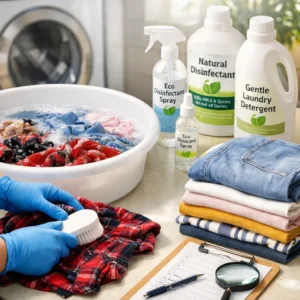
Hate redoing sewing projects due to crooked seams or snapping threads? These 10 sewing tools for sewists prevent mistakes, save money, and keep work neat.
Sewing can be one of the most rewarding hobbies, or even a small business, but it comes with its fair share of frustrations.
From buying expensive tools that don’t live up to expectations, to struggling with broken threads, uneven seams, or fabric wasted on avoidable mistakes, it’s easy to feel overwhelmed.
Many sewists, either beginners or seasoned, end up spending more time and money than necessary simply because they don’t have the right tools on hand.
Instead of wasting hours struggling with slippery fabric or broken threads, you can finally have a set of tools that actually make sewing easier and more enjoyable. I’ve put together 10 sewing tools that I swear by, ones that save time, protect your fabric, and don’t empty your wallet.
Whether you’re sewing in New York, Lagos, Sydney, or London, these tools are accessible, and adaptable for any location.
By the end of this guide, you’ll not only know what to buy but also how to use each tool effectively, saving both time and money while taking your sewing projects to the next level.
Curious why sewing projects sometimes go wrong? Learn practical solutions in Why Your Sewing Machine Keeps Skipping Stitches (And 7 Easy Fixes That Work Fast) to keep your stitches smooth and precise.
Essential Sewing Tools for Sewists
1. Ergonomic Seam Ripper
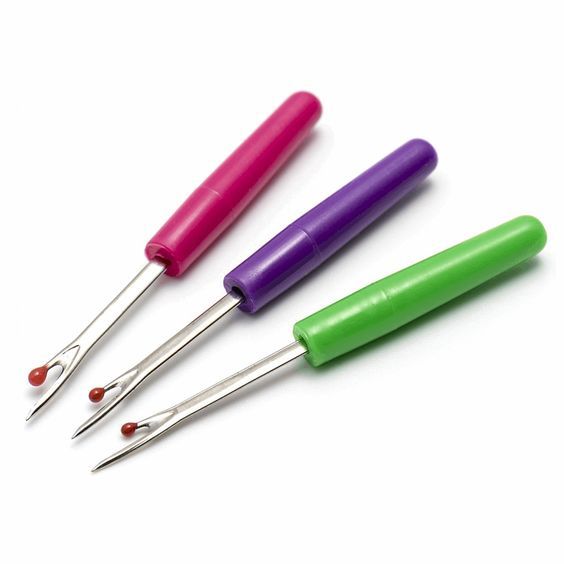
If you’ve ever tried removing stitches with a traditional seam ripper, you know it can hurt your fingers, slip unexpectedly, and even damage your fabric. It’s one of those small tools that can create big headaches if it doesn’t fit your hand properly.
How It Solves the Problem
An ergonomic seam ripper is shaped to fit comfortably in your hand, reducing strain and giving you better control. This design helps you remove stitches cleanly without risking your fabric.
How to Use It Safely
Hold it like a pencil and gently slide the tip under the stitch. Work in small sections rather than trying to pull out long lines at once. Move slowly and deliberately, this keeps your seams neat and prevents tears.
Budget-Friendly Options
You don’t have to spend a lot. Many ergonomic seam rippers are available for under $10, both online and in local sewing stores. Look for one with a protective cap and a sturdy handle, these small details make using it much safer and more comfortable.
Looking to turn your sewing skills into income? Check out Struggling to Make Money From Home Sewing? Launch a Profitable Sewing Side Hustle for tips on starting a side hustle without feeling overwhelmed.
2. Rotary Cutter & Self‑Healing Mat
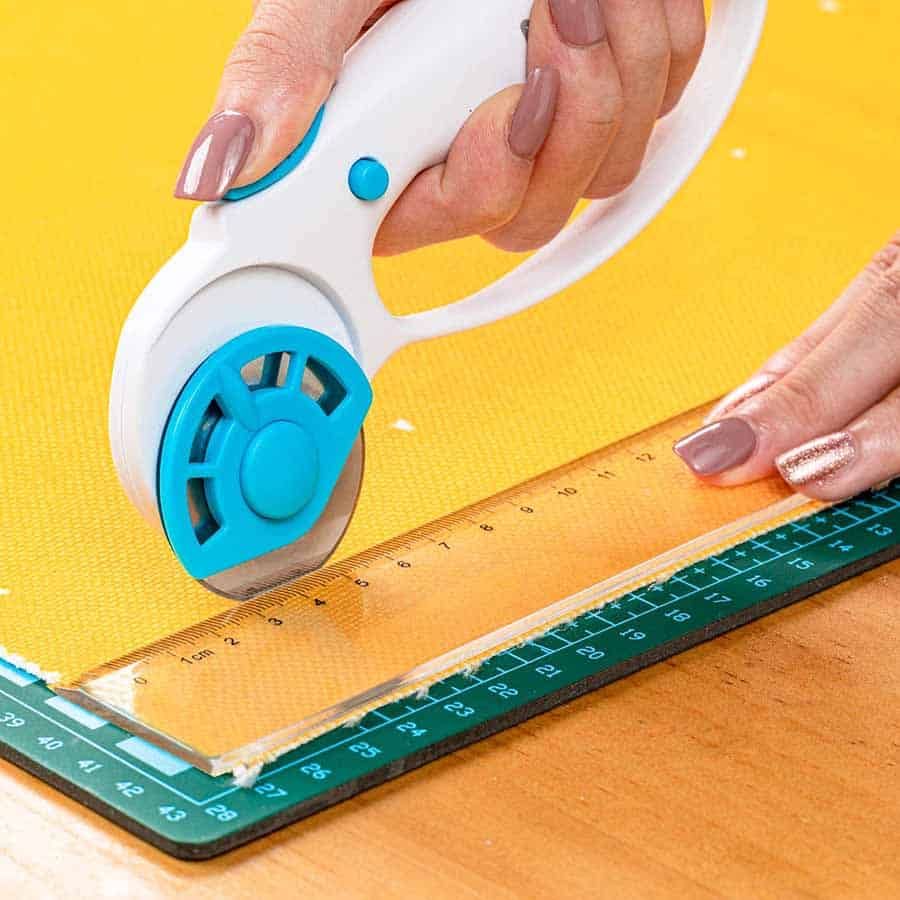
Cutting fabric only with scissors can be slow and uneven, especially if you’re cutting long edges or several layers at once. That’s where a rotary cutter paired with a self‑healing cutting mat really helps.
The cutter has a round, sharp blade that rolls and slices through fabric smoothly, and the mat protects your table and keeps the blade from dulling too quickly.
The Problem It Solves
If your fabric slips or shifts when cutting, the edges won’t match your pattern. Scissors also struggle with slippery or layered fabrics, and you can end up with jagged or uneven cuts. A rotary cutter glides through most fabrics with less effort, and the mat gives you a stable surface with grid lines that help keep cuts straight.
How to Use Them Together
- Lay your fabric flat on the self‑healing mat.
- Use the grid lines to align your pattern or straight edge.
- Hold the rotary cutter like a pencil with steady pressure and roll it along the line.
- A ruler or straight edge can help guide cuts for perfect straight lines. Always cut away from your body and keep fingers behind the blade’s guard for safety.
Choosing the Right Blade Size
Rotary cutters come with different blade sizes:
- Smaller blades (18 mm, 28 mm): Better for tight curves and small pieces.
- Standard blade (45 mm): Most versatile for general sewing.
- Larger blades (60 mm): Cut through multiple layers or thick fabrics more easily. Pick the one that matches the kind of fabric and cutting you do most.
Where You Can Get Them Internationally
Rotary cutters and self‑healing mats are sold in most sewing shops and online stores around the world. Look for basic sets from trusted brands like Olfa, Fiskars, or Clover because they often include a cutter and a mat that work well together.
Many sellers also offer different mat sizes , choose one that fits your workspace and the projects you make most.
3. High‑Quality Fabric Scissors (Only for Fabric)
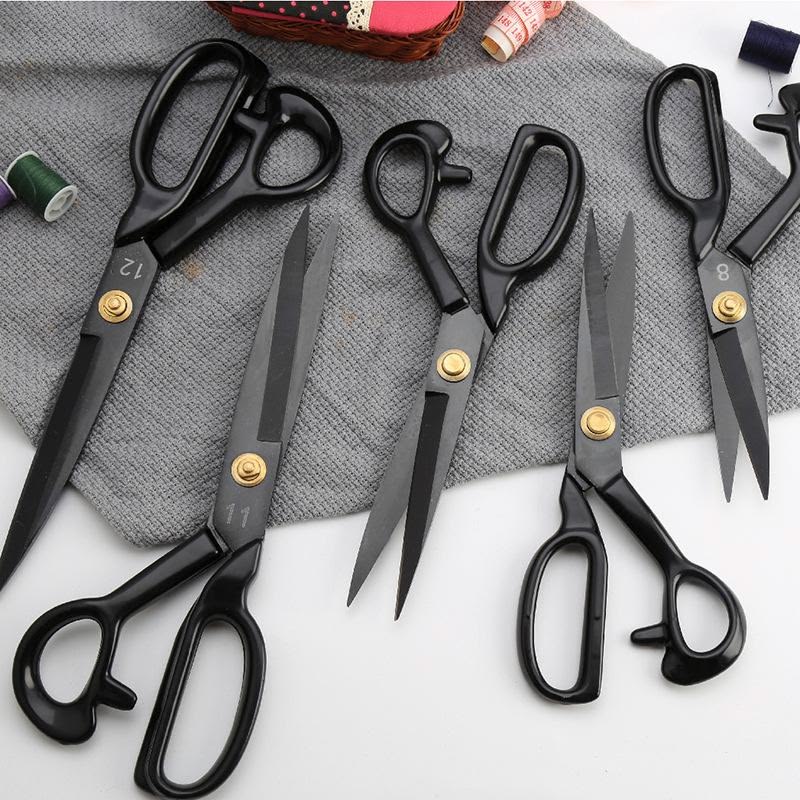
One of the most common frustrations for sewists is using dull or inappropriate scissors. When you cut fabric with regular household or paper scissors, the edges can fray, stretch, or look uneven.
This makes your sewing projects harder to finish and less professional. Among sewing tools for sewists, high‑quality fabric scissors really stand out because they give you clean cuts that match your patterns and protect your fabric.
The Problem It Solves
Many people mix up their scissors and end up cutting paper, cardboard, or tags with the same pair they use for fabric.
This quickly dulls the blades. Dull scissors don’t slice smoothly, they pinch or drag the fabric, causing mistakes and frustration. Dedicated fabric scissors change that by cutting through material cleanly, so seams and edges look neat and accurate.
How to Maintain Sharpness
To keep your fabric scissors working well:
- Only use them on fabric. Never cut paper, plastic, or thread with these scissors , that’s how blades get dull fastest.
- Clean them occasionally. Wipe the blades with a soft cloth after heavy use to remove fibers or sticky residue.
- Store them safely. Keep them in a protective cover or pouch so the blades don’t rub against other tools and dull.
- Sharpen when needed. Over time, all scissors can get dull. You can take them to a local sharpener or use a quality scissor sharpener at home, this keeps them performing like new.
How This Helps You as a Sewist
Using quality fabric scissors among your sewing tools for sewists makes cutting faster, more precise, and less frustrating. This one tool improves your entire workflow, because every piece you cut starts your project off right.
Understanding patterns can be tricky. This guide, How to Read Sewing Patterns Without Feeling Lost ,breaks it down so you can follow any pattern with confidence.
4. Fine Pins & Magnetic Pincushion
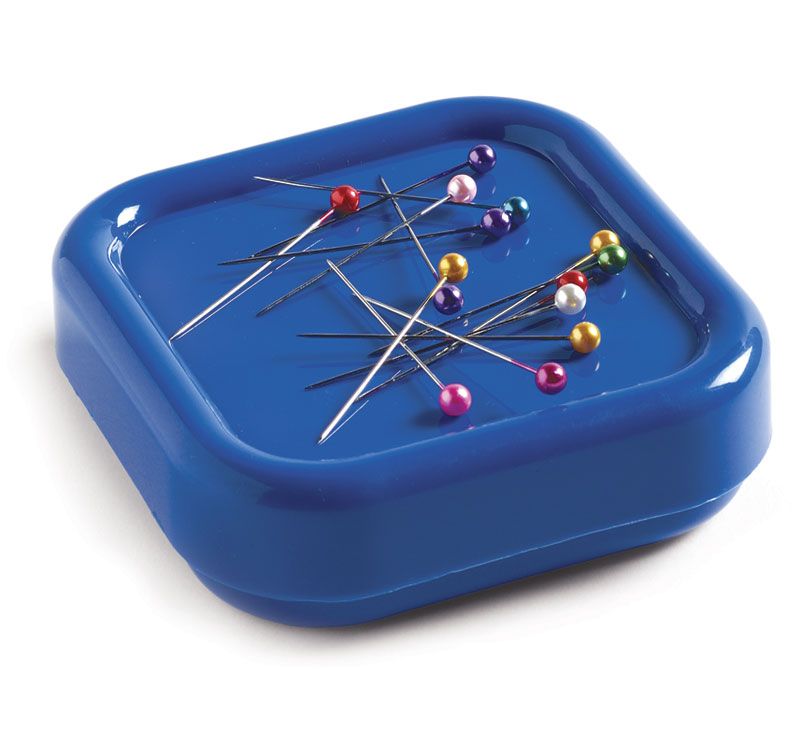
When sewing, keeping your fabric in place is essential, but pins can be surprisingly tricky. Ordinary pins can leave marks, slide out, or even get lost in your fabric. Among sewing tools for sewists, a set of fine glass-head pins paired with a magnetic pincushion makes a huge difference.
It keeps pins organized, easy to grab, and safe while you work.
The Problem It Solves
Slippery fabrics like satin or silk are especially difficult to hold in place. Pins that are too thick or dull can leave holes, snag fibers, or shift the fabric entirely. A magnetic pincushion not only keeps pins upright and secure but also helps you quickly pick up dropped pins without searching the floor.
How to Use Them Effectively
- Pin placement: Always insert pins perpendicular to your seam line. This keeps the fabric aligned and makes removing pins while sewing easier.
- Spacing: Place pins closer together on slippery or layered fabrics to prevent shifting. For stable fabrics, pins can be spaced a little farther apart.
- Safety tip: Keep the magnetic pincushion nearby so you can drop pins on it instead of leaving them on your table or floor.
Why It’s Worth It
Using fine pins and a magnetic pincushion improves accuracy, saves time, and reduces frustration. It’s a small addition to your toolkit but solves a surprisingly big problem for sewists working with delicate ofabrics.
5. Quality Thread & Thread Organizer
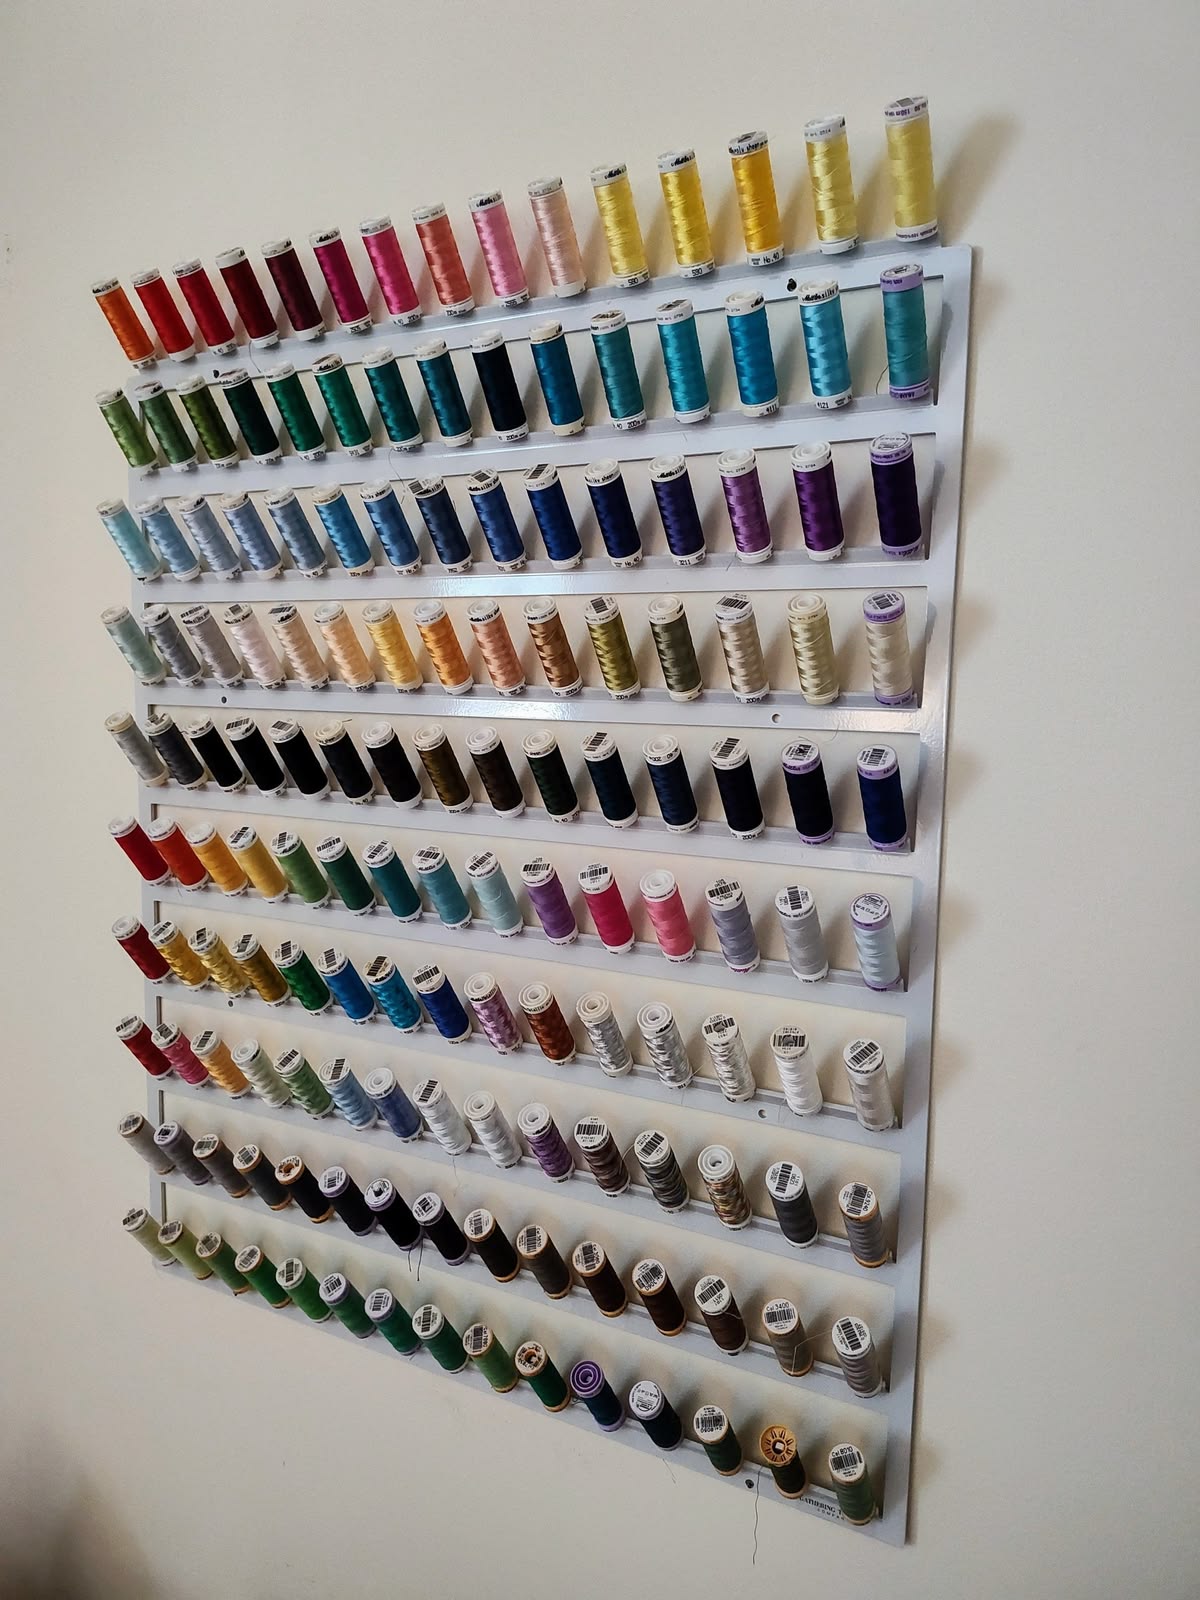
Nothing slows down a sewing project faster than thread problems. Threads that break mid-stitch, tangle, or fade can ruin your work and cost you extra time and money.
Among sewing tools for sewists, having high-quality thread and a simple thread organizer makes a noticeable difference. Reliable thread keeps your stitches strong, consistent, and smooth, while an organizer ensures your colors are easy to find and protected.
The Problem It Solves
Cheap or low-quality threads often snap unexpectedly, especially when using a machine at high speed or sewing thick layers. Tangled threads can waste your time, and mixing up colors can ruin your project’s final look. Without an organizer, it’s easy to lose track of threads, causing frustration and unnecessary purchases.
How to Store Threads Effectively
- Use a thread box or spool rack: Keeps spools upright, prevents tangling, and makes colors easy to see.
- Keep similar types together: Cotton, polyester, and specialty threads should be stored separately to prevent snags or uneven stitching.
- Avoid direct sunlight: Sunlight can fade colors over time, so store threads in a cool, shaded place.
- Tidy loose ends: Use small clips or bobbin holders to secure thread ends and prevent unwinding.
Why It’s Worth It
Good threads and an organized system may seem simple, but they save a lot of frustration. Every project feels smoother, faster, and more professional when your thread is reliable and easy to access. It’s one of those small upgrades among sewing tools for sewists that really improves your workflow.
Every sewist benefits from a solid foundation. The Beginner’s Guide to Sewing Machine Basics You’ll Actually Use teaches practical skills that make learning fun and frustration-free.
6. Fabric Markers & Chalk
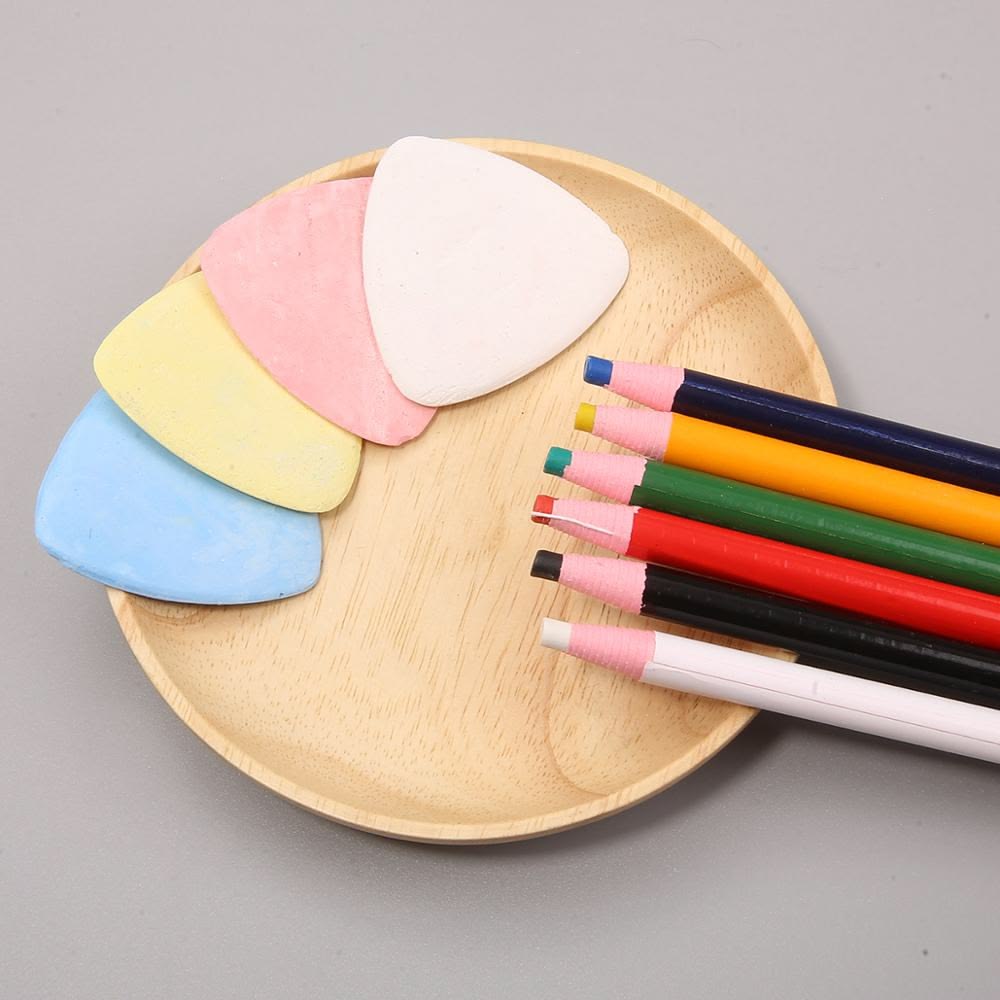
Fabric markers and tailor’s chalk are simple tools used to draw or mark directly on fabric to guide your sewing. They let you mark lines for hems, darts, seams, or patterns without cutting or permanently altering your fabric.
Unlike a regular pen or pencil, these tools are made to disappear over time or wash away easily, making them safe for all types of projects.
The Problem They Solve
When sewing, it’s easy to lose track of your pattern lines or seam allowances. Ordinary pens can stain, fade too quickly, or leave permanent marks. Chalk or washable markers solve this by providing clear, temporary lines that help you stay precise, especially on tricky fabrics like silk, satin, or dark cotton.
How to Use Them
- For curves and darts: Make small, precise marks instead of long lines. This ensures accuracy when folding or shaping fabric.
- Hems and seam allowances: Draw short, evenly spaced lines along the fold to guide your stitching.
- Testing first: Always try the marker or chalk on a scrap piece to make sure it disappears and doesn’t stain.
- Keep tools clean: Sharpen chalk points or cap markers tightly to keep them working smoothly.
Budget-Friendly Options
Basic tailor’s chalk and disappearing pens are inexpensive and widely available. Even small sets give you a variety of colors for light or dark fabrics, so you don’t need to spend much to get versatile, effective tools.
How It Helps You as a Sewist
Using fabric markers or chalk makes your work more accurate and less stressful. You can follow patterns confidently, prevent mistakes, and finish projects faster without worrying about permanent marks or guesswork.
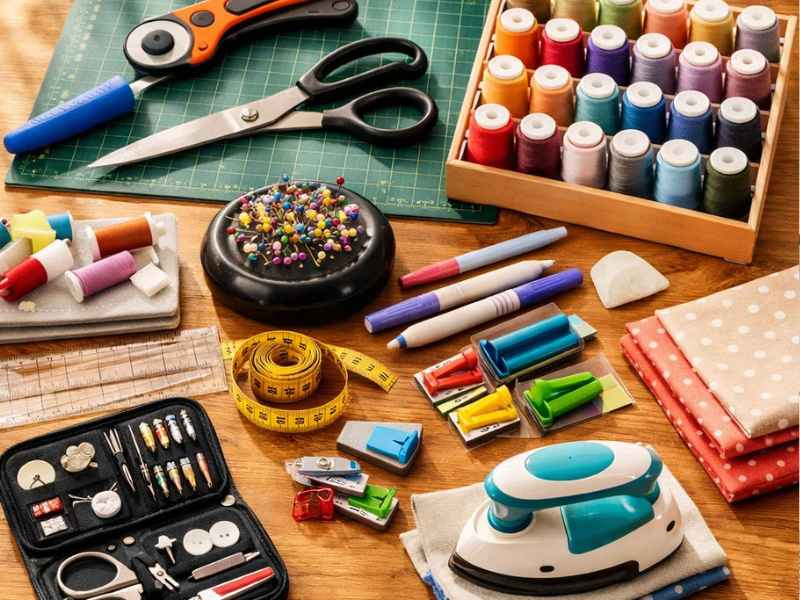
7. Measuring Tape & Clear Rulers
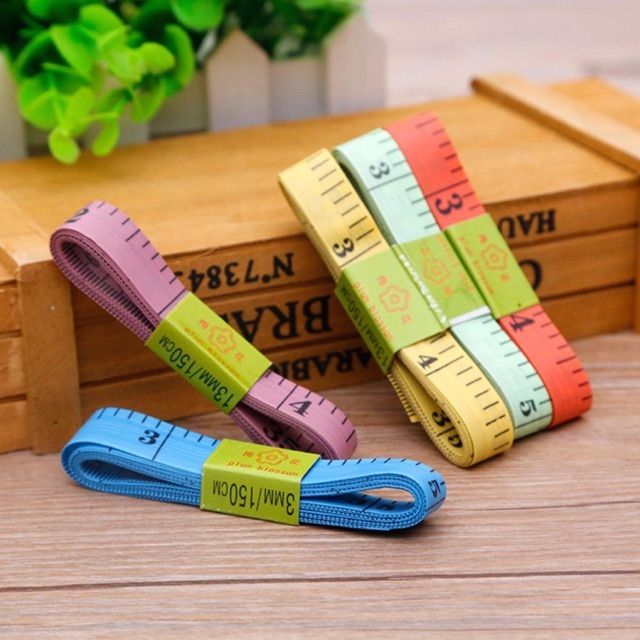
A measuring tape and clear rulers are basic but essential tools for any sewist. The flexible measuring tape lets you measure curves, body dimensions, and fabric lengths accurately.
Clear rulers, often made of plastic with printed grids, help you draw straight lines, check angles, and align patterns precisely. Together, they ensure your cuts and seams match your design intentions.
The Problem They Solve
Incorrect measurements are one of the biggest causes of wasted fabric and ill-fitting garments. Using a rigid ruler alone on curved seams doesn’t work, and eyeballing measurements leads to errors. Without proper measuring tools, even a simple hem can end up uneven, costing time and material.
How to Use Them
- Measuring tape: Wrap it gently around curves, like waistlines or sleeves, keeping it snug but not tight. Note the measurement at eye level for accuracy.
- Clear rulers: Use them to draw straight lines on patterns or fabric. Place the grid along the edge to ensure precise cuts.
- Units and conversions: Most measuring tapes show inches and centimeters. Double-check which unit your pattern uses, and keep a small conversion chart handy if needed.
Budget-Friendly Options
Affordable measuring tapes and small clear rulers are widely available at sewing stores or online. Even a few basic rulers of different lengths, combined with a flexible tape, give you enough versatility for most projects.
How It Helps You as a Sewist
Accurate measurements make every step of sewing easier. You can cut patterns confidently, fit garments properly, and avoid wasting fabric. These simple tools make your work more precise and professional, saving you frustration in the long run.
Draw inspiration from global fashion by exploring Cultural Fashion: 10 Stunning Traditional Attire from Around the World You Need to See for Style Inspiration, perfect for adding unique touches to your projects.
8. Small Iron or Mini Pressing Tool
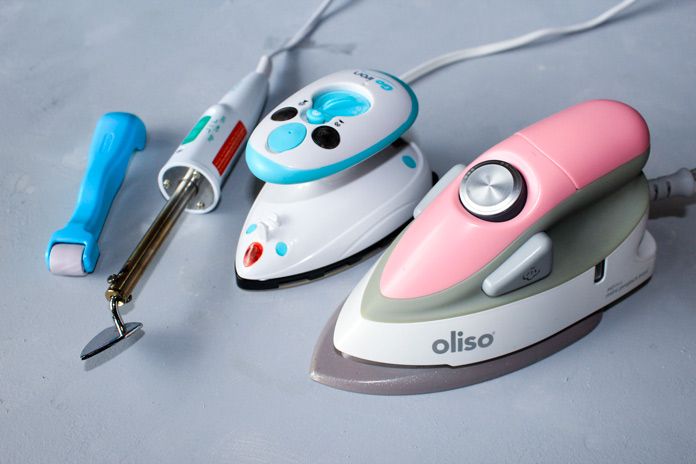
A small iron or mini pressing tool is a compact version of a standard iron, designed specifically for sewing tasks. Unlike a full-sized iron, it’s easy to handle and perfect for pressing seams, hems, darts, and small fabric pieces.
Among essential sewing tools for sewists, it’s one of the most practical for improving accuracy and speed, especially when working with delicate or layered fabrics.
The Problem It Solves
Creases and uneven seams can ruin the look of a project. Using a large iron on small pieces or tricky fabrics is cumbersome, and pressing everything flat can stretch the fabric out of shape. Without the right tool, finishing seams neatly takes longer and can damage your project.
How to Use It Effectively
- Press, don’t iron: Instead of sliding the iron back and forth, place it gently on the seam to set it. This prevents stretching and distortion.
- Seam allowance: Press open or to one side according to your pattern instructions. Small irons allow you to target specific areas precisely.
- Temperature check: Match the iron’s heat to your fabric type to avoid burns or melting synthetic materials.
Budget-Friendly Options
Mini pressing tools are widely available online and in sewing stores. You don’t need an expensive model — even compact irons under $20 can handle most home sewing tasks effectively.
How It Helps You as a Sewist
Using a small iron or mini press makes your sewing projects look professional and neat. Seams are accurate, fabrics aren’t stretched, and finishing becomes faster. It’s a small investment that significantly improves results, making it a must-have among sewing tools for sewists.
9. Bias Tape Maker
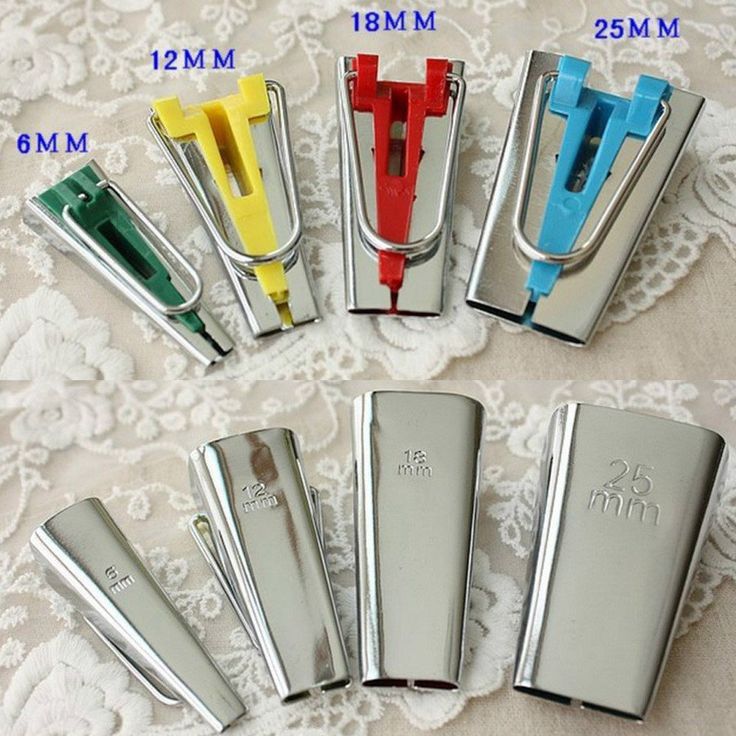
A bias tape maker is a small, simple tool that helps you create strips of fabric folded on the bias, ready for finishing edges, binding necklines, hems, or quilts. It takes the guesswork out of folding and ironing fabric perfectly, so your tape comes out uniform every time.
The Problem It Solves
Making bias tape by hand can be slow, tedious, and uneven. Trying to fold and press long strips consistently is frustrating, and uneven tape can ruin the finish of your projects. Without a bias tape maker, you might end up with tape that’s crooked, stretched, or bulky.
How to Use It
- Cut your fabric on the bias (at a 45° angle).
- Feed the strip through the bias tape maker.
- Press with an iron as it comes out the other end, this sets the folds neatly.
- Use the tape to bind edges of garments, quilts, or any sewing project.
Budget-Friendly Options
Bias tape makers are small, inexpensive tools available online or in sewing shops. They come in different widths, so pick one that matches the size of tape you use most often. Even an affordable set will last for years if used and stored carefully.
How It Helps You as a Sewist
This tool saves time and improves precision. Clean, even bias tape makes edges look professional, whether you’re finishing a garment, quilting, or adding decorative trim. It’s one of those small tools that reduces frustration and improves the overall quality of your sewing projects.
Small changes can make a big difference. Discover clever techniques in 15 Sewing Hacks for Beginners Who Want Neater, More Professional Results to elevate every project.
10. Compact Sewing Kit for Travel or Quick Fixes
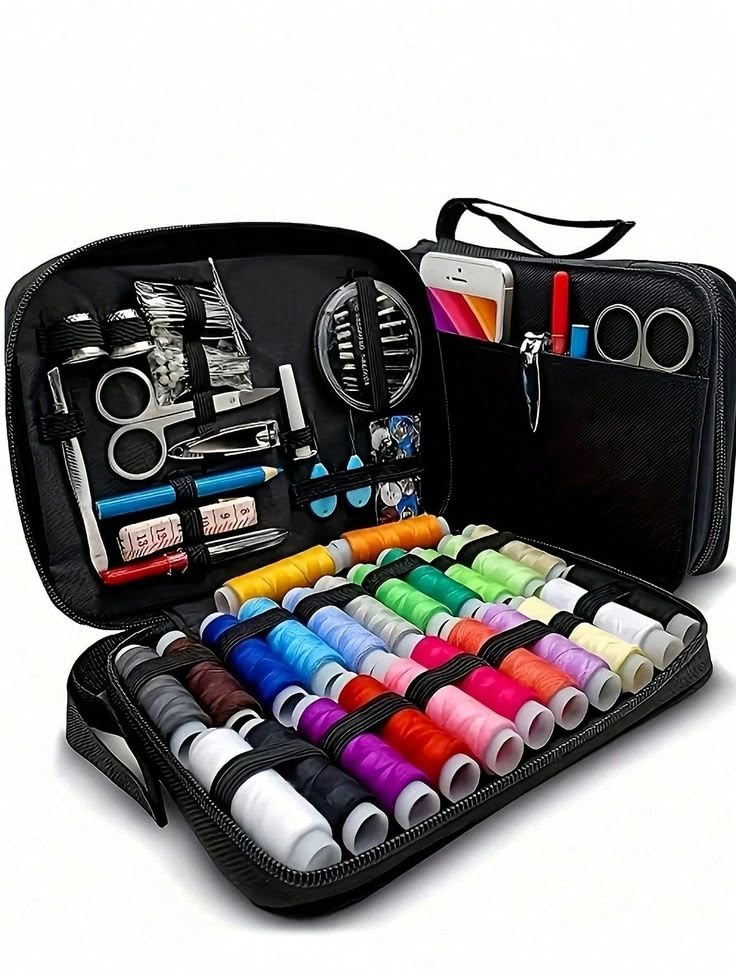
A compact sewing kit is a small, portable collection of essentials, needles, threads, buttons, small scissors, and pins , designed for quick repairs or on-the-go sewing.
This sewing tools for sewists is invaluable because it keeps everything you need in one place, ready whenever a project or wardrobe emergency arises.
The Problem It Solves
Nothing interrupts sewing or clothing fixes faster than missing supplies. A broken button, snapped thread, or misplaced needle can completely halt your work. Without a ready kit, you may waste time searching for items or improvising, which can damage fabric or create sloppy results.
How to Use It Effectively
- Stock the essentials: Include a variety of needle sizes, matching threads, a few spare buttons, pins, a small pair of scissors, and a thimble.
- Keep it organized: Use small compartments or a zippered pouch so items don’t tangle or get lost.
- Portable readiness: Store the kit in your bag, car, or sewing drawer so it’s always within reach.
- Maintenance tip: Replace used needles and threads regularly to ensure your kit is always reliable.
Budget-Friendly Options
Compact sewing kits are inexpensive and widely available online or at local sewing stores. Even small, affordable kits include all the basics, making them accessible to sewists anywhere in the world.
How It Helps You as a Sewist
A ready-to-go sewing kit keeps your projects moving smoothly and prevents frustration. You can handle unexpected repairs, continue your work without delay, and stay organized whether at home, traveling, or sewing with friends.
It’s one of the most practical sewing tools for sewists, combining convenience, efficiency, and peace of mind in one small package.
Stay ahead in style by adapting timeless pieces with insights from 2026 Sewing Fashion Trends: Sew Classic Pieces with a Modern Update to Refresh Your Wardrobe.
11. Seam Gauge & Hem Marker
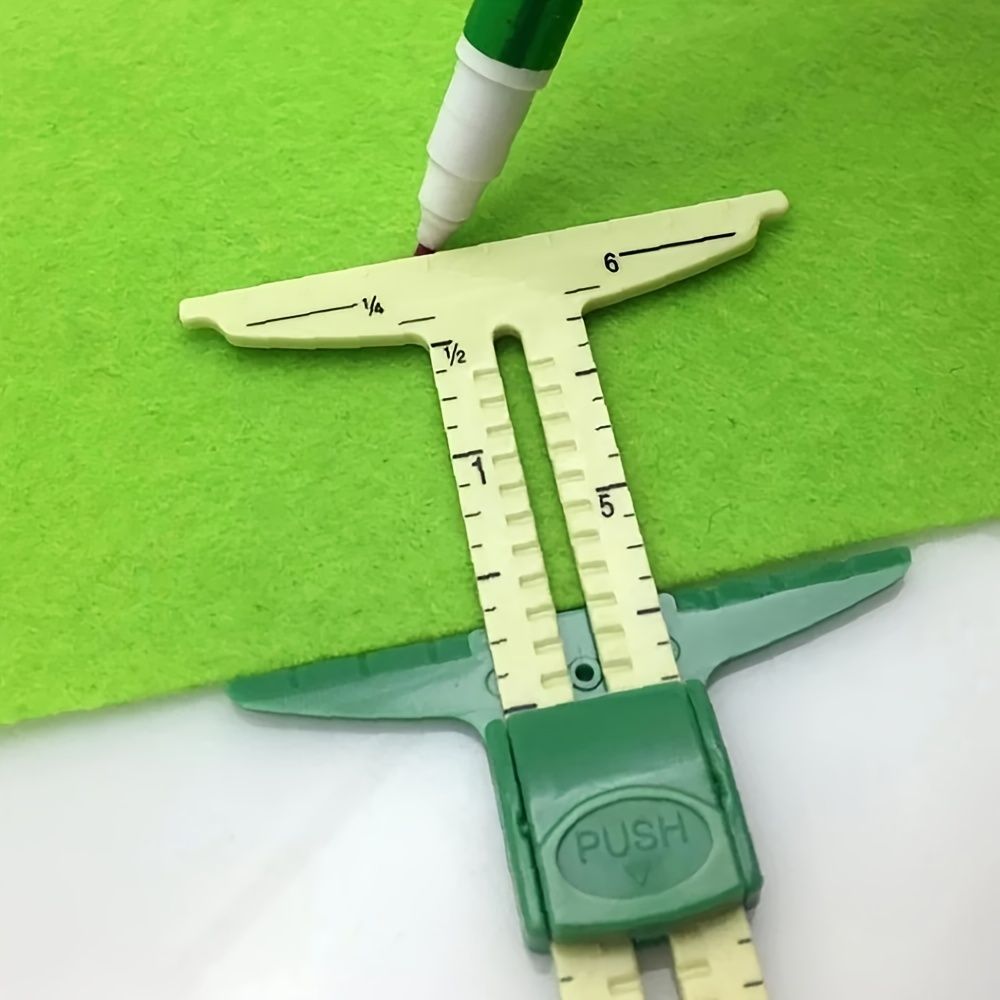
A seam gauge is a small ruler (usually 6 inches / 15 cm) with a sliding marker you can fix at a measurement. A hem marker is a simple tool or edge on the gauge that helps measure hems, seam allowances, pleats, and spacing fast and accurately.
Together, they help you measure small precise distances that bigger rulers or tapes struggle with.
The Pain Point It Solves
Often, the problem isn’t just measuring, it’s measuring consistently and precisely. Without a gauge:
- Hems end up uneven left vs. right
- Seam allowances shift as you sew
- Pleats or spacing on pockets don’t match
This can destroy fit and balance, especially on garments. Mistakes here aren’t fixed by simply better scissors or tape — they require a measuring tool that stays fixed once set.
How It Solves the Problem
With a seam gauge you can:
- Set a fixed hem allowance (e.g., 1 cm / ⅜ in) and repeat it exactly around the whole garment
- Mark equal pleats without guessing
- Check seam allowance while sewing so lines stay straight
The sliding marker means once you set the number, you just run the gauge along the fabric — no eyeballing, no shifting.
How to Use It Properly
- Set first: Slide the marker to the measurement you need (e.g., 1.5 cm).
- Check often: When sewing long edges or hems, run the gauge along the fabric at intervals to keep the line even.
- Use the edge: Align the gauge’s edge with the fold or stitching line to guide marking/pressing.
- Dual units: Most gauges show cm and inches — so you can switch between patterns that use different units easily.
Budget‑Friendly Note
Seam gauges are inexpensive and widely available online, in sewing shops, or haberdasheries. Even basic plastic models work well; you don’t need a fancy metal one unless you want extra durability.
How It Helps Sewists More Than Basic Tools
This tool turns guesswork into precision. Once you start using a seam gauge for hems, seams, and pleats, your sewing becomes more consistent and less frustrating, especially on garments where balance and fit matter most.
It’s one of those sewing tools that truly bridges the gap between beginner results and professional accuracy.
Looking for creative gift ideas? 11 Unique and Handmade Wedding Gift Sewing Projects That Will Impress Newlyweds shows thoughtful, handcrafted options for any occasion.
How to Prioritize Which Tools to Buy First on a Tight Budget
When starting out, buying every tool at once can be overwhelming and expensive.
Focus on tools that solve the most common problems first:
- Cutting & Measuring: Start with a rotary cutter, self-healing mat, measuring tape, and clear rulers. Accurate cuts and measurements prevent mistakes that waste fabric and money.
- Seam Finishing: A small iron or pressing tool ensures neat seams and hems from the start.
- Fabric Handling: High-quality scissors, fine pins, and a magnetic pincushion make cutting and holding fabric easier and more precise.
- Thread & Stitching Essentials: Reliable thread, needles, and a compact sewing kit prevent project interruptions.
Buy versatile tools first that you’ll use in almost every project, then add specialized tools like bias tape makers or seam gauges once you have the basics covered.
Wondering why your sewing business isn’t growing despite your skills? Learn actionable strategies in Why You’re Probably Not Getting Clients for Your Sewing Business — Even Though You’re Skilled.
Tips on Maintaining and Prolonging the Life of Sewing Tools
Taking care of your tools not only saves money but also improves your results:
- Scissors & Rotary Blades: Keep them sharp and only use on fabric. Wipe blades after heavy use to remove lint.
- Pins & Needles: Store in a dry place and avoid using bent or rusty pins. Replace needles regularly for smooth stitching.
- Measuring Tools & Chalk: Keep rulers clean and chalk or markers capped to prevent drying.
- Thread: Store away from sunlight to prevent fading and tangling.
- Mini Iron & Pressing Tools: Empty water reservoirs after use and clean the soleplate to avoid residue buildup.
A little care goes a long way, even inexpensive tools will last much longer if properly maintained.
Love designer looks on a budget? Try tips from Thrift flip Sewing Projects Ideas For People Who want Expensive Style on A Budget to create chic pieces affordably.
International Sourcing
Sewists around the world can access tools affordably if you know where to look:
- Online Stores: Sites like Amazon, Etsy, and specialized sewing shops ship internationally and often offer reviews to guide your choice.
- Multipacks: Buying packs of pins, needles, or thread can save money and reduce the need for frequent replacements.
- Local Alternatives: Many countries have small sewing or craft shops that stock quality basics at a lower cost than international shipping.
- DIY Hacks: Simple tools can sometimes be made at home, like fabric weights (instead of buying specialty ones) or homemade thread organizers using cardboard or small boxes.
Always check international shipping policies and read reviews from buyers in your region to ensure compatibility and quality.
Not sure whether to invest in a home or industrial machine? Industrial vs Domestic Sewing Machines: Which One Should You Buy as a Beginner helps you make the right choice for your needs.
Conclusion
These 10 sewing tools for sewists aren’t just nice-to-haves, they solve real problems, save money, and make every project smoother and more accurate.
Each tool listed here is chosen to reduce frustration and improve results for sewists just like you.
Bookmark this post, share it with fellow sewing enthusiasts, or start assembling your budget-friendly toolkit today , even small steps make a big difference.
Stay tuned for our next guide, How to Choose the Right Fabric for Every Season, to keep your sewing projects on track all year round.