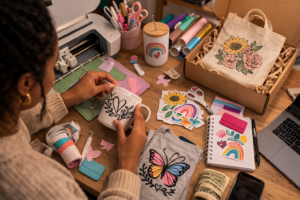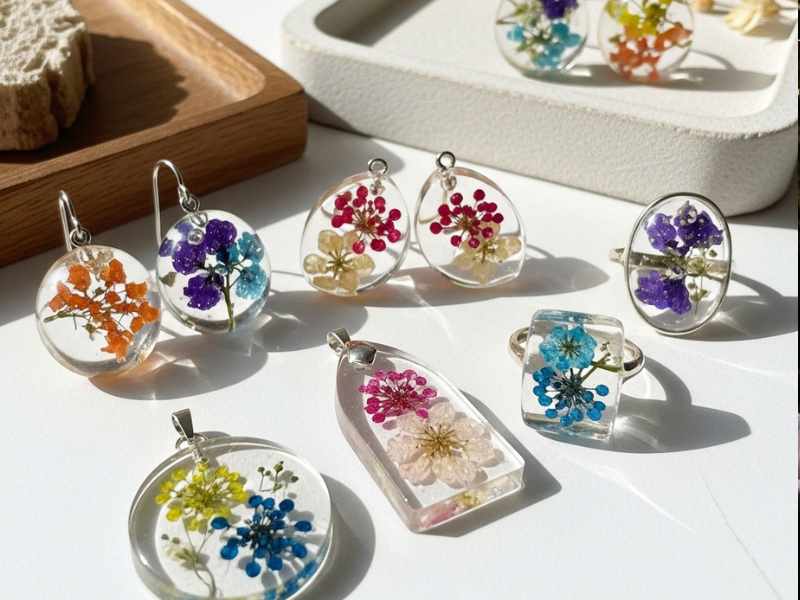
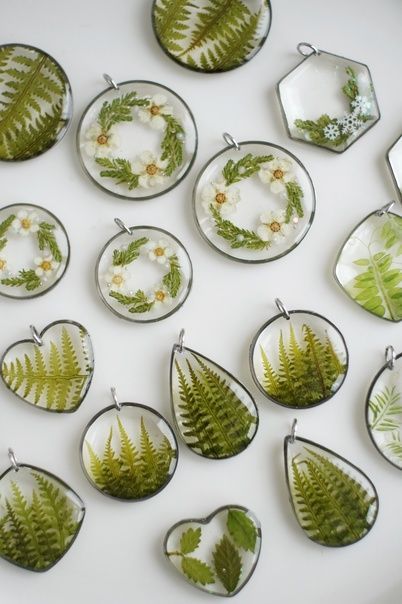
Create beautiful Resin Jewelry with Real Flowers that looks professional.
Have you ever spent hours carefully pressing flowers, mixing resin, and imagining how beautiful your jewelry would turn out… only to hold the finished piece and feel a little let down?
Maybe the resin turned cloudy, the flowers lost some of their color, or the edges weren’t smooth like you hoped. It’s frustrating, isn’t i, especially when you put so much care into it.
That moment, when your creation doesn’t match the vision in your head, can feel discouraging. But it doesn’t mean you can’t make pieces that truly shine. With some simple techniques and a little patience, you can create resin jewelry with real flowers that looks polished, vibrant, and professional, all from your own home.
By the time you finish reading this guide, you’ll know exactly how to preserve your flowers, avoid common mistakes, and create resin jewelry that looks polished, vibrant, and professional, even if this is your first attempt. And yes, you’ll be able to wear it, gift it, or show it off with pride.
If simple DIY projects feel intimidating, you’ll love DIY Projects for People Who Don’t Feel Crafty at All, which shows how anyone — even absolute beginners, can successfully create beautiful crafts like resin jewelry with real flowers.
Secrets to Clear and Vibrant Floral Resin Jewelry
Making resin jewelry with real flowers is incredibly satisfying, but even small details can affect how your finished pieces look. Beginners often get frustrated when their flowers lose color, resin turns cloudy, or tiny bubbles appear. These are common issues, and knowing how to handle them is the key to creating clear, vibrant, professional-looking resin jewelry at home.
1. Keep Your Flowers Vibrant
Flowers can fade or brown if they aren’t properly pressed and dried before use. Even a little moisture can change the color once encased in resin. Take your time to press flowers fully, and choose blooms that are sturdy and colorful. Handling them gently ensures they stay intact and bright, giving your jewelry a polished, professional look.
2. Avoid Cloudy Resin
Cloudy resin is one of the biggest frustrations for beginners. It can happen from overmixing, using the wrong type of resin, or working in a room that’s too cold or humid. Use a high-quality epoxy resin designed for jewelry and mix slowly to minimize trapped air. Following these steps will help you get that crystal-clear finish that makes your flowers pop.
Resin jewelry makes thoughtful, personalized gifts, and if you’re looking for even more creative options, 10 Low-Cost DIY Crafts to Make and Sell From Home offers easy projects that are perfect for gifting or selling online
3. Manage Bubbles
Tiny bubbles can form even if you’re careful. Stir slowly, tap the mold gently to release trapped air, and lightly pass a heat gun or candle over the surface to remove remaining bubbles. This small step makes a big difference in achieving professional results.
4. Smooth Edges and Easy Demolding
Mold release and fully cured resin prevent pieces from sticking. Flexible silicone molds are ideal because they allow you to remove your jewelry without damaging the flowers or resin edges. Waiting the full curing time also ensures a smooth, polished finish.
Once you’ve mastered resin jewelry, you might enjoy exploring other beginner-friendly craft ideas — like those in 10 Cricut Crafts Beginners Always Struggle With- And How to Make and Sell Them
Materials You’ll Need for Floral Resin Jewelry
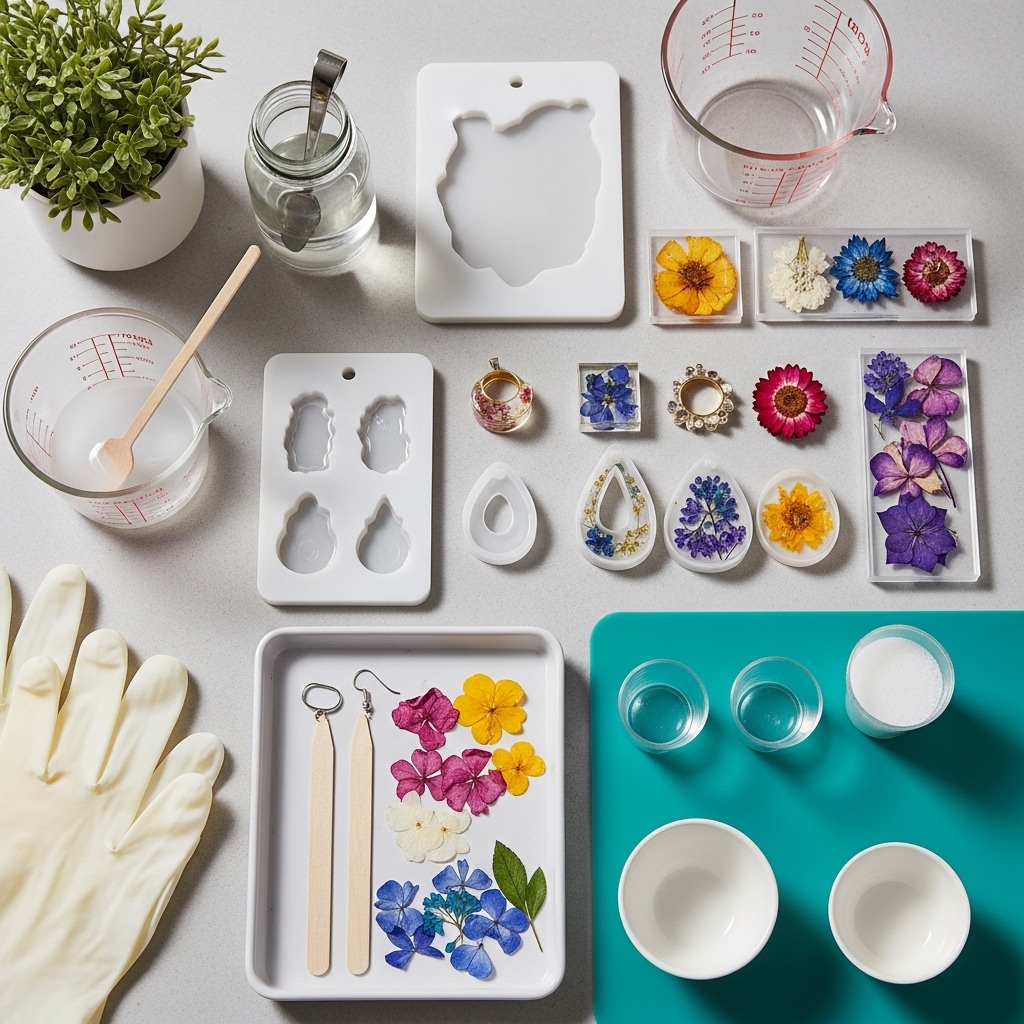
To create clear, professional-looking resin jewelry with real flowers, having the right materials is essential. Each item plays a role in ensuring your pieces turn out vibrant and polished.
1. Best Resins for Clarity
Choose a high-quality epoxy resin designed for jewelry. These resins cure clear, resist yellowing, and allow the natural colors of your flowers to shine. Using the right resin is the first step toward professional-looking results.
2. Resin Jewelry Molds for Real Flowers
Flexible silicone molds in shapes like pendants, earrings, or keychains help shape your jewelry and make removal easy. They also prevent sticking, so your pieces come out smooth and intact.
3. Pressed Flowers & Preservation Methods
Flowers should be fully dried and pressed before embedding in resin. This keeps their color vibrant and prevents browning or fading. You can press them using a traditional flower press, heavy books, or a microwave press for faster results.
4. Mixing Tools
Stir sticks, disposable cups, and measuring tools ensure accurate resin mixing. Proper mixing reduces bubbles and ensures the resin cures evenly.
5. Gloves
Nitrile or latex gloves protect your hands from resin, which can be sticky and irritating to skin.
6. Heat Gun or Candle
A gentle heat source helps remove small bubbles from the resin surface, keeping your jewelry clear and smooth.
Some readers turn their crafting passion into extra income. If that interests you, Struggling to Make Money From Home Sewing? Launch a Profitable Sewing Side Hustle offers tips on starting a creative side hustle — and resin jewelry is a perfect addition to that toolkit.
How to Make Resin Jewelry with Real Flowers Step by Step
Creating resin jewelry with flowers is incredibly rewarding. There’s nothing like wearing a tiny preserved flower that you made yourself. But if you’ve ever tried and ended up with cloudy resin, floating flowers, or bubbles everywhere, don’t worry , it’s not magic, it’s technique.
I will walk you step by step, showing exactly what to do, what to watch for, and how to get clear, vibrant, professional-looking jewelry.
Step 1: Press Your Flowers Correctly
Beautiful resin jewelry starts with properly pressed and dried flowers. If they’re not completely dry, your resin can cloud or petals may brown.
How to press flowers step by step:
- Select flowers carefully
- Pick small, flat blooms like daisies, pansies, or forget-me-nots.
- Avoid thick flowers or very soft petals — they can fold or tear in resin.
- Press flowers
- Traditional method:
- Place flowers between coffee filters or parchment paper.
- Sandwich in a heavy book and leave for 24–48 hours.
- Check after 24 hours — flowers should feel dry and crisp.
- Microwave press method:
- Follow manufacturer instructions carefully — over-drying can brown petals.
- Traditional method:
- Storage tip: Keep pressed flowers in a dry, airtight container until ready to use. Moisture is the biggest enemy of clear resin.
Note: Treat flowers gently. Even a slight bend can show up in the finished jewelry.
Step 2: Set Up Your Workspace and Mold
Preparation makes the process calm and stress-free:
- Use silicone molds for pendants, earrings, or keychains. Flexible molds help with easy demolding.
- Cover your workspace with parchment, wax paper, or disposable sheets — resin can spill.
- Gather tools:
- Stir sticks, measuring cups
- Tweezers
- Gloves (nitrile or latex)
- Small heat gun or candle for bubbles
Tip: Have everything ready before mixing resin. Resin cures quickly, and preparation prevents mistakes.
Step 3: Mix Resin Carefully
Mixing slowly is the key to clarity. Cloudy resin is a top beginner frustration.
Step-by-step mixing:
- Measure resin and hardener exactly per manufacturer instructions.
- Stir slowly for 2–3 minutes, scraping sides and bottom. Stop if you see air bubbles forming from over-stirring.
- Let the resin sit 2–3 minutes so trapped air rises.
Dos & Don’ts:
- ✅ Do stir gently
- ❌ Don’t mix too fast — bubbles form easily
- ✅ Do work in room temperature (68–77°F) and low humidity
Know this: This is where beginners often ask why resin jewelry is cloudy. Slow, careful mixing solves it.
Busy schedules shouldn’t stop you from crafting. Check out Spring DIY Projects You Can Start, Stop, and Pick Up Again Without Losing Progress to see how easy it is to manage creative projects, perfect for beginners making resin jewelry at home.
Step 4: Pour the Base Layer
- Pour a thin layer of resin into the mold (about 2–3 mm thick).
- Let it settle for 2–3 minutes — air bubbles will rise naturally.
- This layer acts as a “cushion” for your flowers.
Note: Pouring too much at once can push flowers around later. Keep it thin and controlled.
Step 5: Place Your Flowers Carefully
- Use tweezers to pick up and position flowers.
- Arrange the flowers as you like — think about angles and spacing.
- Avoid pressing hard — petals can fold.
- Optional: Add tiny leaves or dried foliage for a layered look.
Tips:
- Place flowers slightly above the resin base, not touching the bottom, for a “floating” effect.
- Check flowers from different angles, this is what will show in the final piece.
Step 6: Add the Top Layer of Resin
- Slowly pour resin over the flowers, near the mold edges to avoid disturbing placement.
- Fill until the mold is slightly overfull, resin shrinks a little while curing.
- Tap the mold lightly on the table to release trapped bubbles.
- Use a heat gun or candle flame a few inches above the surface to pop remaining bubbles. Move gently and evenly.
Dos & Don’ts:
- ✅ Do pour slowly
- ✅ Do use heat for bubbles
- ❌ Don’t overheat or touch flowers directly
This is the moment beginners worry about — how to avoid bubbles in resin jewelry. Take your time and move slowly.
If you love creating keepsakes that last, you might also enjoy Eco-Friendly Easter Crafts You Can Make and Reuse Year After Year, which shows simple, sustainable projects that can be enjoyed season after season — just like your handmade resin jewelry with real flowers.
Step 7: Curing Your Jewelry
- Place your mold in a dust-free area.
- Let resin cure undisturbed for 24–48 hours, following manufacturer instructions.
- Avoid touching or moving the mold, vibrations can ruin clarity.
Teacher tip: Patience here is critical. It’s better to wait than to rush and ruin a beautiful piece.
For those who enjoy unique DIY accessories, DIY Bridal Feather Hand Fan Tutorial is another creative project that combines elegance and personal flair, similar to how you can design custom resin jewelry with real flowers.
Step 8: Demolding and Finishing
- Gently push or peel the silicone mold to remove the jewelry.
- If edges are rough, lightly sand with fine-grit sandpaper (400–600 grit).
- Attach findings: earring hooks, pendant bails, keychain rings.
Step 9: Optional Finishing Touches
- Add a thin layer of resin on top if you want extra shine or a perfectly smooth surface.
- Use a soft cloth to polish your jewelry lightly.
- Display or gift your pieces confidently, they’re now ready to wear or share.
Video credit of making the Resin Jewelry with Real Flowers: @ LET’S RESIN
Common Challenges in DIY Resin Jewelry and How to Fix Them
Creating resin jewelry with real flowers is incredibly satisfying, but even small mistakes can make a piece look less polished than you imagined. Many beginners face the same challenges, and understanding them is the first step to making jewelry that looks professional.
1. Flowers Browning or Fading
You carefully place your pressed flowers into resin, wait for curing, and… the petals have lost their color or turned brown. This usually happens because the flowers weren’t fully dry before using them, or they contained hidden moisture.
How to Fix It:
- Always press flowers for at least 24–48 hours until they feel crisp and dry.
- Handle flowers gently, avoid bending or crushing petals.
- Store pressed flowers in a dry, airtight container until ready to use.
- Optional: Spray flowers lightly with a clear acrylic sealant before embedding them to help retain color.
Mini tip: Even tiny traces of moisture can ruin clarity. When in doubt, let flowers dry a little longer.
2. Resin Turning Cloudy
Cloudy or milky resin is one of the most common frustrations for beginners. It can happen from overmixing, using the wrong resin, or mixing at too low/high temperature.
How to Fix It:
- Choose a high-quality epoxy resin designed for jewelry; some resins are better suited for crafts than others.
- Mix slowly and carefully, scraping the cup sides and bottom. Avoid vigorous stirring.
- Work in a room that’s around 68–77°F (20–25°C) with low humidity. Extreme temperatures can affect clarity.
- Avoid introducing extra additives unless the resin brand allows them, glitter or colorants can cloud resin if added incorrectly.
Let mixed resin sit for a couple of minutes before pouring; this helps trapped air rise and reduces cloudiness.
3. Bubbles Forming
Tiny bubbles trapped in resin or around flowers can make the final jewelry look amateurish. Even careful mixing can leave some bubbles behind.
How to Fix It:
- Tap the mold gently on your workspace after pouring to release trapped air.
- Use a heat gun or small torch, held a few inches above the surface, to pop bubbles. Move evenly, don’t leave heat in one spot for too long.
- You can also blow gently over the resin with a straw or let it sit for a few minutes; many bubbles naturally rise to the top.
Patience is key, rushing this step can damage flowers or leave the surface uneven.
4. Pieces Sticking to Molds
Sometimes your resin jewelry gets stuck in the mold, making it hard to remove and risking broken flowers or jagged edges.
How to Fix It:
- Always use flexible silicone molds, these release more easily than rigid molds.
- Allow resin to fully cure for the time recommended by the manufacturer before attempting to remove.
- If edges stick slightly, gently flex the mold or slide a thin plastic tool along the edge to help release.
Avoid trying to demold too early, it’s tempting, but waiting ensures smooth edges and professional-looking jewelry.
Looking for more wearable DIY projects?
DIY Sequin Clutch Tutorial: Easy & Sparkly Party Handbag You Can Make Yourself shows how to make stylish, sparkly accessories, much like the custom, colorful jewelry you can create with resin and flowers.
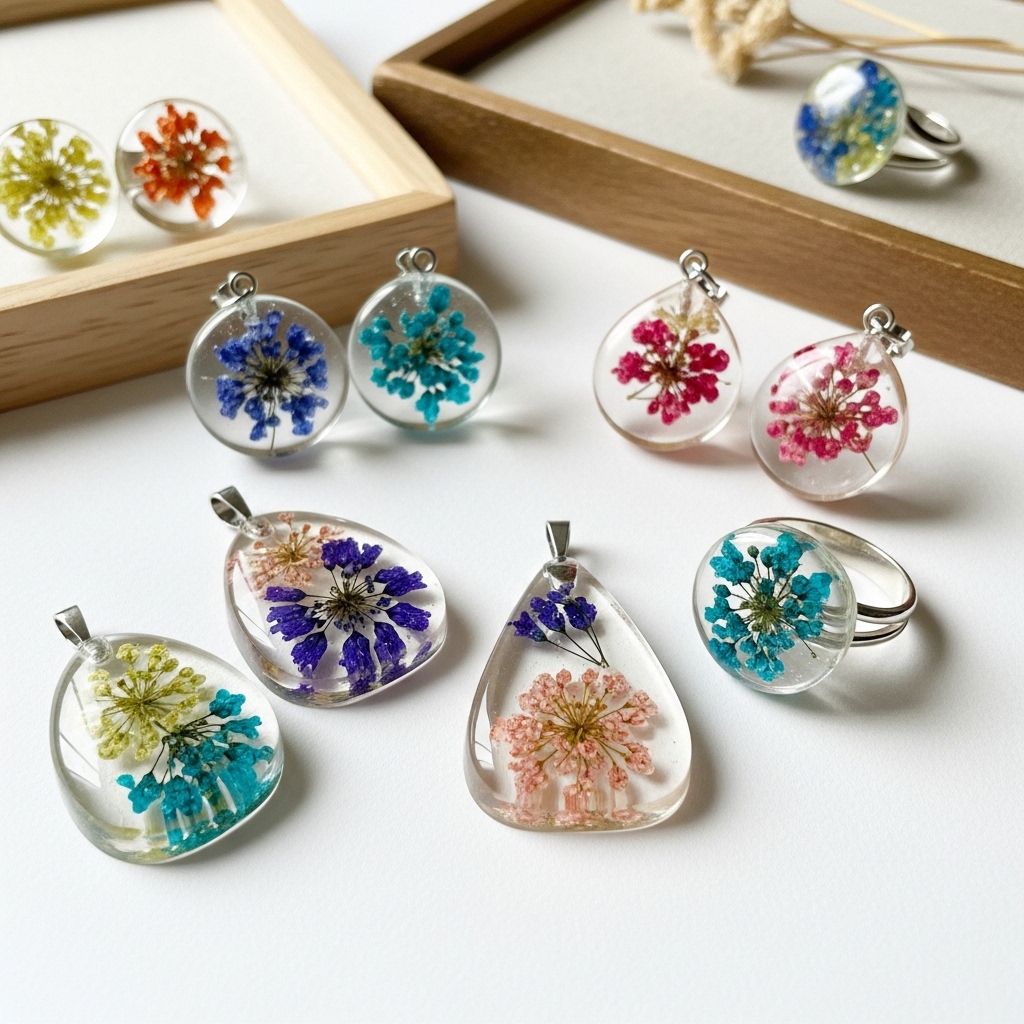
Gift Ideas & Creative Uses for Your Resin Jewelry with Real Flowers
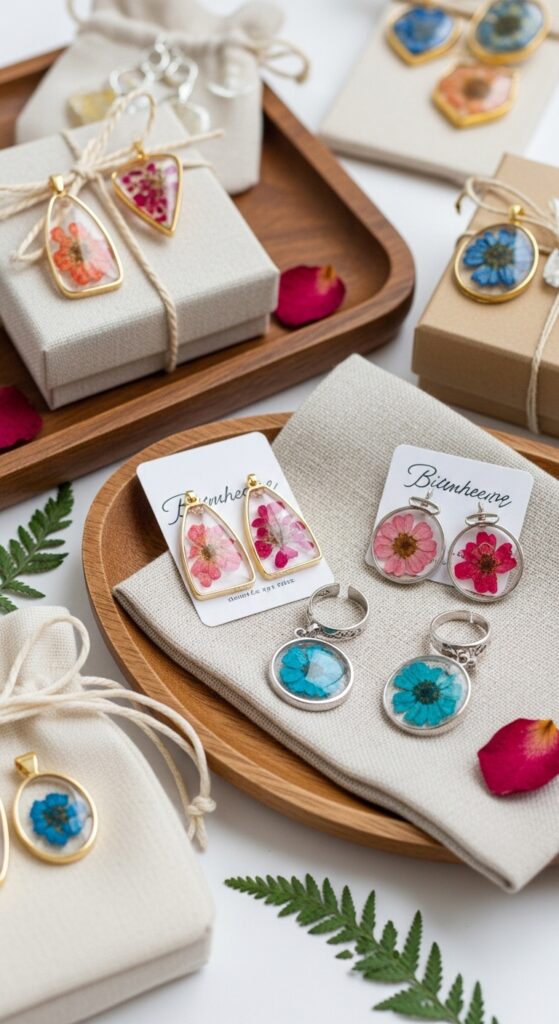
One of the best things about making Resin Jewelry with Real Flowers is that your creations aren’t just beautiful, they’re also perfect for gifting or personalizing your space.
Here’s how you can use your pieces and turn them into thoughtful, memorable items:
- Pendants for Birthdays or Special Occasions
- A delicate floral pendant can make a heartfelt birthday gift, bridesmaid gift, or anniversary keepsake.
- You can customize the flowers by color or type to match the recipient’s favorite blooms.
- Wrap in a small jewelry box or tie with a ribbon for a polished presentation.
- Earrings for Everyday Wear or Events
- Tiny pressed flowers in resin earrings are lightweight, elegant, and unique.
- Perfect for a friend who loves handmade accessories or someone celebrating a special milestone.
- Pair with complementary outfits for a personalized touch.
- Keychains That Capture Memories
- Turn larger resin pieces or layered designs into custom keychains.
- Include flowers from meaningful events, like a wedding bouquet or a garden flower from a loved one’s home.
- They make charming, practical keepsakes that are easy to gift.
- Home Décor Accents
- Use your Resin Jewelry with Real Flowers to create miniature hanging ornaments or decorative charms.
- Attach to curtain ties, drawer knobs, or small display trays to bring delicate floral touches into any room.
- Great for seasonal decorations or a subtle springtime accent in your home.
When gifting, include a small note explaining the flowers used and their significance , it adds a personal touch that makes DIY floral resin jewelry gift ideas even more special.
If you enjoy hands-on, useful DIYs, you’ll love How to Make DIY Homemade Vaseline for Skin , which adds a self-care twist to your crafting routine, complementing your resin jewelry creations b
Conclusion
You’ve seen it all , the little mistakes that make beginners cringe, the tricks to keep flowers vibrant, and how to get crystal-clear, bubble-free resin every time. Making Resin Jewelry with Real Flowers isn’t just about pouring resin; it’s about capturing a tiny piece of nature and turning it into something you can wear, gift, or treasure forever.
The best part? Every piece you create tells a story. That pressed flower from your garden, that bloom that reminds you of a loved one — it all becomes something magical in resin. Even if your first piece isn’t perfect, every attempt teaches you something new, and soon you’ll be making jewelry that looks like it came from a boutique.
So go ahead , gather your flowers, grab your molds, and start creating. With the tips, solutions, and guidance in this guide, you’re not just making jewelry; you’re making memories, gifts, and pieces that feel alive. And once you see your first finished pendant or earring, you’ll know — all that effort was worth it.
Your journey from beginner to confident resin crafter starts right here, right now. Don’t wait. Your flowers, your creativity, and your next masterpiece are ready.
FAQs About Resin Jewelry with Real Flowers
1. Can I embed large or thick flowers in resin?
Large or thick flowers can trap air or prevent resin from curing evenly, so it’s best to slice them into thin, flat sections or use small blooms and pour resin in layers to ensure clarity.
2. How do I prevent my flowers from floating in resin?
Flowers may drift or tilt before curing, ruining your design. Pour a thin base layer first, let it slightly set, then place flowers and pour the top layer slowly around them, adjusting gently with tweezers.
3. Why does resin sometimes remain sticky even after curing?
Sticky resin usually happens when the resin and hardener weren’t measured correctly or the room is too humid. Always mix slowly, measure precisely, and work in a dry, stable environment. If sticky, sanding and a thin topcoat can help.
4. Can resin jewelry turn yellow over time?
Resin may yellow if exposed to sunlight, heat, or low-quality materials. Using UV-resistant epoxy and storing your jewelry away from direct sunlight will keep your Resin Jewelry with Real Flowers vibrant.
5. How do I fix bubbles that form around flowers?
Tiny bubbles can appear even with careful pouring. Use a heat gun or small torch to gently pop them, or let the resin sit for a few minutes so bubbles rise to the top naturally.
6. Can resin jewelry be safe for kids or sensitive skin?
Once fully cured, epoxy resin is generally non-toxic and safe. Avoid contact while uncured, wear gloves during crafting, and pair your jewelry with hypoallergenic findings for extra safety.
7. How can I make multiple pieces that all match?
Consistency is tricky for beginners. Use the same molds, measure resin carefully, press flowers consistently, and plan layouts with a simple sketch or template before pouring.
8. Can I repair resin jewelry if a flower shifts or the surface isn’t smooth?
Yes! Small adjustments can save a piece. Sand uneven edges gently, add a thin top layer of fresh resin if needed, and make sure it fully cures to stabilize flowers and surface.
9. How long does resin take to fully cure?
Curing time depends on the resin brand, temperature, and humidity, but most epoxy resins take 24–48 hours to fully harden. Avoid removing pieces too early, even if they feel firm, because premature demolding can distort edges or damage flowers.
10. Can I use fresh flowers directly in resin?
No, fresh flowers contain moisture, which can make resin cloudy or cause petals to brown. Always press and dry your flowers for 24–48 hours before embedding them. For extra protection, a thin layer of clear acrylic sealant on the petals helps preserve color and shape.