How to Make and Maintain a Sourdough Starter — The No-Fail Routine for First-Time Bakers
First-time baker? Here’s how to make and maintain a sourdough starter with a foolproof routine that keeps it active and healthy.
Starting sourdough for the first time can feel a little scary. You see words like starter, folds, and rising times, and wonder if you’ll just end up with a dense loaf that doesn’t rise. That worry is normal.
The truth is, sourdough isn’t complicated. It’s just flour, water, and a bit of patience. Most beginners struggle not because it’s hard, but because no one has shown them how to take it one simple step at a time.
If you’re not sure how to get a starter going, this guide works alongside How to Make and Maintain a Sourdough Starter — The No-Fail Routine for First-Time Bakers
With a healthy starter and clear steps, you can bake your first loaf successfully — nothing fancy, just a loaf you made yourself.
You will find this guide helpful: Homemade Greek Yoghurt Recipe: How to Make It Naturally from Scratch and How to Make Homemade Tiger Nut Drink Without Preservatives: Stays Fresh Longer
Why Homemade Sourdough Bread Is Healthier, Tastier, and Better for You
Sourdough bread isn’t just trendy , it’s genuinely different from regular bread. Learning how to make and maintain a sourdough starter not only gives you fresh, homemade bread but also opens the door to a healthier, tastier, and often more affordable loaf.
Unlike commercial bread, sourdough undergoes a natural fermentation process. The wild yeast and beneficial bacteria in the starter break down starches and gluten, making the bread easier to digest. This means people who often feel bloated after regular bread may tolerate sourdough better. Understanding this natural fermentation is key because it’s the foundation of the bread’s unique nutritional profile.
Taste is another area where sourdough stands out. The slow fermentation develops complex, sour flavors that simply cannot be replicated with store-bought yeast.
Each loaf carries subtle notes of sourness, nutty undertones, and a chewy texture that bread lovers crave. By taking the time to learn how to make and maintain a sourdough starter from scratch, you control the flavor, hydration, and crust to match your personal preference, something impossible to do with mass-produced bread.
Cost is often overlooked when people compare sourdough to regular bread. While artisan loaves can be expensive, homemade sourdough is surprisingly economical. A small bag of flour and some filtered water is enough to feed your starter for weeks.
Once you know how to make and maintain a sourdough starter from scratch, you can create multiple loaves at a fraction of the price of buying high-quality artisan bread. Over time, this makes baking sourdough at home both budget-friendly and rewarding.
Beyond nutrition, taste, and cost, sourdough also encourages mindfulness in the kitchen. Maintaining a starter is a daily ritual that connects you with the process of food creation. This recipe teaches patience, attention to detail, and the satisfaction of creating something with your own hands. It’s a simple, small practice that can make your baking experience more intentional and enjoyable.
In short, sourdough bread offers real advantages over standard bread: it’s easier to digest, rich in flavor, budget-friendly, and offers a fulfilling baking experience.
Mastering how to make and maintain a sourdough starter from scratch is the first step to enjoying all these benefits, and it’s easier than many beginners expect. With consistent care, a little patience, and some basic ingredients, you can bake sourdough bread that’s better for your body, your taste buds, and your wallet. Also read: 10 Showstopping Christmas Desserts to Make This Holiday Season
Ingredients for a Sourdough Starter
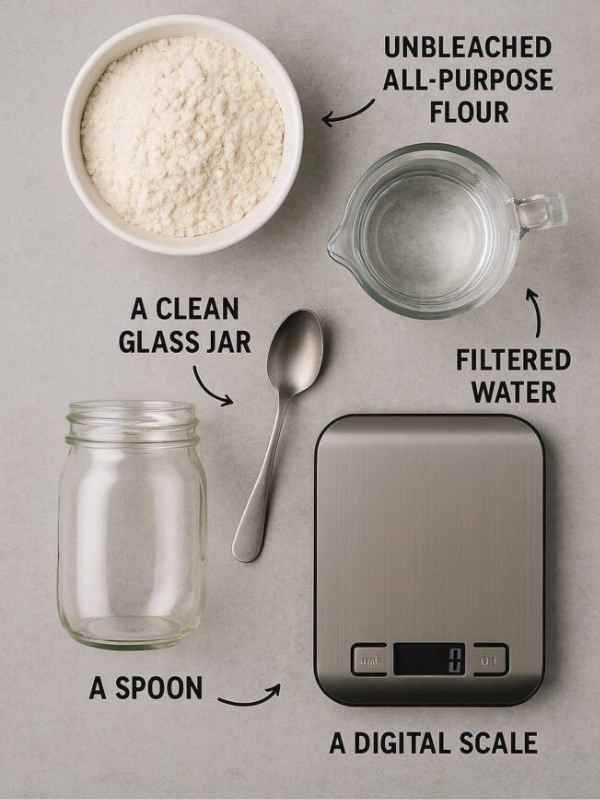
Photo credit: @ Blog Dolce Vita
- Flour (100 g / ~¾ cup per feeding)
- Use high-protein, unbleached flour such as bread flour, whole wheat, or rye.
- Avoid bleached or overly processed flours — they don’t support healthy yeast growth.
- Whole wheat or rye flour can jump-start your starter because they have more natural microbes.
- Water (100 ml / ~⅓ cup per feeding)
- Use filtered, bottled, or dechlorinated water. Tap water with chlorine can slow or kill your starter.
- Room temperature water works best (around 22–27 °C / 72–81 °F).
- Avoid boiling water — it will kill the natural yeast and bacteria.
Optional Ingredients / Tools
- A clean glass jar (at least 250 ml / 1 cup) to hold your starter.
- Kitchen scale — recommended for accurate feeding ratios.
- Wooden spoon or spatula to stir the starter.
- A breathable cover (like a clean cloth or paper towel) to allow air in while keeping dust and insects out.
You might find this guide helpful: What to Make for Dinner When You’re Too Tired to Cook but Still Hungry
How to Make and Maintain a Sourdough Starter from Scratch
Creating your own sourdough starter may seem intimidating at first, but it’s simple once you understand the process. This guide will walk you through every step, making it easy for beginners to succeed. Something else that may inspire you: Soft Milky Doughnuts Recipe
Step 1: Gather Your Ingredients and Tools
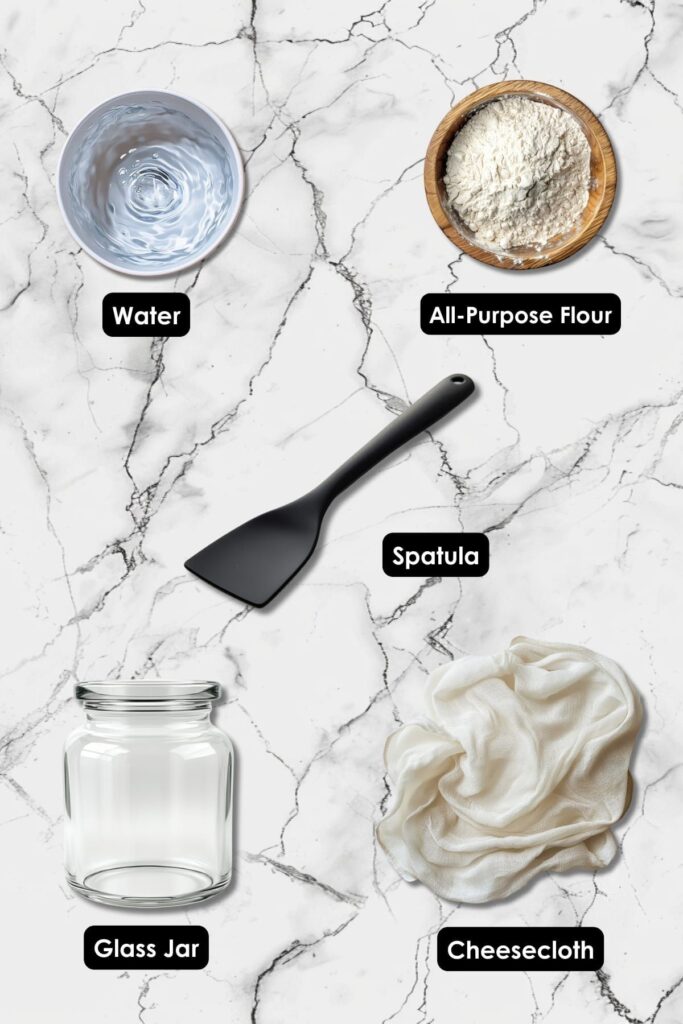
Photo credit: @ nature of home
Before you start, make sure you have everything you need:
- Flour – 100 g per feeding (high-protein, unbleached bread flour, whole wheat, or rye).
- Water – 100 ml per feeding (filtered, bottled, or dechlorinated, at room temperature).
- Glass jar – at least 250 ml (1 cup).
- Wooden spoon or spatula for stirring.
- Kitchen scale (optional, but helps with accurate measurements).
- Breathable cover – a clean cloth, paper towel, or loosely fitted lid.
Having everything ready helps the process run smoothly and makes it easier to maintain an active sourdough starter.
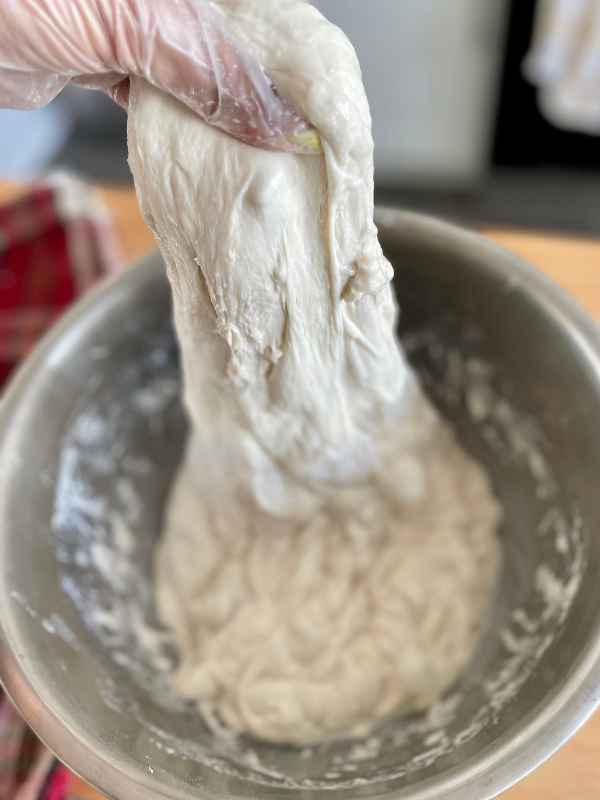
Step 2: Combine the Flour and Water
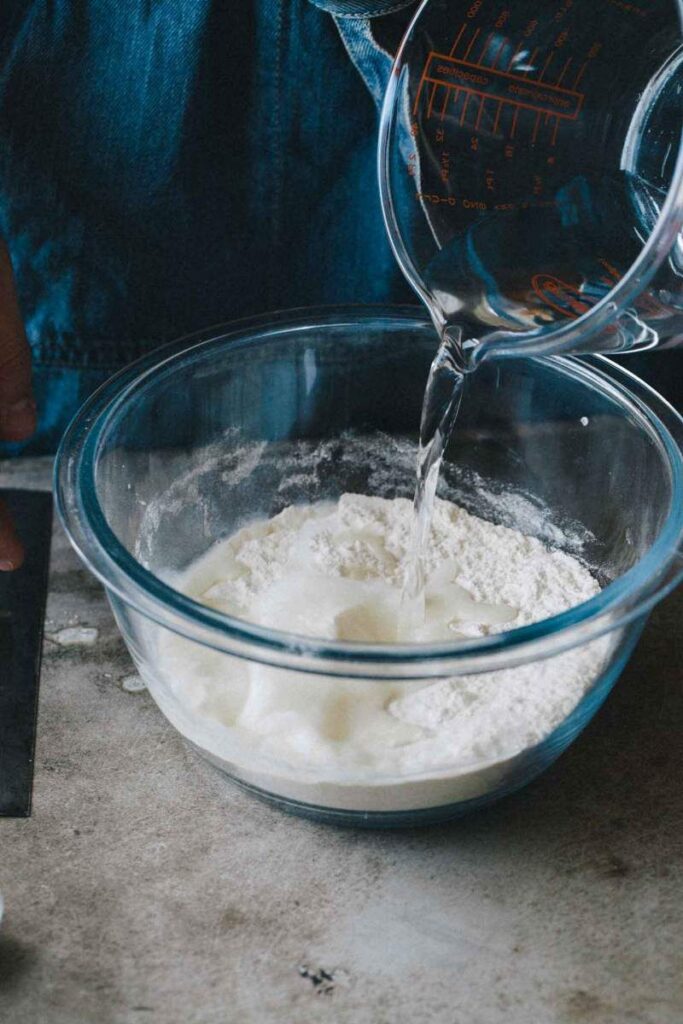
Photo credit: @ Jernej Kitchen
- Measure 100 g of flour and 100 ml of water.
- Pour the flour into the clean glass jar.
- Slowly add the water, stirring continuously to mix the flour and water together.
Stir until there are no dry lumps. The mixture should look like a thick batter, not too runny and not too stiff. This consistency helps the natural yeast and bacteria grow.
Step 3: Loosely Cover the Jar
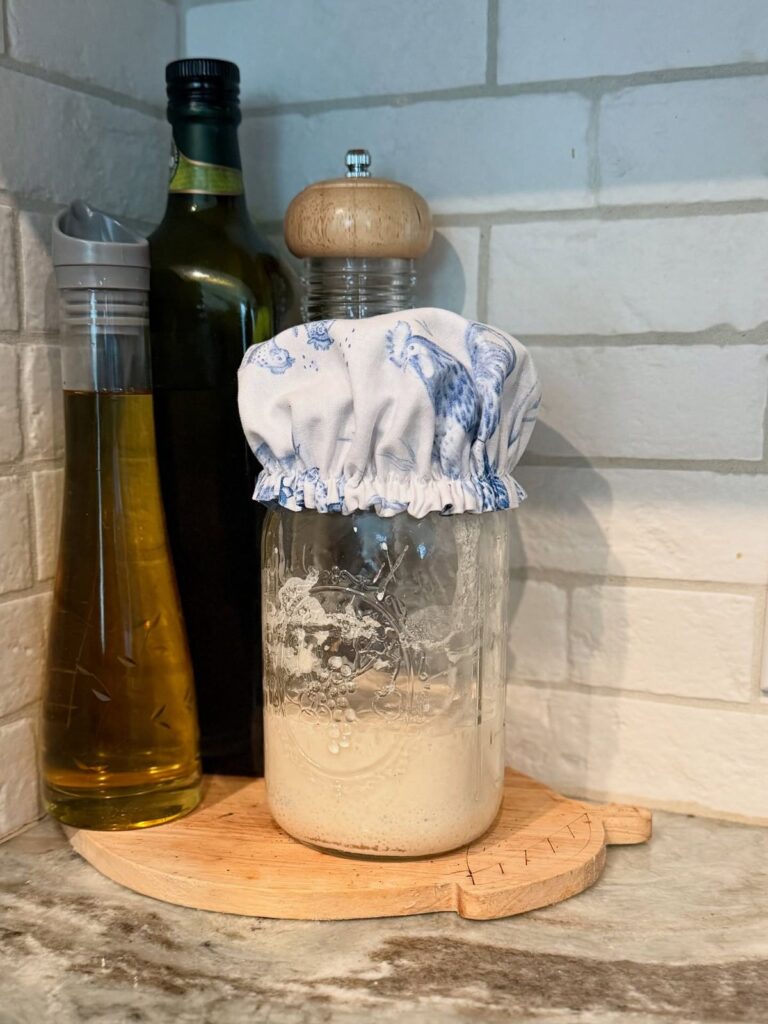
Photo credit: @ SG Cakes TX
- Use a clean cloth, paper towel, or loosely fitted lid to cover the jar.
- The cover keeps dust and insects out but allows air to flow, which is necessary for yeast growth.
Don’t seal the jar tightly, your starter produces gas as it ferments, and it needs space to expand.
Step 4: Let It Rest at Room Temperature
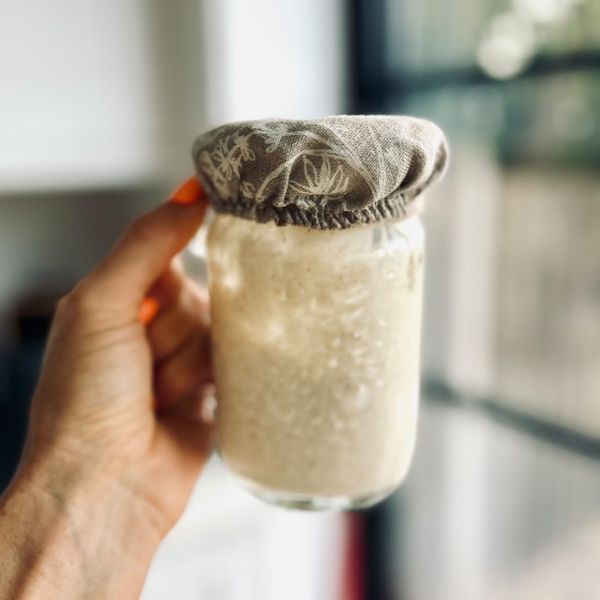
Photo credit: @ Helen Round
- Place your jar in a warm, stable spot (ideally 22–27 °C / 72–81 °F).
- Avoid direct sunlight, drafts, or cold corners.
Temperature is important for fermentation. If it’s too cold, the starter will grow very slowly. If it’s too warm, it may grow too fast and develop off smells. So warm is ideal.
Step 5: Stir Daily
- Every 24 hours, stir your starter gently.
- Use a clean spoon or spatula to mix in air and redistribute the yeast and bacteria.
Stirring keeps your starter active and prevents a layer of water (called “hooch”) from forming on top. If hooch appears, just stir it in, it’s normal and safe.
Step 6: Begin Regular Feedings
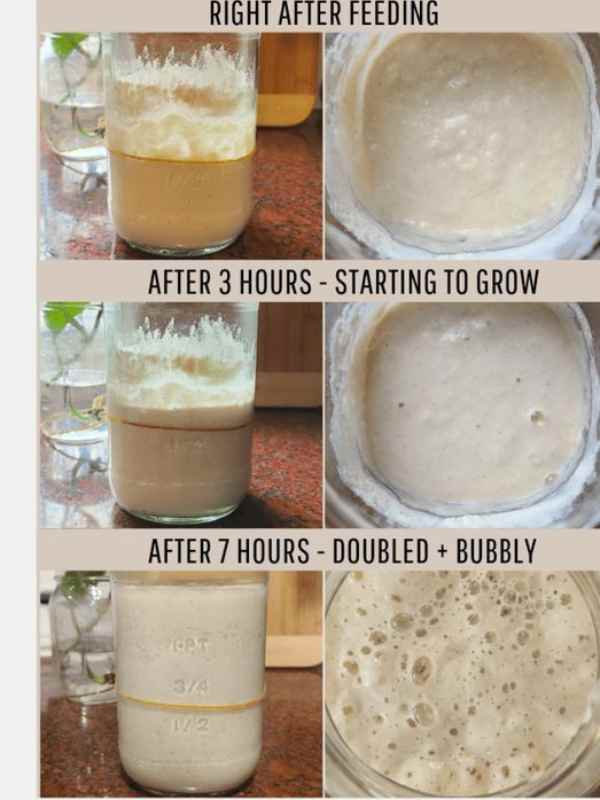
Photo credit: @ Dani Koch
- After 24 hours, it’s time for the first feeding:
- Discard about half of your starter (to keep it manageable and active).
- Add 100 g flour and 100 ml water.
- Stir well and cover again.
- Repeat this feeding every 24 hours. As the days go on, your starter will begin to bubble, rise, and smell pleasantly tangy.
Consistent feeding is the key to a healthy sourdough starter for beginners. Missing feedings can weaken the culture.
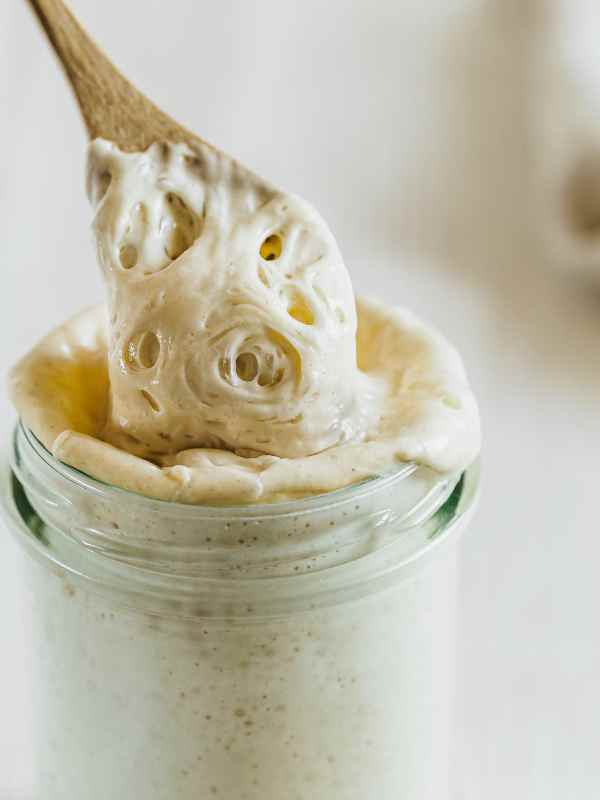
Step 7: Observe Your Sourdough Starter’s Progress
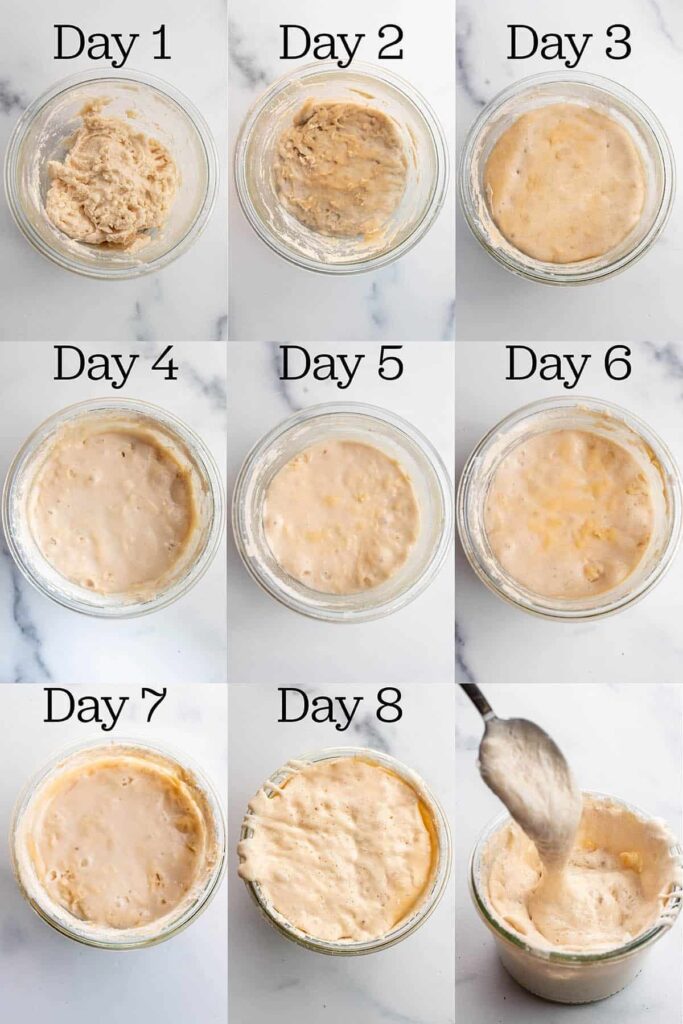
Photo credit: @ Dirt and Dough
- Day 2–3: You may notice tiny bubbles forming and a slightly sour smell. This is normal.
- Day 4–5: The starter should double in size within 6–8 hours of feeding and have a tangy, yeasty aroma.
- Day 6–7: Your starter is strong, active, and ready to use for baking.
If your starter doesn’t bubble or grow, check the flour, water, temperature, and feeding consistency. Adjust as needed.
Step 8: Maintaining Your Starter

Photo credit: @ Jacqueline Gorski
Once your starter is active, you can keep it:
- At room temperature: Feed daily if kept outside the fridge.
- In the fridge: Feed once or twice a week. Take it out, discard half, feed it, let it sit a few hours, then return it to the fridge.
Maintaining regular feedings ensures your starter remains healthy, active, and ready for any sourdough recipe you want to try.
How to Maintain Your Sourdough Starter During Travel, Heat, or Breaks
If you’ve been learning how to make and maintain a sourdough starter from scratch, you know that keeping it alive and active requires consistent care.
But life doesn’t always follow our baking schedule, sometimes you need to travel, face hot weather, or take a short break. Fortunately, with the right approach, your starter can survive these interruptions and remain ready for baking. You might find this post helpful: Homemade Moist Banana Bread Cake Recipe with Toasted Coconut Topping
-
Short Travel or Overnight Breaks
For trips of a day or two, your starter can usually handle a short pause. Before leaving, give it a regular feeding, discard half and add fresh flour and water, so it has enough strength to endure the break. Then, store it in a cool, shaded spot at room temperature, away from direct sunlight or drafts. When you return, simply resume your normal feeding routine.
This simple adjustment ensures that even beginners mastering how to make and maintain a sourdough starter from scratch don’t lose progress due to short absences.
-
Longer Travel: Refrigeration
For trips lasting several days or weeks, refrigeration is the best option. Feed your starter well before storing it, discard half, add fresh flour and water, and mix thoroughly. Place the jar in the fridge with a loose lid or breathable cover. Cold temperatures slow down fermentation, so daily feedings aren’t needed.
When you return, take the starter out, feed it at room temperature, and allow a few hours for bubbles and activity to return. This approach allows you to maintain a healthy sourdough starter without daily attention while traveling.
-
Hot Weather Challenges
Warm conditions can cause your starter to ferment too quickly, peak too early, or develop a strong aroma. To prevent this:
- Move the starter to a cooler spot, away from heat sources and sunlight.
- Reduce feeding amounts slightly to avoid over-fermentation, for example, feed half the usual flour and water.
- Stir the starter once or twice a day to keep it aerated and active.
Even in hot weather, these small adjustments make it easy to continue how to make and maintain a sourdough starter from scratch, ensuring your yeast and bacteria stay healthy.
-
Extended Breaks
If you won’t be around for a week or more, consider drying or freezing your starter.
- To dry: Spread a thin layer of starter on parchment paper and let it air dry completely. Store in an airtight container. When ready to reactivate, soak in water and resume regular feedings.
- To freeze: Portion small amounts into a freezer-safe container. Thaw gradually and feed consistently to revive activity.
These methods allow beginners to pause without losing the effort they’ve put into making and maintaining a sourdough starter from scratch.
-
Maintaining Consistency
While away or during challenging conditions, maintaining cleanliness and using the right ingredients is essential:
- Always use clean jars and utensils to prevent contamination.
- Feed with high-protein flour and filtered water to give the yeast the best chance to stay active.
- Observe the starter upon return, the presence of bubbles, the tangy aroma, and a slightly risen texture indicate it’s healthy. A few extra feedings may be needed to fully revive it.
By following these steps, your starter remains resilient, allowing you to continue baking fresh homemade sourdough bread without worrying about interruptions.
Sourdough for Busy People: Quick Daily Routines

1. Morning Quick Check
Time needed: 2–3 minutes
A quick morning check of your sourdough starter is a simple yet powerful habit for busy bakers. Begin by observing its appearance and smelling it. Look for tiny bubbles rising through the mixture and a slightly tangy aroma, both signs that your starter is active and healthy.
If it seems hungry or sluggish, give it a small feeding using your usual flour and water ratio. Even a minimal feeding helps maintain a lively starter, keeping it ready for baking without demanding much time.
Adding this brief daily ritual ensures that your starter doesn’t get neglected, even on the busiest mornings, and reinforces the consistency needed when learning how to make and maintain a sourdough starter from scratch.
-
One-Minute Stir
Daily stirring is another fast, essential step for maintaining a strong sourdough starter. Use a clean spoon to gently stir the starter each day. This process redistributes the natural yeast, incorporates air, and prevents a layer of liquid, called “hooch,” from forming on the surface.
Although it only takes a minute, this habit can make a noticeable difference in the activity and health of your starter. For beginners trying to master how to make and maintain a sourdough starter from scratch, even this tiny daily action ensures the yeast stays active and ready for baking.
-
Strategic Feeding Schedule
You don’t always have to stick to rigid 24-hour feedings. Adjusting the feeding schedule to match your routine is a smart way to keep a sourdough starter healthy without spending extra hours each day. If your mornings are hectic, consider feeding in the evening instead.
For refrigerated starters, feeding 1–2 times a week is usually enough to maintain activity. By streamlining your feeding schedule in a way that suits your lifestyle, you can continue to manage a lively, active starter while maintaining your daily responsibilities. This approach is particularly helpful for beginners learning how to make and maintain a sourdough starter from scratch in a busy life.
-
Prep Ingredients in Advance
Preparation is key for busy bakers. Keep measured flour and filtered water ready for each feeding, and always use the same jar for your starter. Having a clean spoon nearby makes the process quick and stress-free.
When ingredients are prepped in advance, feeding your starter becomes a smooth part of your routine rather than a stressful task. This small organization step supports beginners trying to master how to make and maintain a sourdough starter from scratch, even on days when time is limited.
-
Keep It Visible
Placement matters when it comes to maintaining a sourdough starter. Keeping it somewhere visible in your kitchen, like on the counter or near your coffee station, serves as a constant reminder to check and feed it. Visibility helps you stay consistent, turning daily starter care into a natural part of your day. This simple adjustment ensures that your starter remains active and thriving, which is essential for anyone learning how to make and maintain a sourdough starter from scratch.
Why Your Sourdough Starter Keeps Failing & How to Fix Them
If your sourdough starter isn’t bubbling, rising, or behaving as expected, its okay. Many bakers face this challenge, but most failures happen because of small, avoidable mistakes.
In this section, we’ll explain why sourdough starters fail and provide practical tips to fix them, so your sourdough starter can thrive and stay active.
Starter Not Bubbling? Most Likely You’re Skipping Feedings
A common reason a sourdough starter fails is irregular feedings. Yeast and bacteria need fresh flour and water to stay active, and skipping feedings weakens the starter. If your starter is inactive, not bubbling, or rising very slowly, it’s often because it hasn’t been fed consistently.
How to fix it:
- Feed your starter on a consistent schedule — every 24 hours or every 12 hours in cooler kitchens, to keep the culture healthy.
- Set reminders so you don’t forget feedings, as consistent care is key to a strong and active starter.
- If the starter seems weak, a series of fresh feedings will usually revive it, restoring bubbles and fermentation activity.
Following this routine, even a struggling starter can regain strength, making it easier to maintain a reliable sourdough starter for beginners.
Using the Wrong Flour or Water — A Hidden Starter Killer
Flour and water quality play a big role in starter activity. Low-protein or overly processed flour can prevent yeast growth, and chlorinated water may kill beneficial bacteria. Many new bakers don’t realize that the wrong ingredients can stop a starter from developing properly.
How to fix it:
- Choose high-protein, unbleached flour such as bread flour, whole wheat, or rye to encourage healthy fermentation.
- Use filtered or bottled water to avoid chlorine that can harm your starter’s natural yeast.
- Stick to one type of flour for several days so your sourdough starter can stabilize and grow consistently.
Using proper ingredients ensures your starter bubbles and rises, helping you fix a sourdough starter that keeps failing.
Cold Kitchen-Temperature Matters for Fermentation
Yeast and bacteria in a starter are very sensitive to temperature. If your kitchen is too cold, the starter may ferment slowly or not at all. Inconsistent or extreme temperatures can also throw off the balance, causing sourdough starter problems.
How to fix it:
- Keep the starter in a warm, stable spot between 22–27 °C (72–81 °F).
- Avoid placing it near drafts, open windows, or heat sources that cause temperature swings.
- In colder environments, place the jar near a slightly warm appliance or inside a switched-off oven with the light on.
Maintaining a steady temperature will help your starter become active and bubbly, making it easier to revive a failing sourdough starter.
Overfeeding or Underfeeding
Both overfeeding and underfeeding can harm a starter. Feeding too often dilutes the yeast, while not feeding enough starves it. Many beginners fail to maintain the right balance, which causes sourdough starter issues.
How to fix it:
- Use a consistent feeding ratio, like 1:1:1 by weight (starter: flour: water).
- Feed the starter only when it has peaked, rather than strictly by the clock, so the yeast has a chance to grow strong.
- Adjust feeding frequency based on the starter’s activity and your kitchen temperature.
Keeping this balance will help your starter stay strong and active, making sourdough starter troubleshooting simpler for beginners.
How to Rescue a Failing Starter — Simple Recovery Steps
Even a struggling or failing starter can often be revived with consistent care.
Recovery steps:
- Move the starter to a warm, stable location to encourage yeast activity.
- Feed with high-protein flour and filtered water to strengthen microbial growth.
- Adjust hydration slightly if the starter is too runny, helping it thicken and ferment more reliably.
- Feed on the correct schedule and ratio, giving the starter time to respond and grow bubbles.
- Be patient — recovery may take a few days of consistent feeding, but most starters bounce back.
These steps, you can fix a sourdough starter that keeps failing and restore it to a healthy, active state.
Debunking Sourdough Myths: What’s True and What’s Overhyped

Sourdough bread has skyrocketed in popularity over the past few years, inspiring home bakers and food enthusiasts alike. With that popularity comes a lot of claims, some accurate and some overhyped. If you’re curious about what actually matters, this guide will separate fact from fiction, giving you a clear understanding of sourdough’s real benefits and what to focus on.
What’s Actually True About Sourdough Bread
Gentle on Digestion
Sourdough is naturally fermented with wild yeast and lactic acid bacteria. This slow fermentation helps break down starches and some gluten, which can make the bread easier to digest compared to regular commercial bread. Many people notice less bloating or heaviness after eating sourdough, making it an appealing choice for those who want a gentler bread option.
Lower Glycemic Impact
Because of the fermentation process, sourdough typically has a lower glycemic index than most standard breads. This means it can provide a slower, steadier release of glucose into the bloodstream, helping avoid sharp spikes in blood sugar. For people looking to manage energy levels or support healthy blood sugar, this is a real advantage.
Improved Nutrient Absorption
The natural fermentation process reduces certain compounds that block nutrient absorption, such as phytic acid. As a result, minerals and nutrients in the flour, like iron, magnesium, and B vitamins, become more bioavailable. This makes homemade sourdough bread a more nutritious choice than many quick-rise breads.
Superior Flavor and Texture
Sourdough develops a rich, tangy flavor and a chewy, satisfying texture. By learning how to make and maintain a sourdough starter from scratch, you can control hydration, fermentation time, and flour type to create bread exactly the way you like it, crusty, soft, tangy, or mild.
What’s Overhyped or Misunderstood
Not Safe for Celiac Disease
Some claims suggest that sourdough is safe for those with gluten intolerance. While fermentation reduces some gluten, sourdough made from wheat or rye still contains gluten. People with celiac disease should avoid it.
It Doesn’t Deliver Probiotics After Baking
Although sourdough starter is full of live bacteria and yeast, the baking process kills these microbes. While sourdough may offer prebiotic benefits and improved digestibility, it does not function as a probiotic food after it’s baked.
Many Store-Bought “Sourdoughs” Aren’t Authentic
Not all breads labeled as sourdough are made with a natural starter or slow fermentation. Many commercial varieties rely on quick-rise yeast and flavor additives. The benefits of real sourdough digestibility, flavor, and nutrient availability, come from traditional starter-based methods, which is why knowing how to make and maintain a sourdough starter from scratch is key.
It’s Not a Miracle Health Food
While sourdough has advantages, it’s still bread. Eating too much or pairing it with high-calorie toppings can still contribute to excess calories. Portion control and balanced meals are important, even with sourdough.