Eco-Friendly Easter Crafts You Can Make and Reuse Year After Year
Looking for sustainable Easter ideas? Read eco-friendly Easter crafts you can make and reuse year after year, that are easy, reusable, and fun for the whole family.
Every Easter, it’s easy to get caught up in the excitement of decorations. But how often do those cute, store-bought items end up in the trash after just a few days? It’s frustrating, expensive, and honestly, kind of wasteful.
Many of us face the same struggles every year:
-
Decorations that feel disposable almost immediately
-
Expensive store-bought crafts that don’t feel personal
-
Feeling overwhelmed or uninspired by DIY projects that seem too complicated
That’s where this guide comes in. Inside, you’ll find eco-friendly, reusable Easter crafts that are simple to make, beautiful to display, and designed to last year after year, so you can enjoy a creative, sustainable, and stress-free Easter season.
If you think holiday crafts are too complicated or intimidating, this guide on DIY projects for people who don’t feel crafty at all offers simple, stress-free projects and confidence-building tips before you jump into more detailed seasonal ideas.
From Wasteful to Wonderful: The Case for Sustainable Easter Crafts
Easter is a time for celebration, but it can also create a surprising amount of waste. Many store-bought decorations are designed to be used once and tossed, adding unnecessary clutter to landfills. Eco-friendly Easter crafts help change that, offering both environmental and practical benefits.
Here’s why they’re worth making:
-
Reduces holiday waste: Using reusable materials like fabric, wood, or recycled paper ensures your decorations last beyond a single holiday.
-
Saves money over time: A little effort now means you won’t need to buy new decorations every year, your DIY creations can be displayed for multiple Easters.
-
Encourages creativity and family participation: Making your own decorations is a chance for families to bond, share skills, and explore creativity together.
Choosing eco-friendly crafts, you’re creating beautiful decorations that mean more than just aesthetics, they save resources, nurture creativity, and make your Easter celebrations truly thoughtful.
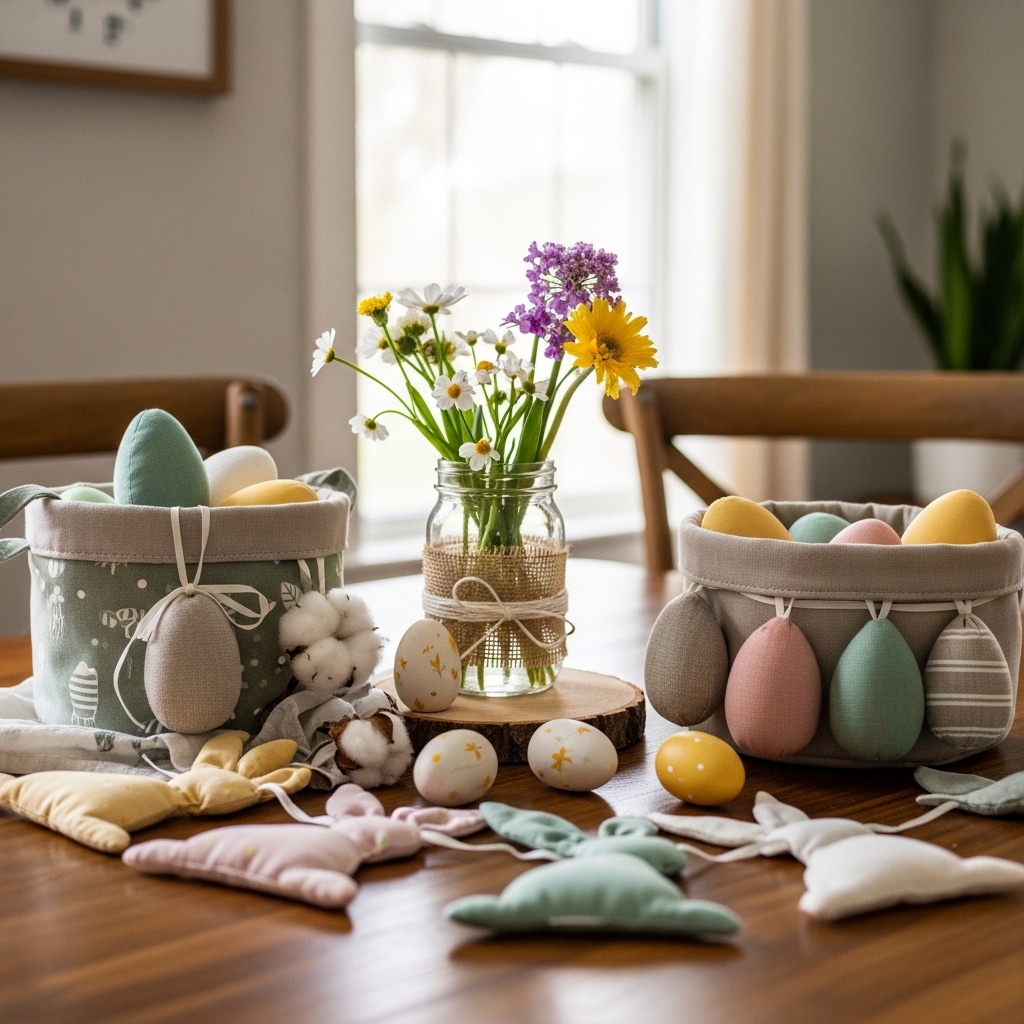
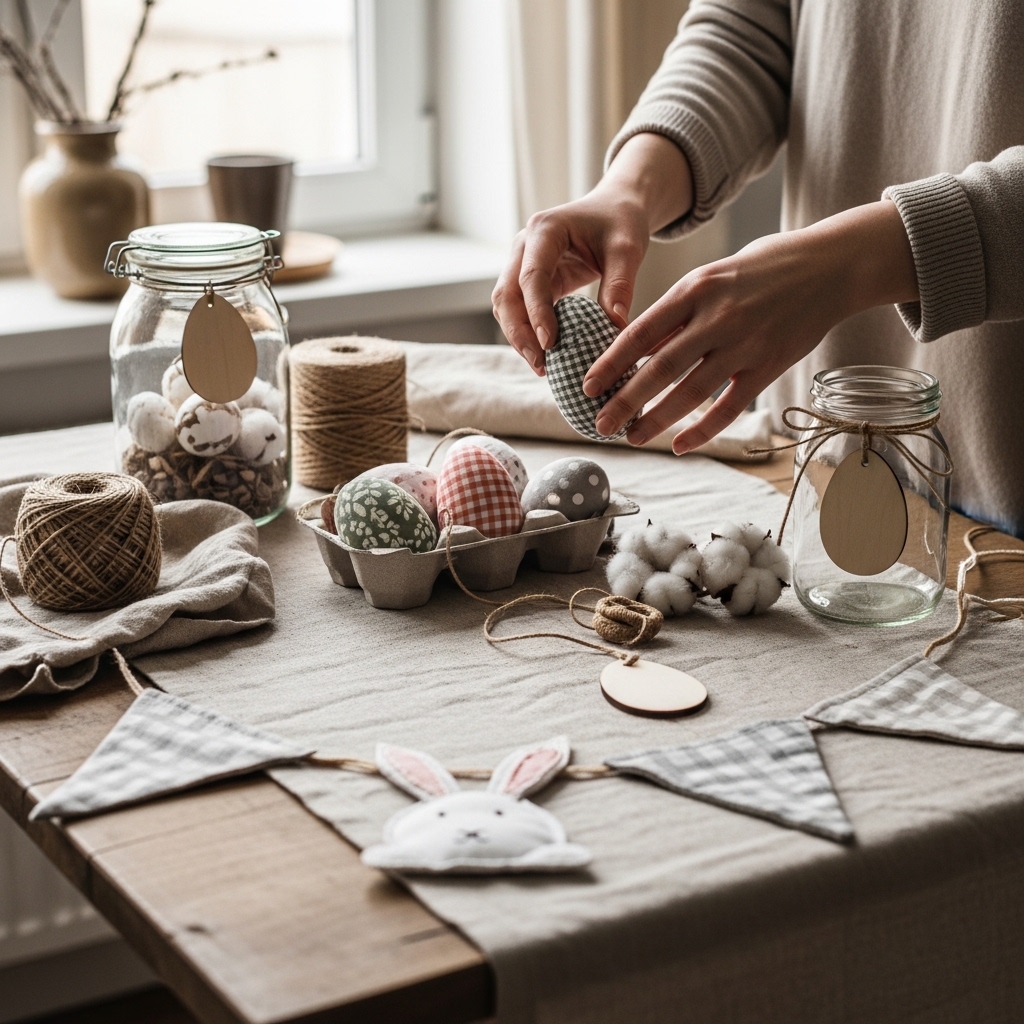
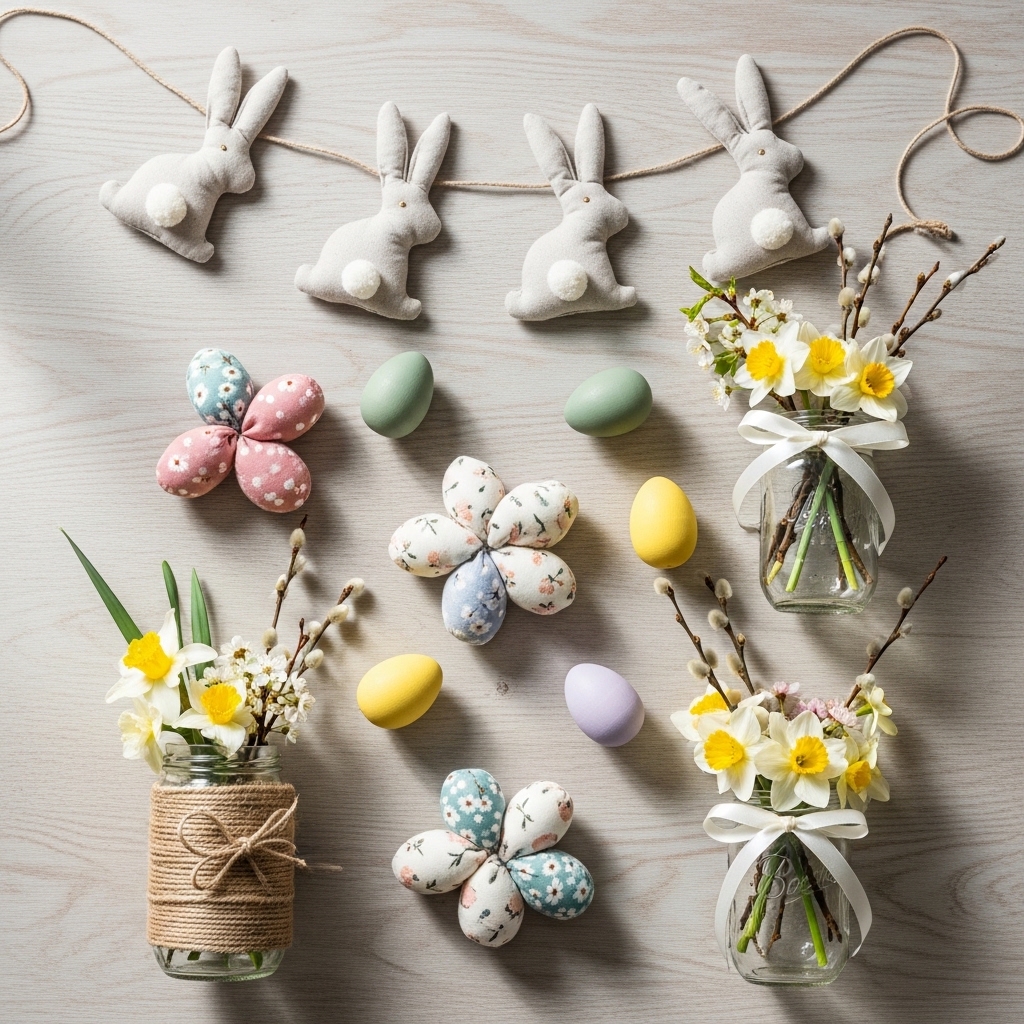
1. Fabric Garland or Bunting
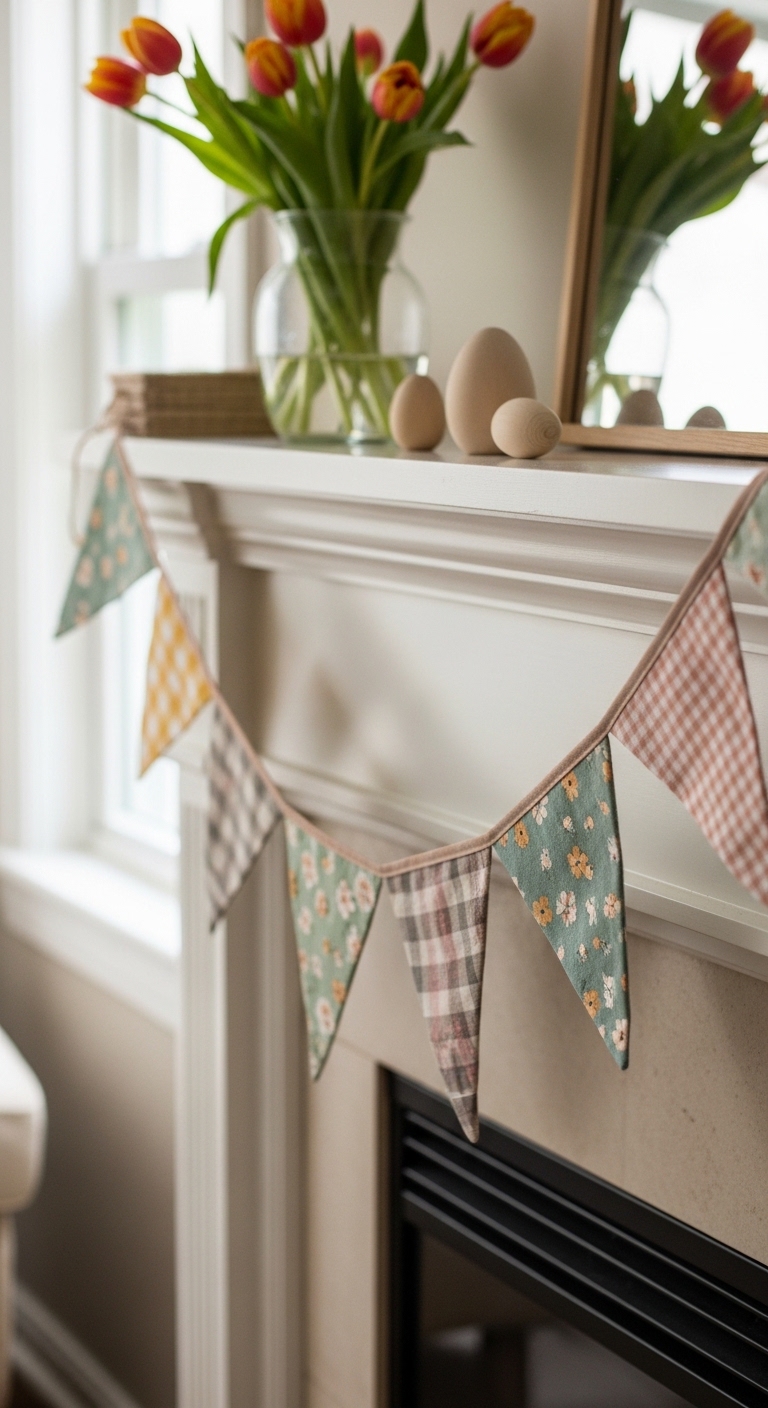
A fabric garland is a versatile, eye-catching decoration that works for every season. You can use scraps of fabric or repurpose old clothing, making it eco-friendly and budget-conscious. The textures, colors, and patterns you choose give each garland a unique personality. Perfect for draping across windows, walls, or stair rails.
Materials Needed:
-
Scrap fabrics (cotton, linen, or felt in seasonal colors)
-
Scissors
-
String, ribbon, or twine
-
Needle and thread or fabric glue
Step-by-Step Instructions:
-
Select and Prep Fabrics: Choose colors and patterns that fit the season. For spring, pastels and floral prints work beautifully. Iron fabrics to smooth wrinkles so cutting is precise.
-
Cut Shapes: Decide on shapes—triangles, rectangles, or Easter-themed eggs—and cut evenly. Using different textures like felt and cotton adds depth and interest.
-
Fold & Attach to String: Fold the top edge over the string, leaving a small seam. Sew or glue each piece onto the string. Space pieces evenly; overlapping slightly can create a layered, full effect.
-
Mix Patterns and Textures: Combine solids with patterns, or thick with thin fabrics, to make your garland visually dynamic.
-
Hang & Adjust: Drape across a mantel, window, or wall. Adjust spacing or length as needed for the area, and make sure the fabric hangs freely without twisting.
Why It’s Reusable:
-
The garland can be stored folded. You can swap fabrics each season for a fresh look while keeping the same base string, making it eco-friendly and sustainable.
To make the most of leftover materials while staying eco-smart, check out this post on what to do with fabric scraps, it’s filled with creative ways to turn scraps into lasting keepsakes.
2. Decorative Wooden Ornaments
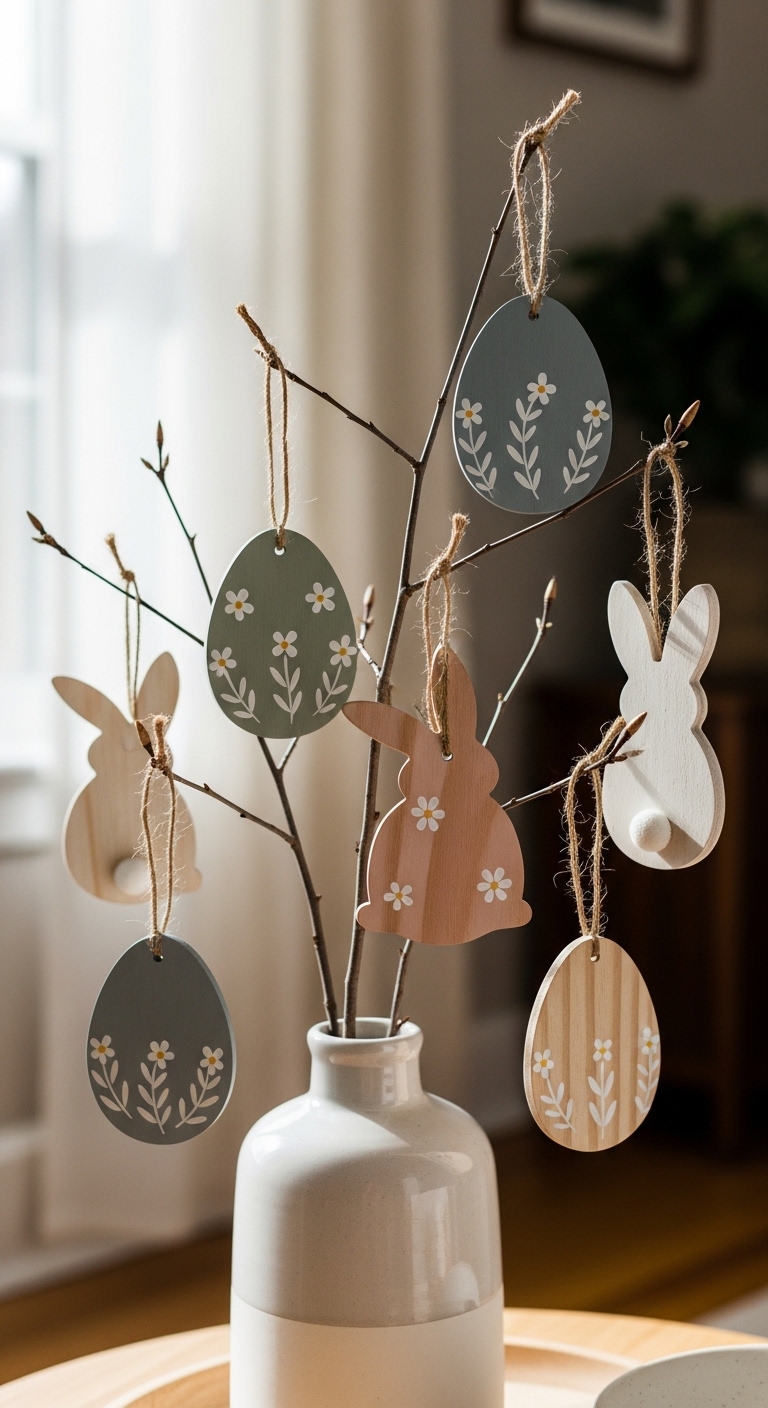
Wooden ornaments are durable, customizable, and perfect for seasonal displays. They can be shaped like eggs, stars, hearts, or any design, then painted or decorated. Their sturdiness allows for multiple seasons of reuse, and they can double as gift tags, hanging decorations, or table accents.
Materials Needed:
-
Small wooden shapes
-
Acrylic paint or wood stain
-
Paintbrushes
-
Ribbon or twine for hanging
Step-by-Step Instructions:
-
Prepare the Wood: Sand each wooden piece to ensure a smooth surface for painting. Small rough edges can prevent paint from sticking evenly.
-
Design Each Piece: Decide on color schemes or patterns. For Easter, soft pastels and floral patterns work well. For fall, use warm oranges, browns, and yellows. Sketch designs lightly in pencil if needed.
-
Paint & Layer: Apply base colors first. Once dry, add layers for texture, patterns, or highlights. Consider using stencils or masking tape for clean lines.
-
Seal & Protect: Apply a thin coat of clear acrylic sealant to protect paint and ensure durability.
-
Add Hanging Elements: Tie ribbons or twine through pre-drilled holes, or glue small hooks. This allows ornaments to hang from walls, doors, or tables.
-
Display & Reuse: Arrange in clusters or individually. Each ornament can be refreshed with new paint or accents for the next season.
Why It’s Reusable:
-
Strong wooden material withstands multiple years of display, and repainting allows you to change styles without starting from scratch.
3. Reusable Table Runners or Placemats

Table runners and placemats transform your dining space instantly. By using washable fabrics and seasonal designs, they are a functional decoration. They also help protect tables while adding a festive touch, and the ability to change patterns or colors makes them sustainable.
Materials Needed:
-
Fabric (cotton, linen, or felt)
-
Sewing machine or needle and thread
-
Scissors
-
Optional: fabric paint, stencils, or appliqué
Step-by-Step Instructions:
-
Measure & Cut: Determine the dimensions of your runner or placemats. Add at least an inch to each side for hemming. Consider the table size and space between settings.
-
Hem Edges: Fold edges over ½ inch twice and sew for a neat, fray-free finish. Beginners can use fabric glue or iron-on hem tape for a no-sew option.
-
Decorate: Add seasonal designs using stencils, fabric paint, or appliqué shapes. For Easter, consider pastel eggs, bunnies, or floral motifs. Layering colors and textures adds depth and interest.
-
Display: Lay them on your table for meals, parties, or seasonal decor. Mix and match with other table decorations like centerpieces or candles.
-
Care: Wash carefully to maintain colors and fabric integrity. Store flat or rolled to prevent creases and damage.
Why It’s Reusable:
-
Fabric is durable, and designs can be updated seasonally. One set can last multiple years, saving money and reducing waste.
Some of the techniques in our reusable Easter projects can also translate into income-earning crafts, explore this list of 10 low-cost DIY crafts to make and sell from home for creative inspiration.
4. DIY Wreaths
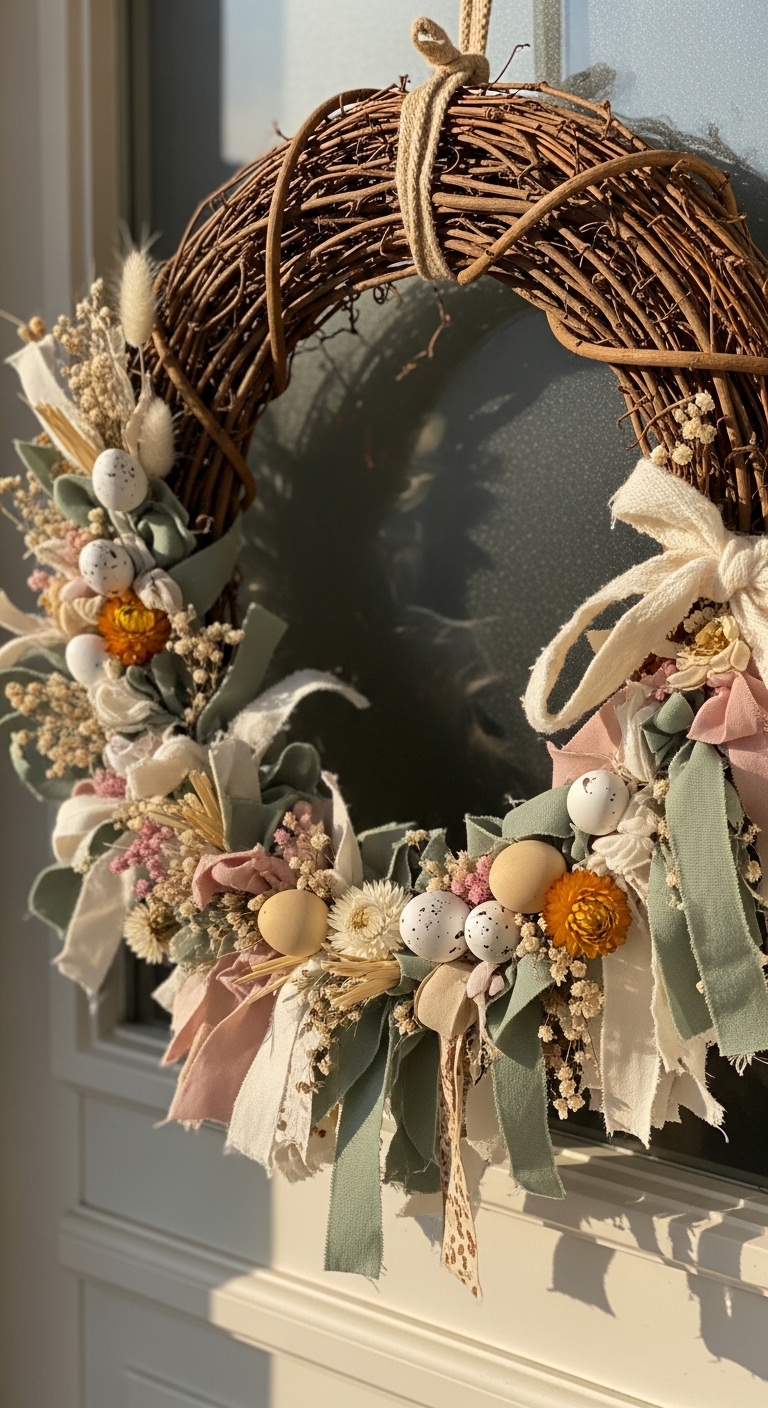
Wreaths are timeless, multi-seasonal decorations. They can be natural, floral, or themed, and are ideal for doors, walls, or tabletops. Using a sturdy base allows you to swap seasonal accents and colors each year, making wreaths a lasting investment in your holiday decor.
Materials Needed:
-
Wreath base (grapevine, wire, or foam)
-
Seasonal accents: flowers, leaves, ribbons, pinecones
-
Hot glue gun or floral wire
-
Scissors
Step-by-Step Instructions:
-
Select Your Base: Choose a durable wreath base like grapevine for texture, wire for flexibility, or foam for lightweight support.
-
Plan the Layout: Lay accents loosely on the base first. Decide on symmetry, layering, and color balance before attaching.
-
Attach Accents: Start with larger elements, securing with hot glue or floral wire. Fill gaps with smaller items for depth.
-
Add Seasonal Flair: Use ribbons, berries, or themed embellishments to match the holiday. Consider adding natural elements for a rustic, eco-friendly look.
-
Finish & Hang: Trim stray stems and fluff elements for a polished look. Hang on doors, walls, or over mantels.
Why It’s Reusable:
-
The wreath base lasts for years. Decorations can be swapped seasonally, allowing the same base to transform for Easter, fall, winter, or summer celebrations.
For additional tips on integrating seasonal decor into your home without visual overload, you might enjoy this post on How to Make Spring Decor Feel Cozy in Small or Shared Spaces ,perfect for displaying your reusable Easter crafts thoughtfully.
5. Seed Paper Egg Ornaments
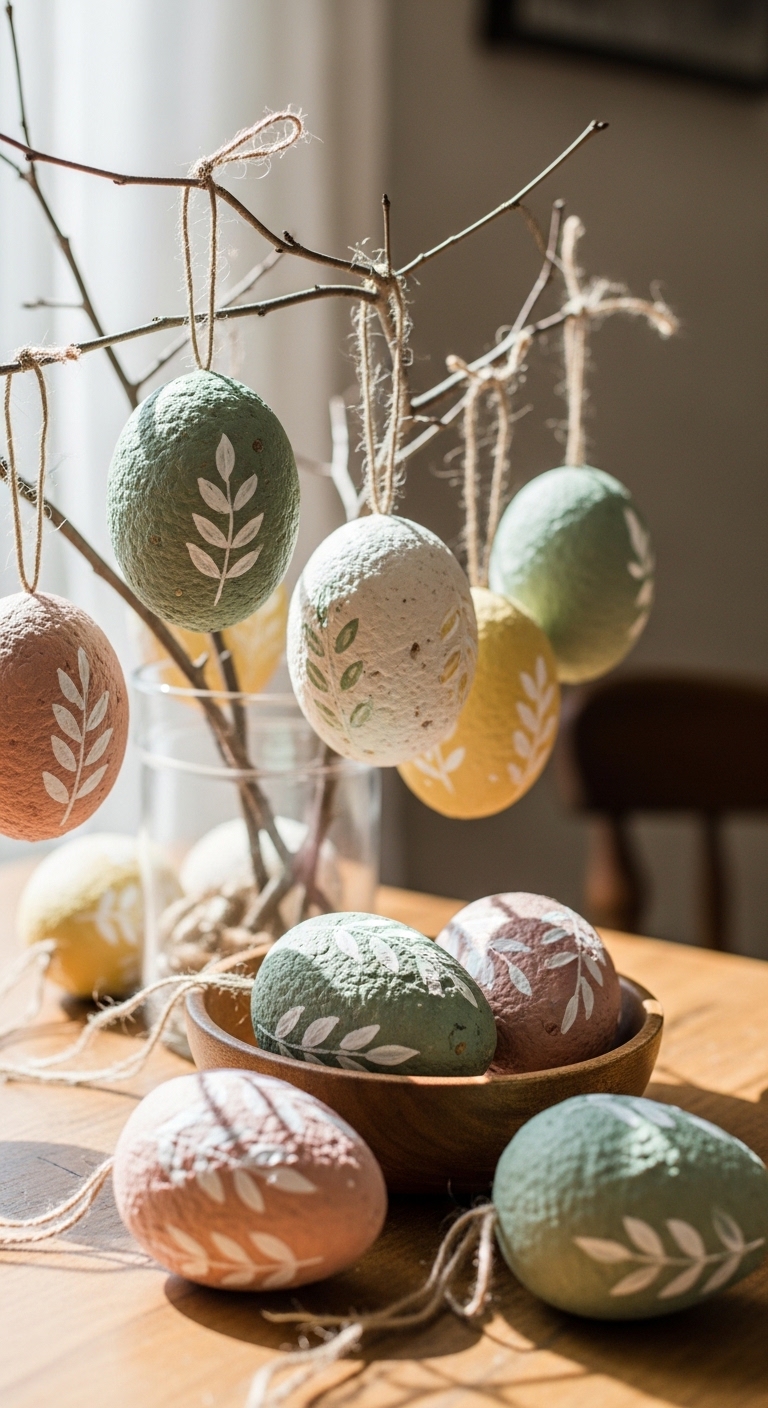
Seed paper Easter egg ornaments are eco-friendly, biodegradable, and can even grow into flowers or herbs after the holiday. They add a charming, handmade touch to your seasonal decor while supporting sustainability. Perfect for hanging on trees, wreaths, garlands, or as part of a table centerpiece.
Materials Needed:
-
Recycled seed paper sheets (pastel colors recommended)
-
Scissors or craft knife
-
Hole punch
-
Natural jute twine or ribbon
-
Optional: watercolor paints, markers, or stamps for decoration
Step-by-Step Instructions:
-
Cut Egg Shapes: Use a stencil or freehand to cut egg shapes from your seed paper. Sizes can vary depending on where you’ll hang them.
-
Decorate the Eggs: Add subtle watercolor washes, stamped designs, or hand-drawn patterns with markers. Keep decorations light so the paper remains flexible and seeds aren’t damaged.
-
Punch a Hole: Carefully punch a small hole near the top of each egg for hanging. Ensure the hole is centered and not too close to the edge to prevent tearing.
-
Add Twine: Thread natural jute twine or ribbon through the hole and tie a secure loop for hanging. Adjust the length depending on your display.
-
Display & Enjoy: Hang on an Easter tree, wreath, or garland, or place in a centerpiece arrangement. After the season, the paper can be planted to grow flowers, herbs, or wildflowers.
Why It’s Reusable:
While technically plantable, these seed paper eggs can also be carefully stored and reused for multiple years if handled gently. Even as a one-time display, they embody the spirit of sustainable, eco-friendly crafts that give back to nature.
How to Make Eco-Friendly Easter Crafts Last Year After Year
Creating decorations that you can enjoy for years doesn’t have to be complicated. With Eco-Friendly Easter Crafts, you not only reduce waste but also make your holiday preparation more cost-effective and meaningful.
Here’s how to ensure your crafts stand the test of time:
-
Choose Durable Materials: Opt for fabric, wood, metal, or sturdy paper instead of fragile or single-use plastics. Durable materials can be reused for multiple Easters without losing their charm.
-
Avoid Fragile, Disposable Items: Stay away from thin cardboard, cheap plastics, or items that are prone to tearing or breaking. They may look cute for a day but won’t survive the season—or storage.
-
Select Timeless Colors and Designs: Neutral tones or classic seasonal colors (like pastels for spring or earthy shades for fall) ensure your crafts remain stylish for years. Avoid overly trendy designs that might feel outdated next year.
-
Proper Storage: Carefully store your crafts in labeled bins or boxes in a dry, cool area. Wrap delicate pieces in tissue or bubble wrap to prevent damage. Maintaining organization ensures they’re ready to use every Easter.
Following these steps, your Eco-Friendly Easter Crafts will not only brighten your home but also save resources, reduce waste, and bring joy year after year.
Quick Eco-Friendly Easter Hacks
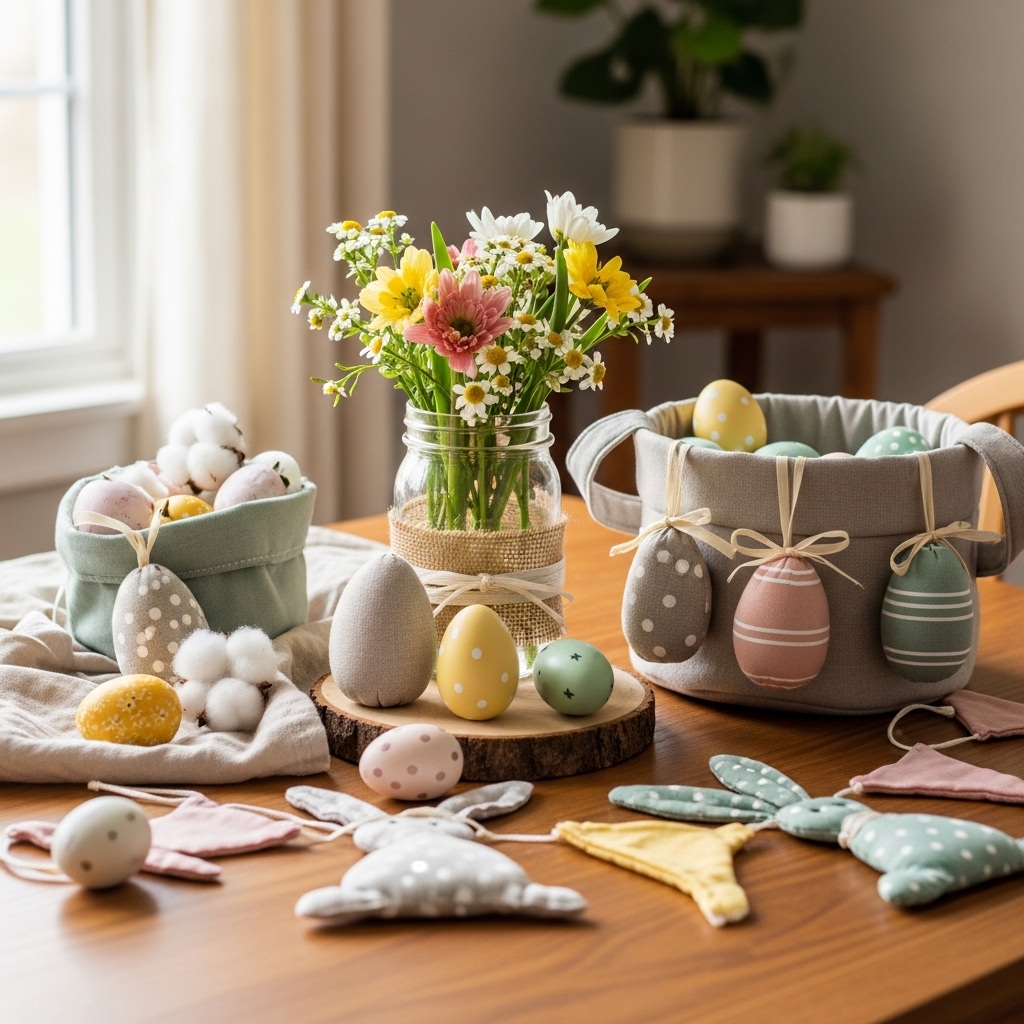
You don’t need to spend a fortune to create beautiful, lasting decorations. With a few smart ideas, your home can feel festive while keeping sustainability in mind. These Eco-Friendly Easter Crafts show how simple it is to be creative and mindful at the same time:
-
DIY Decorations Using Household Items: Turn old jars into charming vases, scrap fabric into garlands or buntings, and cardboard into cute Easter shapes. Everyday items can be transformed into seasonal decor with minimal effort and cost.
-
Upcycle Old Decorations: Breathe new life into last year’s Easter decor. Paint, add embellishments, or combine pieces to make entirely new creations, reducing waste while keeping your decor fresh.
-
Simple Ways to Reduce Waste: Focus on reusable materials, plan projects that last multiple years, and store decorations properly for future use. Even small choices, like swapping disposable plastic eggs for wooden or fabric versions, make a big difference.
If you want crafts that adapt to your schedule, this guide on Spring DIY projects you can start, stop, and pick up again shares smart ways to organize projects that won’t lose momentum.
Conclusion:
Easter decor doesn’t have to be about one-day decorations or wasteful purchases. By embracing Eco-Friendly Easter Crafts, you’re creating more than decor, you’re shaping habits, memories, and a mindful approach to celebrating. Each handmade piece can spark creativity, invite family participation, and even inspire future projects.
The real magic comes in seeing your crafts return year after year, reminding you of past celebrations, small victories in creativity, and the joy of making something with care. These crafts become part of your home’s story, proving that thoughtful, sustainable choices can be beautiful, as well as meaningful.
I always was interested in this subject and still am, thanks for posting.
You are welcome