Learn how to create DIY farmhouse planter ideas that feel handmade, elegant, and perfectly scaled for any space in your home.
A simple planter can completely change a corner, a hallway, or a doorway. It can turn a dull, empty space into something warm and inviting. But it’s frustrating when your own planters don’t feel right, when they look cheap, out of place, or like they belong in someone else’s home.
Maybe you’ve tried before: the paint chipped, the wood felt weak, or the plants just didn’t sit right. Or maybe those online ideas looked amazing in pictures but never worked in your space. That frustration is real, and it’s what makes so many give up before finishing.
This guide isn’t about showing you trendy, impossible-to-copy planters. You’ll discover DIY farmhouse planter ideas that really look handmade, feel thoughtful, and fit every space.
You’ll get simple construction tips, smart placement advice, and styling ideas to make your planters look professional and personal, without spending a fortune.
Struggling with messy or frustrating DIY projects? 15 Must-Have Crafting Tools Beginners Often Forget -That Make DIY Projects Easier will show the small tools that change everything.
What Makes a Planter Look Cheap
Before you start building, it helps to see why some planters just don’t feel right. Fixing these little details will make your planter look intentional and high-quality.
-
Too Small or Too Symmetrical
If your planter is tiny or perfectly symmetrical, it can feel timid or staged. Try choosing a slightly larger size or arranging your planters with a bit of variety. A little imbalance makes it feel natural and purposeful.
-
Wrong Material Combination
Plastic, shiny metals, or fake plants can instantly make a planter look cheap. Real materials like wood, clay, concrete, or weathered metal give your planter character and authenticity. Using materials that feel solid and tactile makes all the difference.
-
Poor Scale & Balance
Check your planter against nearby furniture, doorways, or walls. If it feels lost or too small, adjust the size or add complementary elements until it feels balanced. A planter that fits the space naturally will instantly feel more polished.
Try this: Look at your planter in its space before finishing. Does it feel too small or lost? Does the material feel solid and intentional? Adjusting size, placement, or materials here will make your planter feel expensive and handcrafted, even if it’s a simple DIY.
Feeling like you’re “not crafty”? DIY Projects for People Who Don’t Feel Crafty at All proves anyone can create stylish, fun projects that actually work.
Farmhouse Planter Materials That Look Expensive
Choosing the right material can make a simple planter look high-end, even if it’s a DIY project. Picking wisely also helps your planter last longer and feel intentional. Here’s how to do it:
A. Wood — The Core of Farmhouse Aesthetics
Wood is the heart of farmhouse style, but not all wood works the same.
- Choosing the right wood: Pine, cedar, or reclaimed barn wood works well indoors. For outdoors, cedar or pressure-treated wood resists rot.
- Sealing without fancy tools: A simple wood sealer or outdoor paint protects your planter without needing epoxy machines.
- Aging gracefully: Sand edges, add a light whitewash, or let natural weathering happen slowly. This creates that authentic, handcrafted look instead of letting the wood rot or peel.
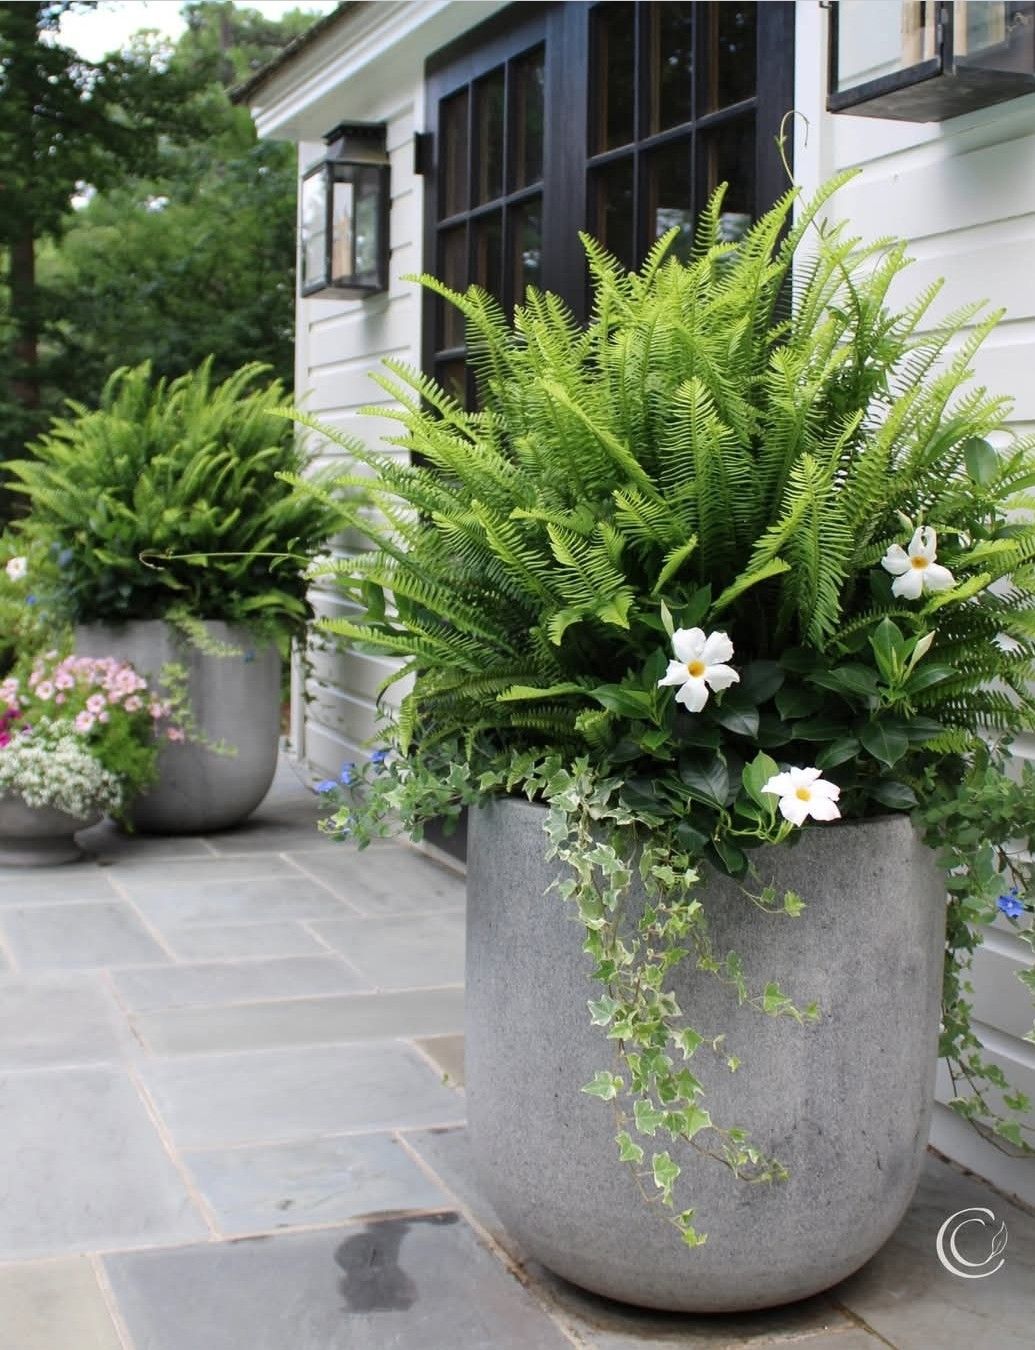
B. Concrete and Fiberstone Planters — Farmhouse Weight & Texture
Concrete and fiberstone add a heavy, grounded feel that makes planters feel serious, not cheap.
- Texture matters: A slightly rough finish avoids the “toy store” look. Smooth and shiny surfaces can feel plastic-y.
- DIY-friendly: You can mix your own concrete with molds or even repurpose containers as forms. Minimal tools, maximum impact.
C. Metal Accents — Farmhouse Industrial Without Looking Tinny
Adding metal creates character, but choosing the wrong finish screams cheap.
- Rusted or patina finish: Adds depth and an aged look. Avoid shiny, bright metals.
- Mix with wood: Pairing metal with wood balances warmth and texture—your planter looks thoughtful and styled, not slapped together.
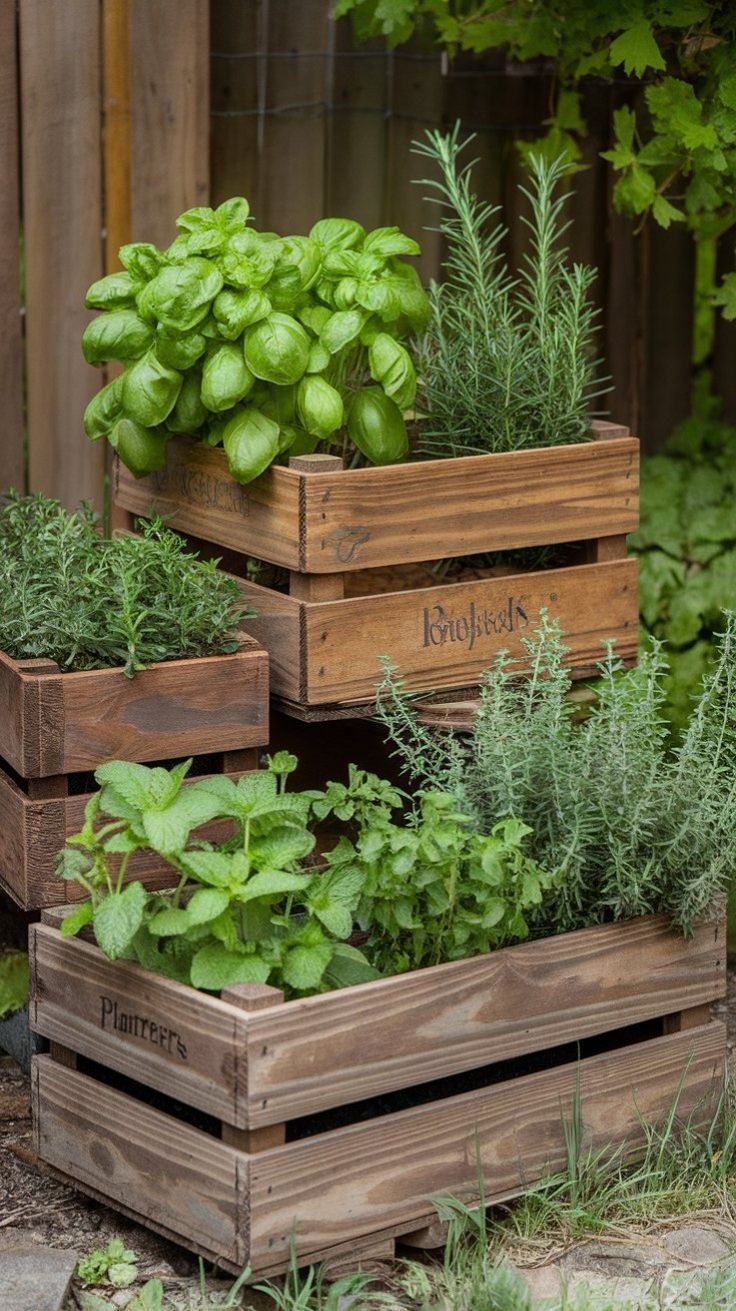
D. Upcycled Containers — Smart, Sustainable, and Stylish
Reusing old crates, drawers, buckets, or wooden boxes gives your planters personality and saves money.
- Structural tips: Reinforce weak points with screws, brackets, or lining to make sure they hold soil and plants safely.
- DIY farmhouse planter ideas tip: Add wood trim, paint, or small metal accents to elevate old containers so they look handcrafted rather than leftover junk.
Want to craft sustainably without wasting money or time? Eco-Friendly DIY Projects for Sustainable Living at Home That Save Money and Time gives practical, eco-conscious solutions.
DIY Planter Ideas That Fit Every Space
Finding a planter that looks intentional, fits your space, and doesn’t feel cheap can be tricky.
Here are step-by-step DIY farmhouse planter ideas that actually fit in every homes, small or large, indoor or outdoor.
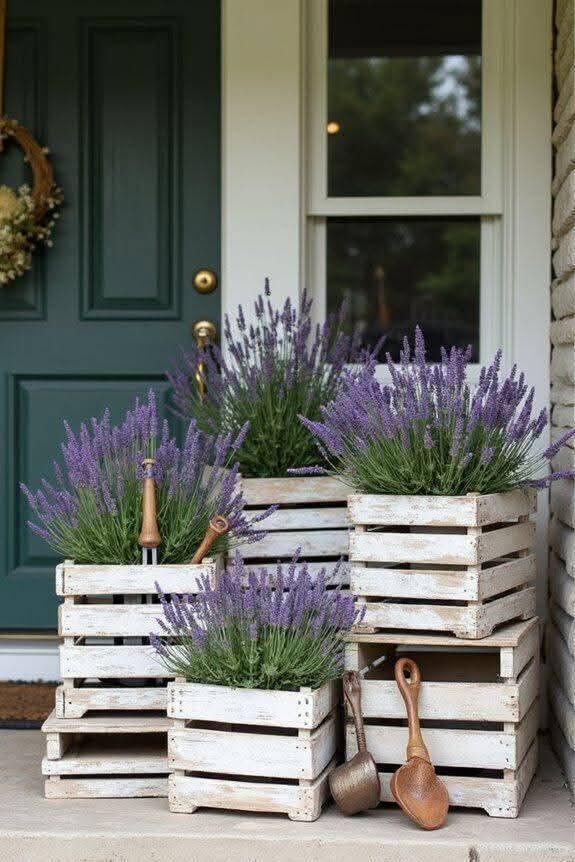
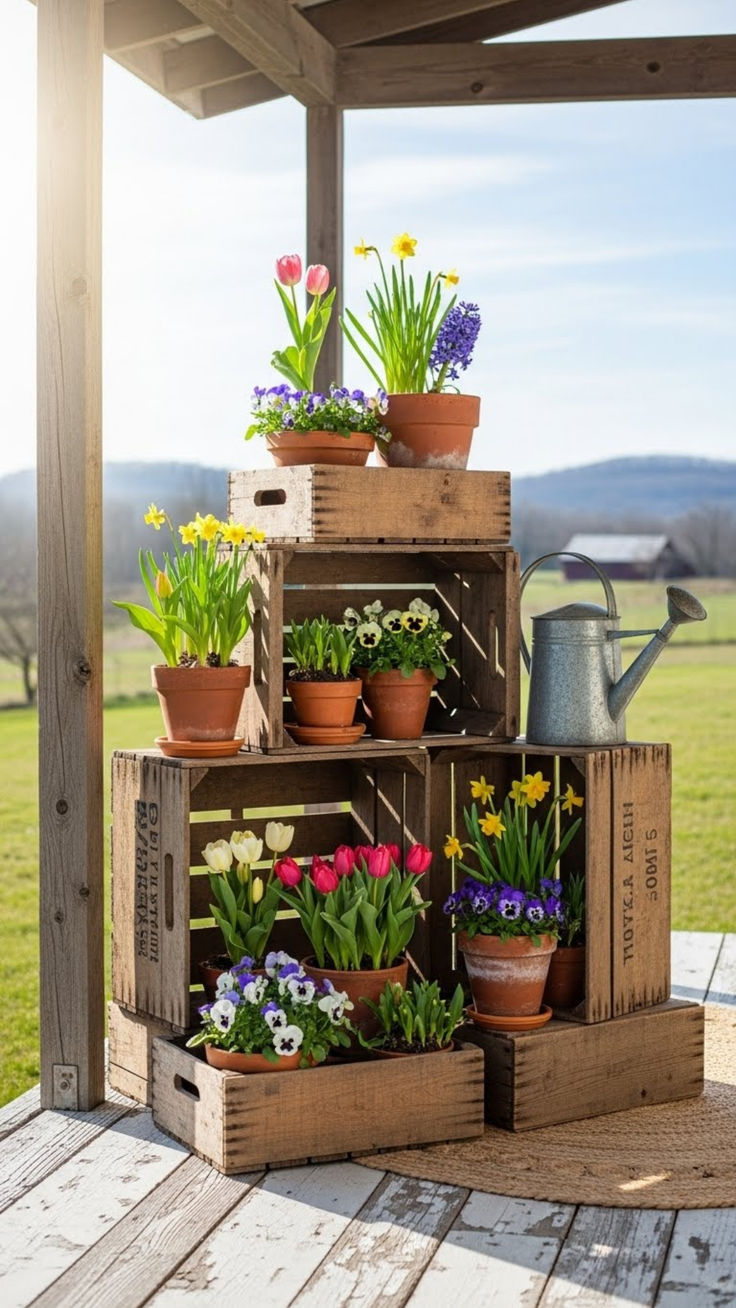
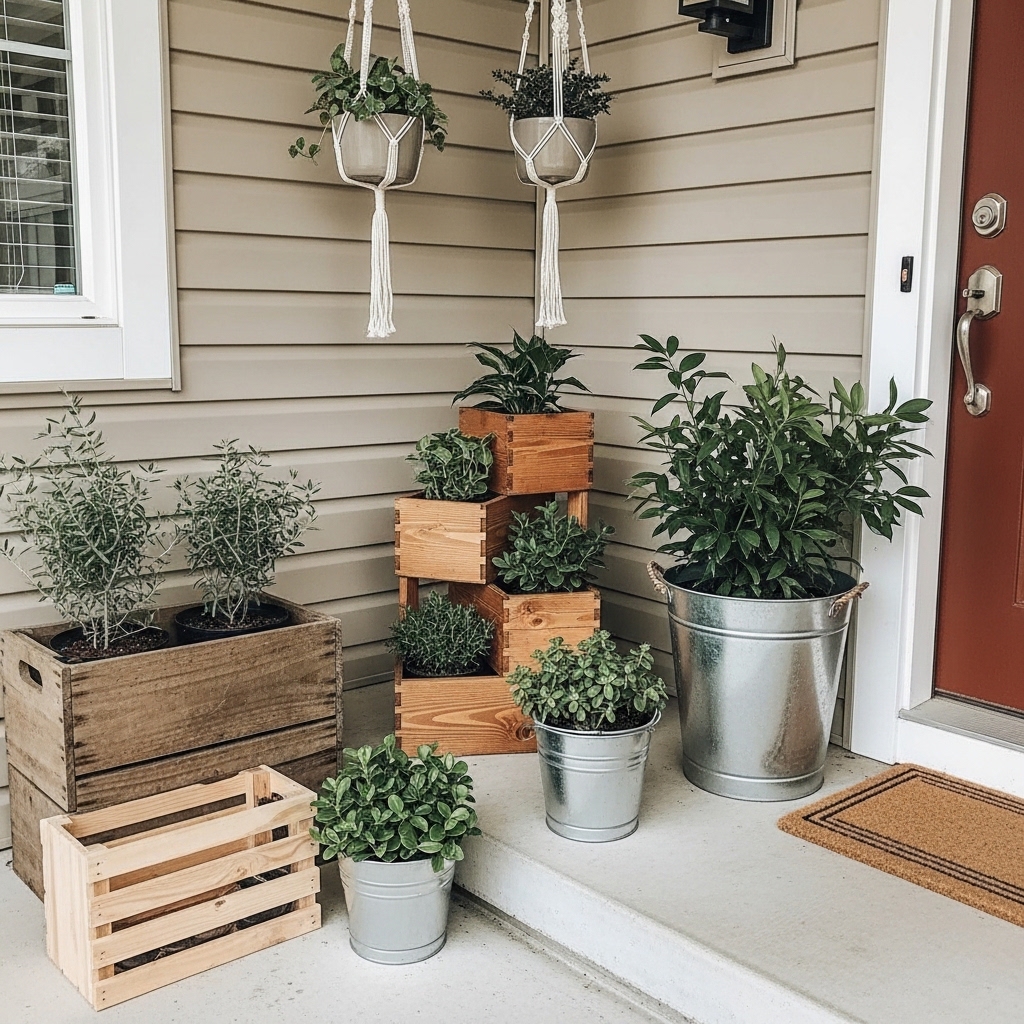
✅ Rustic Wooden Crate Planter
This planter is a wooden crate made into a simple, strong container for your plants. It lasts a long time and adds a warm, natural touch to any space. Using a reclaimed wooden crate can instantly elevate a space and make it feel intentionally designed. Theidea isn’t just picking a crate, it’s how you treat, style, and place it.
Each step below has a purpose. With this you can see the reasoning behind every choice.
Materials: Reclaimed wood crate, wood screws, sandpaper, outdoor sealer, optional paint or stain.
Best Placement: Porch, balcony, or entryway.
Choosing the Right Crate
The foundation determines if your planter looks intentional or cheap. A crate that’s unstable or worn the wrong way will feel sloppy no matter what plants you add.
How to do it:
- Pick solid, slightly weathered wood.
- Avoid soft, splintered pieces.
- Add small corner reinforcements for stability.
Preparing the Wood
The finish affects both the look and the longevity of your planter. Smooth it too much, and it loses character; leave it rough, and it can feel unfinished.
How to do it:
- Lightly sand edges for smoothness, but keep some texture for that rustic farmhouse charm.
- Outdoors: Use a clear outdoor sealer to protect the wood and enhance the grain.
- Indoors: A natural oil finish brings warmth without heavy chemicals.
Choosing and Arranging Plants
Placement inside the planter affects how full and balanced it looks. Randomly placed plants can make even a beautiful crate feel messy.
How to do it:
- Place taller plants at the back, trailing plants at the front, smaller fillers in the middle.
- Add a liner or gravel at the bottom to prevent water damage.
Placement Matters
Even the most beautiful crate can feel like an afterthought if it’s in the wrong spot. Proper placement makes your planter part of the space, not just decoration.
How to do it:
- Don’t place a tiny crate in a wide, empty corner—it will feel lost.
- Anchor corners, beside benches, or near doorways for balance and visual appeal.
Making It Look Handmade and Thoughtful
Details create authenticity. Paying attention to wood, finish, plant arrangement, and placement makes your planter feel like a custom, intentional piece rather than a generic store-bought item.
How to do it:
- Focus on small choices, finish, plant types, and where it sits.
- Each thoughtful decision adds to a handcrafted, personal look.
Some Cricut projects seem impossible at first—but 10 Cricut Crafts Beginners Always Struggle With- And How to Make and Sell Them breaks them down step by step for real results.
✅ Concrete Block Planter
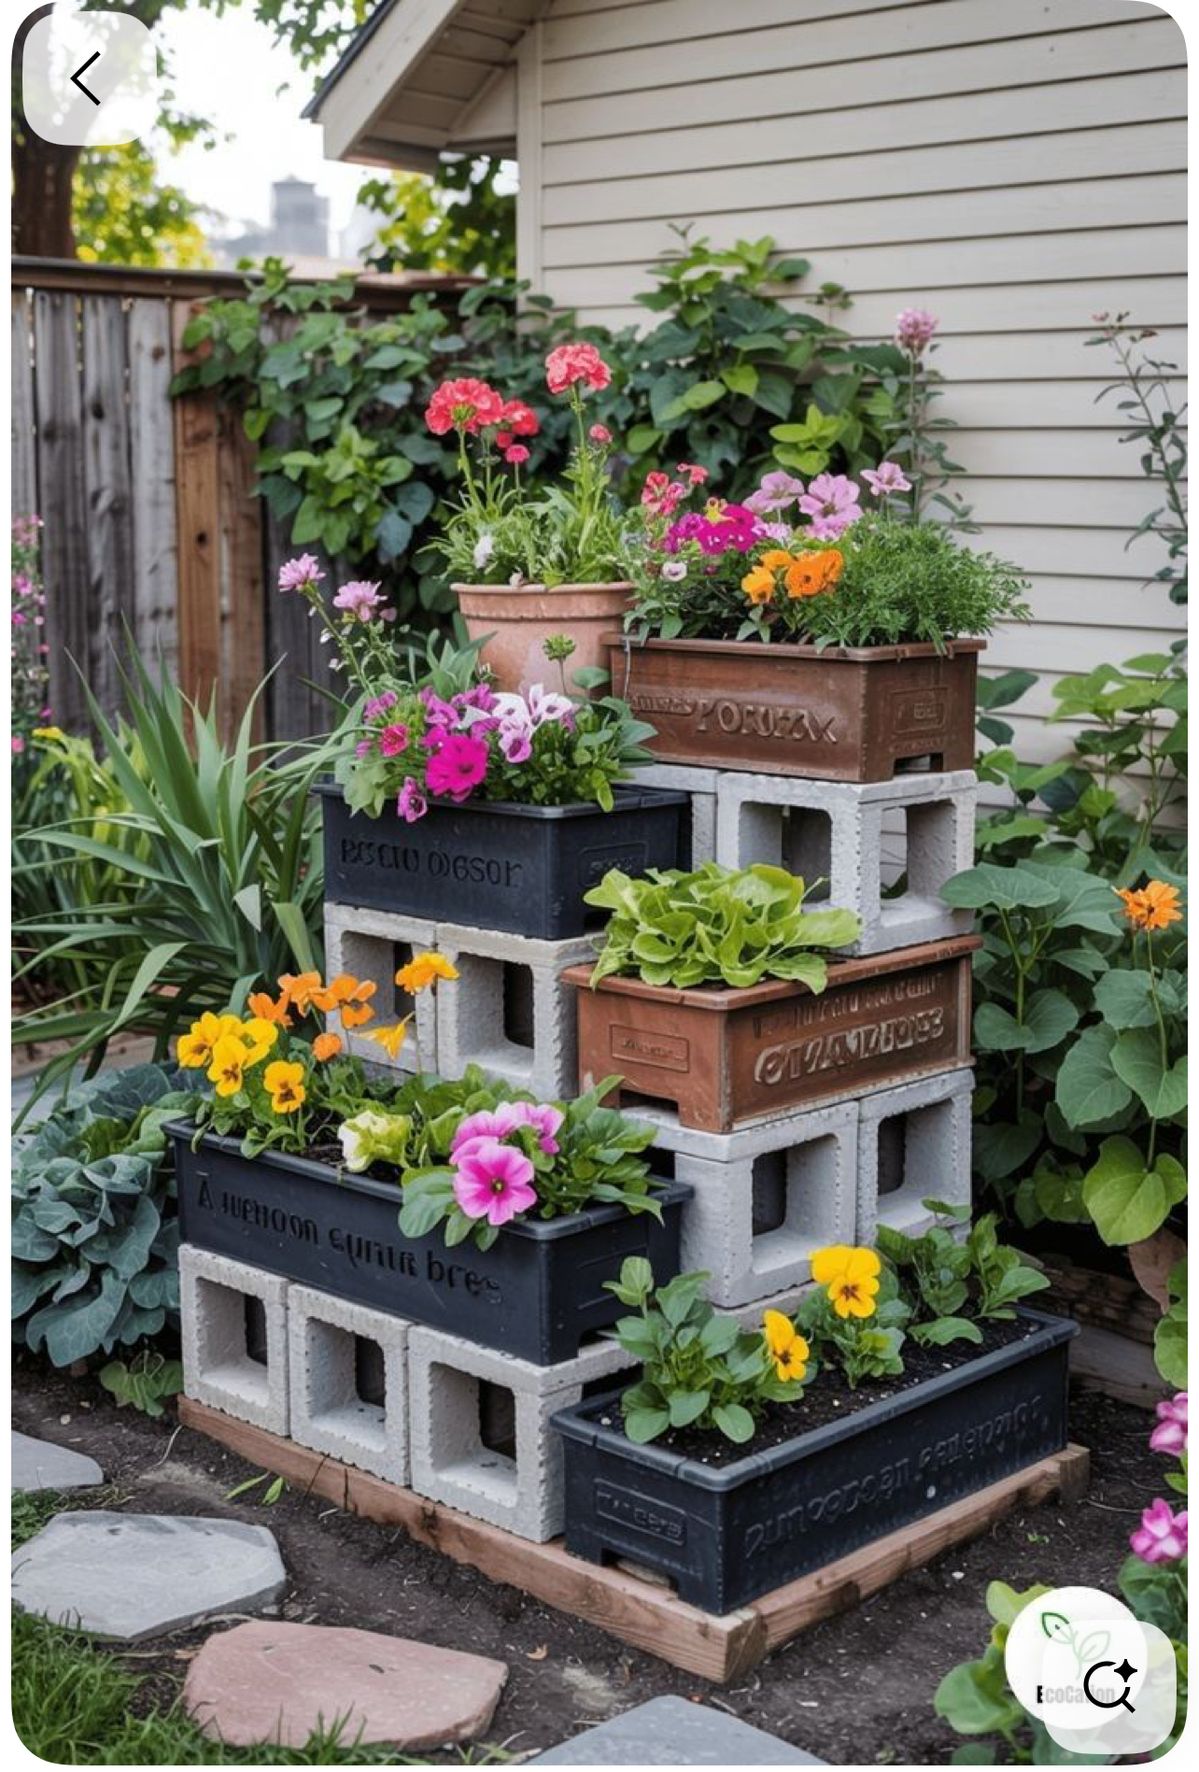
This planter is made from a simple concrete block turned into a modern farmhouse home for your plants. It’s strong, durable, and adds texture and weight to any space.
Using concrete blocks is a smart way to create a stylish, minimal, and low-cost planter that fits both indoor and outdoor areas.
The idea isn’t just stacking a block, it’s how you style, arrange, and place it. Each step below has a purpose, helping you understand the reasoning behind every choice. This is one of the most versatile DIY farmhouse planter ideas you can try.
Materials: Concrete block, sandpaper or wire brush, optional paint or stain, liner or small gravel, plants of choice.
Best Placement: Porch, balcony, small garden, or entryway.
Choosing the Right Block
The foundation determines whether your planter looks intentional or unfinished. A chipped or uneven block can make the whole project feel sloppy.
How to do it:
Pick a solid, clean block with minimal cracks. For added interest, use blocks with natural holes for planting small succulents or trailing plants.
Preparing the Block
The surface affects both style and longevity. Rough edges give a rustic look, while smoothing certain areas helps keep the planter tidy.
How to do it:
Lightly sand sharp edges to avoid scratching plants or hands. For outdoors, consider sealing the block with a weatherproof coating. For indoor use, leaving it raw creates a natural, industrial feel.
Choosing and Arranging Plants
Placement inside and around the block affects how balanced and intentional it feels. Randomly placed plants can make even a striking block look messy.
How to do it:
Use taller plants in back or inside larger holes, trailing plants over edges, and small fillers in smaller crevices. Add gravel or a liner in each cavity to protect the block and allow proper drainage.
Placement Matters
Even a strong, well-styled concrete planter can feel out of place if positioned incorrectly. Placement helps it anchor the space visually.
How to do it:
Use it to frame a doorway, line a porch step, or add height to a balcony corner. Avoid putting it in a wide, empty area alone, it will feel lost without context.
Making It Look Handmade and Thoughtful
Details create authenticity. Paying attention to the block’s finish, plant choice, and positioning transforms a simple concrete block into a polished, intentional planter.
How to do it:
Consider painting or staining the block for a soft farmhouse tone, layering plants carefully, and pairing with other natural elements like wood or metal accents. Each thoughtful decision turns this project into one of the most appealing DIY farmhouse planter ideas.
Turning DIY creations into extra income doesn’t have to be expensive—10 Low-Cost DIY Crafts to Make and Sell From Home shows how to create sellable items affordably.
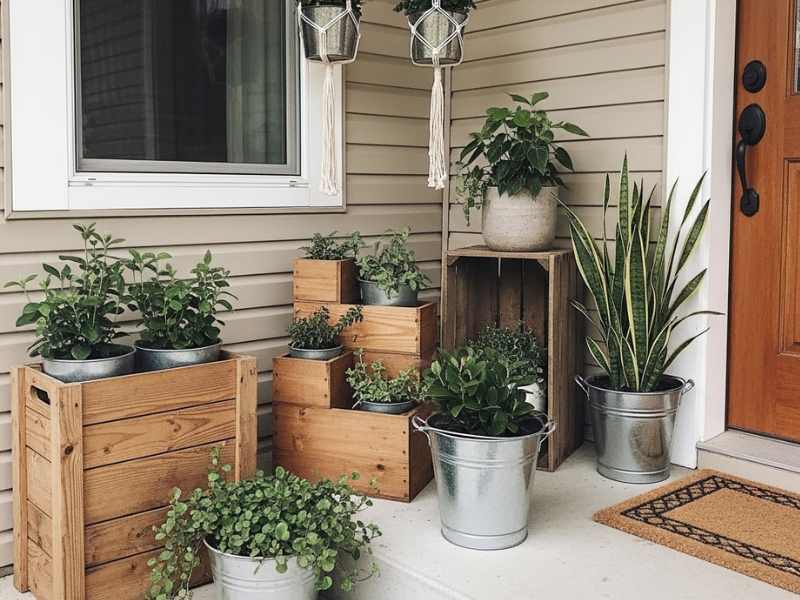
✅ Tiered Wood Box Planter
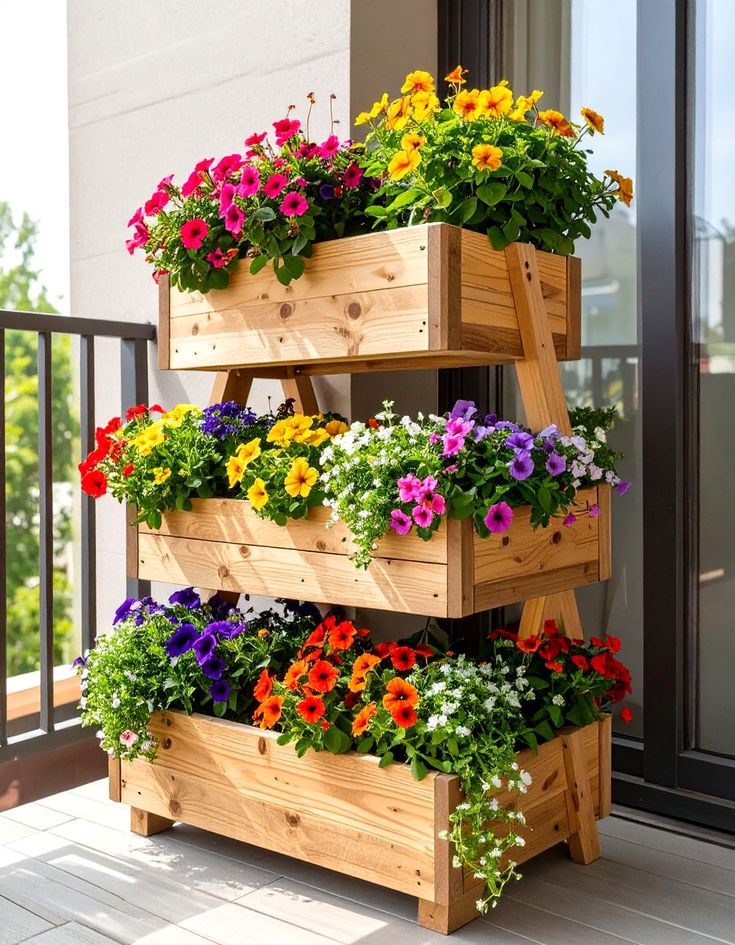
This planter is made from stacked or tiered wooden boxes, creating layers for different plants. It’s perfect for adding height, depth, and visual interest to a porch, balcony, or indoor corner.
The design is practical, space-saving, and feels thoughtfully arranged. The idea isn’t just stacking boxes, it’s about how you layer, finish, and style them. Each step has a purpose, making it one of the most versatile DIY farmhouse planter ideas.
Materials: Reclaimed wooden boxes of various sizes, wood screws or brackets, sandpaper, outdoor sealer or paint, liner or gravel, plants of choice.
Best Placement: Porch, balcony, garden corner, or entryway.
Choosing the Right Boxes
The foundation determines how sturdy and polished your planter will look. Uneven or weak boxes make the whole structure feel unstable.
How to do it:
Pick solid boxes with similar wood thickness. Slightly worn wood works well for rustic charm, but avoid splintered or cracked pieces that can break under weight.
Preparing and Securing the Boxes
The finish affects both durability and style. Stacking boxes without securing them can be risky, especially outdoors.
How to do it:
Lightly sand rough edges to remove splinters but keep texture for farmhouse character. Secure boxes together using screws or brackets to prevent wobbling. Seal outdoors with a weatherproof coating, or use a natural finish for indoor warmth.
Choosing and Arranging Plants
How you place plants in each tier affects balance and visual appeal. Random placement can make even a layered structure look chaotic.
How to do it:
Place taller plants in the back or top tier, trailing plants along edges, and smaller fillers in front or middle tiers. Use gravel or liners at the bottom of each box to prevent water damage and encourage healthy roots.
Placement Matters
Even a beautifully stacked planter can feel out of place if positioned incorrectly. Placement helps it anchor the space visually and functionally.
How to do it:
Place it against a wall, on a balcony corner, or along a porch railing to add height and dimension. Avoid floating it in a large open space, it works best when it visually interacts with furniture or structural elements.
Making It Look Handmade and Thoughtful
Details make this planter feel custom and intentional. Paying attention to wood finish, box alignment, and plant arrangement transforms a simple stack into a curated piece.
How to do it:
Consider varying box sizes for an organic look, mixing plant types for texture, and pairing with other farmhouse elements like rope handles or metal accents. Each careful choice enhances this project as a standout DIY farmhouse planter idea.
✅ Upcycled Metal Bucket Planter
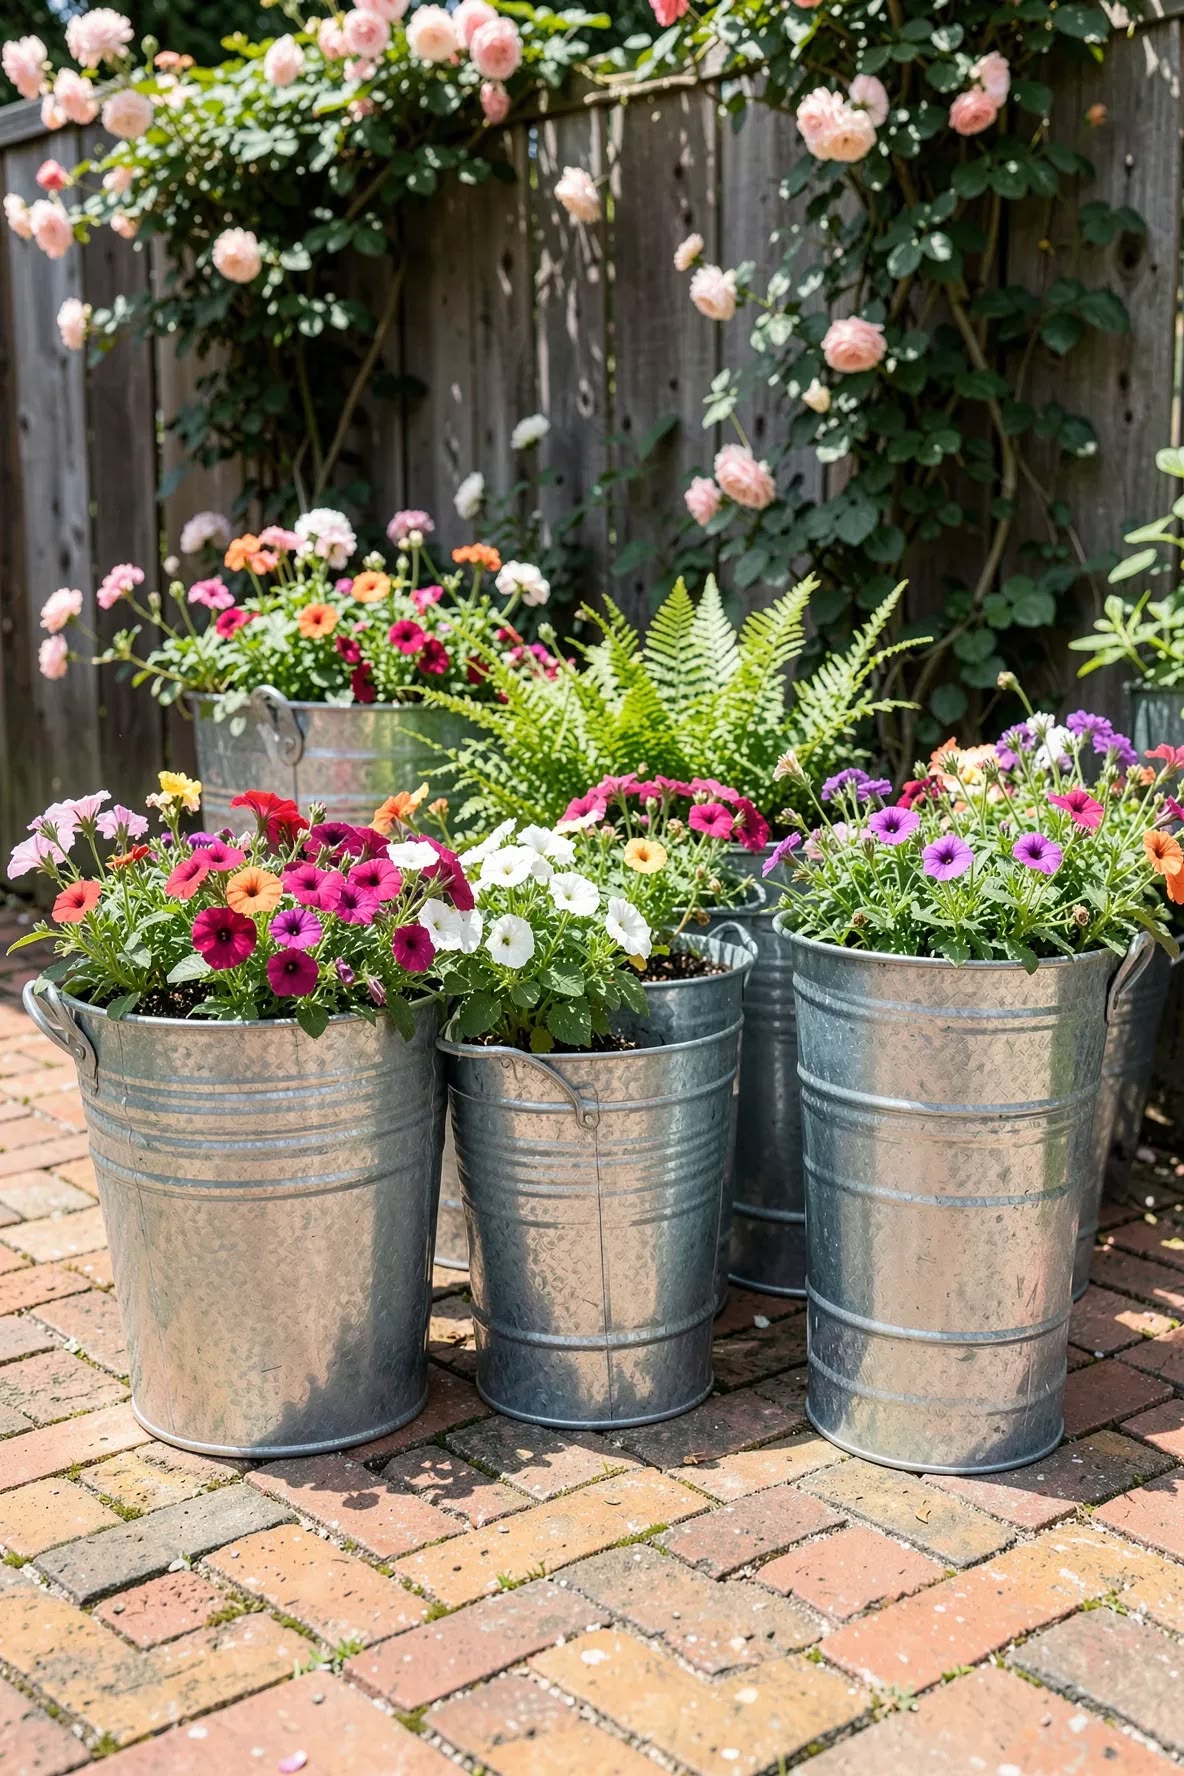
This planter is a metal bucket transformed into a practical and stylish container for plants. It adds a rustic, farmhouse charm and gives new life to an old object. The focus is on preparation, thoughtful planting, and placement so it looks intentional and lasting.
Materials: Metal bucket, sandpaper or wire brush, rust-proof primer or paint (optional), gravel or small stones, potting soil, plants of your choice.
Best Placement: Porch, balcony, kitchen window, or garden corner.
Selecting Your Bucket
The right bucket forms the foundation of your planter. Sturdy, slightly worn buckets can bring character, while very thin or damaged ones may not hold soil well.
How to do it:
Choose a bucket that can support soil and plants without bending. Lightly clean or smooth rough edges for safety.
Preparing the Bucket
Proper preparation protects your planter and ensures it lasts.
How to do it:
Drill a few drainage holes at the bottom. Sand rough spots, and apply a rust-proof primer or paint if you want extra durability and style.
Arranging Plants
The way you place plants affects how full and balanced the planter feels.
How to do it:
Position taller plants in the center or back, add trailing plants along the edges, and smaller fillers in front. Layer gravel at the bottom to help with drainage.
Placement Tips
Where the planter sits impacts the overall look of your space.
How to do it:
Place it where it complements surrounding decor, beside benches, along pathways, or near doorways—so it feels like a natural part of the space.
Elevating the Look
Small thoughtful details make the planter stand out.
How to do it:
Mix different plant textures, let trailing plants drape naturally, or add subtle accents like twine or small decorative markers to enhance its farmhouse charm.
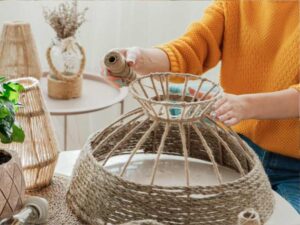
✅ Hanging Rope Macramé Planter
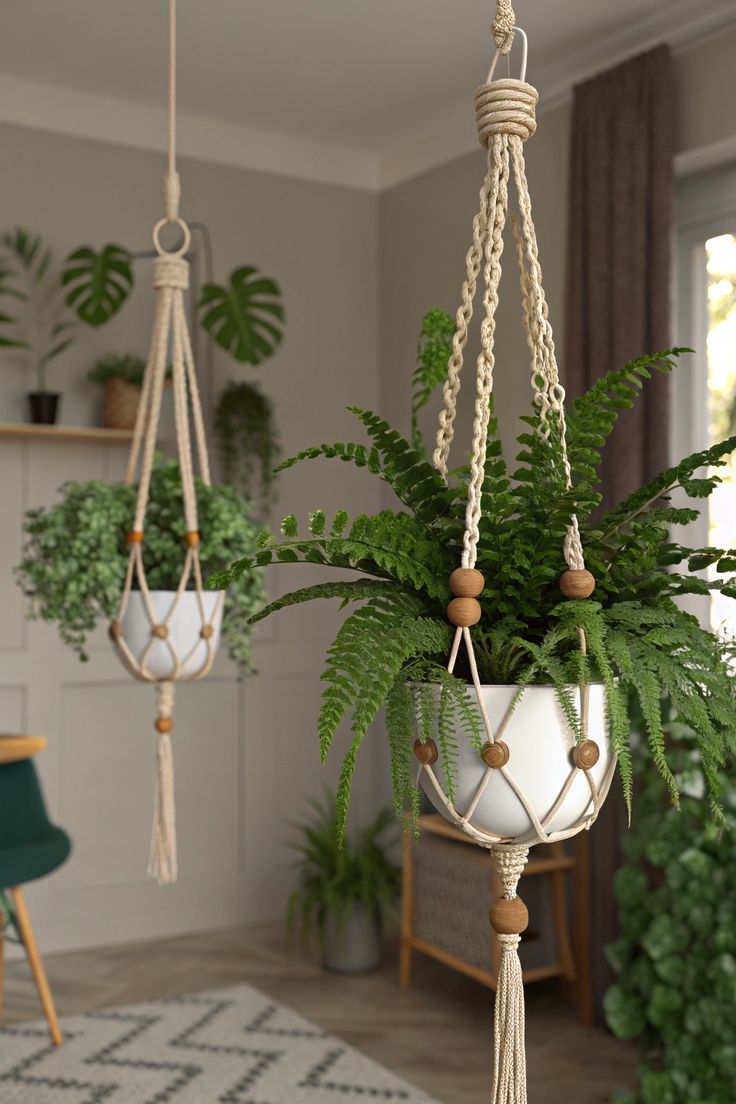
A handcrafted macramé holder suspends a pot using knotted rope, adding height, texture, and a cozy farmhouse feel to any room or porch.
It’s perfect for small spaces or corners where furniture can’t fit, giving your greenery a stylish, floating display. Among DIY farmhouse planter ideas, it stands out because it combines handmade charm with functional design.
Materials: Cotton or jute rope, a small to medium pot, scissors, optional wooden ring for ceiling attachment.
Best Placement: Indoors near windows, balcony corners, or on porches for a vertical display.
Choosing the Right Rope
The rope affects both durability and style. Thicker cotton or jute offers strength and a soft farmhouse feel, while thinner cords suit lighter pots.
How to do it:
Pick rope that safely supports the pot’s weight. Test by gently tugging before hanging.
Knotting Basics
Macramé relies on knots to hold and style the planter. Symmetry and consistent tension are key to keeping the pot stable.
How to do it:
Use simple square knots or spiral knots. Keep spacing even so the pot sits level.
Pot Placement and Safety
The pot should fit snugly in the knots to avoid tipping.
How to do it:
Measure the pot’s width and height before knotting. Add extra support at the bottom if the plant is heavy.
Hanging and Styling Tips
Height, lighting, and nearby decor change the planter’s impact.
How to do it:
Hang at eye level or slightly higher indoors. Combine multiple macramé planters at different heights for a dynamic display. Trailing plants add movement and charm.
Making It Look Handmade and Thoughtful
Every knot and rope choice adds personality. Careful selection of rope, pot, and placement ensures the planter feels intentional, stylish, and cozy, rather than generic.
Placement -Where and Why to Put Each Planter
Where you put a planter can make or break how your space feels. The right spot brings balance, warmth, and style, while the wrong placement can make even a beautiful planter look out of place. Thinking about space size, height, and entry points helps you avoid common mistakes.
1. Match Planters to Your Space Size
Smaller spaces, like a narrow porch or balcony, work best with vertical or hanging planters. They bring greenery upward without taking up valuable floor space. On a large patio, ground-level planters paired with seating or decor accents create cohesion and make the area feel intentionally designed. Indoors, placing a tall planter in a corner with soft lighting can draw the eye upward and add depth.
2. Consider Height and Sight Lines
Eye-level placement changes how your space feels. Taller planters near doors or walkways guide focus and create natural balance. Shorter planters look best along low furniture or at floor level, so nothing feels crowded or disproportionate. Thinking in layers—different heights and textures—adds dimension without clutter.
3. Pair With Entry Points
Placing planters on either side of a doorway creates a welcoming frame. Symmetry feels classic and balanced, while asymmetrical pairings—like one tall planter with one medium, add energy and a more modern vibe. Even small adjustments in placement can make a big difference in how inviting your entrance feels.
Seasonal and Functional Enhancements
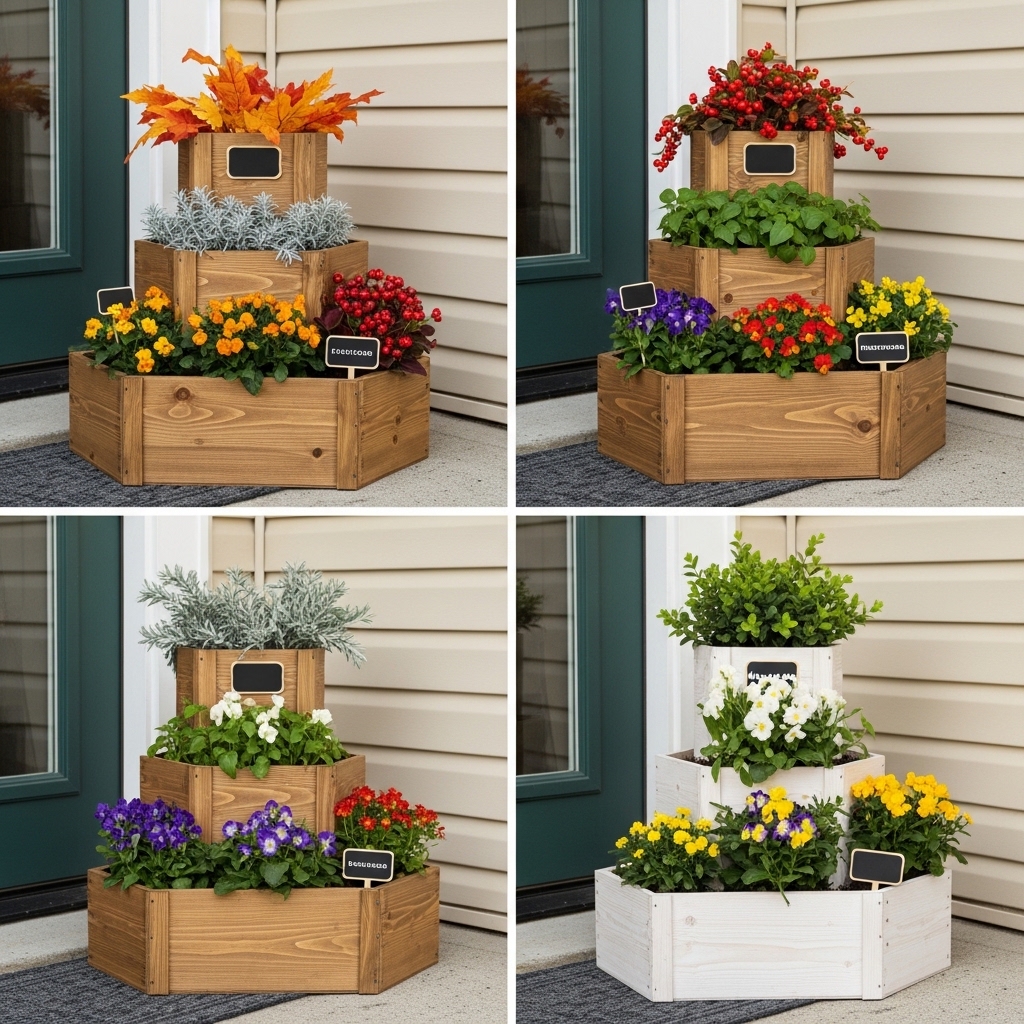
You can make your DIY farmhouse planter ideas work all year, not just for one season. Adding thoughtful touches keeps your planters feeling fresh and functional while still staying true to farmhouse style.
1. Swappable Seasonal Accents
Adding small seasonal elements, like fall leaves, winter berries, or spring flowers—lets your planter feel updated without a full redesign. Using removable decorations means you can change the look quickly while keeping the main planter intact.
2. Built-In Lighting
Planters with subtle lighting, like solar stakes or LED strips tucked inside, make your porch or balcony feel inviting after dark. Light draws attention to your planter and highlights textures in the wood, metal, or rope.
3. Chalkboard Sections or Removable Tags
Adding a small chalkboard area or a tag gives your planter personality. You can write seasonal greetings, plant names, or fun messages. This functional touch makes your DIY farmhouse planter ideas interactive and adaptable, without ever looking cluttered.
Common Mistakes and How to Avoid Them
Even the best DIY farmhouse planter can look off or fail if a few key details are missed.
Here’s how to prevent common problems and fix them before they ruin your work.
1. Preventing Wood Rot
Planters made from untreated or damp wood can quickly start to rot. Always seal wood for outdoor use with a clear outdoor sealer or natural oil finish. Avoid placing planters directly on wet soil, use small feet, gravel, or a tray to elevate them slightly.
2. Stop Paint from Peeling
Cheap or improper paint leads to chipping and peeling. Lightly sand before painting and choose outdoor-grade paints or stains. Adding a protective clear coat after painting can extend the life of your finish.
3. Avoid Overwatering Damage
Too much water can kill plants and damage your planter. Make sure your container has proper drainage holes. Add a layer of gravel or small stones at the bottom before adding soil to prevent water from pooling.
4. Secure Planters Against Wind
Tall or lightweight planters can tip over in windy areas. Anchor larger planters with small brackets or place them against walls. For hanging planters, double-check knots, hooks, and ceiling support.
5. Use Good Soil
Bad soil kills plants fast. Use nutrient-rich potting soil suited to your plant type. Avoid heavy garden dirt that compacts, traps water, and prevents roots from breathing.
Conclusion
A well-thought-out DIY farmhouse planter idea does more than hold plants, it adds character, structure, and personality to your home. When you choose the right materials, plan placement carefully, and pay attention to small details, even a simple planter can transform a space from ordinary to inviting.
Every choice you make, be it wood type, finish, plant selection, and positioning, has a purpose. Understanding these decisions helps your planters feel intentional and handcrafted, rather than random or store-bought.
Start with one project this week. Build it carefully, place it thoughtfully, and observe how it changes the energy of the room, porch, or entryway. Share your creation in the comments to inspire others.
Knowing and practicing these techniques, you’ll gain confidence and the skills to elevate every future DIY farmhouse planter idea you try.