
DIY Clothes That Never Fit? My Brother Ruined His Clothes—Until He Tried These 7 Tailoring Hacks
DIY Clothes That Never Fit? My Brother Ruined His Clothes—Until He Tried These 7 Tailoring Hacks can turn wardrobe disasters into perfect fits.
My brother, an active sewist and DIY crafter, was working on a school project where he wanted to make his own custom shirt. At first, he was excited, picking out the fabric, tracing the pattern, and stitching carefully. But when he tried it on… it didn’t fit.
Clothes that don’t fit can be frustrating, whether they’re too loose, too tight, or just awkward in certain areas. My brother used to ruin his favorite shirts and pants trying to make them work, until he learned a few simple tailoring tricks.
You don’t need a professional sewing degree to fix these problems. With basic tools and easy techniques, you can adjust your clothes to fit better, save money, and get more wear out of your wardrobe.
In this post, you’ll learn 7 practical tailoring hacks that anyone can do at home, even if you’ve never touched a sewing machine before.
Stick around, I’ll also show the simple tools and tips that can make your sewing projects easier and more successful.
Discover the secrets to: Understanding Fabrics for Sewing: Choosing the Right Material for Every Project
Reason DIY Clothes Often Don’t Fit

Most beginners assume that following a pattern exactly will automatically result in a well-fitting garment. But even small mismatches between your body and the pattern can cause fit issues, making your DIY clothes feel awkward or uncomfortable.
This is one of the biggest challenges for beginner sewists, but the good news is, most fit problems can be solved with a few simple tailoring hacks.
Let’s break down the main reasons DIY clothes often don’t fit, starting with the most common one:
✅ Choosing the Wrong Pattern Size
Many beginners pick a pattern size based on standard sizing charts, but these rarely match your actual body measurements. A size medium on paper might be too tight across the shoulders or too loose around the waist.
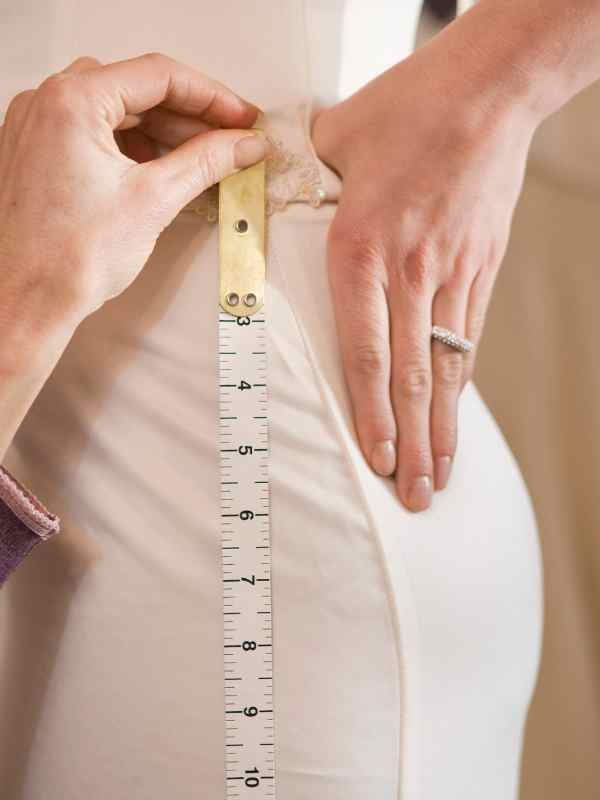
Before cutting your fabric, it’s crucial to measure your body accurately and compare it to the finished garment measurements on the pattern.
Adjust your pattern to match your measurements before sewing. This small step can save hours of frustration and wasted fabric.
✅ Ignoring Body Shape Differences
Standard patterns assume a “one-size-fits-all” body, but we all have unique shapes. Bust, waist, and hip differences can make a DIY shirt or dress look off even if the size is technically correct. Simple adjustments like adding darts, side seams, or slight grading can dramatically improve fit.
Tailoring hack: Take a little extra time to tweak the pattern to your body shape before sewing, it’s the difference between a DIY project that fits and one that frustrates you.
✅ Skipping Fittings and Mock-Ups
One of the easiest ways to end up with DIY clothes that don’t fit is skipping fittings or mock-ups. Testing your pattern on cheap fabric (like muslin) allows you to see fit issues before committing to your final fabric. You can adjust seams, darts, or lengths without ruining your actual material.
Always try a quick muslin test first. This is one of the simplest tailoring hacks that can prevent frustration and wasted fabric.
Here’s a guide to: 15 Genius Ways to Upcycle Old Clothes Into Trendy New Outfits
7 Tailoring Hacks That Finally Make DIY Clothes Fit
Even when you follow a pattern perfectly, DIY clothes can still pull at the shoulders, gape at the bust, or feel loose around the waist. My brother faced this frustration while making a custom shirt, but these tailoring hacks turned his projects into garments that actually fit. Each hack addresses real fit issues and includes practical advice for beginners and seasoned DIY sewists alike.
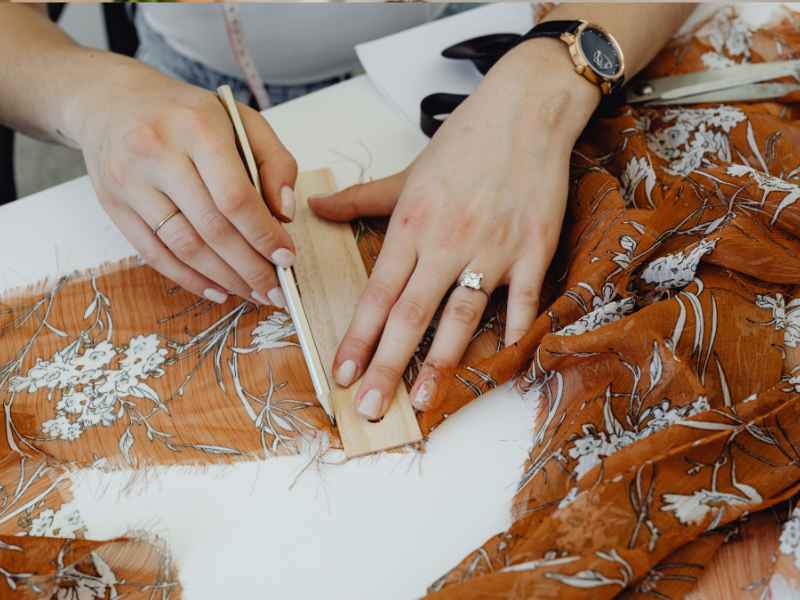
1. Adjust Your Pattern Before Cutting — Make Your DIY Clothes Fit from the Start
One of the biggest mistakes beginners make is cutting fabric without checking measurements first. Standard patterns rarely match your exact body, and assuming the size will fit perfectly often leads to tight shoulders, gaping busts, or awkward waists. Before cutting, measure your shoulders, bust, waist, and hips, and tweak the pattern.
Common mistakes:
- Skipping measurement checks and cutting immediately.
- Assuming the pattern size matches your exact body.
- Ignoring adjustments for shoulder slope, bust darts, or waist curves.
Garment-specific tips: Shirts may need shoulder slope and torso adjustments, dresses often require precise bust darts and waist shaping, and jackets might need extra back width for arm mobility.
Tools to use: Measuring tape, tracing paper, and pattern weights make adjustments safe and precise.
How this helps: Adjusting your pattern first prevents major fit issues, saves fabric, and ensures your DIY clothes feel comfortable and look professionally tailored.
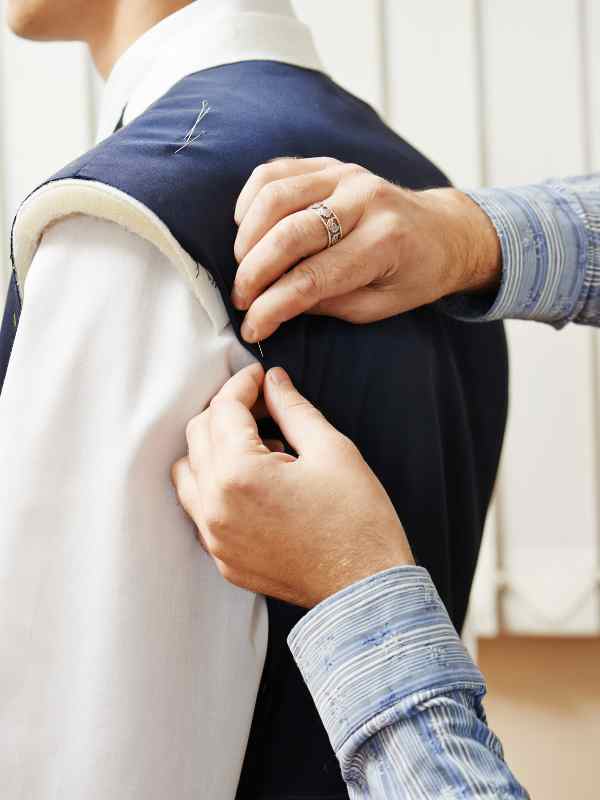
2. Pin, Baste, and Test Fit — See Your DIY Clothes in Action
Sewing all seams at once without checking fit is one of the easiest ways to ruin a project. Pin and baste seams first, then try the garment on at multiple stages. Sit, raise your arms, and walk around, this shows how the fabric behaves when you move, not just when you’re standing still.
Common mistakes:
- Sewing everything without testing fit first.
- Checking fit only while standing, missing tightness in sleeves or waist.
- Forgetting to test movement in dresses, skirts, or pants, leading to pulling or discomfort.
Garment-specific tips: Tops require checking shoulder and bust ease; dresses need waist and hip movement tested; pants and skirts should be tried while sitting to avoid tight knees or waistbands.
Tools to use: Pins, basting thread, sewing clips, and safety scissors make temporary adjustments easy.
How this helps: Testing fit at every step catches issues early, saves fabric, and ensures your DIY clothes move naturally with your body instead of pulling or sagging.
Another post you’ll enjoy: What to Do With Fabric Scraps: Sewing Hacks That Turn Leftovers Into Keep-Worthy Gifts
3. Take In or Let Out Seams Gradually — Fine-Tune Every Inch
Even small seam adjustments can make a huge difference in comfort and appearance. Beginners often overcorrect, taking in too much at once or letting out uneven seams, which can distort proportions. Gradually adjust side seams, shoulder seams, or sleeves, checking the fit as you go.
Common mistakes:
- Making large seam adjustments all at once.
- Altering one side and not balancing the other.
- Ignoring how changes affect overall garment proportions.
Garment-specific tips: Tops benefit from subtle side-seam tweaks to shape the bust and waist; jackets may need shoulder adjustments for easier arm movement; pants and skirts often require minor waist or hip alterations to stay proportional.
Tools to use: Seam gauge, pins, chalk marking pencil, and measuring tape help make precise, controlled adjustments.
How this helps: Gradual seam changes allow you to solve fit issues without overcorrecting, so your DIY clothes look polished, feel comfortable, and move naturally with your body.
See our guide on: Thrift Business in Nigeria: How to Start a Profitable Thrift Clothing Business in 2025
4. Use Darts and Pleats for Body Shaping — Make Your DIY Clothes Flatter Your Curves
Beginners often skip darts and pleats, assuming they’re too complicated, but these simple tailoring hacks can transform the look of your DIY clothes. Adding darts at the bust or waist and incorporating pleats where needed helps the fabric follow your body shape instead of hanging loosely or pulling awkwardly.
Common mistakes:
- Forgetting to add darts or pleats, leaving the garment boxy.
- Placing darts unevenly, which distorts the fit.
- Making pleats too deep or too shallow, affecting comfort.
Garment-specific tips: Tops and dresses: use darts at the bust and waist for a tailored look; Skirts: small pleats at the waist prevent gaping; Jackets: back pleats add movement without extra width.
Tools to use: Chalk pencil for marking, pins, measuring tape, and ruler.
How this helps: Darts and pleats give your DIY clothes a professional shape, enhance curves naturally, and make beginner sewing projects look custom-made.
5. Hem Strategically — Perfect the Proportions of Your DIY Clothes
Incorrect hem lengths can make even a well-fitted garment look off. Many beginners just follow the pattern’s hem without checking proportions, resulting in skirts, dresses, or pants that feel too short, too long, or unbalanced.
Common mistakes:
- Hemming too short or too long, throwing off the garment’s balance.
- Ignoring the difference between fabric shrinkage and finished length.
- Not checking hem symmetry front-to-back or side-to-side.
Garment-specific tips: Skirts and dresses: mark the hem while wearing the garment to see how it falls; Pants: check length with shoes; Shirts and tops: consider layering and overall torso length.
Tools to use: Measuring tape, hem gauge, pins, and iron.
How this helps: Strategic hemming ensures your DIY clothes maintain correct proportions, avoid awkward pulls, and enhance the overall look of your finished projects.
6. Pick the Right Fabric for Your Project — Avoid Fit Frustrations Before You Sew
Even with perfect measurements, the wrong fabric can ruin DIY clothes. Stretch, drape, and thickness all affect fit. Beginners often choose fabrics they like visually but that don’t behave as expected.
Common mistakes:
- Choosing fabric that stretches too much or not enough for the design.
- Ignoring the difference between knit and woven fabrics for the same pattern.
- Not pre-washing fabric, leading to shrinkage after sewing.
Garment-specific tips: Tops and dresses: consider lightweight fabrics for drape; Pants: medium-weight with minimal stretch; Jackets: stable woven fabrics with interfacing for structure.
Tools to use: Fabric scissors, pins, and a small sample swatch to test stretch and drape.
How this helps: Selecting the right fabric ensures your DIY clothes hang properly, feel comfortable to wear, and your sewing projects behave exactly as planned.
You Should Read: 5 Clothing Alterations I Stopped Paying a Tailor For (DIY Made Easy)
7. Quick Fixes for Clothes Already Made — Save Projects from Common Fit Problems
Not all DIY clothes go perfectly the first time. Sometimes you need quick fixes to salvage a garment, and knowing the right adjustments can save time, fabric, and frustration.
Common mistakes:
- Ignoring small fit problems until the project is ruined.
- Trying to force a tight garment on without adjustments.
- Using temporary fixes that don’t hold under movement.
Garment-specific tips: Tops and dresses: add side panels or darts; Pants/skirts: insert small elastic sections at the waistband; Jackets: add back pleats or release seams slightly.
Tools to use: Seam ripper, elastic, pins, measuring tape, chalk pencil.
How this helps: Applying small, precise adjustments allows you to fix fit issues in completed DIY clothes, making them wearable and comfortable instead of tossing them aside.
Read: What to Wear on Valentine’s Day Based on Your Plans — Dinner, Staying In, or Galentine’s
Common Fitting Myths That Waste Time and Fabric
You finish sewing a shirt, dress, or jacket, excited to try it on… and it’s a disaster. The shoulders are too tight, the waist gapes, the sleeves are all wrong. You feel frustrated, maybe a little defeated, and wonder why your DIY project can never seem to fit like it does in the pattern picture.
Most beginners think it’s their fault, but a lot of the problem comes from myths about sewing and fit. Following these myths blindly is exactly why so many people end up with DIY Clothes That Never Fit, no matter how much care they put in.
Knowing what’s actually true, and what really matters when adjusting patterns, choosing fabric, and shaping garments, can save you hours of wasted effort and a ton of frustration.
This guide covers: Quick and Soft Valentine’s Gifts You Can Sew in a Few Hours That Melt Hearts
Myth 1: “The pattern size is always correct.”
Most beginners assume the number on the pattern matches their body perfectly. In reality, pattern sizes are standardized and rarely account for individual shoulder slopes, bust shapes, or waist curves. Ignoring this step is a major reason your DIY clothes may feel awkward or tight. Adjusting the pattern before cutting, grading, tweaking darts, or lengthening and shortening, can save frustration and wasted fabric.
Myth 2: “Stretchy fabric automatically fits better.”
Stretch alone doesn’t guarantee a proper fit. The wrong type or amount of stretch can make garments baggy in some areas and tight in others. Even seasoned sewists test stretch, drape, and fabric behavior before cutting because relying on stretch alone is one of the top reasons for DIY Clothes That Never Fit.
Myth 3: “Once sewn, seams can’t be adjusted.”
Beginners often panic when a garment feels tight and assume it’s ruined. In reality, small seam adjustments, adding darts, or letting out sections can save almost any project. Ignoring this possibility is another reason DIY clothes often end up uncomfortable or unwearable.
By recognizing these myths, you can approach sewing with confidence, apply the right tailoring hacks, and finally create DIY Clothes That Never Fit… that actually do.
Next up: DIY Projects for People Who Don’t Feel Crafty at All
Repurposing Mistakes Into Style Wins — Turn DIY Fails Into Wearable Clothes
Nothing’s more frustrating than spending hours on a DIY project, only to realize it’s too tight, the hem is uneven, or it just doesn’t look right. Most beginner sewists would keep it in the corner, feeling like the whole effort was wasted.
But here’s the thing, almost every mistake can be turned into a style win with a few clever adjustments.
Some ways to rescue your DIY clothes include:
- Converting a too-tight dress into a chic tunic. Shortening the hem and loosening the waist slightly can transform a failed garment into a wearable piece you actually love.
- Adding panels, elastic, or lace inserts. These subtle changes fix proportion problems, add comfort, and even give your clothing a unique, custom look.
- Turning uneven hems into layered styles. Layering with tulle, lace, or contrasting fabric can make a botched hem look intentional and fashionable.
Tools and techniques: Seam ripper, elastic, pins, fabric scraps, and chalk for marking adjustments.
How this helps: These simple clothing alterations let you save time, fabric, and frustration, while turning projects that seemed ruined into something stylish and wearable. With a few creative tweaks, even DIY clothes that never fit can become your favorite pieces in your wardrobe.
Planning Before You Cut — The Secret Step Most Beginners Skip
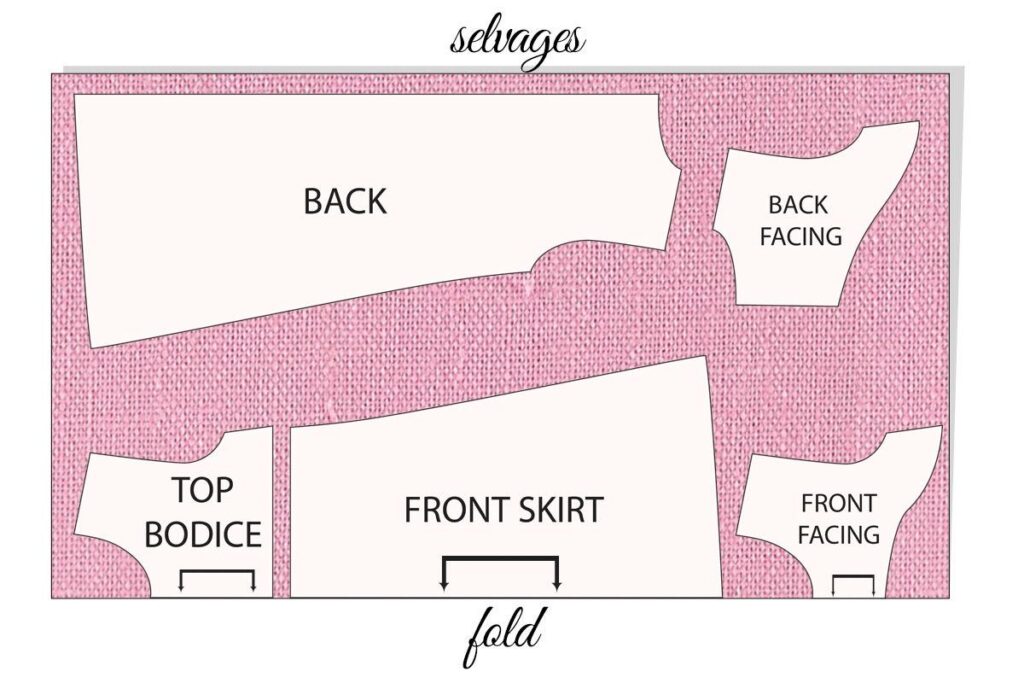
Photo credit: @ TREASURIE
One of the biggest reasons so many people end up withDIY clothes that never fit isn’t sewing, it’s rushing straight to cutting fabric.
You think you’ve measured enough, follow the pattern, and then… disaster. The sleeves are too long, the waist is off, or the shoulders pull in ways you didn’t expect. That frustration can make even simple sewing projects feel impossible.
The secret most beginners skip? Planning before you cut. A little extra time here can save hours of ripping seams, wasted fabric, and disappointment. Here’s how to do it right:
- Create a muslin mock-up. Using cheap fabric lets you test the pattern, see how it fits, and make adjustments without ruining your good fabric.
- Measure multiple times in different postures. Sit, bend, reach, your body changes shape, and your garment should move with it.
- Map out darts, pleats, and hem adjustments. Planning these in advance ensures your final piece fits smoothly and looks professional.
Tools to use: Muslin or scrap fabric, measuring tape, pins, chalk pencil, and pattern paper.
How this helps: Taking the time to plan your project keeps DIY clothes on track, reduces frustration, and makes sewing a much more enjoyable experience.
These simple sewing hacks and thoughtful pattern planning steps are the difference between a garment that sits in your closet and one you actually love to wear.
Adjust for Movement, Not Just Measurements — Clothes Should Move With You
It’s one thing to measure your body and cut fabric precisely, it’s another to actually move in the garment. Many beginners spend hours taking perfect measurements only to end up with a top that pulls across the shoulders when reaching, or a skirt that tugs when sitting. That’s why adjusting for movement is non-negotiable.
- Add ease allowances: Add a little extra room at the sleeves, shoulders, and waist. Even half an inch can make a world of difference.
- Check mobility: Sit, stretch, bend, and lift your arms while testing muslin or pin fittings.
- Garment-specific tips: Jackets need extra back width for shoulder movement; dresses benefit from small side slits; fitted tops often need a bit more chest ease.
Tools to use: Muslin fabric, pins, measuring tape, and chalk pencil for marking.
How this helps: Planning for movement ensures your DIY clothes feel comfortable, wearable, and actually functional, not just “pretty” on a mannequin. This is a common reason beginner sewing projects fail, and fixing it early saves hours of frustration.
Use Temporary Stitches to Test Design Changes — Experiment Without Ruining Your Project
Photo credit: @ Mindy Makes
Ever been halfway through sewing a dart, hem, or seam and realized it’s all wrong? That sinking feeling is brutal, but it doesn’t have to happen. Temporary stitches (basting or hand-stitching) let you experiment safely before committing with your machine.
- Baste darts and seams first: Check how the garment drapes and moves.
- Test new hem lengths: Hand-stitching lets you adjust until it sits perfectly.
- Try different shapes: Side panels, pleats, or easing in fullness can all be tested without permanent stitching.
Tools to use: Hand needle, basting thread, pins, and measuring tape.
How this helps: Using temporary stitches turns trial-and-error into controlled experimentation, so you can make precise adjustments and avoid ruining fabric — a critical trick for anyone frustrated with DIY clothes that never fit.
Document Your Adjustments for Future Projects — Turn Frustration Into Knowledge
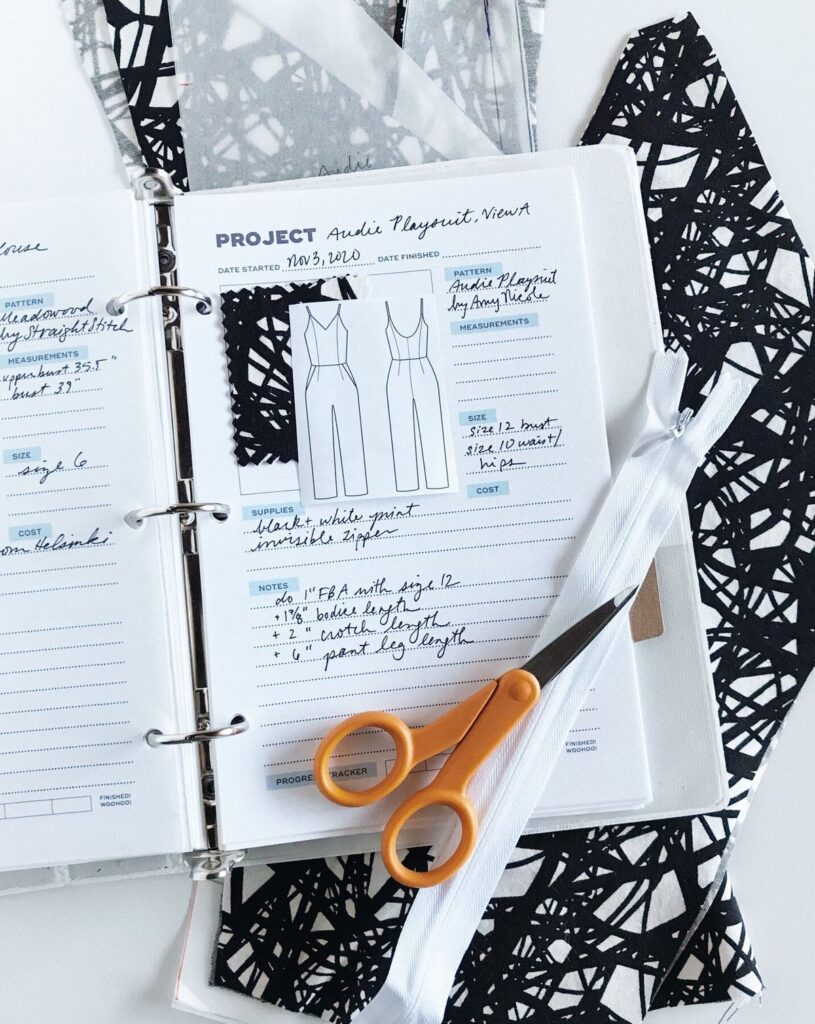
Photo credit: @ Sew DIY
If you’ve ever sewn a project, fixed a tight seam, or altered a dart, and then forgotten exactly what you did, you know the pain. Starting over without notes is frustrating and wastes fabric. Keeping a simple sewing journal transforms mistakes into lessons, and you get to share your knowledge with other individuals.
- Record measurements, pattern tweaks, ease allowances, and fabric choices.
- Note what worked and what didn’t for each garment type (tops, dresses, skirts, jackets).
- Add photos or sketches of tricky adjustments.
Tools to use: Notebook, pen, or a digital note app; optional photos of the garment at different stages.
How this helps: Documenting your process saves time on future projects, prevents repeating mistakes, and gradually builds your own “tailoring cheat sheet.” It turns DIY clothes that never fit into a learning opportunity and makes every new project easier and more successful.
Stop the Frustration and Make DIY Clothes Fit for Real

Tired of staring at yet another DIY project that just won’t sit right? DIY clothes that never fit? You’re not imagining it, this is one of the most common frustrations beginner sewists face. But here’s the truth: it’s not about talent or luck. Fit is a skill, and like any skill, it can be learned.
The hacks in this guide, from adjusting patterns before cutting, adding darts and pleats, planning for movement, to documenting your refinements, are practical steps that actually work. Each adjustment, each test stitch, each small alteration brings you closer to garments that feel like they were made for you.
So don’t let another project sit in your closet, half-finished or unwearable. Take a deep breath, pick one hack, and try it on your next DIY project. With patience, practice, and these strategies, the days of DIY clothes that never fit? will be behind you, replaced with clothes that you can wear, love, and actually feel proud of.